Work and Play

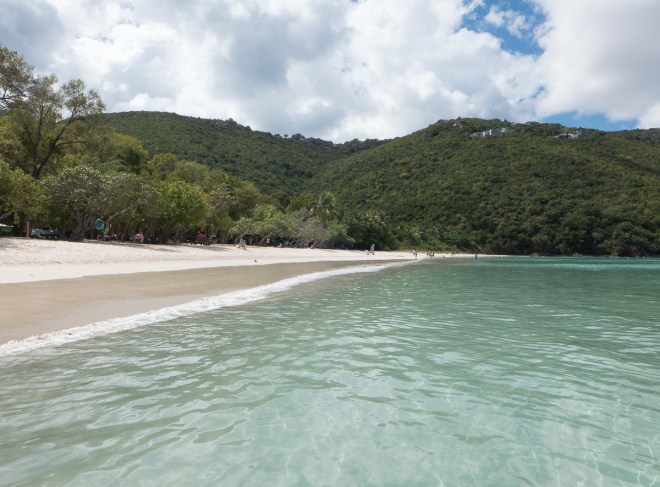
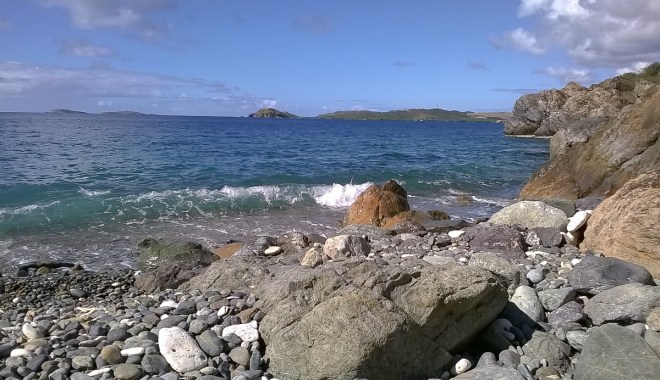
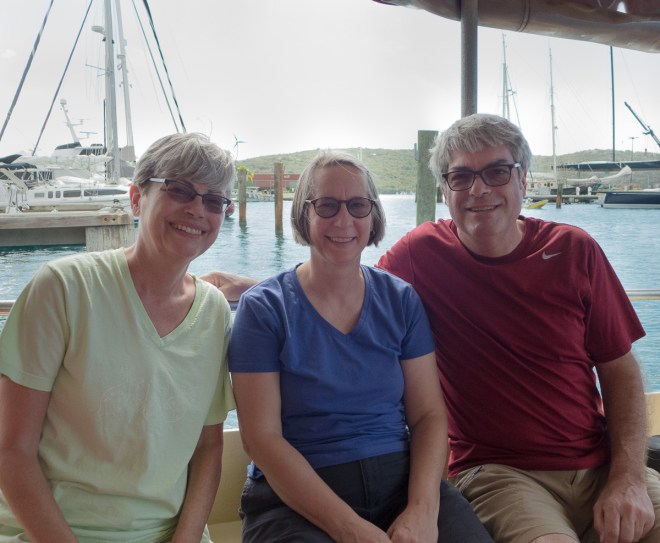
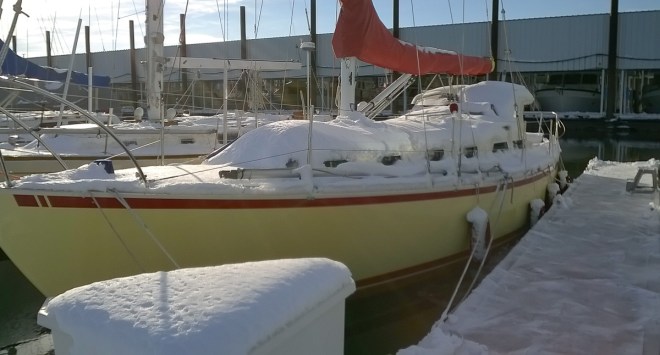
Wow, it is June and we are finally posting an update. It has been a busy two months since our last post. Our goal was to take Gypsy out for the Memorial Day weekend cruise and we did. We had a working head, toilet and water, and a working stove. We spent three days aboard and it was great.

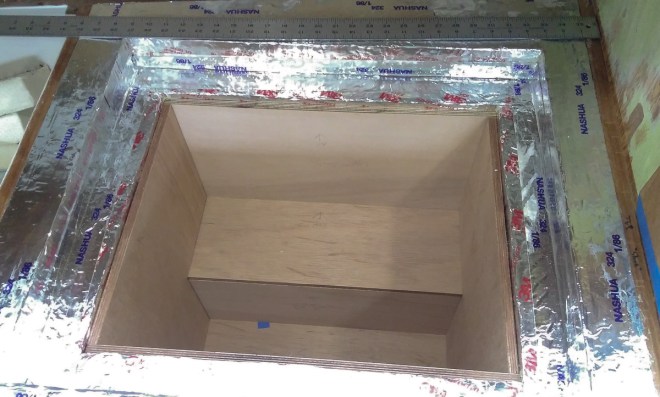
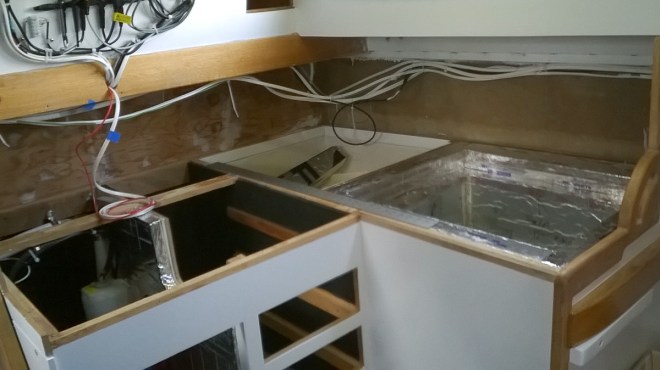
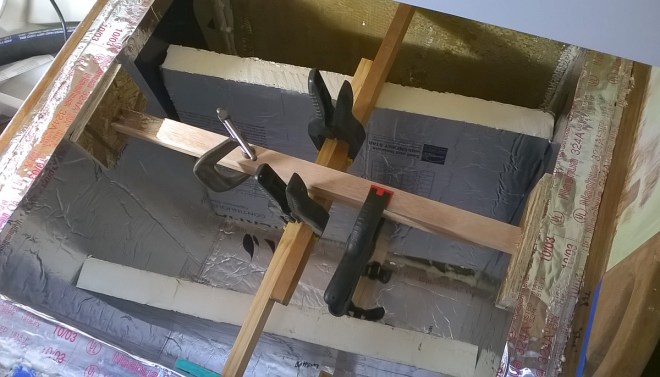
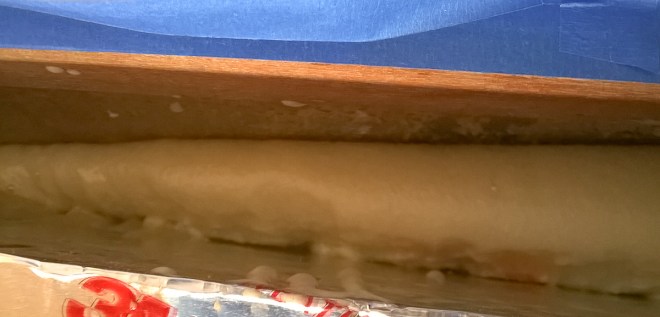
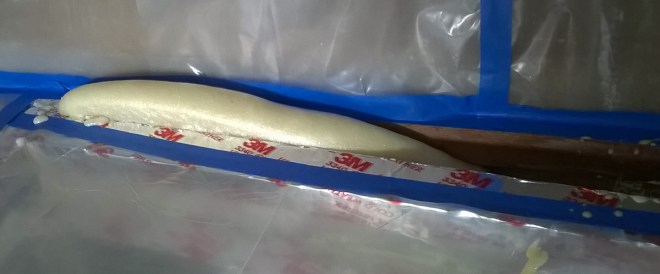
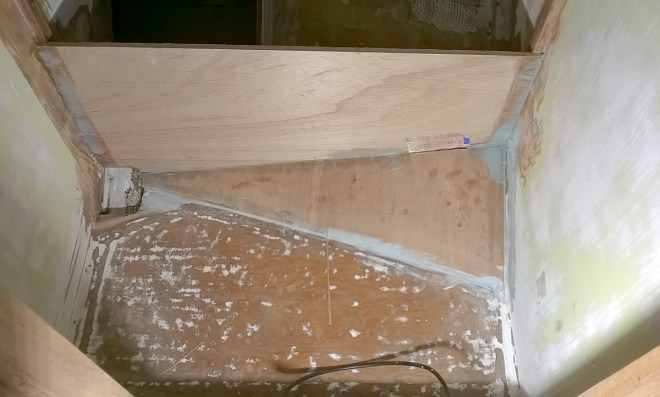
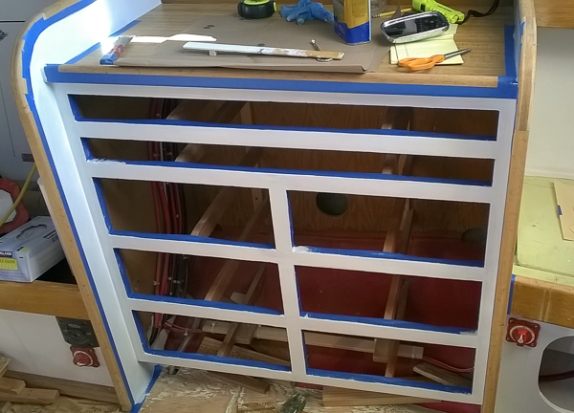
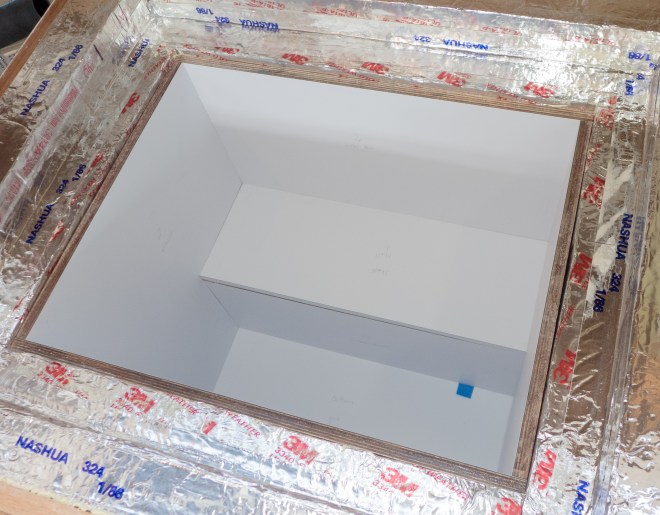
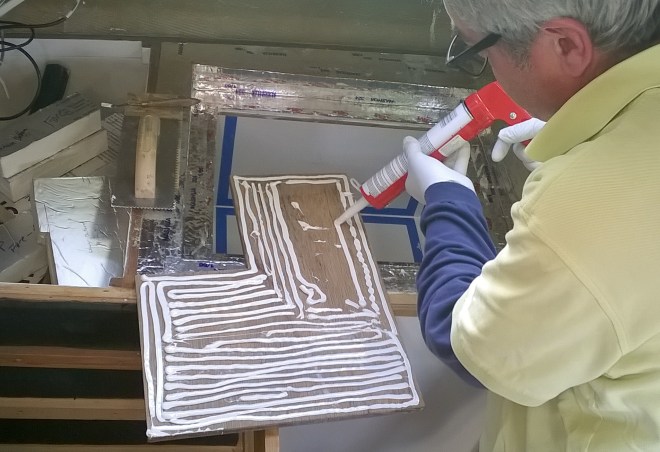
We wanted to get the galley counter top in which means getting the refrigerator installed.  Last post we had built the flange. We used the flange to make the lid. The lid parts were glued up  clamped to the flange with plastic between so they would not stick.

temp_galley

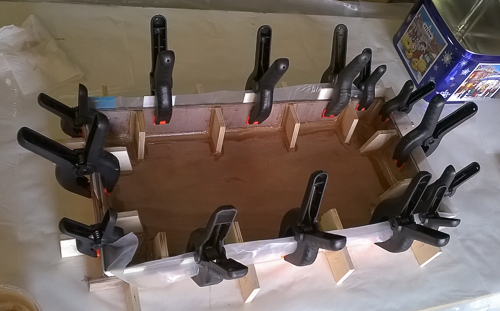
Then we glued the flange to the top of the refrigerator box.flange_glued

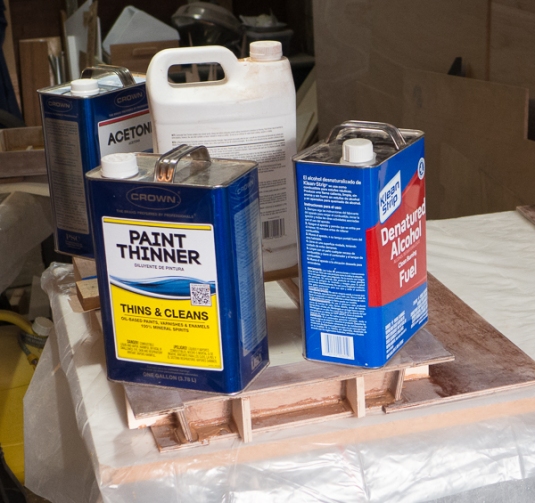
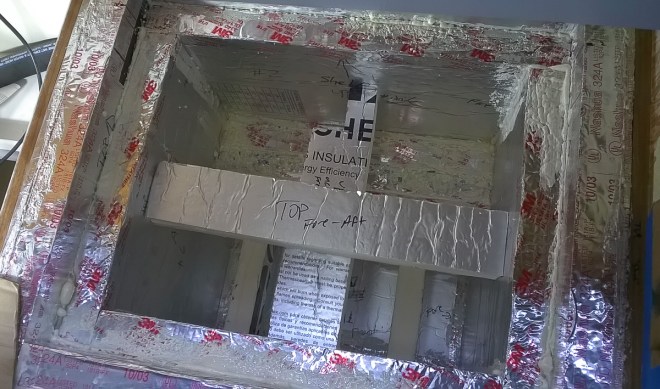
Then we fit the top and flange to the box.fitting_the_flange

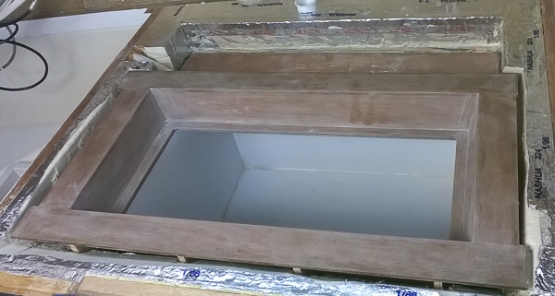
The top of the flange needs to be exactly the same as the underside of the counter top. We also had to figure out how to route the Freon tubes from the evaporator, which is installed in the refrigerator box, back to the compressor.conduit

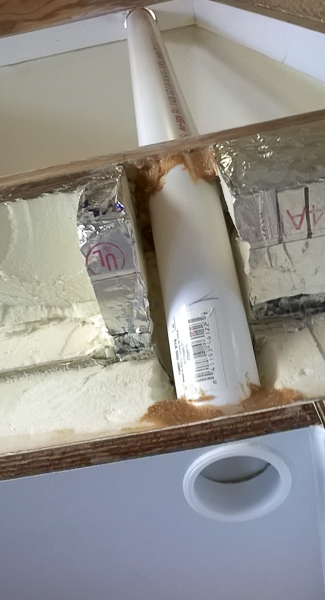
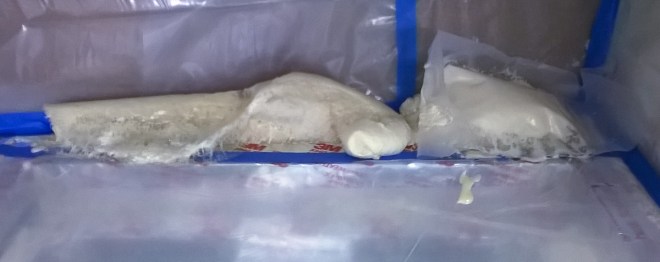
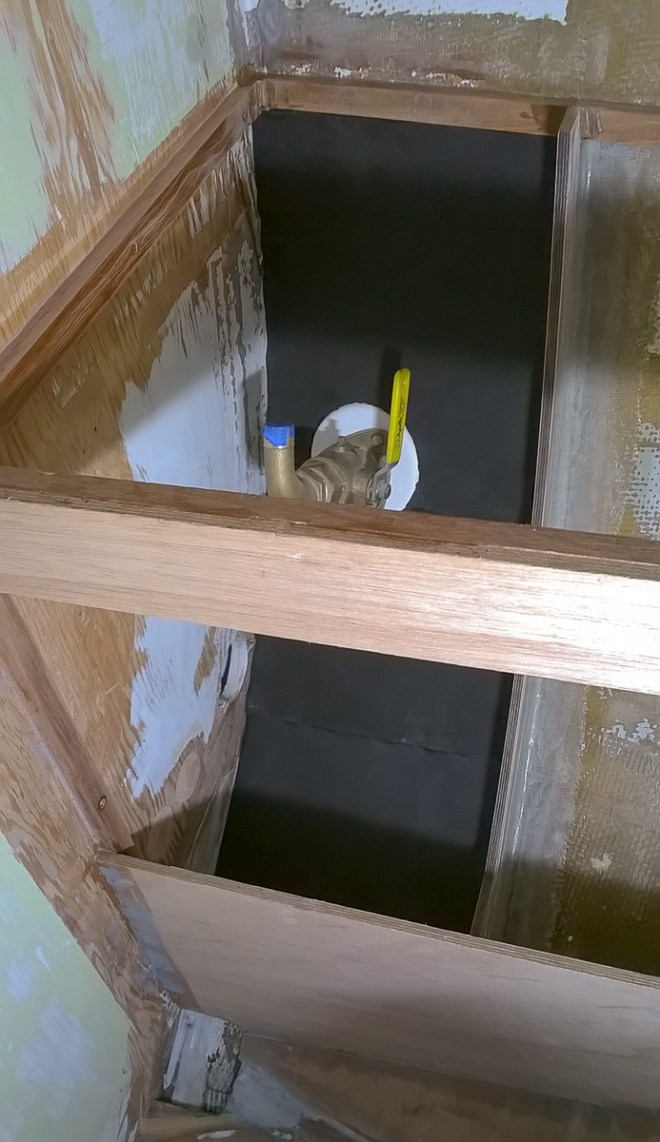
The tubes need to run through the pantry on the way to the compressor and so we wanted them up as high as possible and in a protective tube so they would not be damaged by the canned goods in the pantry. Carefully angled PVC pipe does the job. It will all get encased in foam when it is installed.

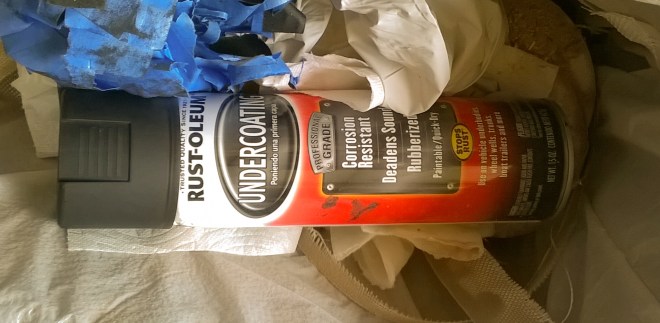
We realized that we would not get this done in time so while we have kept working on the lid and flange, it was not the priority. They got primed last weekend.

painting

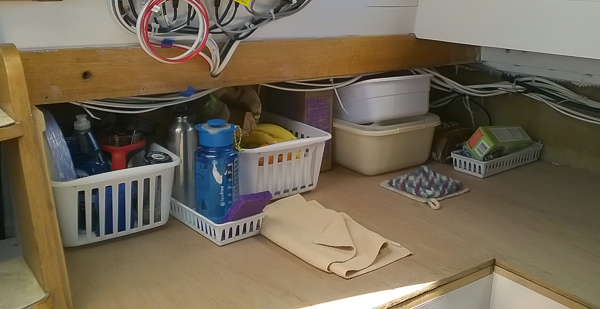
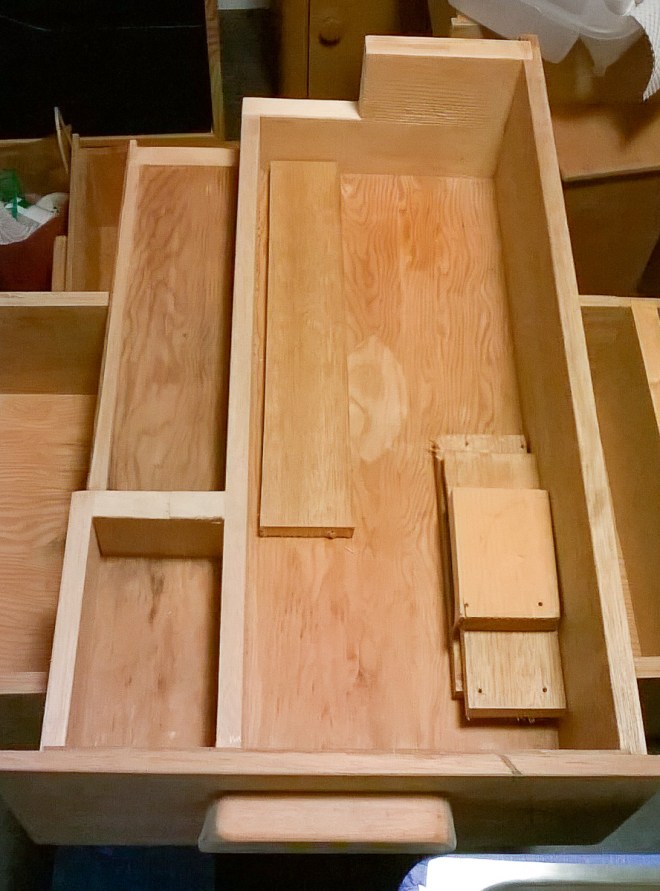
We also did more painting. It has to get done and Gypsy looks so much better in white than lime yellow. Nina worked on varnishing and got the galley drawers done.varnishingdrawers_in

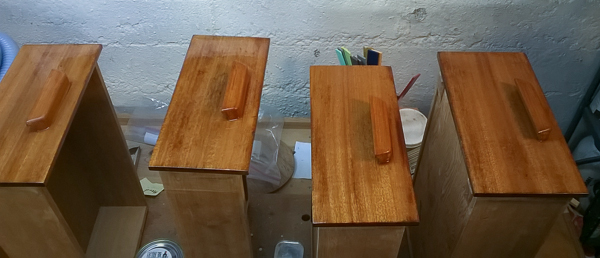
Looks good! They also were helpful for storage on our cruise.

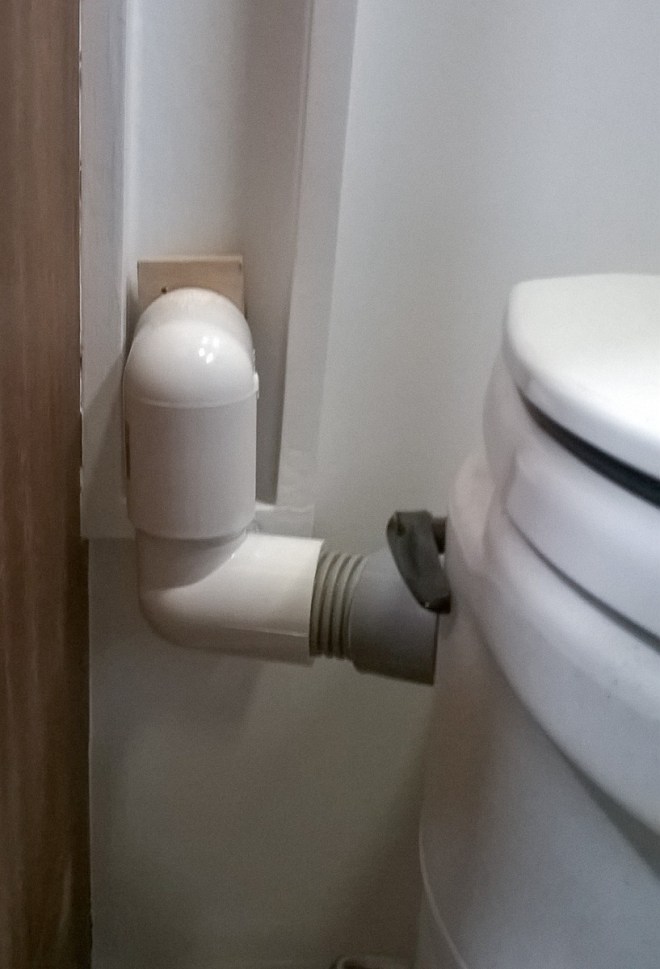
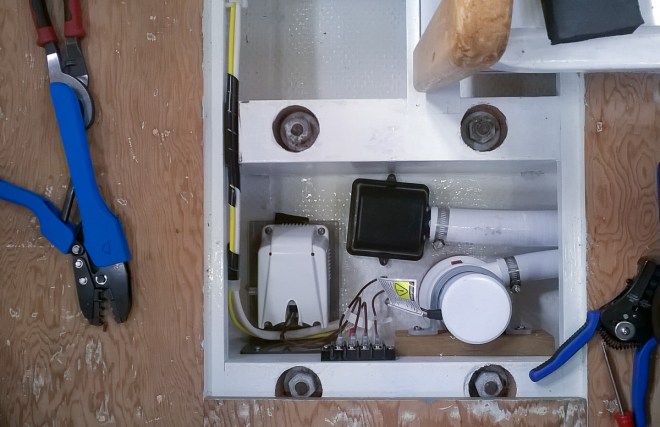
The head needed to get to a working point. Bill had to finish the ducting on our composting toilet. We had decided to build the ducts in for a more finished look. head_duct

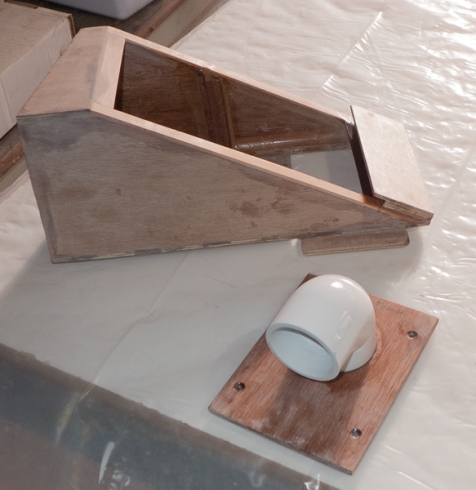
Getting the connecting parts built and painted.duct

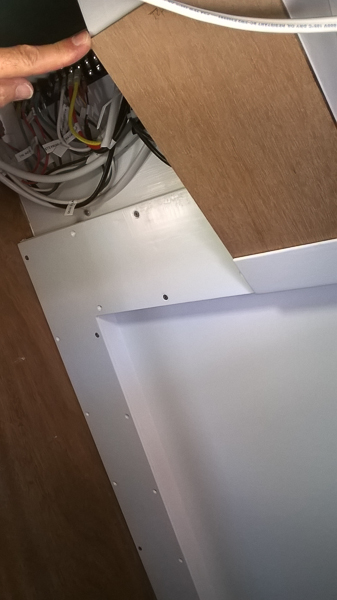
Almost done. One of the great points of our AirHead is that there is no plumbing involved so once the duct was in the toilet install took 30 minutes. The ducting works.counter

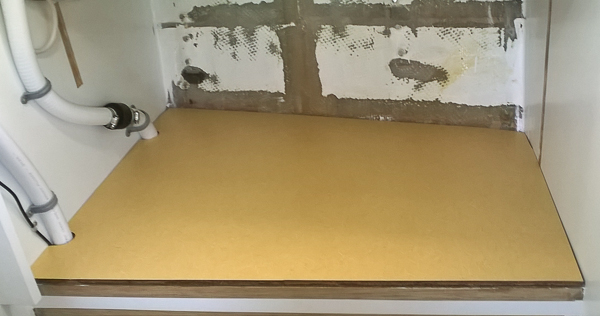
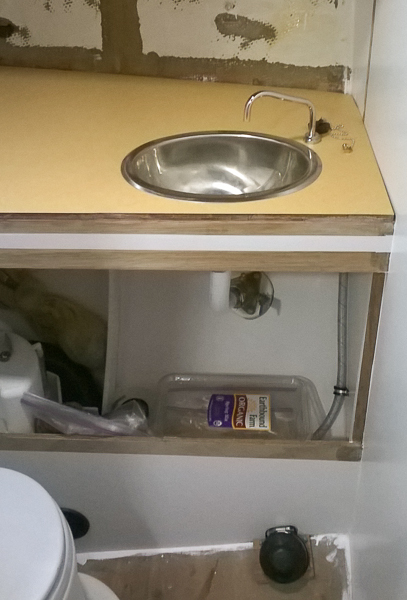
We did need water and it was going to be much easier to install and plumb the head sink than the galley. The counter top got covered in WilsonArt laminate, it is a ocher pattern called something like Tigris parchment. custom_fiddle

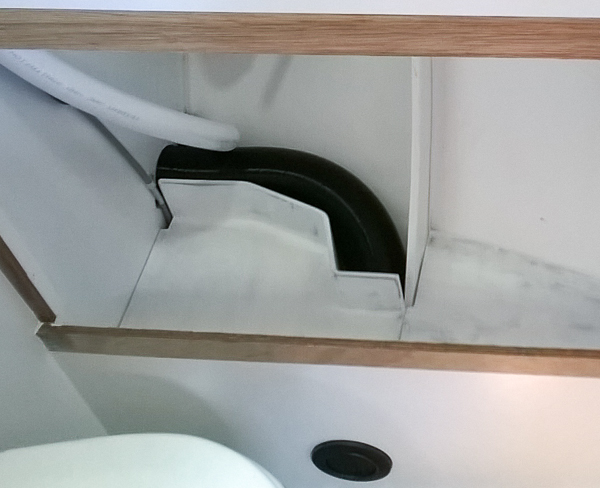
We also made a shelf to fit in the vanity. Note the custom fiddle to protect the heater duct.

sink_ready

Now for cooking. We needed to install the stove and we also had to install the propane system. This was one of these we will figure out the details latter things. Well it was latter and Bill spend too many hours on it, but we now can cook.stove

_galley

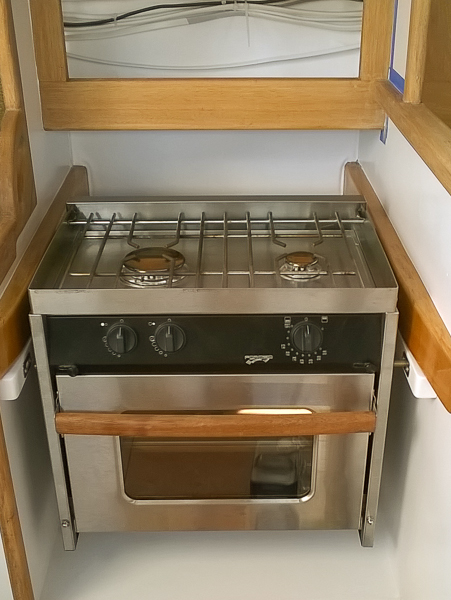
We had the counter top plywood ready so it was slid into place for the weekend.

Nina also has been busy making the new cushions, Needless to say we have been busy evenings which helps to explain the lag in blogging.

The good part of using Gypsy is it really helps us to see how systems are working. It also gave Bill several new projects as we discovered some engine problems. Last weekend Gypsy had the engine aligned and the valves adjusted. Water and fuel leaks also have been dealt with. Fingers crossed and we are more ready for our next outing.


Spring Forward

Yes, we did that and it has been a couple of weeks and I am still grumpy about losing an hour of sleep. I mean who would volunteer for jet lag and not get a vacation out of it? Despite my sleep deprivation things are moving again on Gypsy. The big news is it has finally warmed up a bit. We can use epoxy again. All the waiting projects are possible again. Of course before you can do you must plan and this is one way I do that.

Planninf_for_gear

The cutouts represent equipment that needs to get mounted on the port side bulkhead between the cockpit locker and the galley. The shapes represent the auto pilot computer, the refrigeration compressor and the drinking water filter. They not only need space, they also have to be accessible and serviceable and not interfere with other equipment.

Talking about interference, we had to relocate the circuit breaker that the alternator power feeds through. When we were fitting the galley sink we realized that the sink drain hose would not clear the circuit breaker and they would rub on each other. So we moved the circuit breaker up a bit.

alt_CB_move
The circuit breaker used to sit on the block now circled by the red cable. We were lucky to catch this while the counter top is still off.

The big project is the refrigerator box. We are building a refrigerator from scratch to fit the space we have and to be energy efficient. This needs to be done before the galley counter top can get installed.

refer_box_test_fit

You have seen earlier pictures of the foam getting installed. This is the Formica covered plywood panels being test fit. That is how big our fridge will be – about 3 cubic feet.

refer_box_5200

The panels are glued in with 3M 5200. It is adhesive caulk, once it sets it will never come apart. After putting the beads down we used a notched trowel to get a uniform coating.

refer_box_fam_clamps

The panels are all in. The foam is acting as clamps, cut a bit oversized and forced into place it will hold the panels tight until the 5200 cures. The blue tape is to help to contain the extra caulk. Nina got the job of trying to smooth the caulk beads along the edges.  She was mostly successful, but in hind sight, it would have been easier without all the foam chocks in place.

All of the above happened while it was still cold out. Once it warmed up we coated a sheet of 6mm plywood with fiberglass cloth and epoxy. Once it set Bill, sanded it and cut out the parts to make the lid flange and lid.Refer_box_lid_flange_test

Here I am fitting the parts to make the flange that the lid will set into. The plans are from a twenty year old book. New books don’t have this information. They just figure you will buy a boat with a refrigerator already in place.

Refer_box_lid_flange_glued

Here is the flange glued together. The flying buttresses keep the sides lined up at the right angle. They also support the top and bottom parts that will be added. Once this cures it will become the mold for the lid. This is actually looking like it will work.

refer_compressor_shelf

This is the shelf that will hold the refrigeration compressor. It was represented by one of the manila folder cutouts in the first photo. (it is also upside down, oops)

sink_undercoat

Our galley sink is over the engine so we sprayed it with undercoating to try to help stop engine noise from passing through it. This was another project that has finally gotten out of limbo.  One can down.  We still need another.

The other big news is Bill passed his HAM license test. He now has a General license. So we just need to get a SSB radio and Bill, at least, is all set for communications while cruising.

This was very much a Bill projects week.  Nina spent her time and energy moving a small shed sized pile of mulch into the yard.  Not the boat.

March

The weather in Portland has been cold, wet and impossible to glue, epoxy or paint anything until this past weekend.  Sunday was finally lovely, but we had other plans for the afternoon, so not much boat work was done.  We did get to enjoy music that Shakespeare may have heard.

So, what can be done when the weather does not cooperate?  Someone was asking us how we keep track of the planning process.  Bill uses yellow pads.

Bills_method_(1_of_1)
Bill’s yellow pad system.  Somehow he keeps track of everything on multiple pads.  This is not the full complement of pads, but it does give an idea of how it works. Each pad covers a part of the project: ideas, parts or to do list.
counter_pattern_(1_of_1)
Paper pattern for the galley counter top.
counter_plywood_(1_of_1)
The galley countertop in plywood.  Bill has since marked it all up to locate supporting structure and openings.  It’s in two pieces because that is the only way it will fit down our companionway.
sink_fit_(1_of_1)
Test fitting the sink to figure out where faucets, plumbing and fiddles will go. 

One of the drawbacks of having the sink over the engine is that there is not very much room at all for plumbing once all the engine gear is in place.  We need to fit drains and water hoses and make sure that everything stays clear of the alternator and that all was going to be a challenge.  It was such a tight fit under the sink that Bill decided to move the spacer block we had installed for the circuit breaker to the alternator so we’d have room to actually run hoses without rubbing on wiring or the alternator itself. Another consequence of the lack of space below is that we will probably not add a salt water spigot for the sink.  We will be adding a watermaker at some point, so we should have plenty of water and won’t need the salt water rinse faucet.   We don’t plan on having pressurized water in the galley (we used to, but it was only cold).  Water will be filtered, but it will still be a cold water system.  Bill has run the hoses from the water tanks and we are waiting to install the foot pump for the sink.

galley_drawer_(1_of_1)
The top drawer directly under the sink.  With the old sink, the box on the left was full height and the long space behind it was flat.  The new sink has a different shape so the drawer needed to be reshaped.  It’s amazing what one can do with a back saw, a small Japanese saw and a block plane.  The back was cut down and the old box and the drawer side were cut down.  The wood that was removed can be used to add another bin behind the small one on the left.

The engine cover had one drawback – in order to check the oil, the entire panel needed to be unscrewed.  We found out that Beckson makes an 8″ plate and it’s big enough to get a hand and a dip stick out.  On the left, the hole,  on the right, the plate installed.  The back of the screw off lid is now backed with lead foam so it should help cut down on engine noise.

head_vent_(1_of_1)
Last but not least, Bill’s Star Wars head air vent plumbing project. 

Rain, Rain We Go Away

bilge_pump_ready_1_of_1Since our last snow storm we got a bit done on Gypsy. We got the electric bilge pump wired. We finally have a working electric bilge pump. Yea! We had to build a bracket for the pump and also for the float switch. The float switch was designed to screw into the bottom of the boat, which is not a good idea if you want to keep the water out. In the picture you can see the pickup for the manual pump and the float switch and the electric pump.

tank_fill_and_vent_1_of_1
We also got the fill and vent hoses on the new water tank. the vent hose stays inside the boat so it cannot get salt water in it. The screen on the end is to keep bugs out, which is important in the tropics.

We also got some more LED lights and we put two in the vee berth. We can now see in the vee berth. While we were doing all of this another blizzard was predicted for Portland. We decided that it was time to head south, so we got an a plane and flew to Seattle and on to St. Thomas. Bill’s sister has a place there and it is a great way to get some warm beach time in. We sent enough warm thoughts back to Portland that the blizzard was averted. Portland only had to cope with lots of rain.

rain_st_thomas_1_of_1
So you don’t feel so bad, St. Thomas also has rain. It is blowing about 20 knots and the rain is horizontal. It is also 80 degrees and the rain lasts for about 10 minutes.
st_thomas_view_1_of_1
Our goal was to relax so we took morning walks. This is on the hill behind where we stayed. We were two bays from Red Hook and this view is looking west. Bill snorkeled on the beach down middle right.
condo_1_of_1
Another walk view. This is Cowpet Bay and we stayed in the condos on the left. The St. Thomas Yacht Club is in the middle. There was OK snorkeling in the bay.
st_johns_cinnamon__1_of_1
Cinnamon Beach, St. John’s. A beautiful beach. Good snorkeling. Saw a ray and a turtle.
megans_beach_1_of_1
Magen’s Beach, St. Thomas. Another beautiful beach. There was decent snorkeling by the rocks at the far end of the beach.
snorkel_beach_1_of_1
Rocky beach behind our condo. Bill saw squid here.
us_1_of_1
That’s us on the ferry to Water Island, which has a fun beach.
ladder_1_of_1
All good things have to end, so we returned to Portland and non stop rain. The ladder still needs refinishing, but the old plywood back is off.
refer_box_1_of_1
The refrigerator liner is started. The plywood has been fitted and now it will get coated in epoxy and finished with white Formica.
galley_1_of_1
Yes, galley planning has begun in earnest.  This includes details such: as how big should access lids be for the pantry and refrigerator?  How will we design the storage cubbies and figure out what goes where?  And when will it get warm enough to epoxy and varnish?

Way too cool for comfort

Portland continues to be way too cool. Well, not really cool, cold actually. Cold, snowy and slippery. We got a foot of snow last Tuesday and it has stayed cold so the snow is still here. Sunday we went down to check on Gypsy. It was a cold sunny day.

ice_1_of_1
That is ice on the Columbia river. Sunday it was starting to form along the docks. That piece is about 1/4″ to 3/8″ thick and 3-4 feet long.
snowy_walkway_1_of_1
This shows the snow covered docks and you can see the ice forming.

We went back to Gypsy this morning and the ice was almost all the way across the fairway and it was thick and solid by the dock. That is what a week in the twenties will do.

snowy_gypsy_1_of_1
Gypsy on Sunday.
snowy_gypsy_2_1_of_1
Bill is clearing the snow off Gypsy’s deck. Always have one hand for yourself, especially when wearing slippery sea boots.

We did manage to get a bit more of the windlass and bilge pump wiring done this morning. We had the heater going and we wore our coats. We came home at noon when the freezing rain started. Sometimes we do have enough sense to come in out of the rain.

Baby, It’s Cold Outside

So, it’s been a month since we last posted.  Portland has definitely chilled down since November. You could say we have become the new arctic and yet we are still plugging away on Gypsy.  Nothing major, nothing exciting, but progress is happening.  Really.  It’s been too cold to paint, glue or epoxy.  What does that leave us?  Wiring and hoses and ducts.

head_plumbing
Bilge hose vented loop!  This and the wiring, which did get neatened after the photo was taken, will be behind a panel.  The black hose at the bottom right of the photo is the furnace duct, waiting to be shortened and installed on the front of the vanity bulkhead.
nina_wiring
Nina neatening wiring in the head.  She must have been feeling slightly piratical with those wire ties in her mouth. 

Whenever we think we are done with running wires, we discover we still have more gear to run wires to.  One of the challenges in fitting a lot of wires in a tight space is to make sure there is some slack and that everything bundles neatly so that it doesn’t take over an entire small locker and that it is protected and out of the way. So you have three disparate goals. Try working that out on your boat.

Still to come: more lighting for the v-berth, running lights and the windlass controls.  Those are just the wires coming from the front end of the boat to the control panel in the cabin.  There are still more wires needed for other gear in the aft end of the boat.

We now have the starboard water tank connected to the deck fill.  The vent hose for the tank has also been attached and we just need to screen the end so that once it gets warm and tropical in Portland, the bugs won’t invade the water tank.

All the foam for the refrigerator is in place and we have picked off most of the extra foam.  We’re waiting for warm weather to put together the box.  Our garage is less insulated than the boat and it’s too cold to cut wood or glue up anything out there right now.

Other projects we got done or started on but did not get photos of: the head vanity counter top was fitted with the bilge hose vented loop in place.  Once it gets warm, we can glue on the Formica.  Nina’s been working on patterns for ceiling panels in the main salon.  All the easy ones without lights have been made.  And cold or not, it’s time to get started on cushions.

Boxed in

November has been a long wet grey month where we faced a number of realities that were not pleasant. We knew that both the air and water temperatures were going to get colder and we were in a race to get what we could done while we were still in the operating temperature range of our paints and glues. The cabin sole, which was a big part of our October efforts was too big of a project and it was going to have to wait until spring. We needed to get the head and galley painted, and we needed to get the foam in the refrigerator space. Both of these needed to get done so the head and galley work could continue.

Painting required that we sand the old paint and fill all of the little dings in the surface. When we were ready to paint the big problem was the damp cool weather which is not ideal for painting. At least we had no problems with the paint flashing and getting tacky too fast.

head_primed
Head with a coat of primer. We taped off where we will need to glue parts of the cabinetry.
head_painted
Head painted: it is looking good.
mixing_paint
Bill mixing paint. The photo shows the light we had to paint by.

We also wanted to get the insulation into the refrigerator. Bill was torn between building the liner  for the fridge first and insulating around that or insulating first and building the liner to fit. Insulating first won. It allowed us to be sure we got enough foam installed and avoids having odd small gaps to fill. The space was measured and the foam panels were cut out. Then the panels were fit to the box. When the dry fitting was done the edges of the foam were covered with aluminum tape to keep out moisture. Based on all the info he found, the best practice is to install at least four inches on all sides. Our refrigerator will have 5-6″ of foam around it not counting the pour foam.

foam_panels_rough
These are the rough cut panels for the first layer. The foam is polyisocyanurate which sounds impressive and has a very good R value. The top and bottom sides of the sheet come covered in aluminum foil.

The panels were glued into place with industrial polyurethane adhesive. Spray foam, the stuff in a can, was used to fill any gaps.

foam_step_one_fit
The first layer is dry fit and ready to install.
foam_step_one_glued
The first layer is glued in place. The sticks and foam pieces act as clamps to hold everything tight.
step_2_glued
The rest of the parts were measured for and cut out. The tricky bit here was shaping the pieces that fit against the hull. Again foam pieces are used to clamp the parts. You can see the spray foam where it has pushed out. It will have to be trimmed.
galley__painted
This photo shows the painted galley and if you look at the top back side of the fridge you will see foam wedges that are holding the back of the foam tight. The space against the hull will be filled with two-part pour foam which will give us a much better fit than we could carve.

The two chemicals for the foam are mixed 50/50. You get a few seconds to mix and then it starts to foam. The foam expands a lot so you don’t want to distort your structure with too big of a pour. We did 1 cup batches.

foaming_1
Batch no. 3 starting to foam.
foaming_2
Foaming up.
foaming_3
We had to do a small 4th batch to fill in on the right.

Now we will let everything harden and dry and then it is back to work next weekend.

Head and Sole

Boy have we been enjoying having lights on Gypsy. It is not so sunny anymore and the lights are a big help. As the days get shorter the temperature also drops. The Columbia River is down to 55 degrees. Our focus is on what we need to do below the waterline before the temperature gets too cold. West system epoxy, with the fast hardener is supposed to work down to 40 degrees, but I don’t like to have no margin for error.

We worked on the galley refrigerator box,  head vanity and the cabin sole. Last weekend we tabbed in the mini bulkhead under the head vanity. That got sanded and we continued fitting the filler pieces on the cabin sole. Where the plywood cabin sole (floor) meets the sides of the hull, the sole is the fiberglass of the hull. This presents a problem for installing the cherry floor boards. We are going to glue down 1/4 ” plywood to give ourselves a flat surface for the floor boards. We made patterns and cut the plywood triangles out. They got sanded and planed to fit the curve of the hull. Surprisingly, a hand plane worked well.  We also had to sand away the old paint on the fiberglass for a good glue bond.

vberth_sole_weights
This is in the v berth. You can see the plywood under the weights. We needed to find a way to hold the plywood down while the epoxy cured. The 6″ by 24″ piece of plywood has about a cup and a half of epoxy filler under it. At the bottom of the photo you can see the fiberglass of the hull that has been sanded and is waiting to get its plywood .
head_sole_weights
This is what it looked like in the head. The rolls of wire that are waiting to get installed are nice and heavy. Loren, if you were looking for the washers for the docks, we borrowed them. They are now back in the club shop.


vberth_sole_faired

head_sole_faired
The plywood triangles have been sanded and faired.
head_vanity_cleat
We also got the back cleat for the vanity counter top installed. 
head_vanity_insulation
Nina also installed half the insulation under the vanity. The thru-hulls you see are at the waterline, so everything lower than that is affected by the water temperature.

The galley is also getting attention. The space for the refrigerator got its front panel glued on. We also put a layer of epoxy and cloth on the inside to help prevent moisture getting into the insulation.  No fancy cloth, just the pellon that wrapped a memory foam mattress.

refer_space
Nina did a great job coating epoxying the fabric. She gets a much smoother result than I do . I just hold the light and mix the epoxy.
cleats_for_the_ceiling
Nina had a bit of spare time so she installed the cleats to hold the ceiling panels under the side decks.  Now all she needs to do is get the patterns for the panels made.  And the panels…


October’s projects

It’s been a long month of small projects.  We had visitors, and we had projects that needed more thought and design than actually getting things done.

One of them – flooring. We are floored.  It’s that season.  Interpret how you want.  We sanded the cabin sole down to the bare wood.  This gives us a clean surface to glue new flooring down.  The flooring itself is a story.  We bought cherry flooring with the indestructible finish thinking that we could take off the finish with our planer.  It killed the planer blades.  We’re going with the finish as is.  We reconfigured some of the floor boards so they would be not so long and easier to deal with. We still need to lay out the flooring boards and plan how they will fit.

sanded_sole
The floor sanded down with the odd bilge access epoxied in place. These were the old table post locators (on the left) and old depth sounder access (the square shape on the right) and a no longer remembered circular access on the right. These will be covered with cherry flooring.
new_lights
We got our lights and the lighting got  dry fit. We ended up going with West Marine’s LED lights because the Dr. LED lights we ordered were stuck in China somewhere. It is getting dark sooner and sooner and lights become important. Cabin lighting for the most part will be white, with red/white lights over the chart table, galley sink and in the head.  Nina is beginning to make patterns for the panels.  The lights connect to terminal strips so they are easy to service. The overhead panels will have an access hole for the wiring, but the lights themselves will be attached through the panel and to the mounting blocks in the ceiling.
more_bling
On the outside of the boat, we had a sunny day so added more rub strakes. This will help protect the paint on the way to the main sheet winches. We discovered the problem when we took our test sail. Port and starboard main winches now have strips.  The problem with a fancy paint job is that there will never be enough chafe protection. We won’t need radar or AIS to alert other boats of our presence, as all the boats in our vicinity will be blinded by the glare from our bling.
joining
More wood was needed for new cabinetry. We don’t have a power joiner, so this is the Bill and Nina version of the process. We do have a Stanley joiner plane, manual version. This is Bill getting his steps in for the day. What you don’t see is Nina sitting on the saw horse providing dead weight to the process so the board doesn’t go shooting down our driveway.
head_venting
Composting head ventilation. We wanted to make the hose more integral to Gypsy so Bill designed new venting for the head. This is the piece that will connect to the deck vent. A hole will be cut into the bottom, just above his finger, to connect the horizontal airflow with the vent. The diagonal part of the box will have a drop down door for cleaning and maintenance.  The bigger space above will contain the wiring from the mast.
head_vanity
The beginnings of the vanity. The front will have sliding doors for better access since the left side of the picture will be behind the head. The sink will be on the right side of the counter top. Not shown yet is a bulkhead that will bisect the space under the top. We’ll have a foot pump on the right (beyond the picture’s edge) for water.


Gypsy has left the moorage, 9/12/16

When we left you last time things looked bleak. The engine would not start and we were flying off to Minneapolis. Some of you may have thought, oh no, they won’t return, not with the Maul of America to tempt them. Well we’re back, and we got Gypsy to start, and we left the dock!!!!! Yes, we solved the wiring problem, and the Maul did not win.

Note, if you have starter problems, just replace the engine wiring harness with new marine wire of a larger gauge. Our Yanmar’s wiring harness is made of untinned wire and lots of plain brass connections. We ran new 10 gauge marine wire to and from the starter solenoid and that did the trick: the engine started. We did not trust the engine to start so we tested it several times. Then we left the dock.

When you don’t sail your boat for two years and then change lots of stuff you are in for a surprise when you do. It is a new boat and you have to learn how the boat will respond. Troubleshooting is much more complex.  Nothing is quite the same as it was. Well, we were rusty, but we got out and raised the main and the jib, and then reefed the main. We had fluky winds and we got healed over enough to almost toss the tools around down below. As you gather, we got to try out the boat a bit and we got to hear the lovely sound of water rushing by the hull. We then brought Gypsy back to her slip without adding a scratch. This is the important part with a new paint job.  So we aren’t too rusty.

We went home feeling proud and knowing that we had plenty more to do yet, so sailing will still have to take a back seat to progress.  But at least we can still go out for a quick sail now and again before putting the noses back to the boat grindstone.

returning_to_dock
Proof that Gypsy left the dock. Gypsy is heading back to the marina after we had our first sail.  It’s slightly blurry, but it’s the excitement of the moment.