Big things happened this weekend, and it was, if you are not actively working on the boat, more of the same. When we arrived on Sunday, Tom had the engine hooked up and hoses installed. We still had plenty to do. Bill set to work wiring the engine so that it was connected to the batteries, which he had to haul up from the basement. There are 5 batteries and they each weigh 65 pounds. Nina installed the rest of the rub strips and learned to bend stainless trim. The dodger was attached, the traveler installed, and the mast had the shrouds attached. What’s left to do?
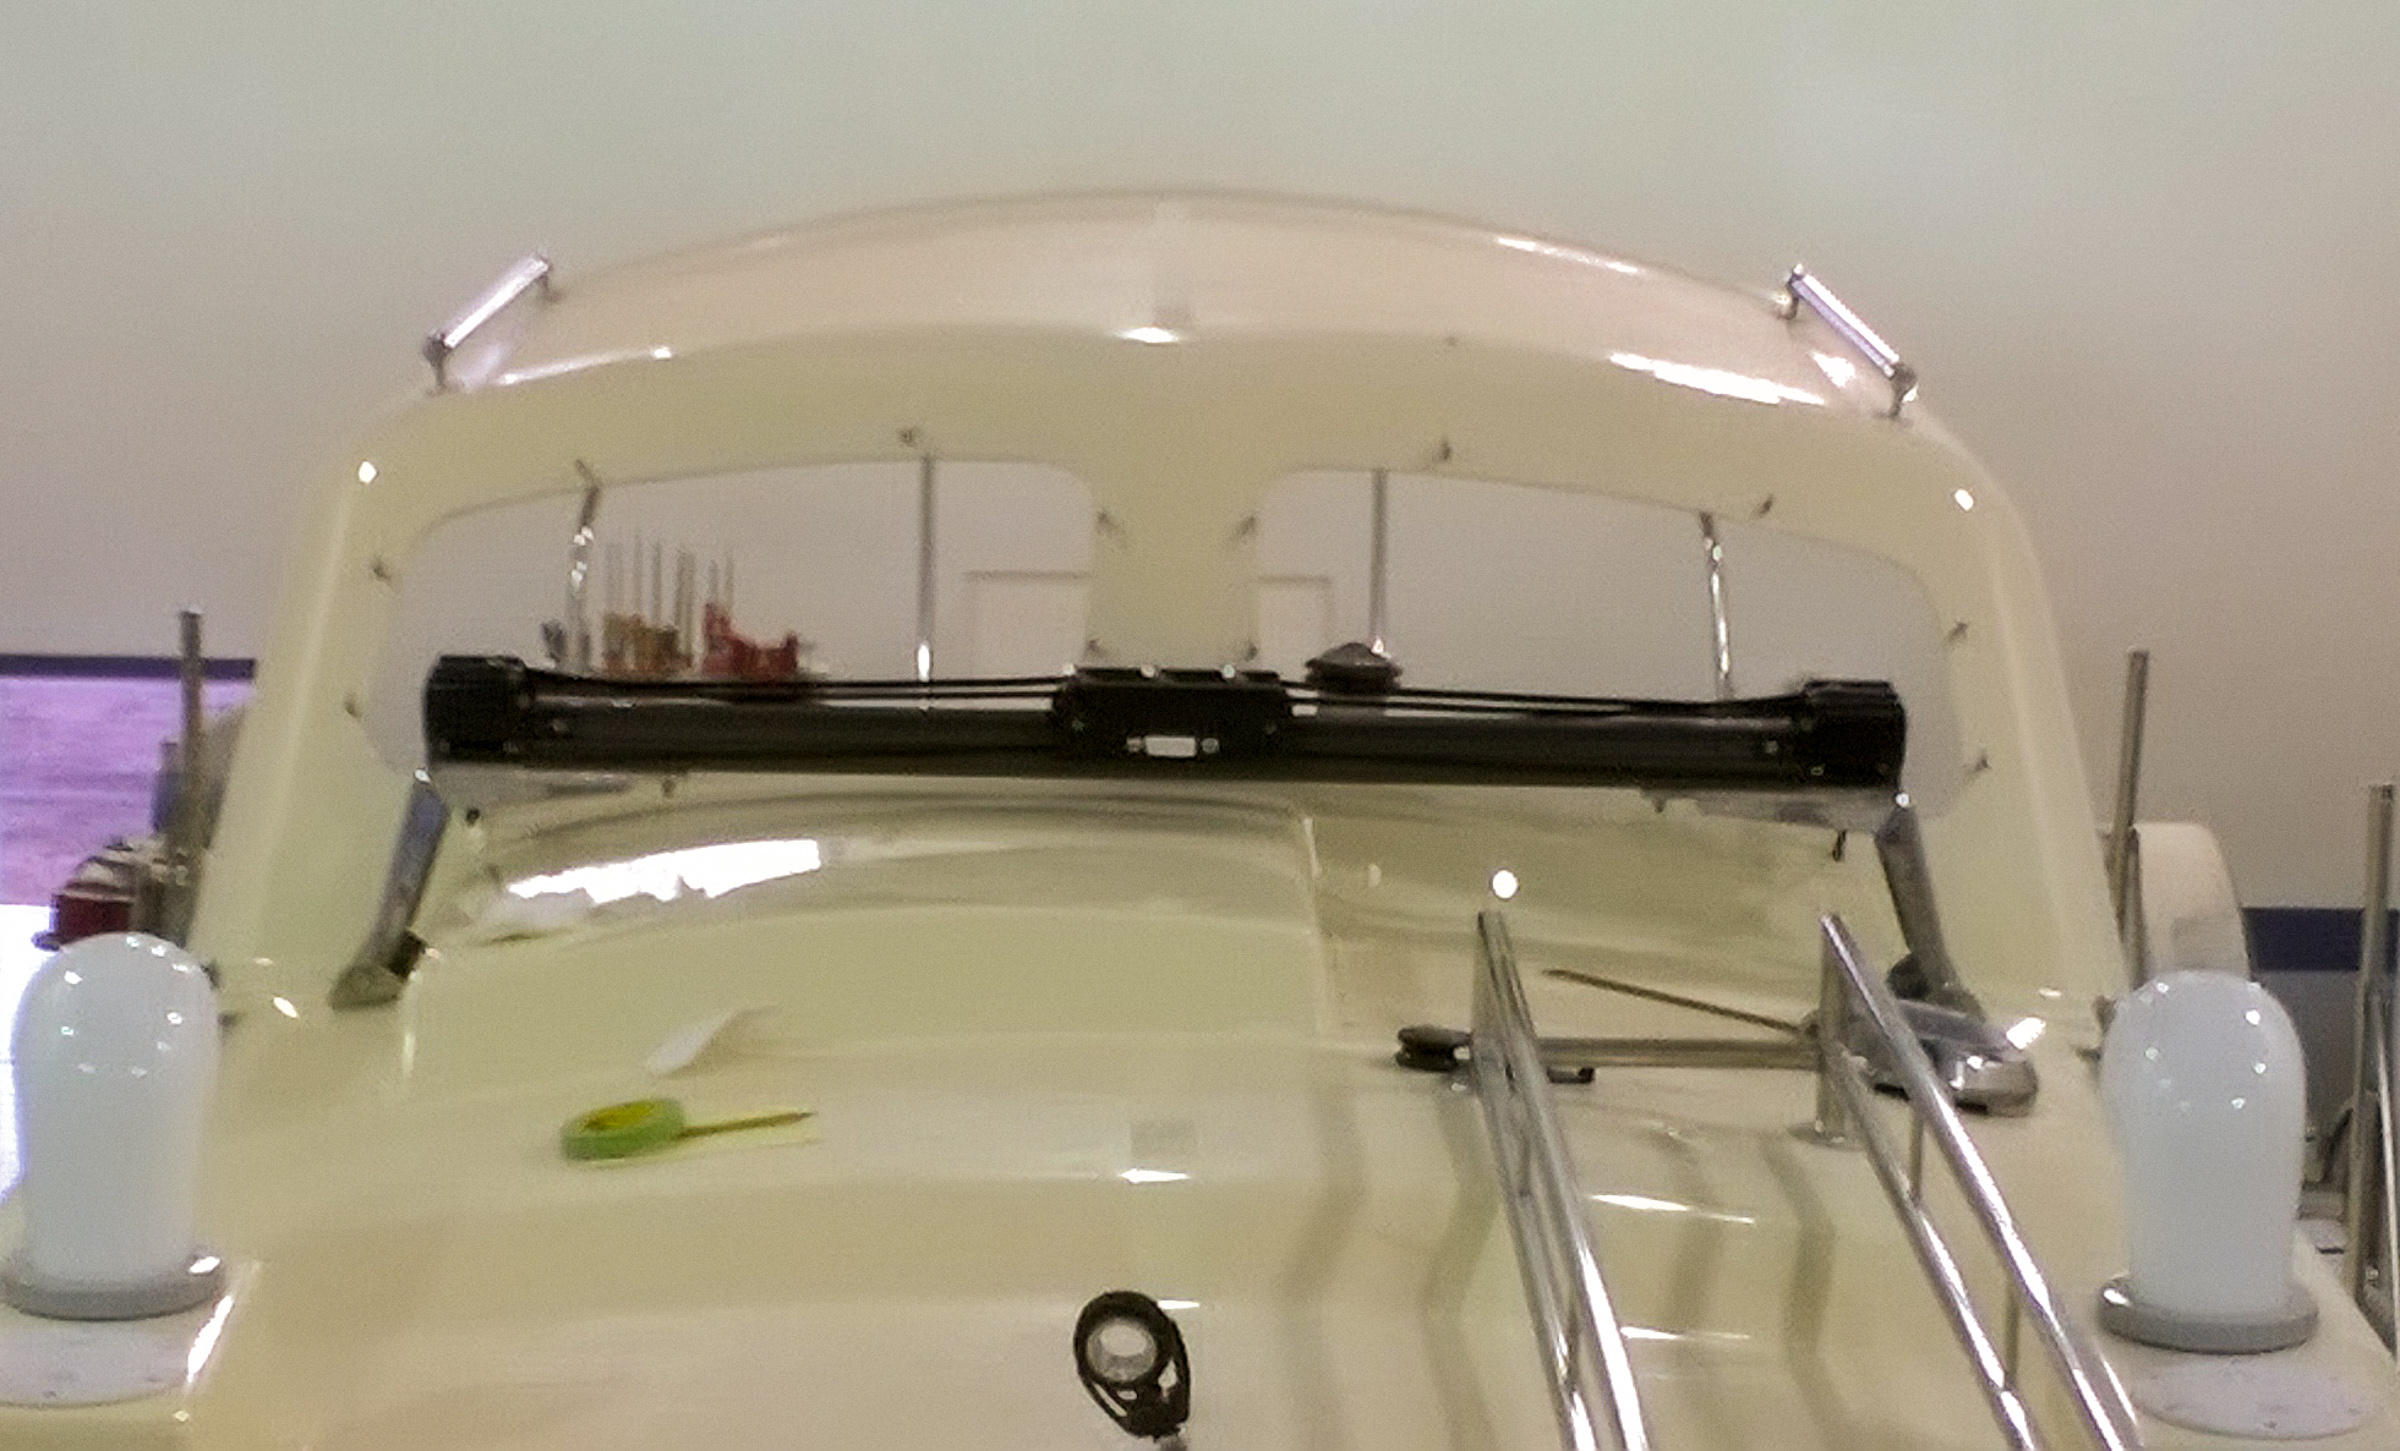
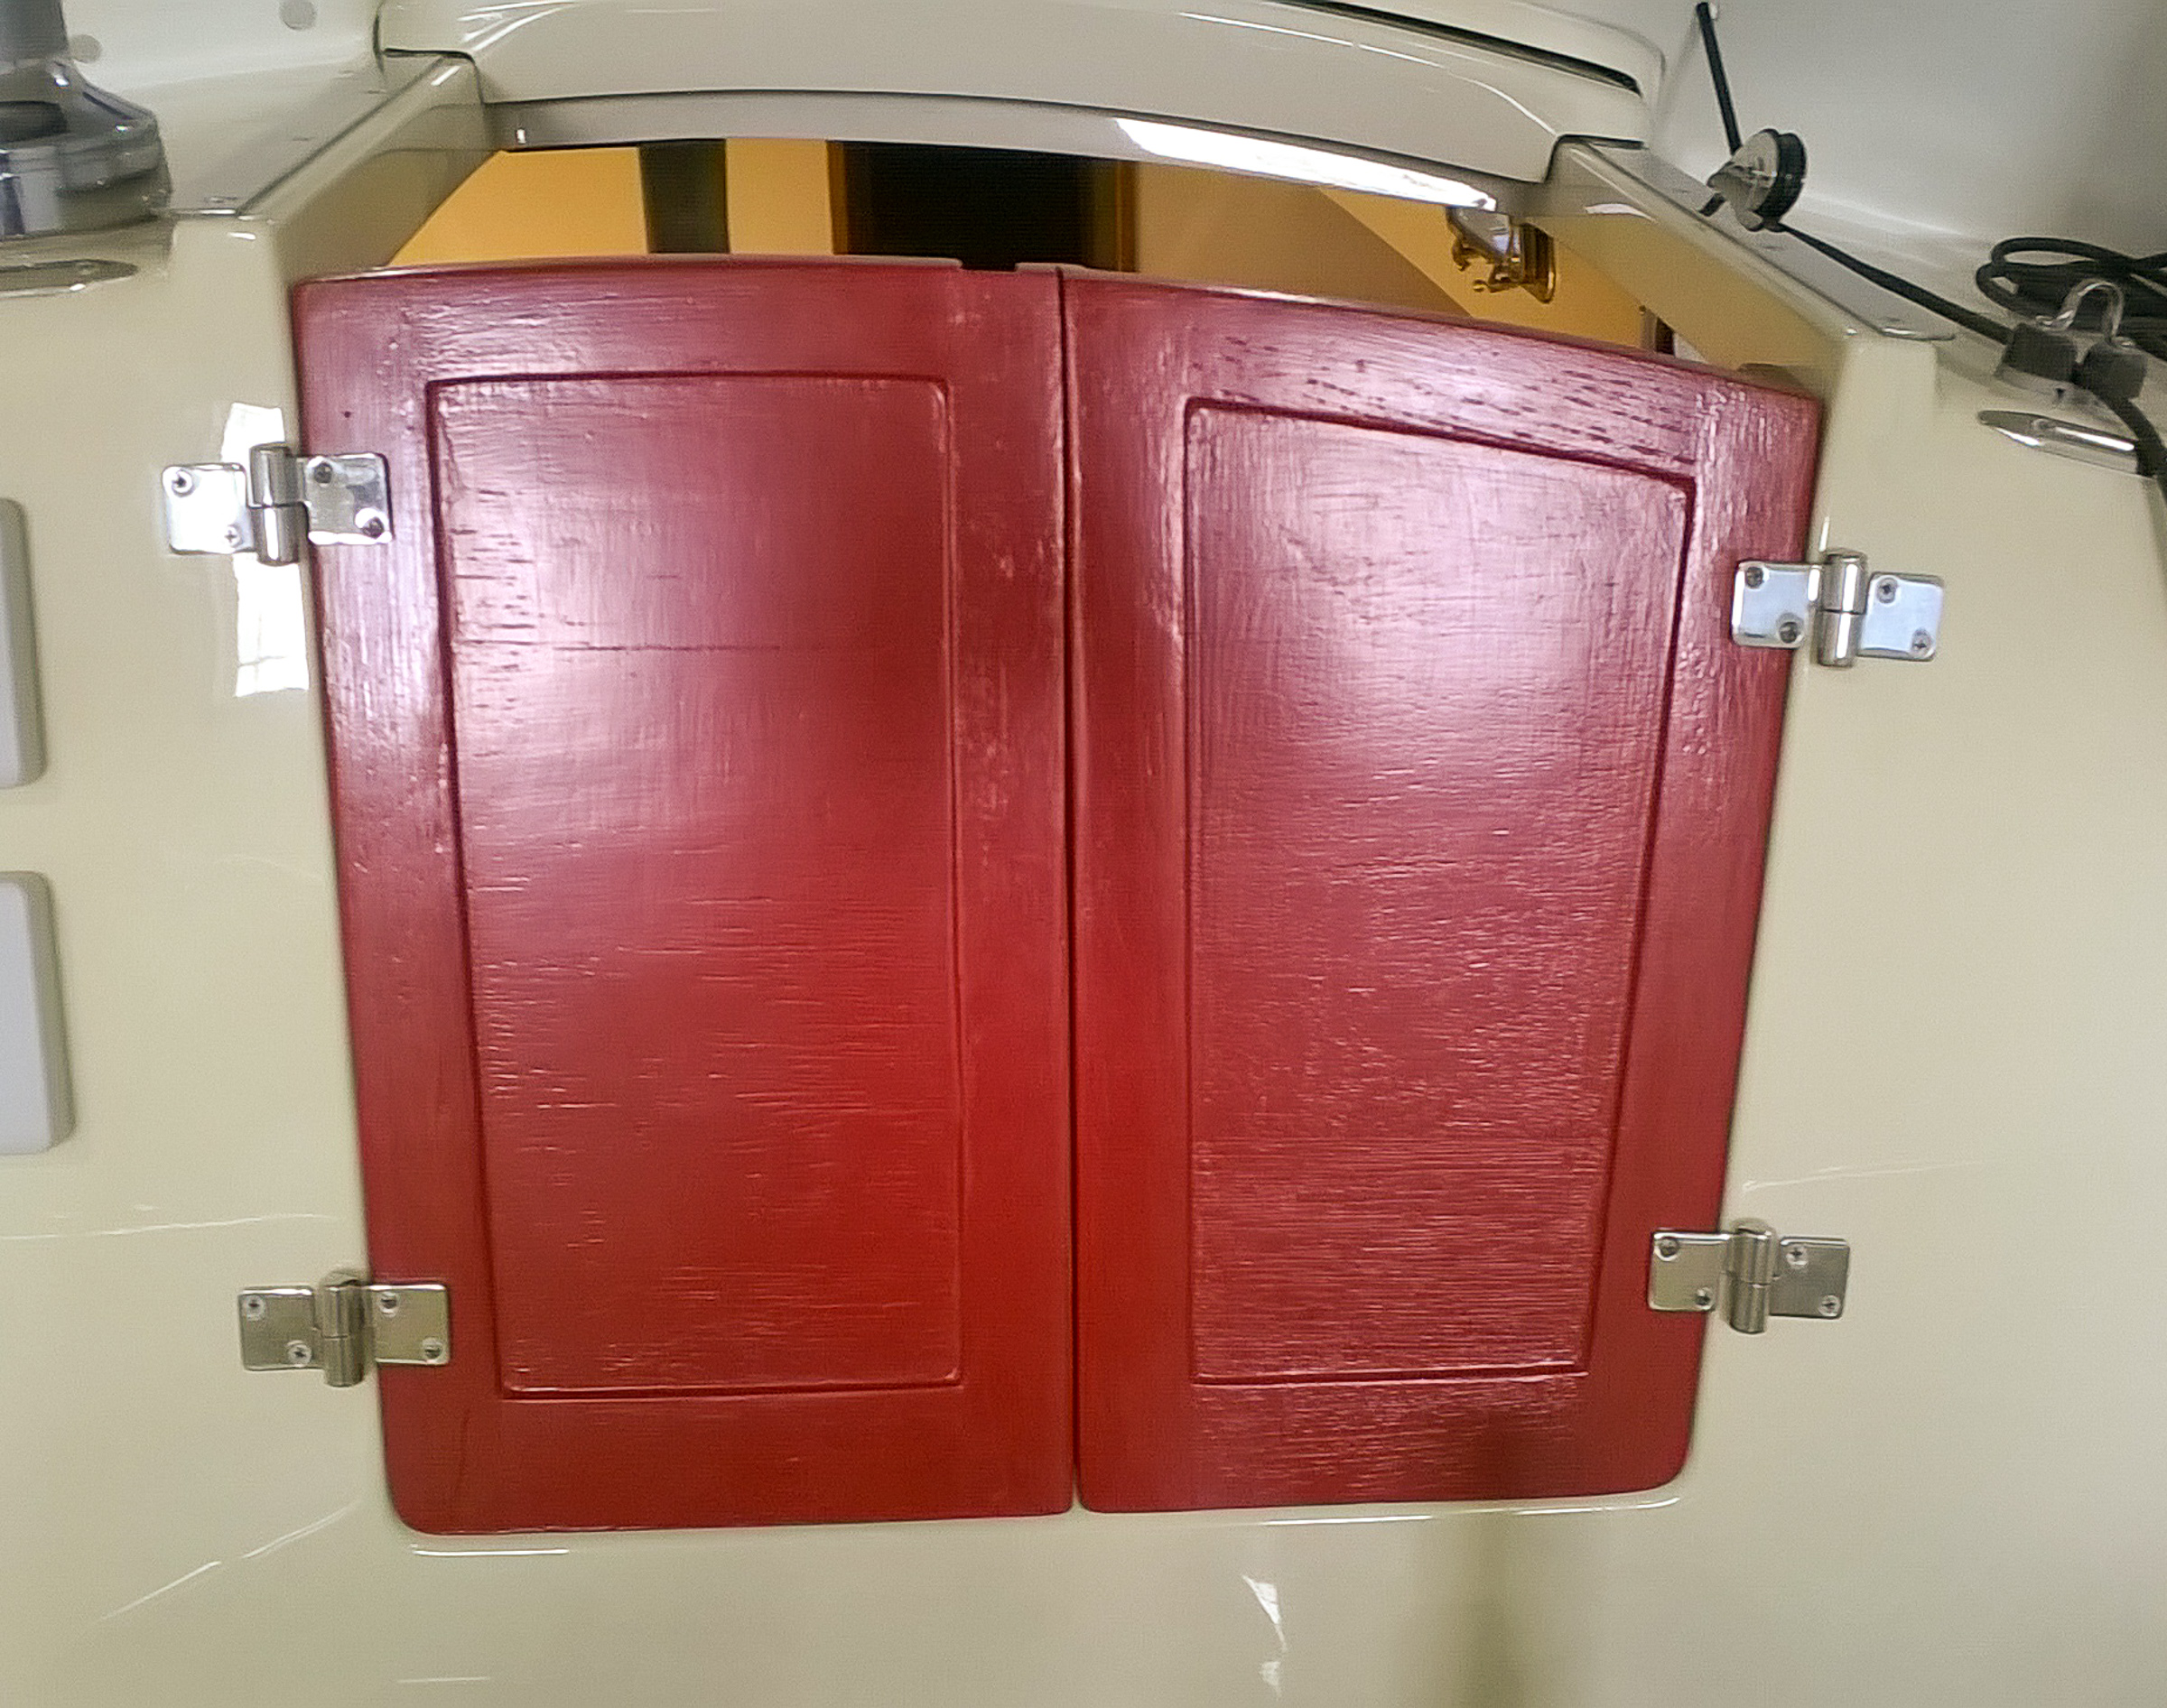
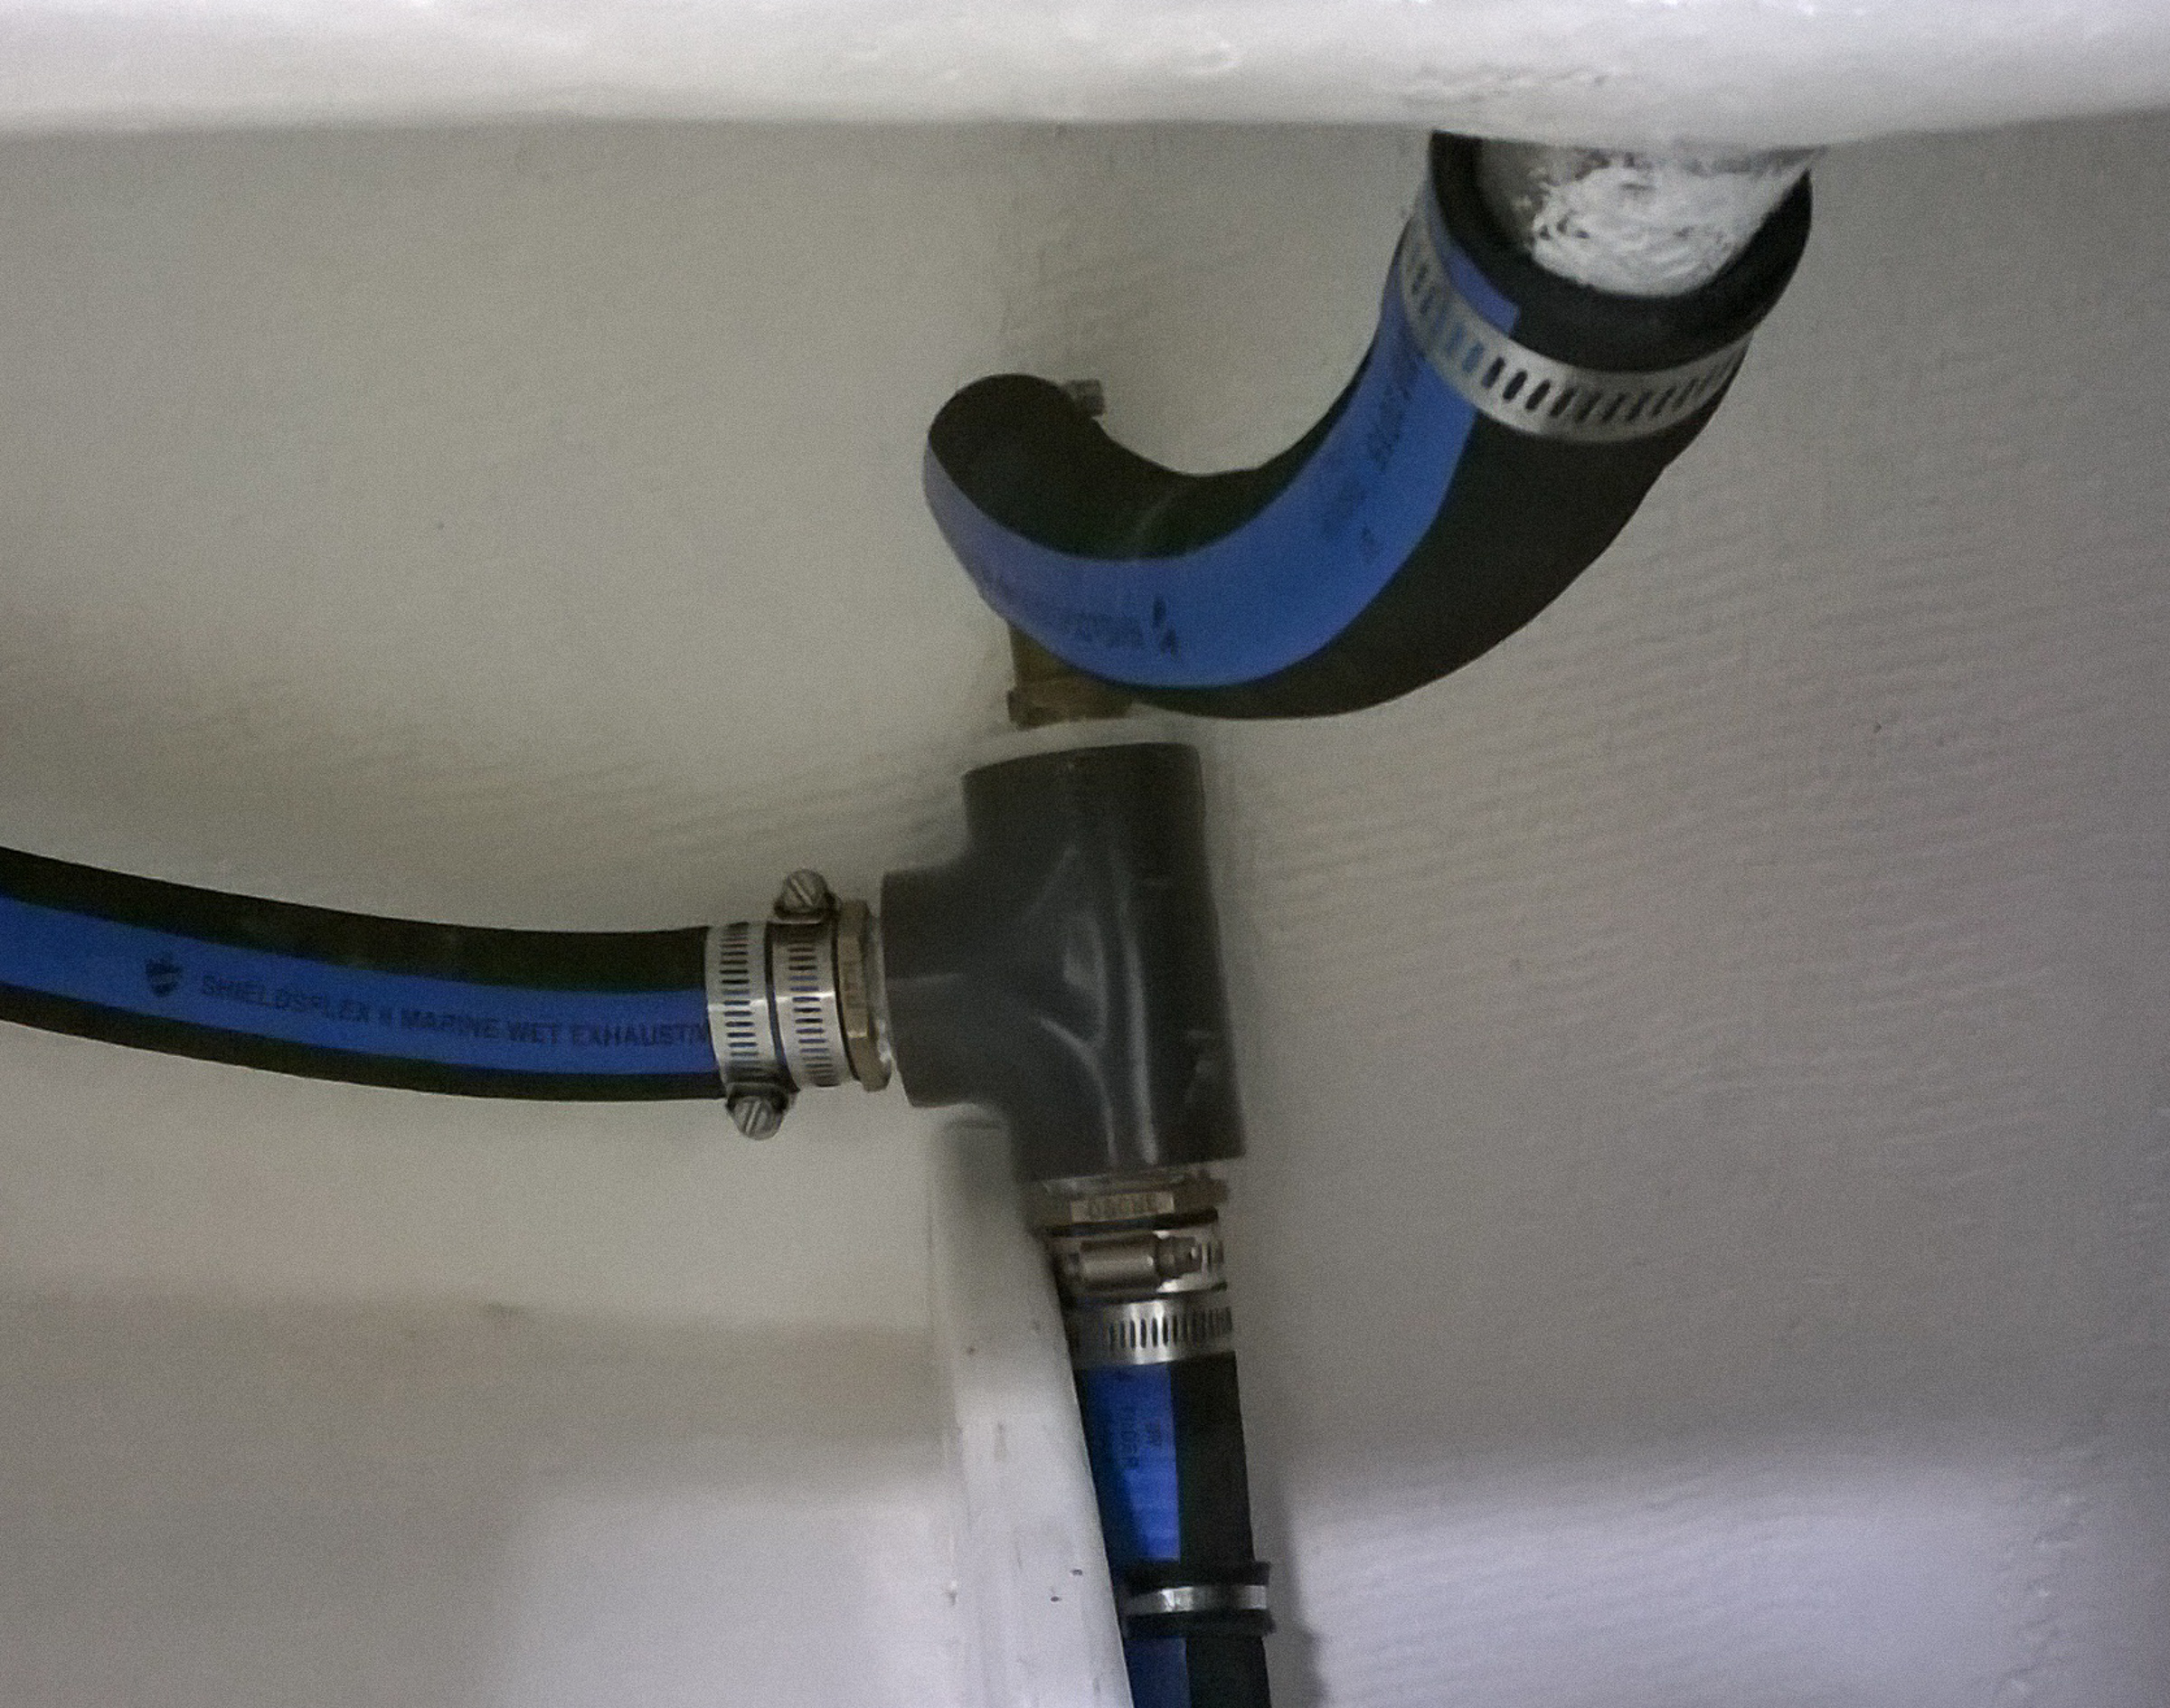
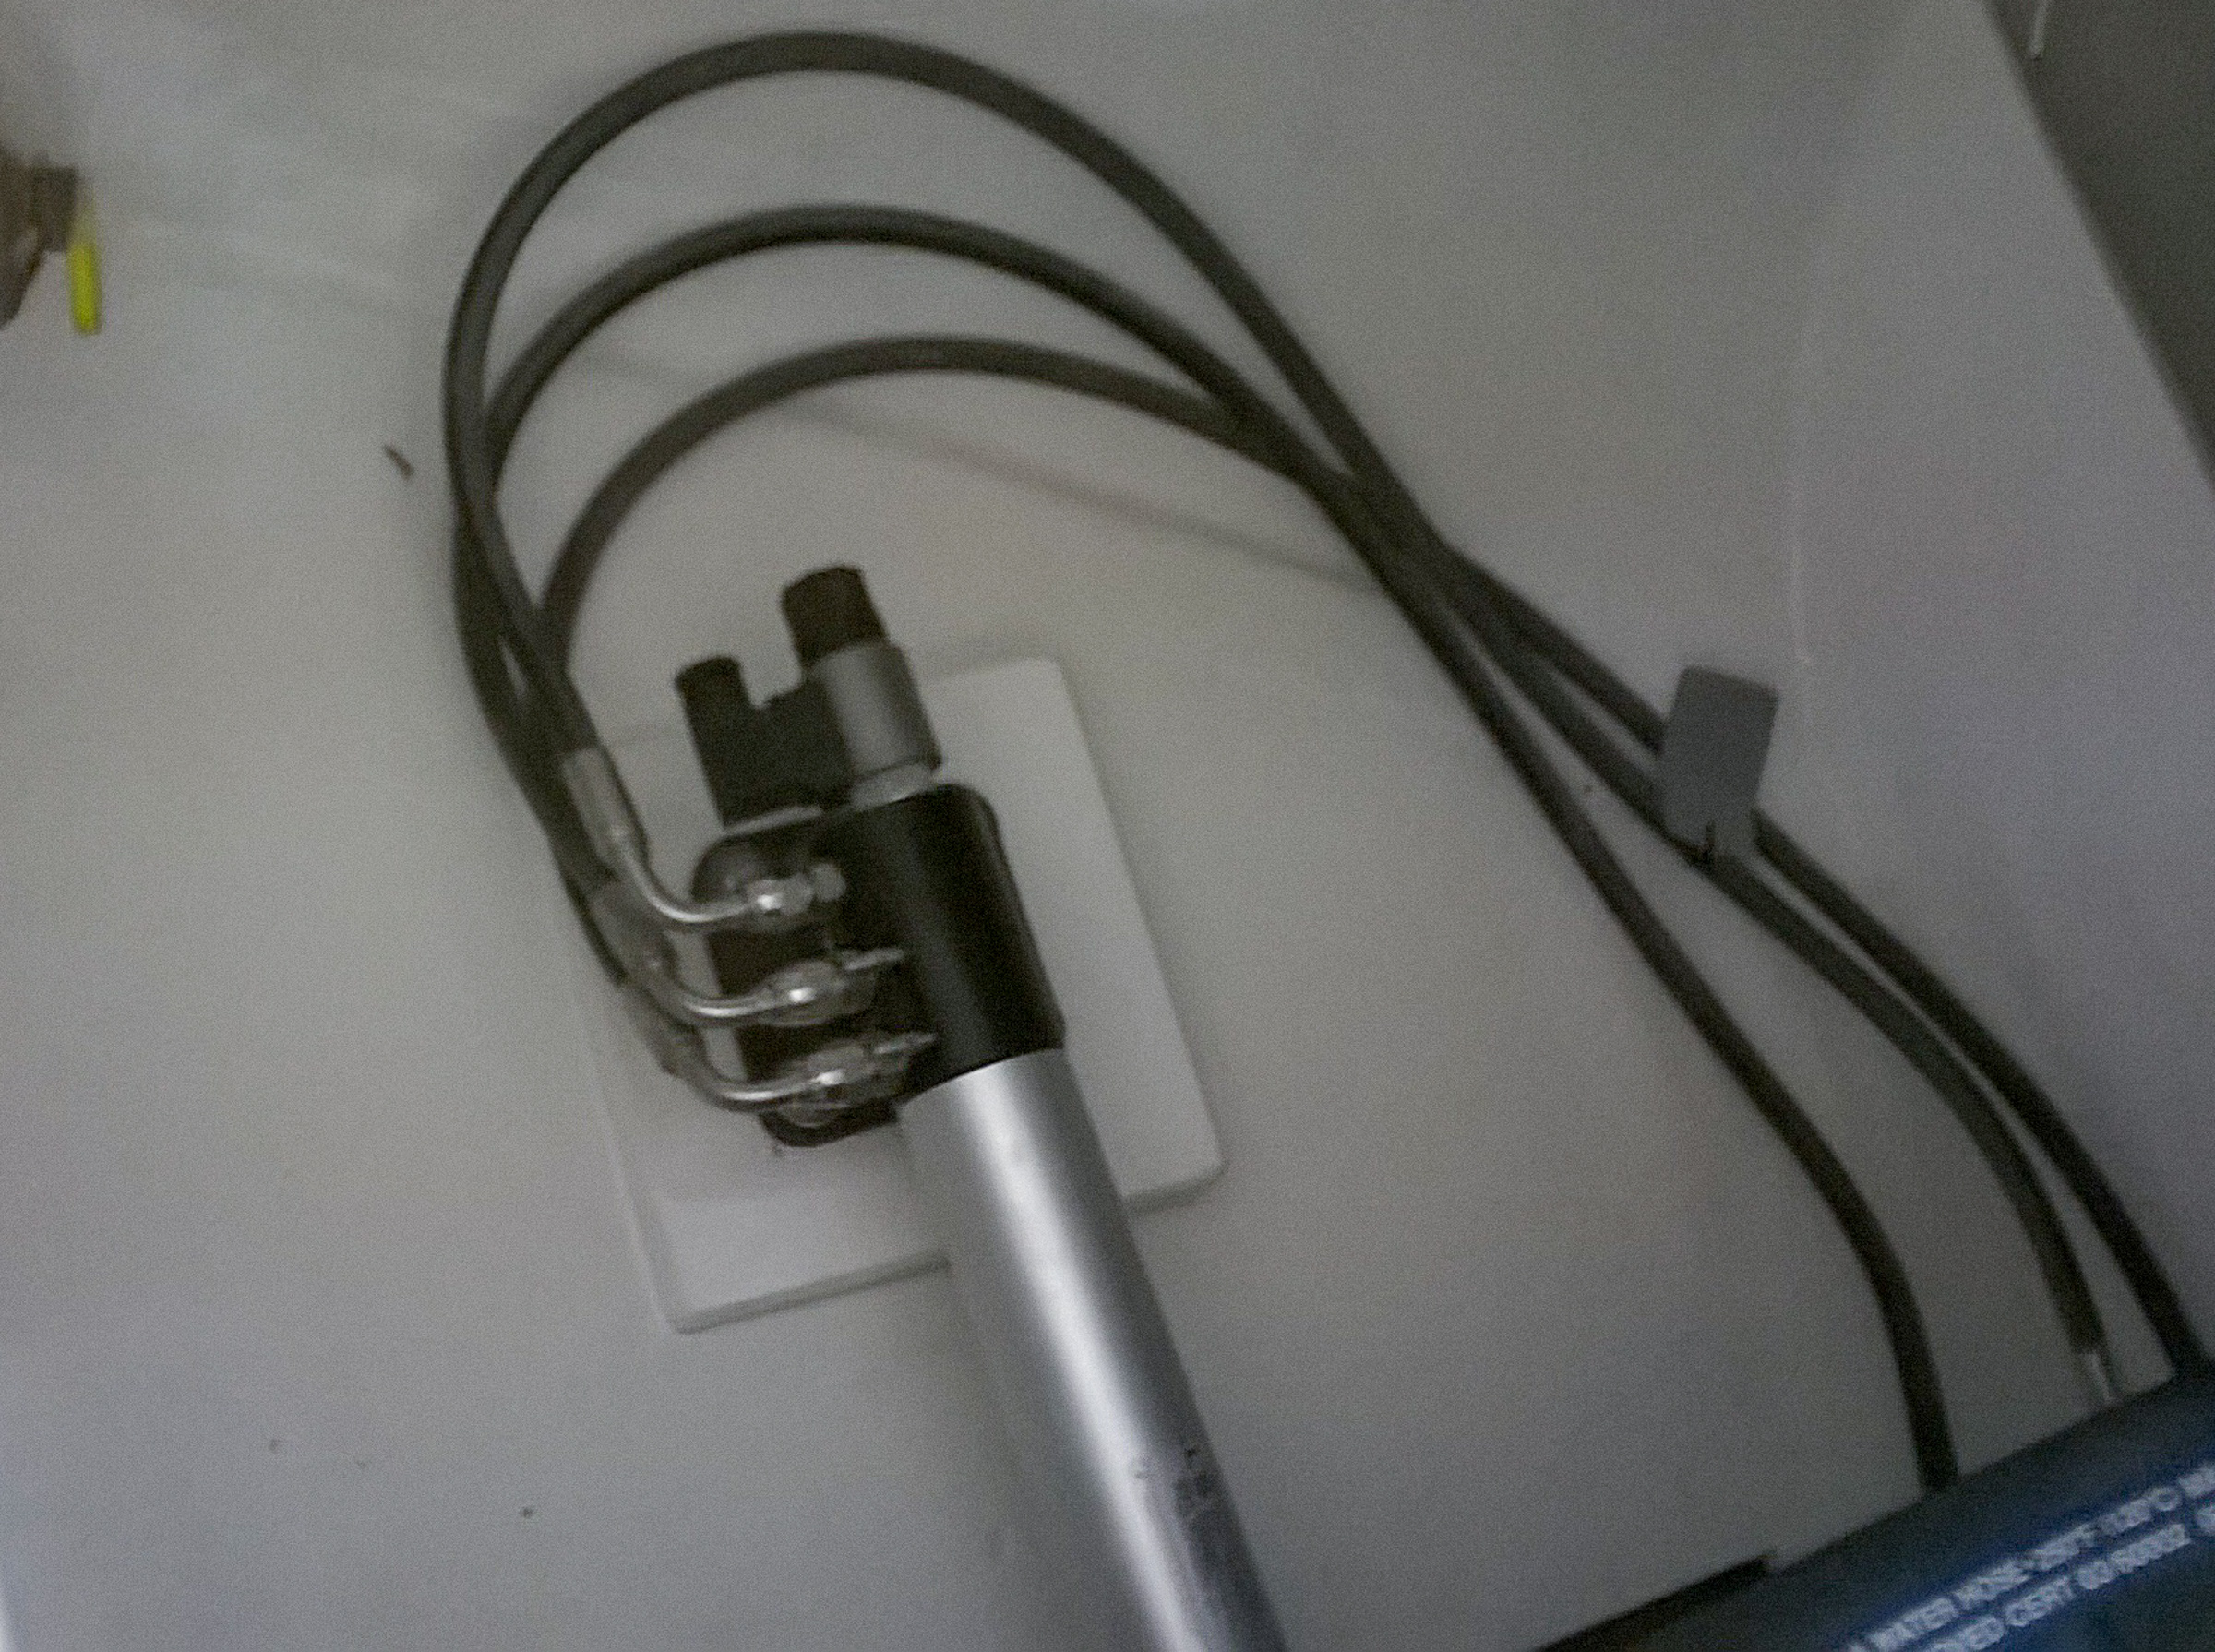
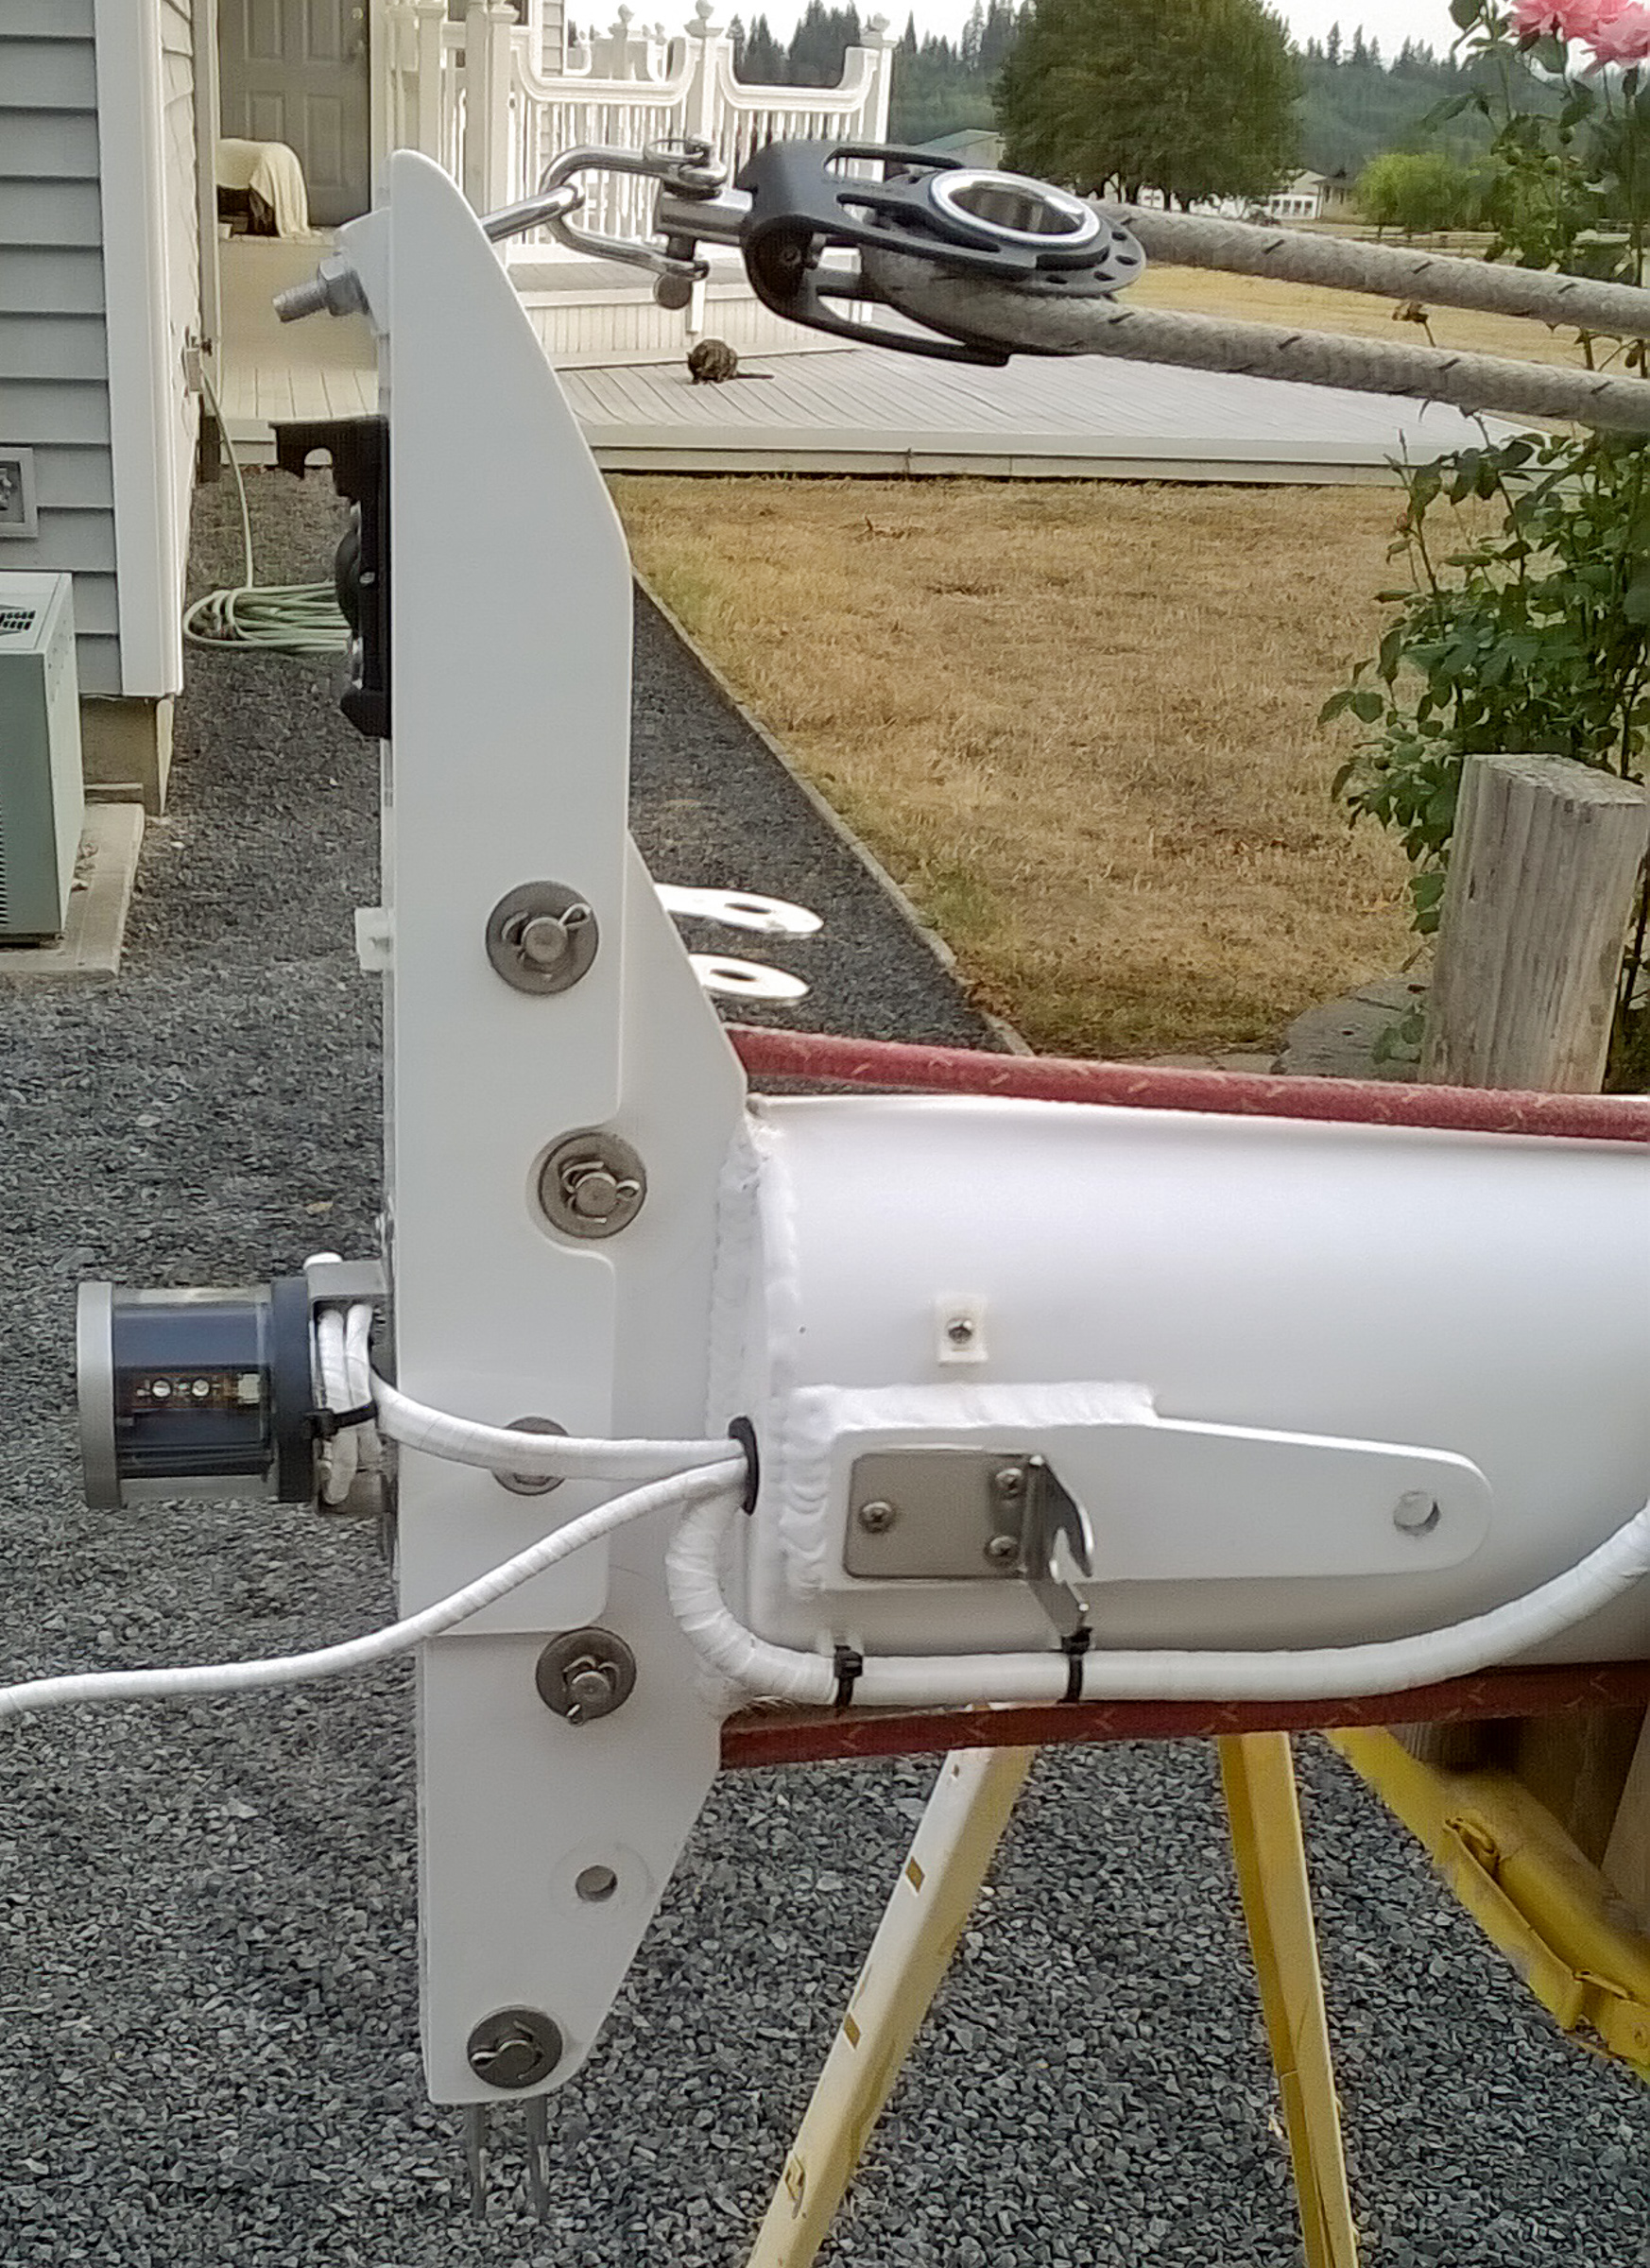
The dodger and the traveler installed. The dodger, other than being bulky and awkward to get up the stairs to the boat, went on quite smoothly. The traveler took some readjustment, but worked out fine in the end.The last of the signature look for Gypsy, the red doors will be temporary. We reinstalled the old doors after touching up the paint and we’ll eventually be replacing them with drop boards. Too many projects, not enough time.Hoses were installed during the week while we were not at the shop. This is a new seat drain hose connected to the new deck drains.The autopilot finally bolted in place. Chris got to crawl down into the new tight locker and get the arm bolted in place and install the cable brake to the rudder post fixture. It all looks lovely down there, but there really is no room for anyone larger than a six year-old. We will be building a platform over the autopilot arm so that all the gear that gets dropped in a locker won’t impede the arm.One of the last things that Nina worked on was re-rigging the mast. All the shrouds went back on. Everything was neatly labeled with tape so the installation went fairly quickly except for bending cotter pins: fussy business, much better done on the ground than in the air.One last shot from the upper door. The dodger is installed but the doors are not yet on. Most of the rub strips are on and Tom is giving the boat a quick once over.
What we saw Sunday morning as we came into the shop.The bottom paint is done. The launch date is now set. T minus two weeks and counting. It looks like a dirigible, but it’s a gorgeous sailboat.
We made great leaps forward this weekend. We got the remaining non-skid painted. We had the side decks and the cockpit locker lids to paint. This consumed almost all of Sunday, taping off the areas and sanding and papering. Thankfully, the side decks had been taped off by Tom or Chris so we didn’t have to tape those. Sunday was hot and the Durabak non-skid paint dried faster than we could pull off the tape and masking. We had lots of bleed over to trim, so the first thing on Monday was carefully removing the extra bits with X-acto knives. Once that was done, Nina taped off the dodger and we painted the non-skid on the dodger top and touched up repairs to the side decks and locker lids. It all finally done and looks great. Durabak is wonderful non-skid, but it is not the most user friendly to install.
The side decks are done.The locker lids are also done. Nina got the starboard combing chafe strip on.
Sunday we also installed the halyards on the mast and upgraded the spinnaker block to a really beefy one that will pivot all the way around.
Halyards and tougher spinnaker block.
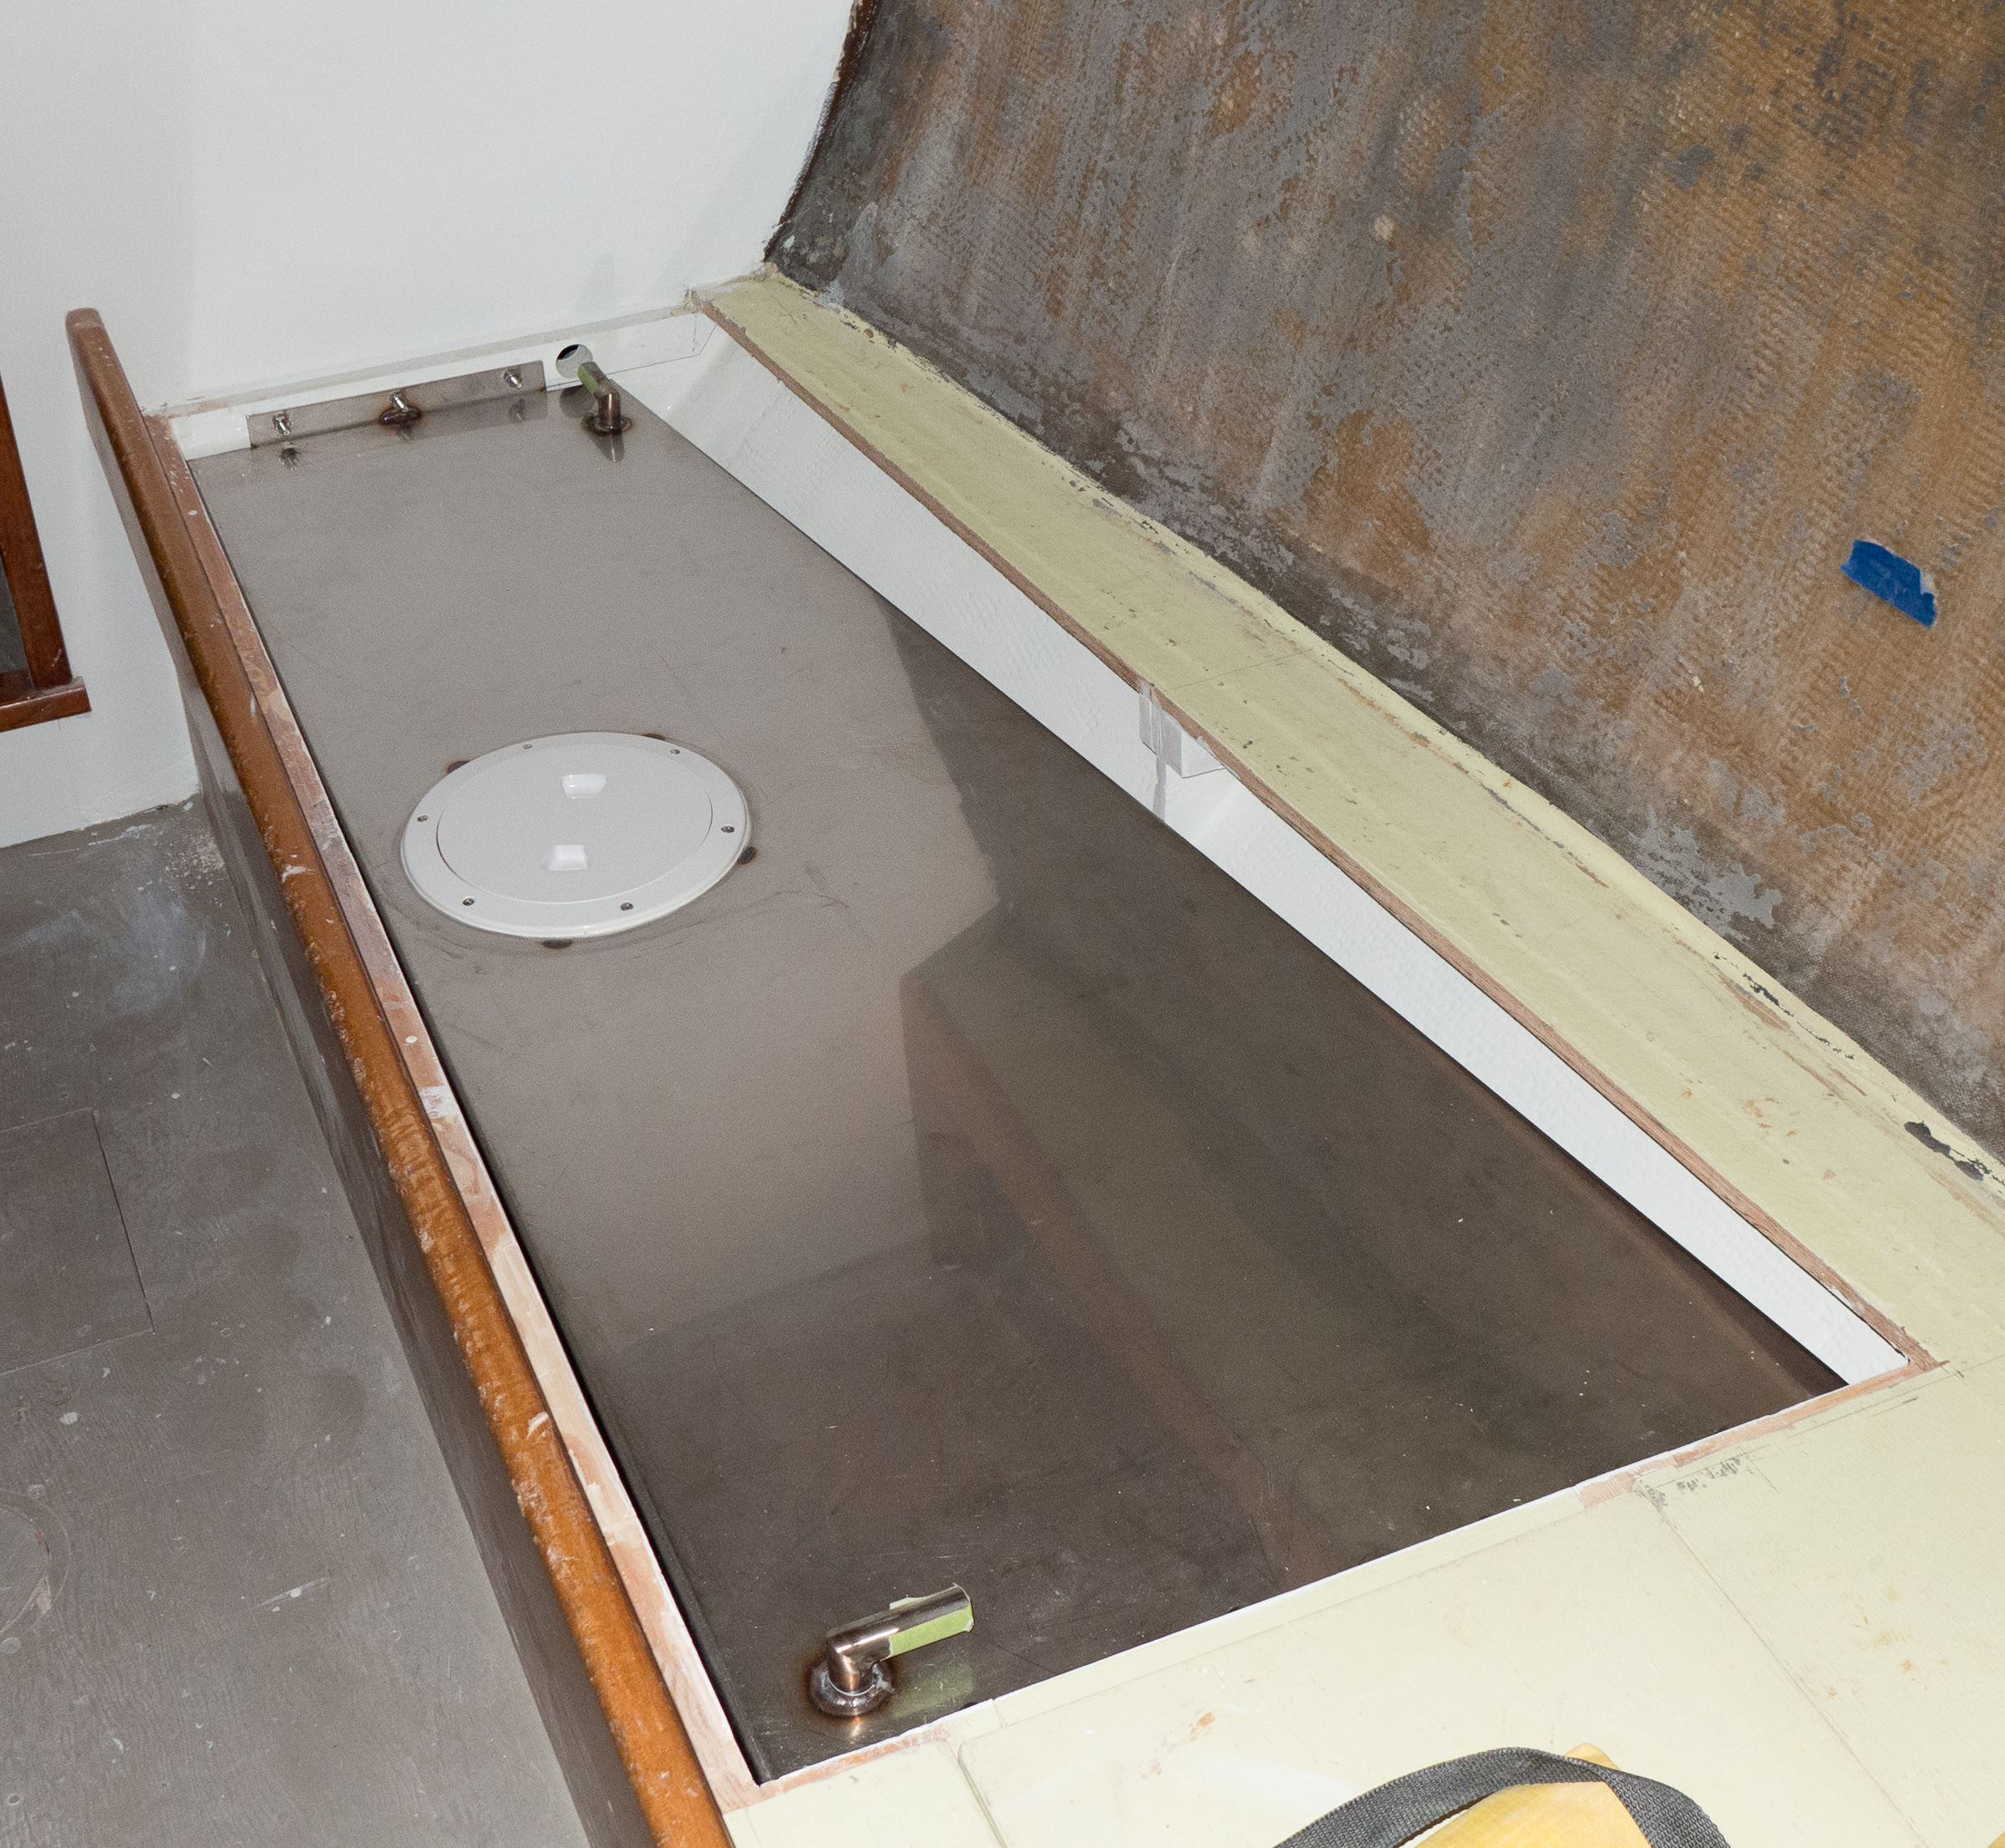
On Monday we also installed the new water tank. It fit perfectly. Bill installed the fuel fill hose on the new fuel tank. It required a lot of extra work to make it fit: very short hose and no space to work in. The hose was finally wrestled into place and it should never need to come off. We also installed the FrigoBoat refrigeration cooler plate on the hull.
Water tank bolted in. We’ll need to install some bracing for a replacement seat, but that’s down the line.
Tom helped us install the engine. He hoisted it up in place and we eased it in through the towel-protected companionway and onto the bedlogs.
Looking down, the engine being lowered into place.Still tied to the hoist, but almost in place.All set: bolted in and ready to connect hoses and wiring.
Stuff is getting done! We are at the stage where we can start to check items off the list as being completed. We also have several lists to work off of. Much is left to be done. We arrived Sunday morning to find Gypsy unwrapped. The hull was clear of paper and tape and plastic. The hull paint had been buffed and Gypsy looked gorgeous. Greeting us as the door was a list of tasks from Tom. This list did not include the things that Tom had told us about last week. The list was long. One of the items: “fix the companion way hatch so it slides better.” The hatch has always stuck a bit, and even reinstalled, it still did bind. The solution: remove the sea hood and the hatch and fix it. We decided that that could wait until Monday. At least the caulk was still fresh – it’s easier to remove than when it’s fully cured.
Bill was overwhelmed by the project lists so he started on the mast. The spinnaker crane for the mast head was painted and he installed that. The only thing left on the mast is to wire the tri-color anchor light at the mast head and put the halyards back on.
The new spinnaker crane should put the spinnaker block out far enough in front that it won’t catch on the forestay. The block currently at the top will be replace with a larger, fully swiveling block. Bill installed the mount for the new wind instrument and also added the L.E.D. tri-color/anchor.
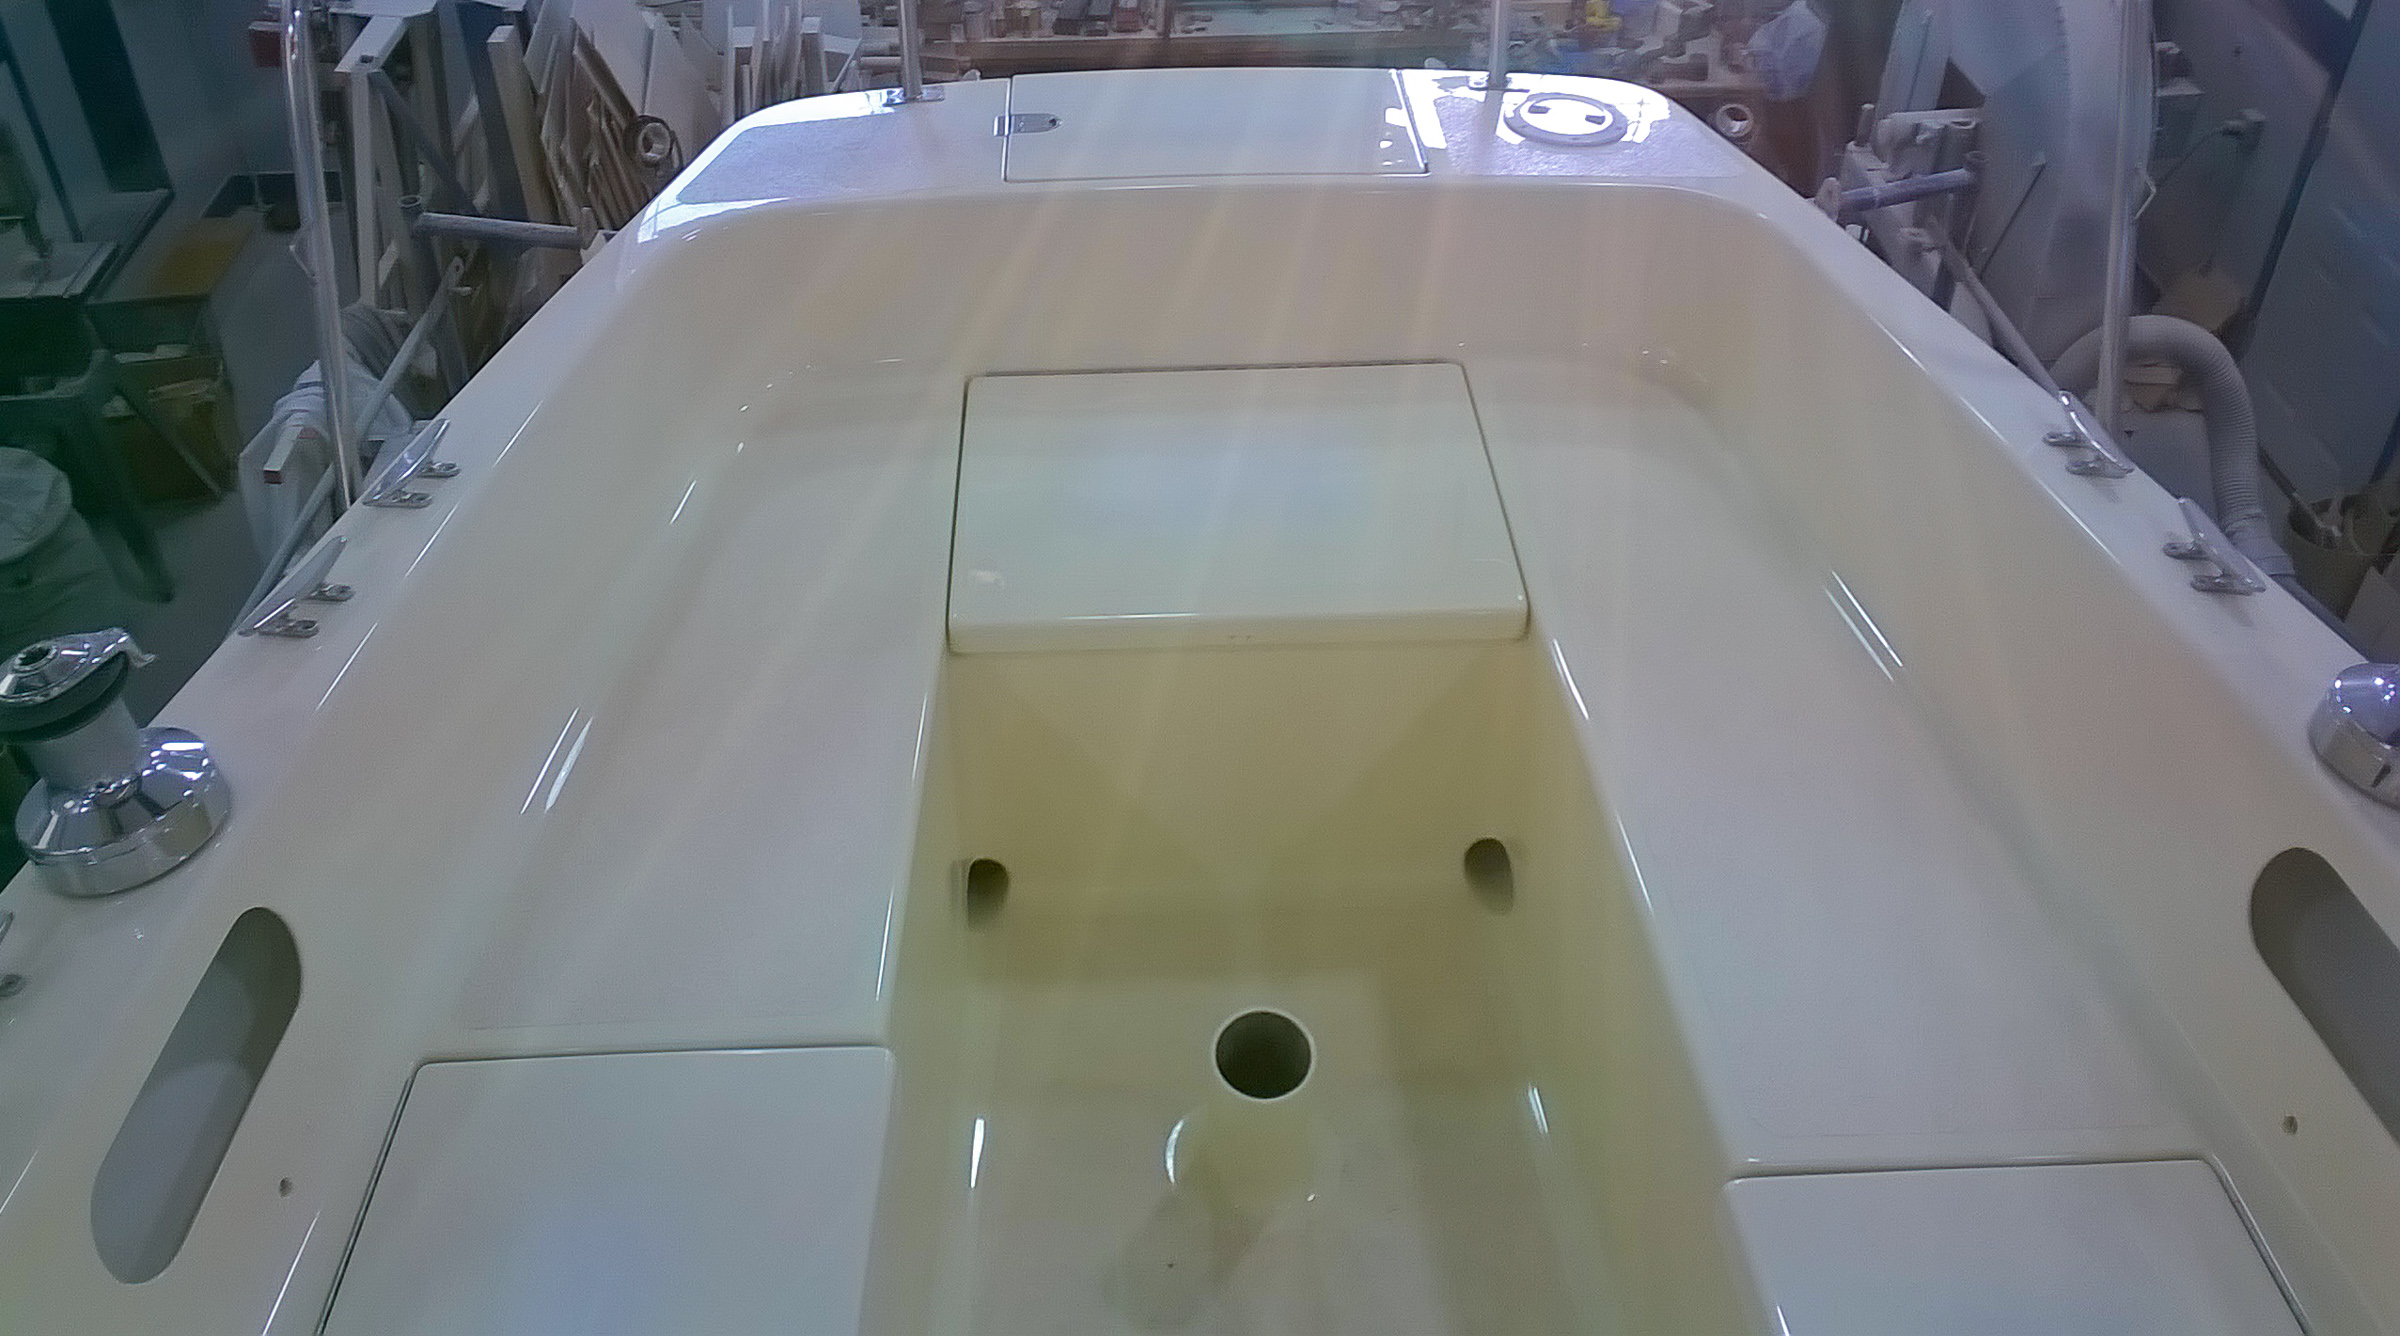
While Bill was working on the mast, Nina was installing the lazarette lid. All of our cockpit locker lids are now installed. Next weekend we will paint them and the side decks with non-skid paint. Now that we know how to tape them off, it should take one day to get that all done.
All the hatches installed – they just need non-skid paint and latches.
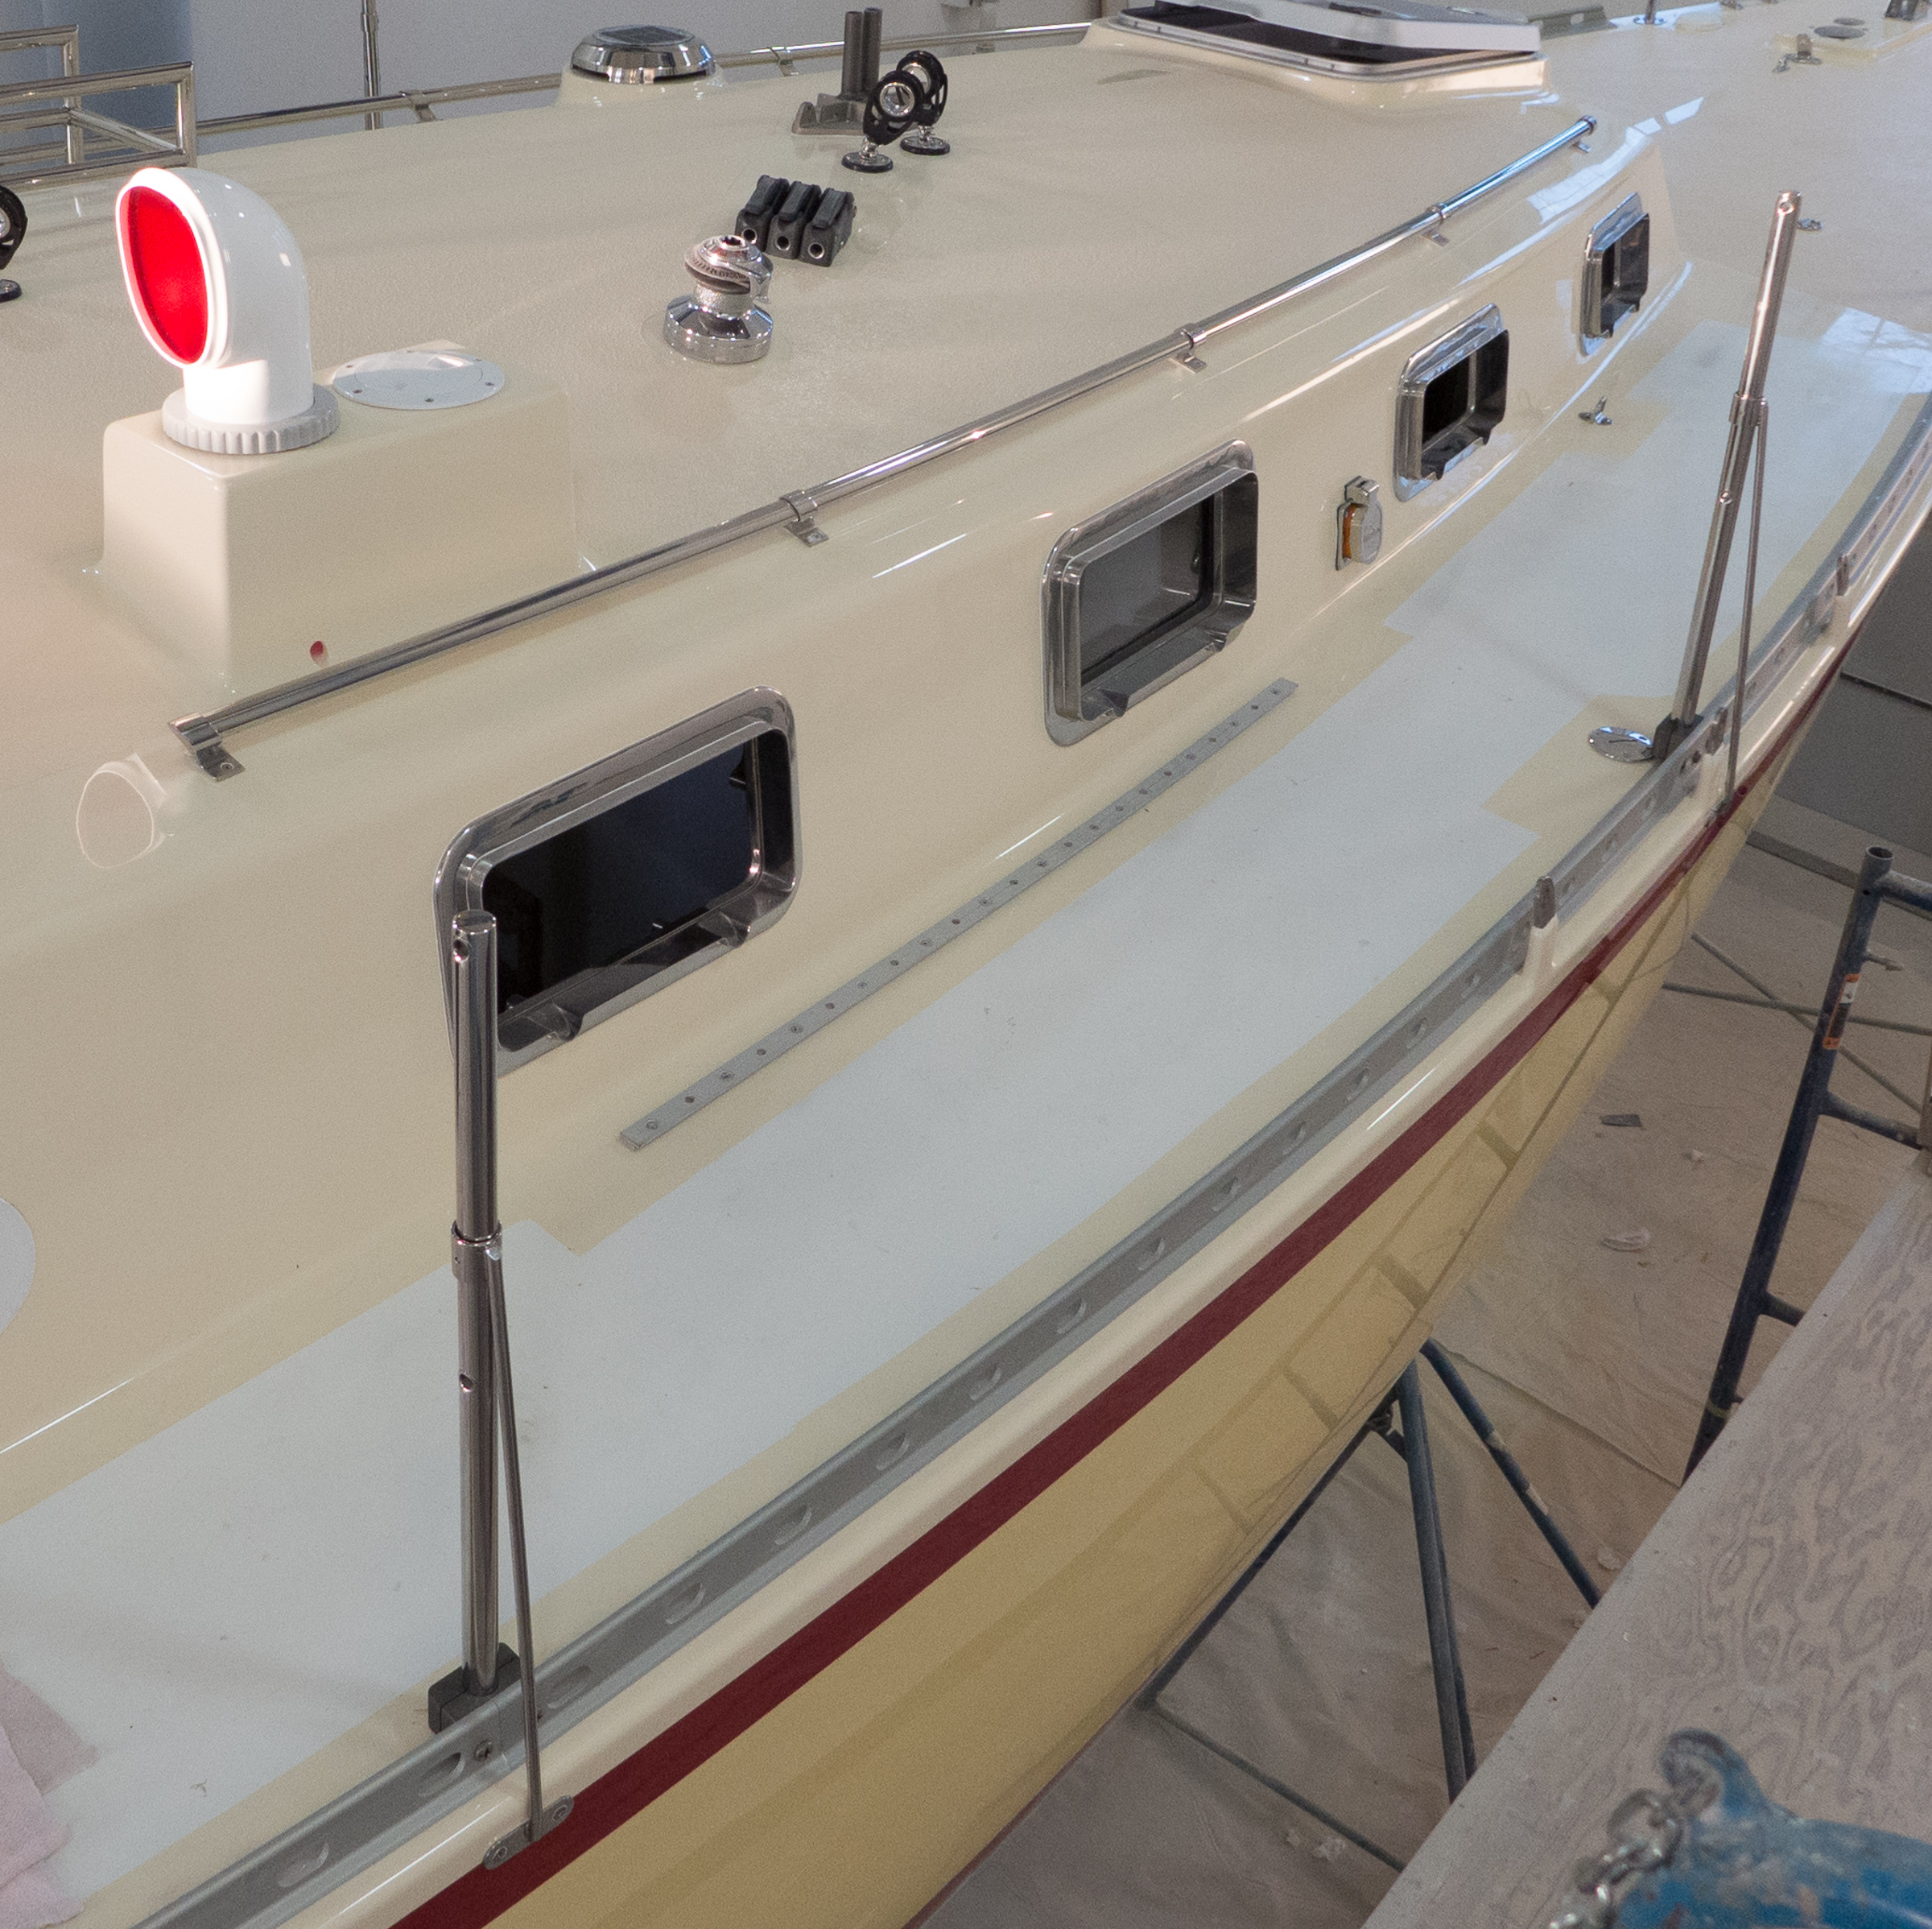
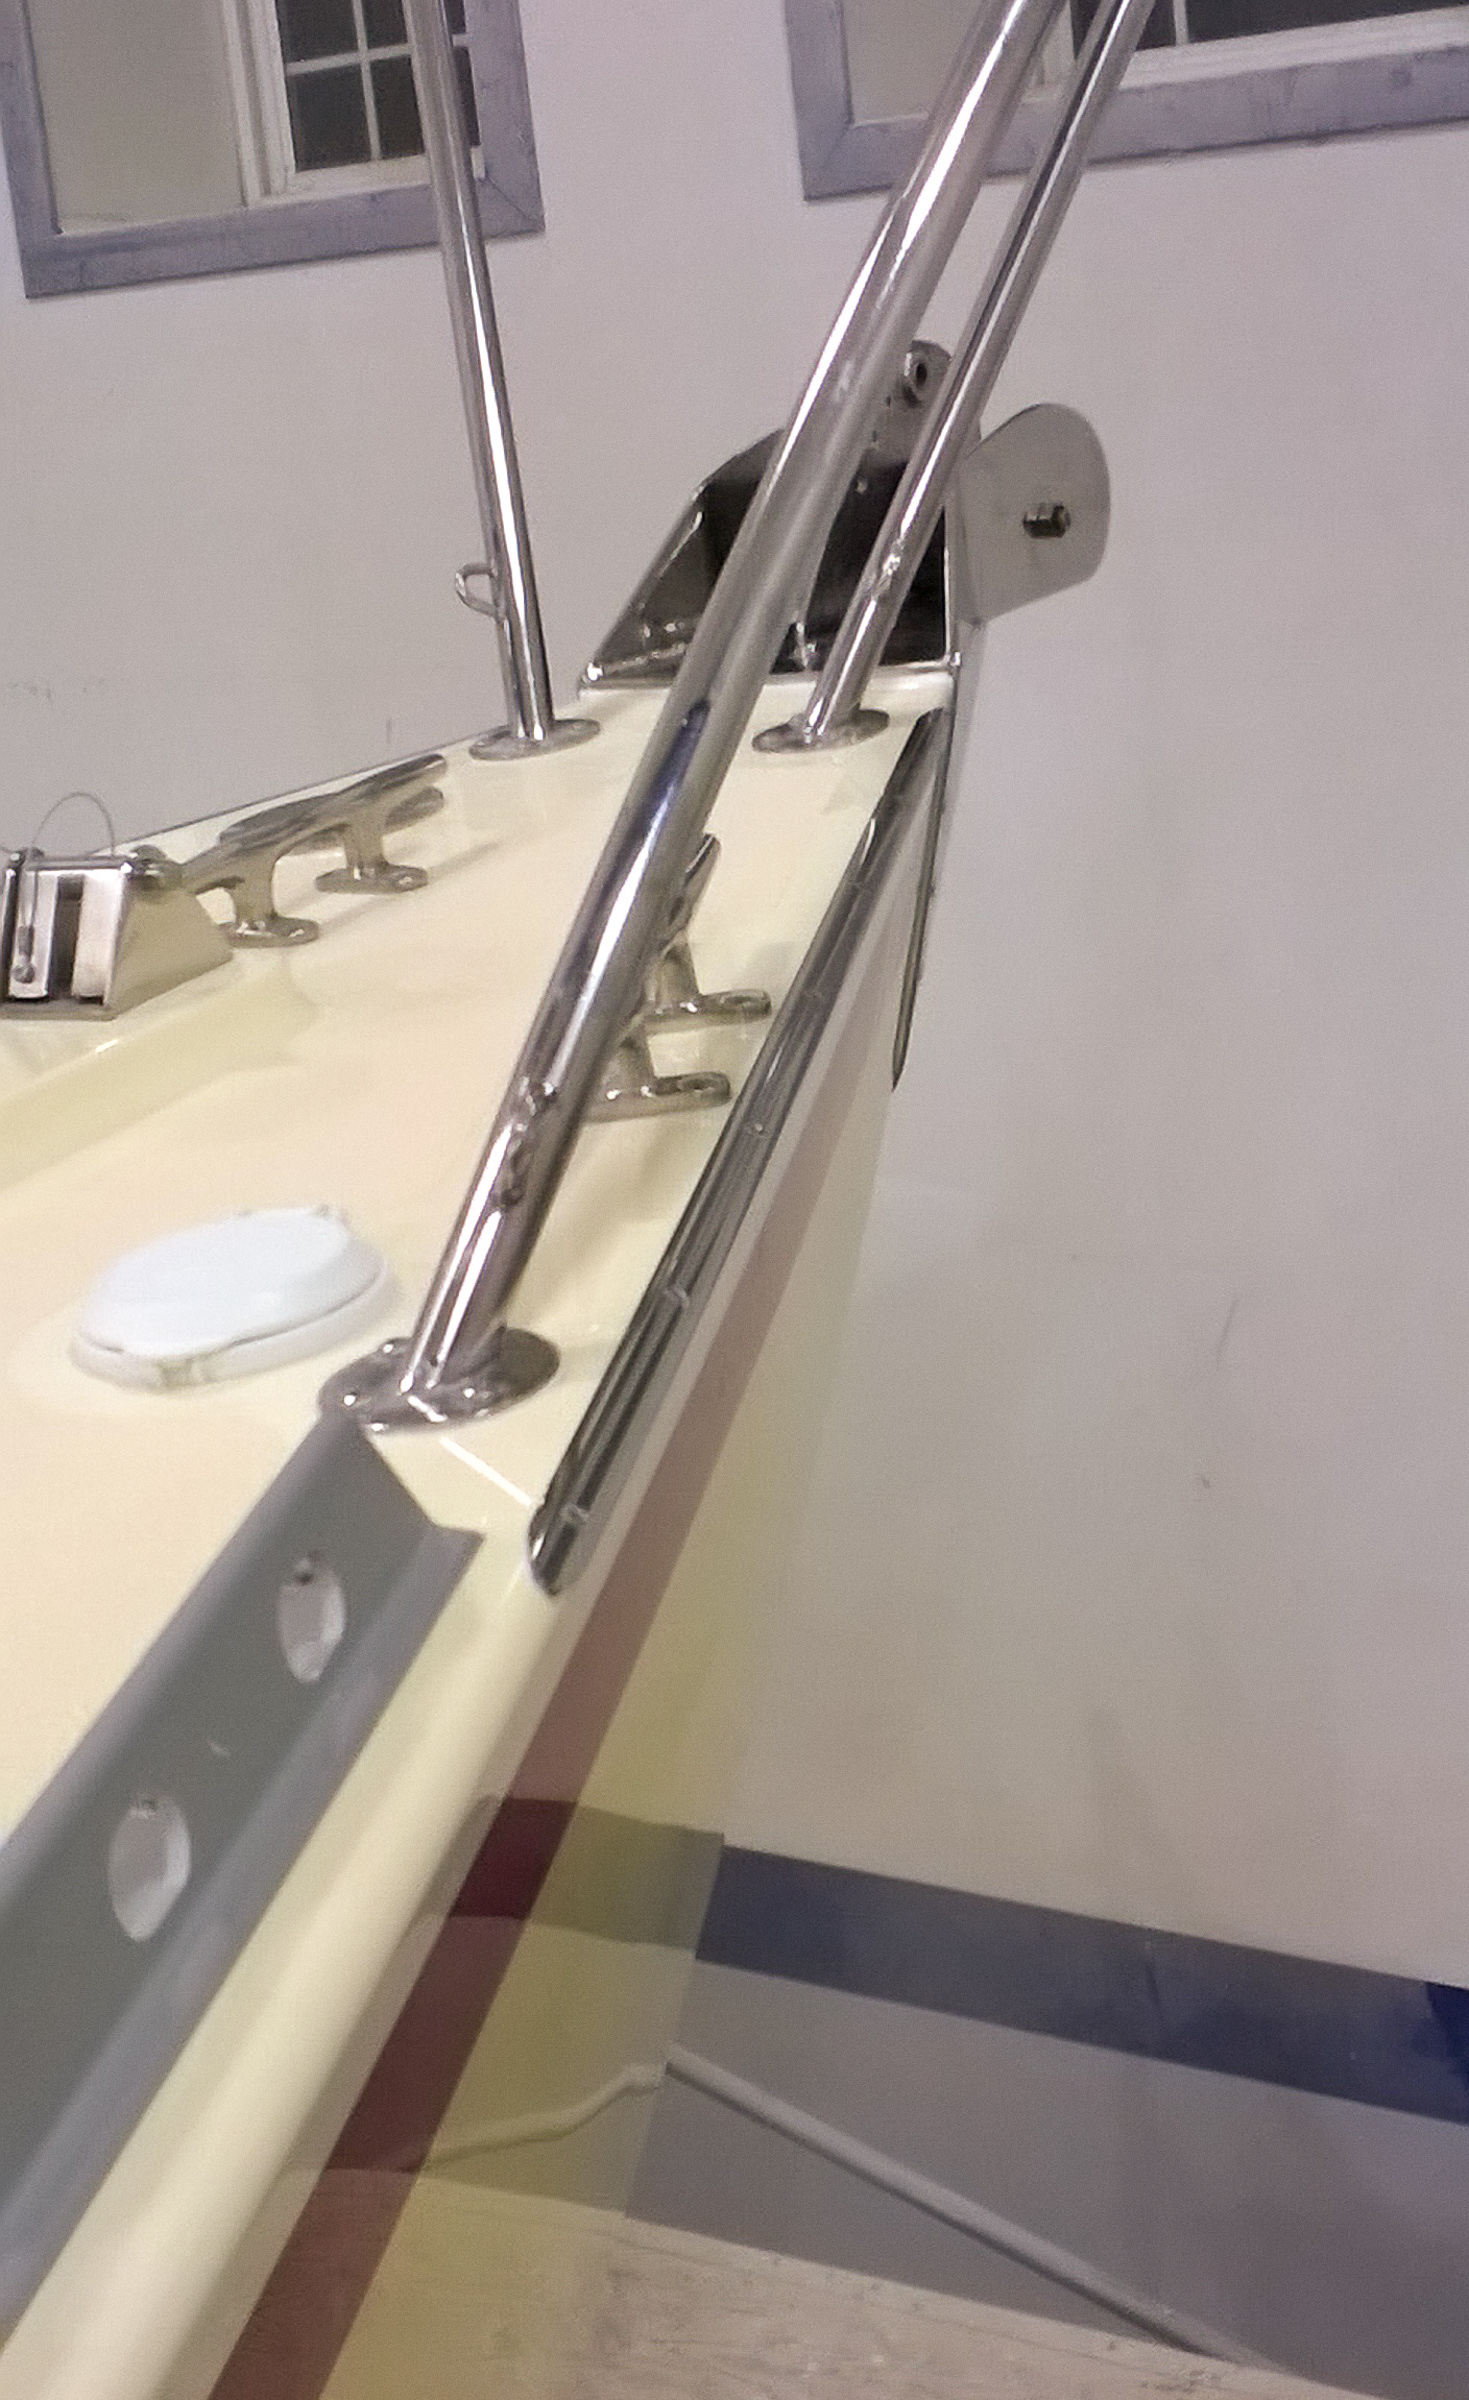
Now that we were warmed up we were ready to tackle the stanchions, which ironically, were not on Tom’s list for us. They are the metal poles that hold the life lines. They actually went in very easily.
These stanchions are stout. The tubes are filled with a fiberglass tube and they have a brace added.
We rounded out the day by installing the new fore hatch, the aft dinghy tie down rings and the last port window. That was 12 hours of work.
On Monday it was time to work on the companionway hatch. We removed the sea hood, which was glued down really well and the hatch. Bill worked on the hatch and it still would not slide well. We asked Tom to look at it and he figured out where it was binding in no time at all. It now slides very well so we reinstalled it and the sea hood.
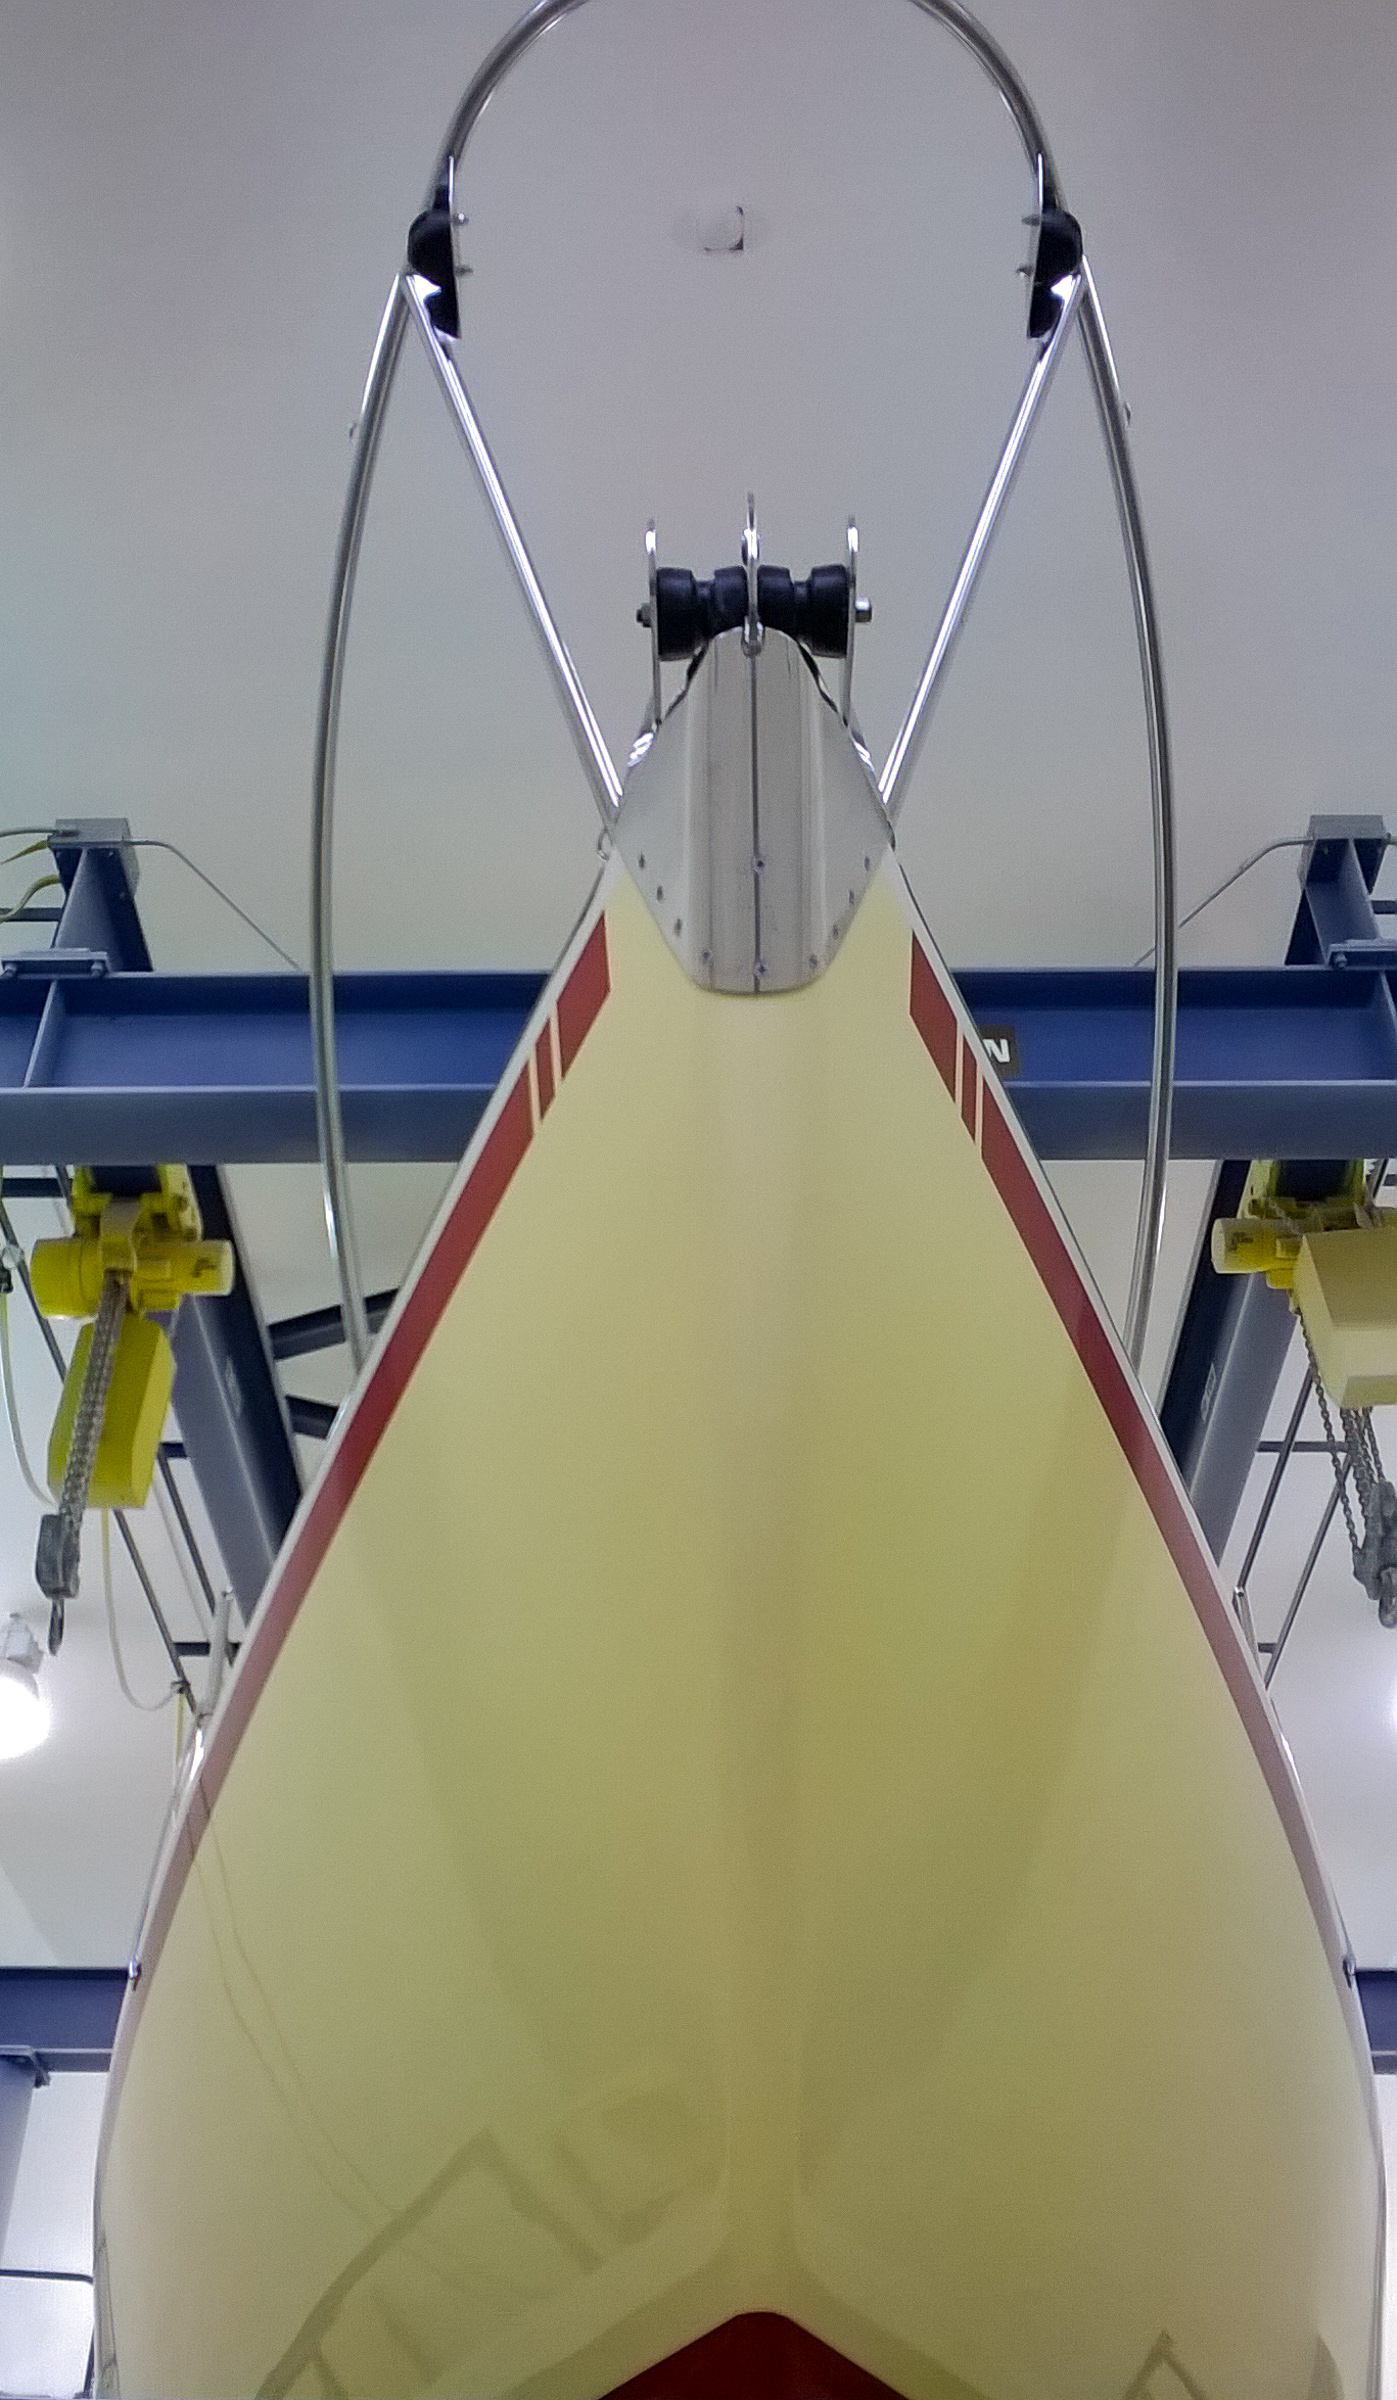
Next up was the bow cap. The bow cap not only protects the bow from the anchor, but it is where the forestay for the mast attaches. After lots of caulk and Nina stuck in the anchor locker tightening nuts upside down, it went on nicely. The windlass went on next and will be used to haul the anchor in. It has an electric motor that was slightly fiddly to install but fit beautifully nonetheless. The wind-lass is very happy since she will no longer have to manually raise the anchor.
The completed bow. You can see the bow cap (upper left) and the windlass (center).
We then bolted the fuel tank in place. Now we are ready for the engine. Nina installed four of the rub strakes she had made last weekend, and with help from Bill, screwed in the exhaust fitting for the Espar heater. Bill installed the compass. That was 13.5 hours work. It was a long day and we both were very tired.
We arrived at the boat shop Sunday morning and we saw Gypsy with her hull painted. The Perfect soundtrack would have been Also Sprach Zarathustra: we were like the cave men finding the stone and it was good.
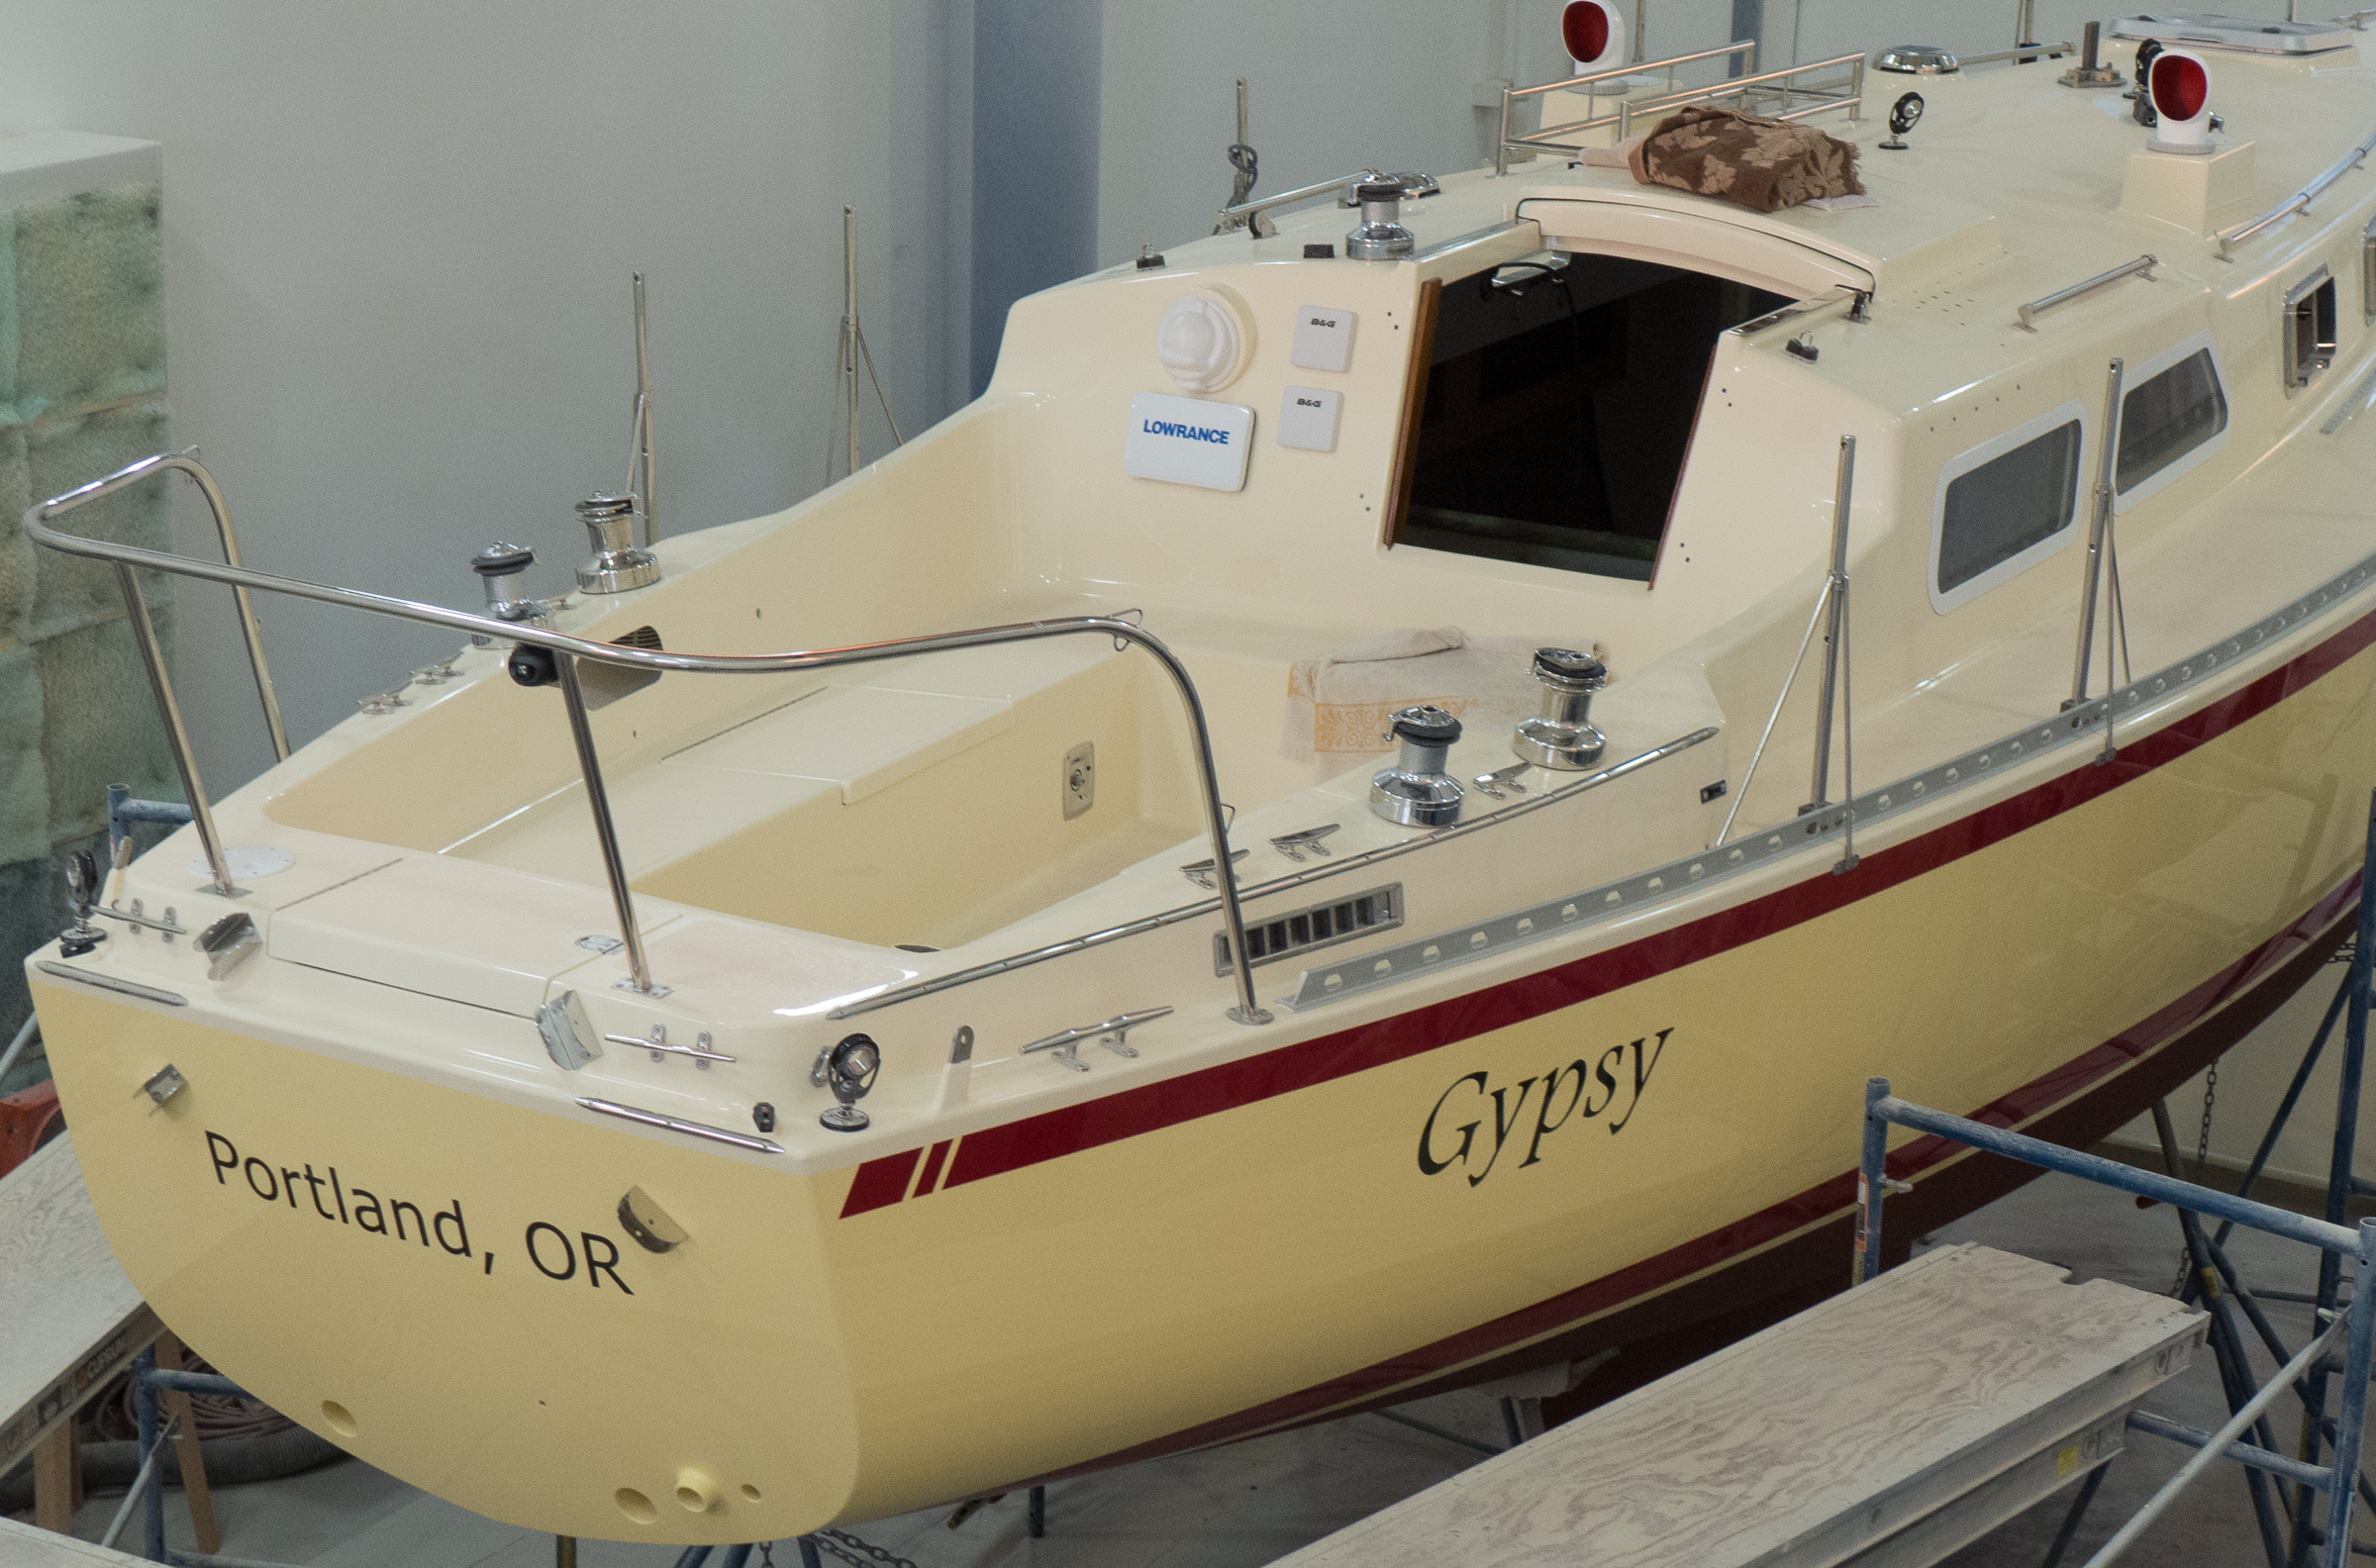
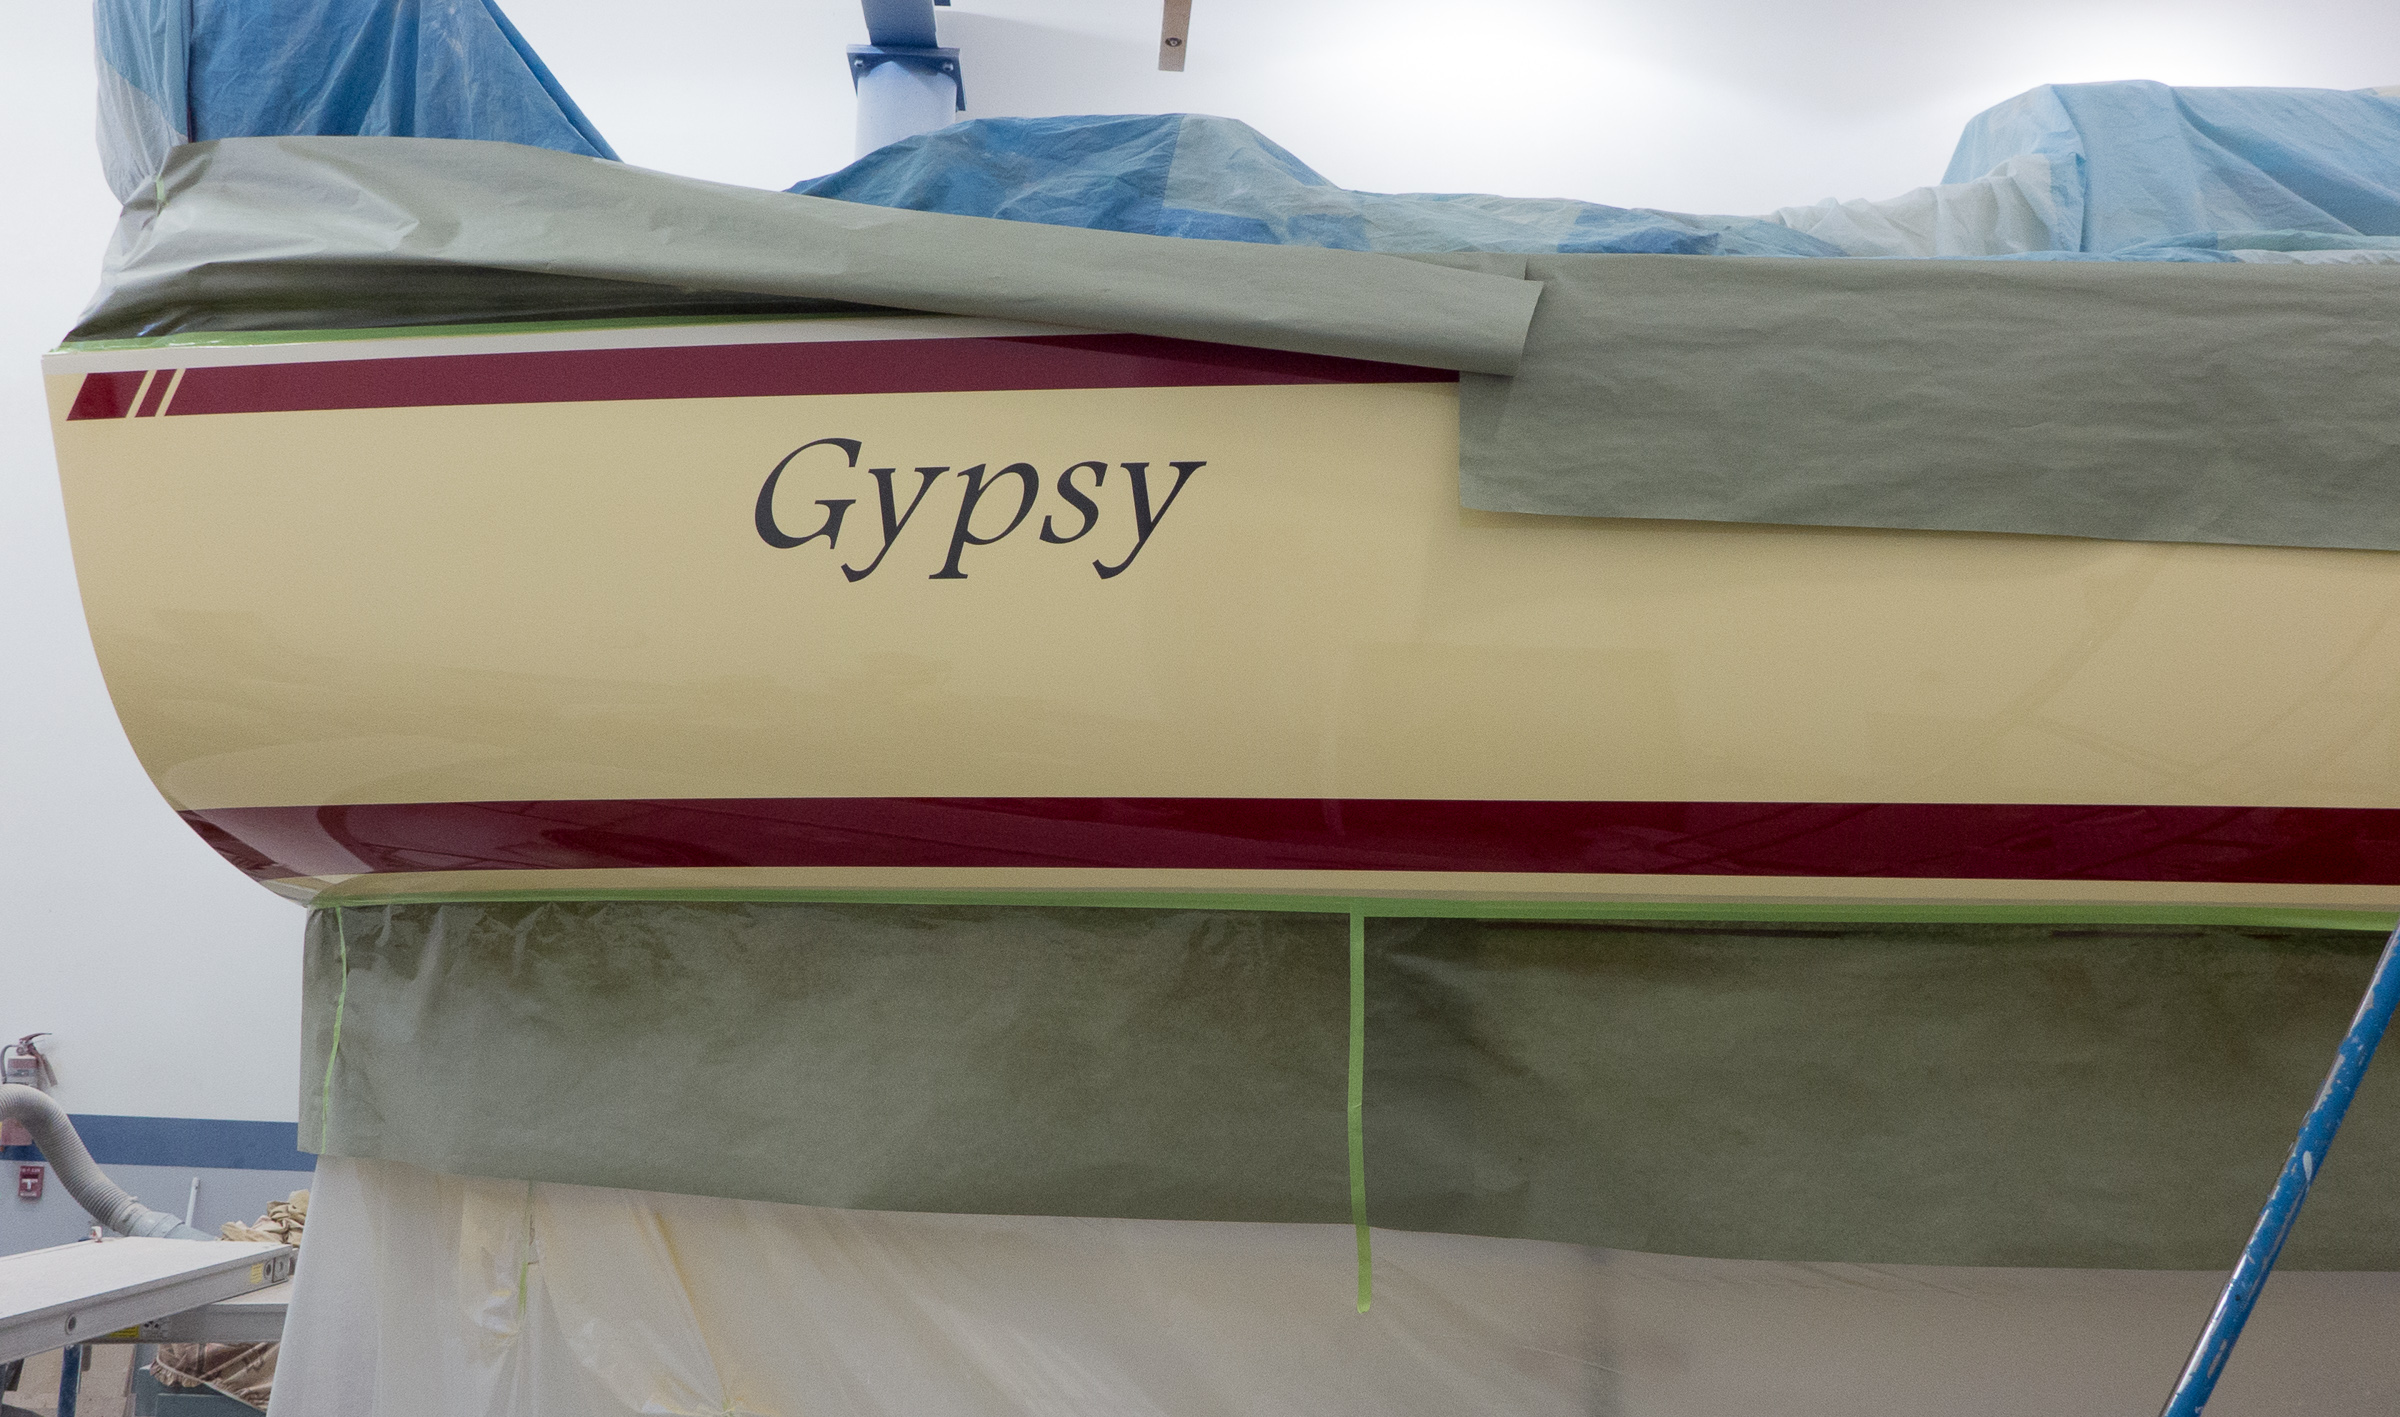
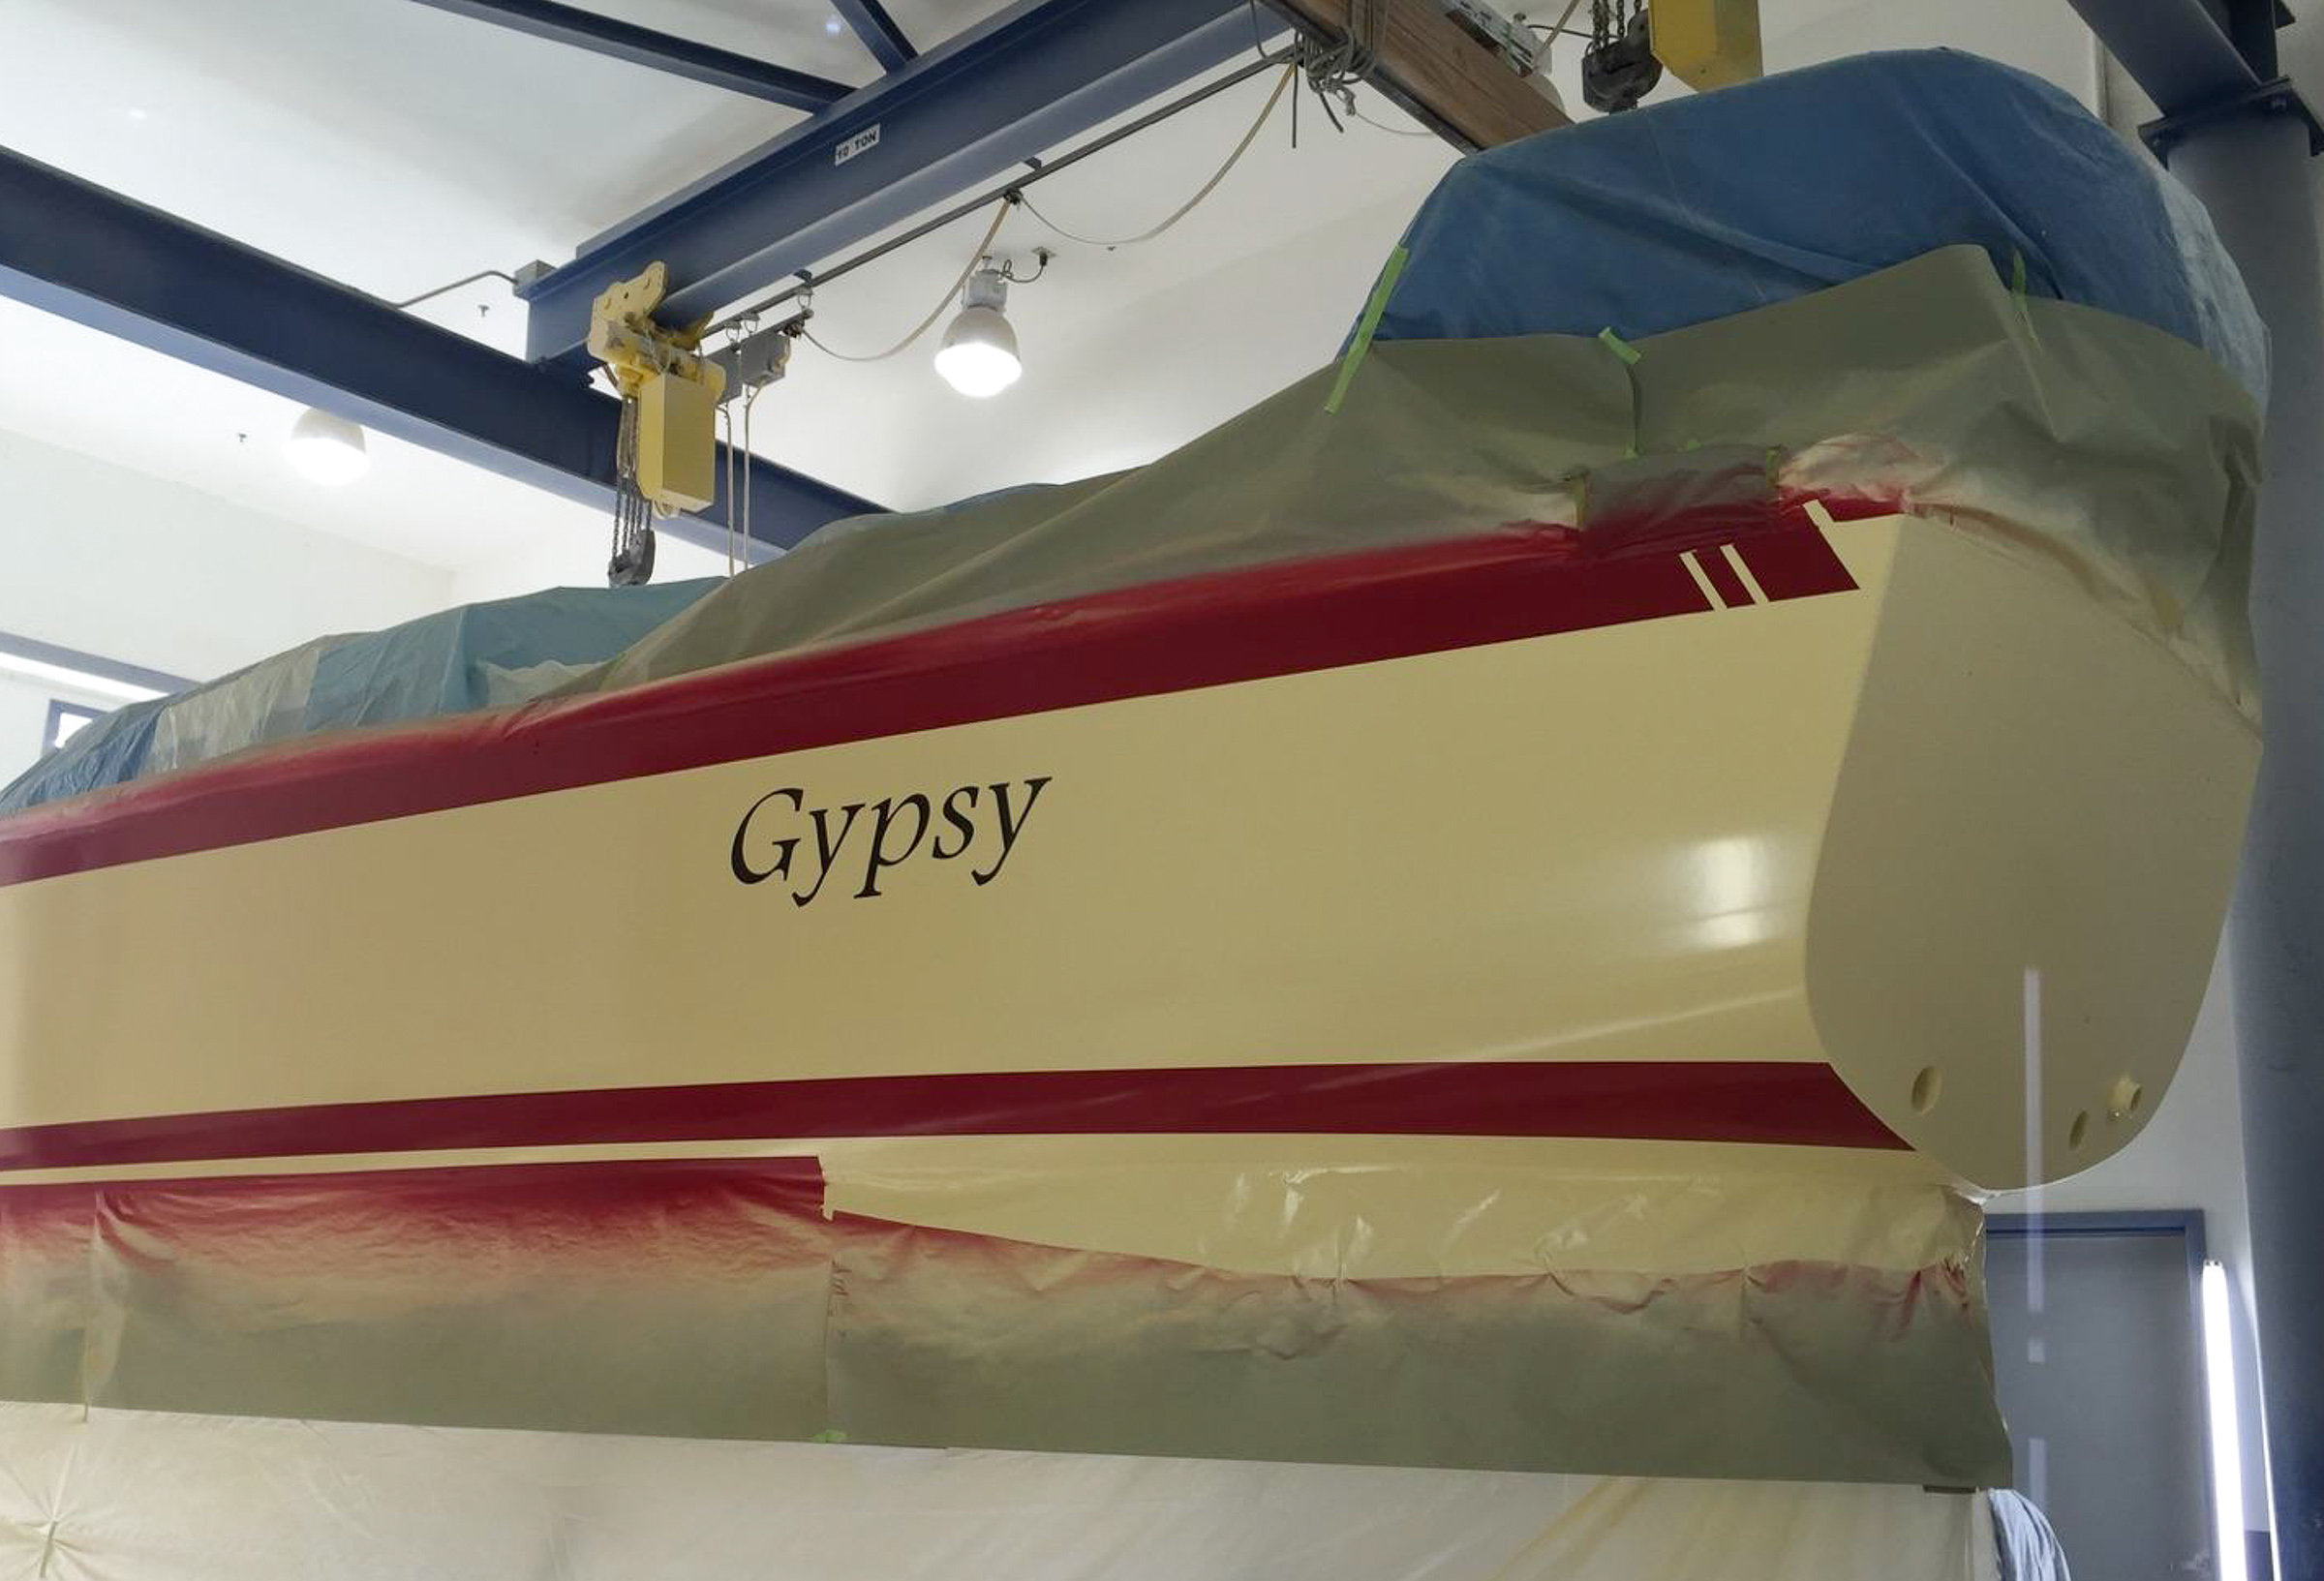
Gypsy’s name was originally on the stern. We’ve moved it to the sides. Painted in metallic black, it sparkles in good light.
Energized about the paint job we focused on the work we needed to do. Nina worked on getting the dodger ready for paint, filling small imperfections and papering the underside. I worked on the spinnaker crane. There was more machining of parts and sanding. While I made piles of aluminum shavings Nina mounted blocks on the mast for the line controls for the whisker pole car. We also put the second Nicro vent on the deck and got the manual bilge pump mounted in the cockpit.
New engine panel. The cover on the left is for the emergency bilge pump.
Monday we installed the engine panel and the plexiglass door that protects it.
Nina installed the locker lids for the port and starboard lockers and the propane locker. The locker lids look a bit anemic but it’s because they need their coat of non-skid. The remaining locker lid needs a paint touch up, so it did not get installed yet.
We both worked on the main companion way hatch and the sea hood.
I also installed the blocks for the Monitor wind vane control lines.
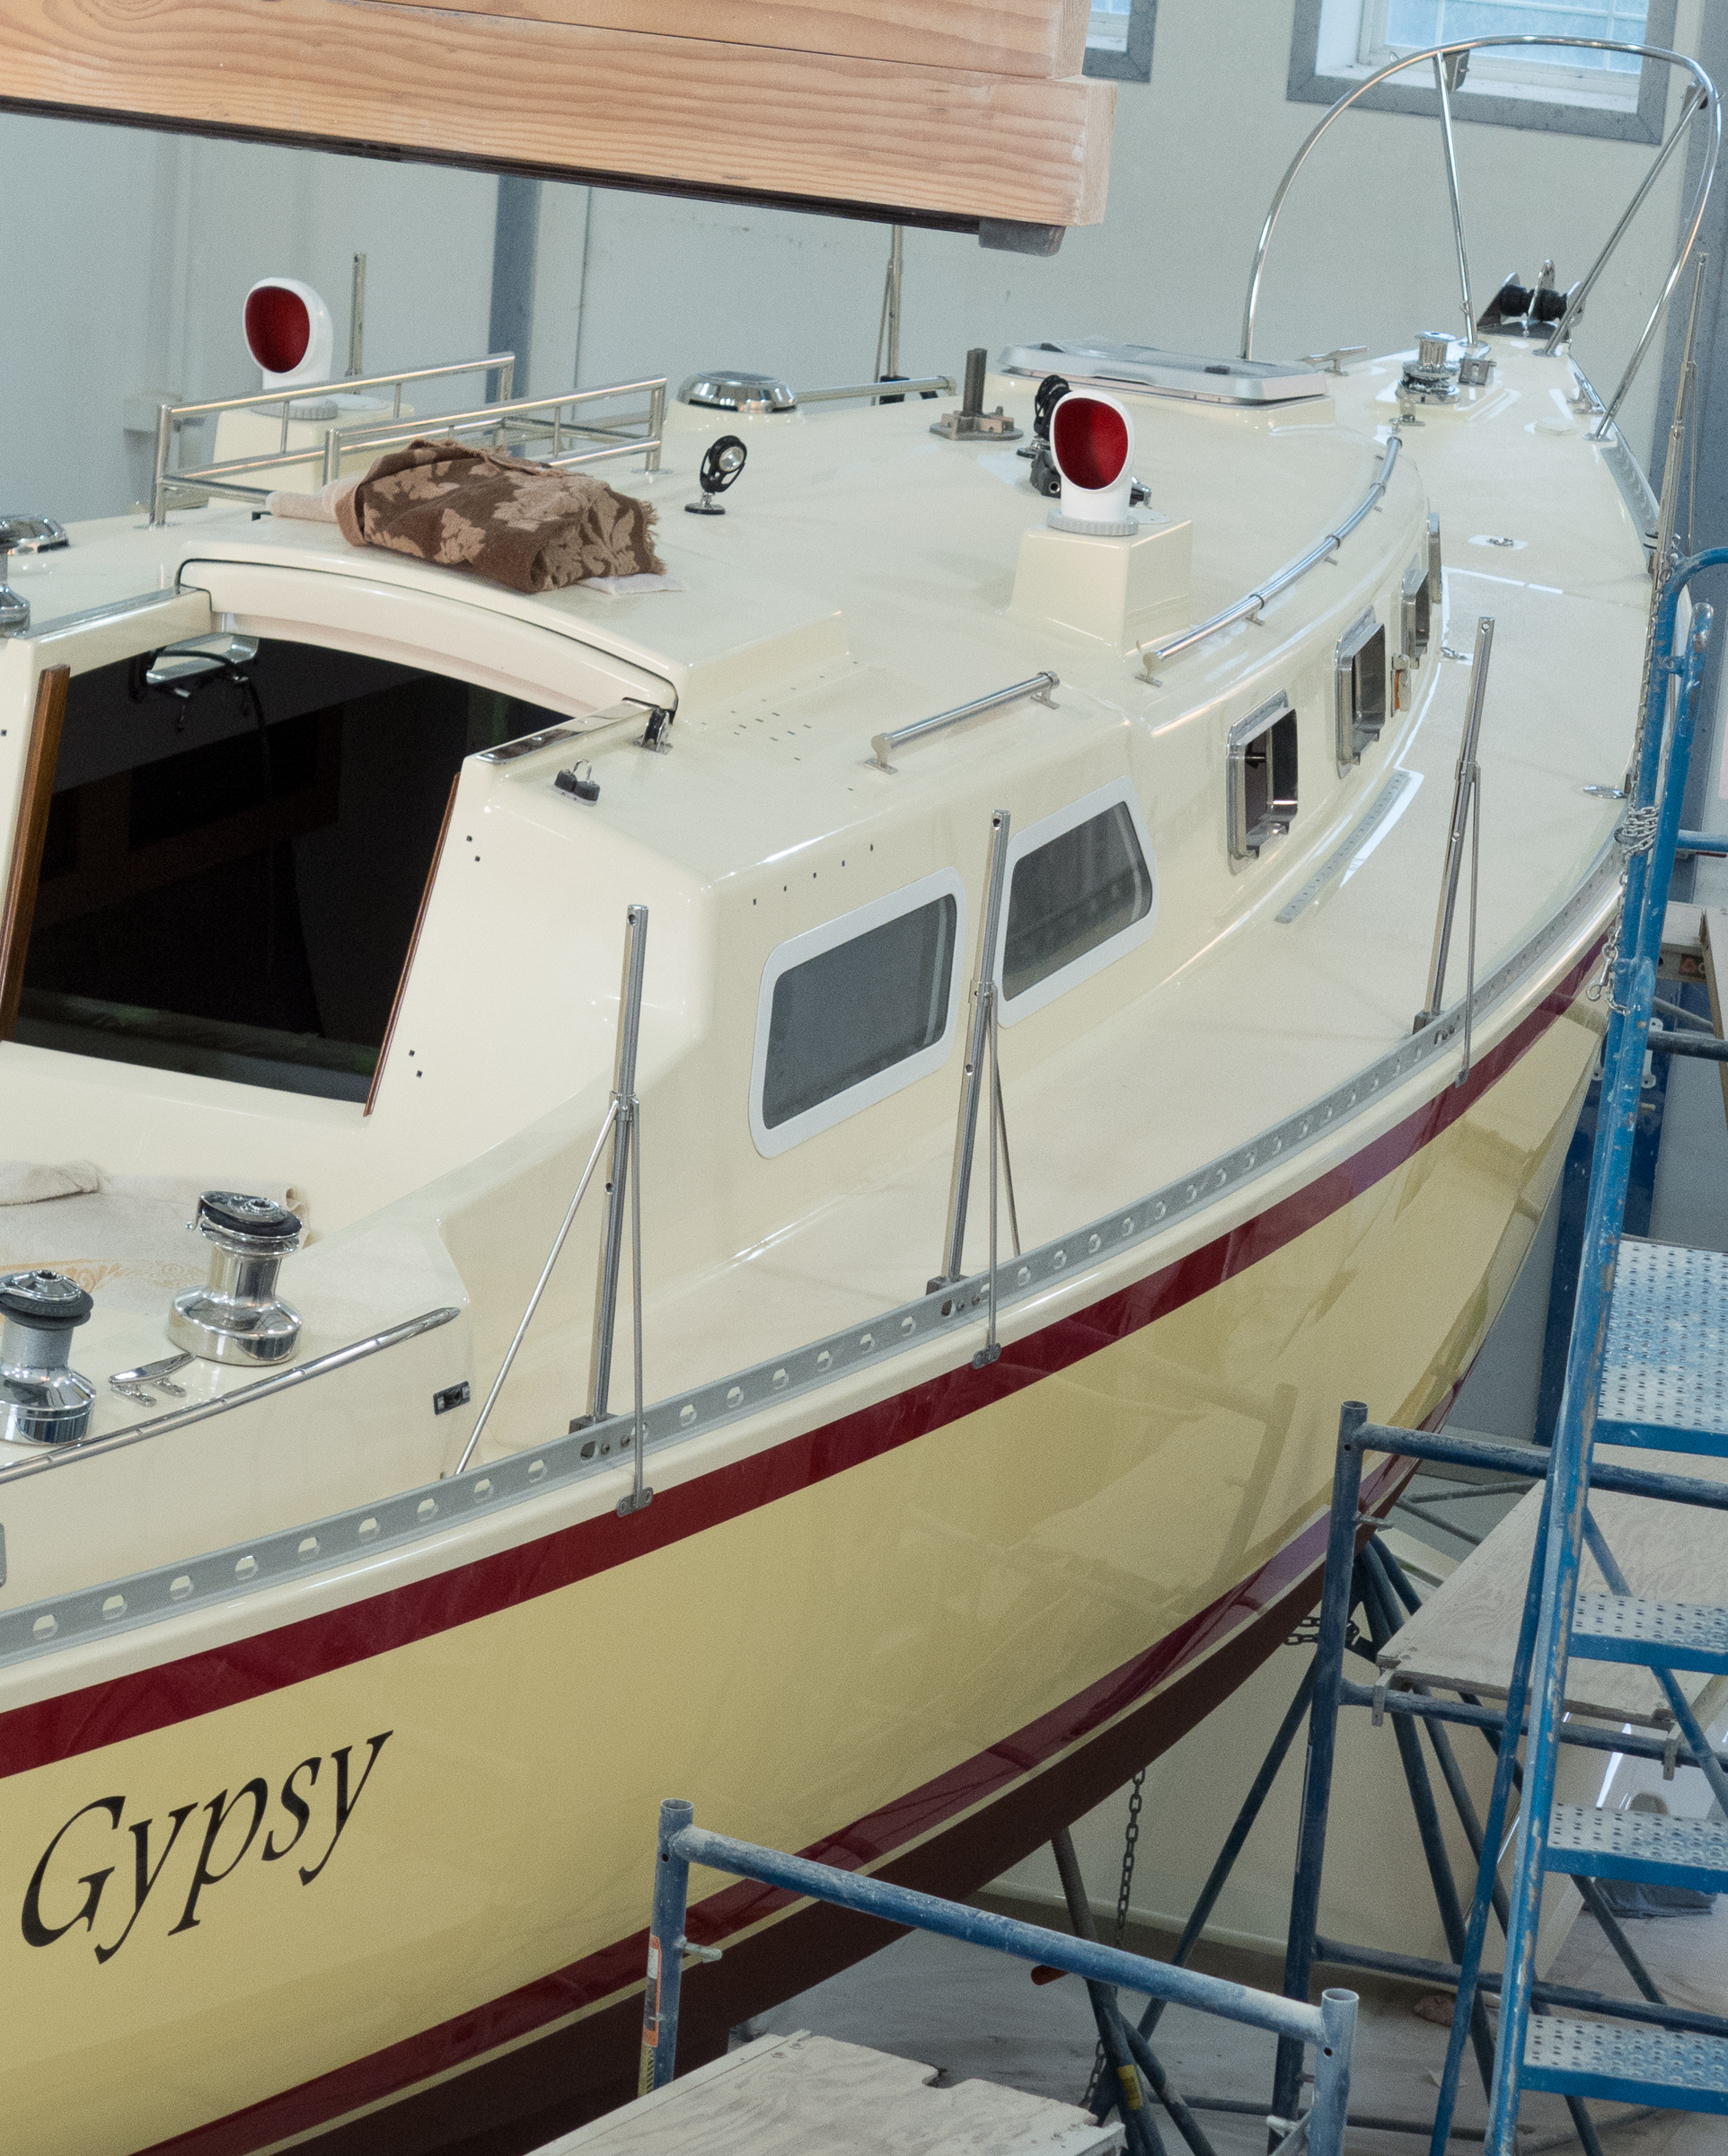
You can see the blocks on their custom wedges. You also can see how the hull and deck colors work together. Beige actually turns out to be very creamy!One last shot of Gypsy.
This week marks several milestones. I have filled the project notebook. I even have been cheating and doubling up for the last week. So Monday was the last entry in the log book. Next week is a new book. We have also made 108 trips to the boat shop since Gypsy went in. This means we have driven 7,128 miles to and from Gypsy to work on her. The other milestone is hinted at in the blog title, but no spoilers, you will have to read on.
Since last week’s post we have put on another coat of non-skid paint. We just have the side decks, and hatches and dodger left to do. The deck is looking great. We also put the teak trim on the companion way and started installing the sailing instruments.
You can see the non skid on the seats and the teak trim on the sides of the companion way hatch opening.
We also installed the deck level navigation lights. They have LED bulbs so they are very efficient.
Monday Nina got the job of making the rub strakes that will keep lines from rubbing off the paint. She started with 8 foot stainless steel pieces and cut and shaped them to fit. I think she is going to want her own welder soon. I was hoping to give her a new sewing machine to make the cushions on.
Take a straight bar and cut the ends to an angle, file smooth, then polish.
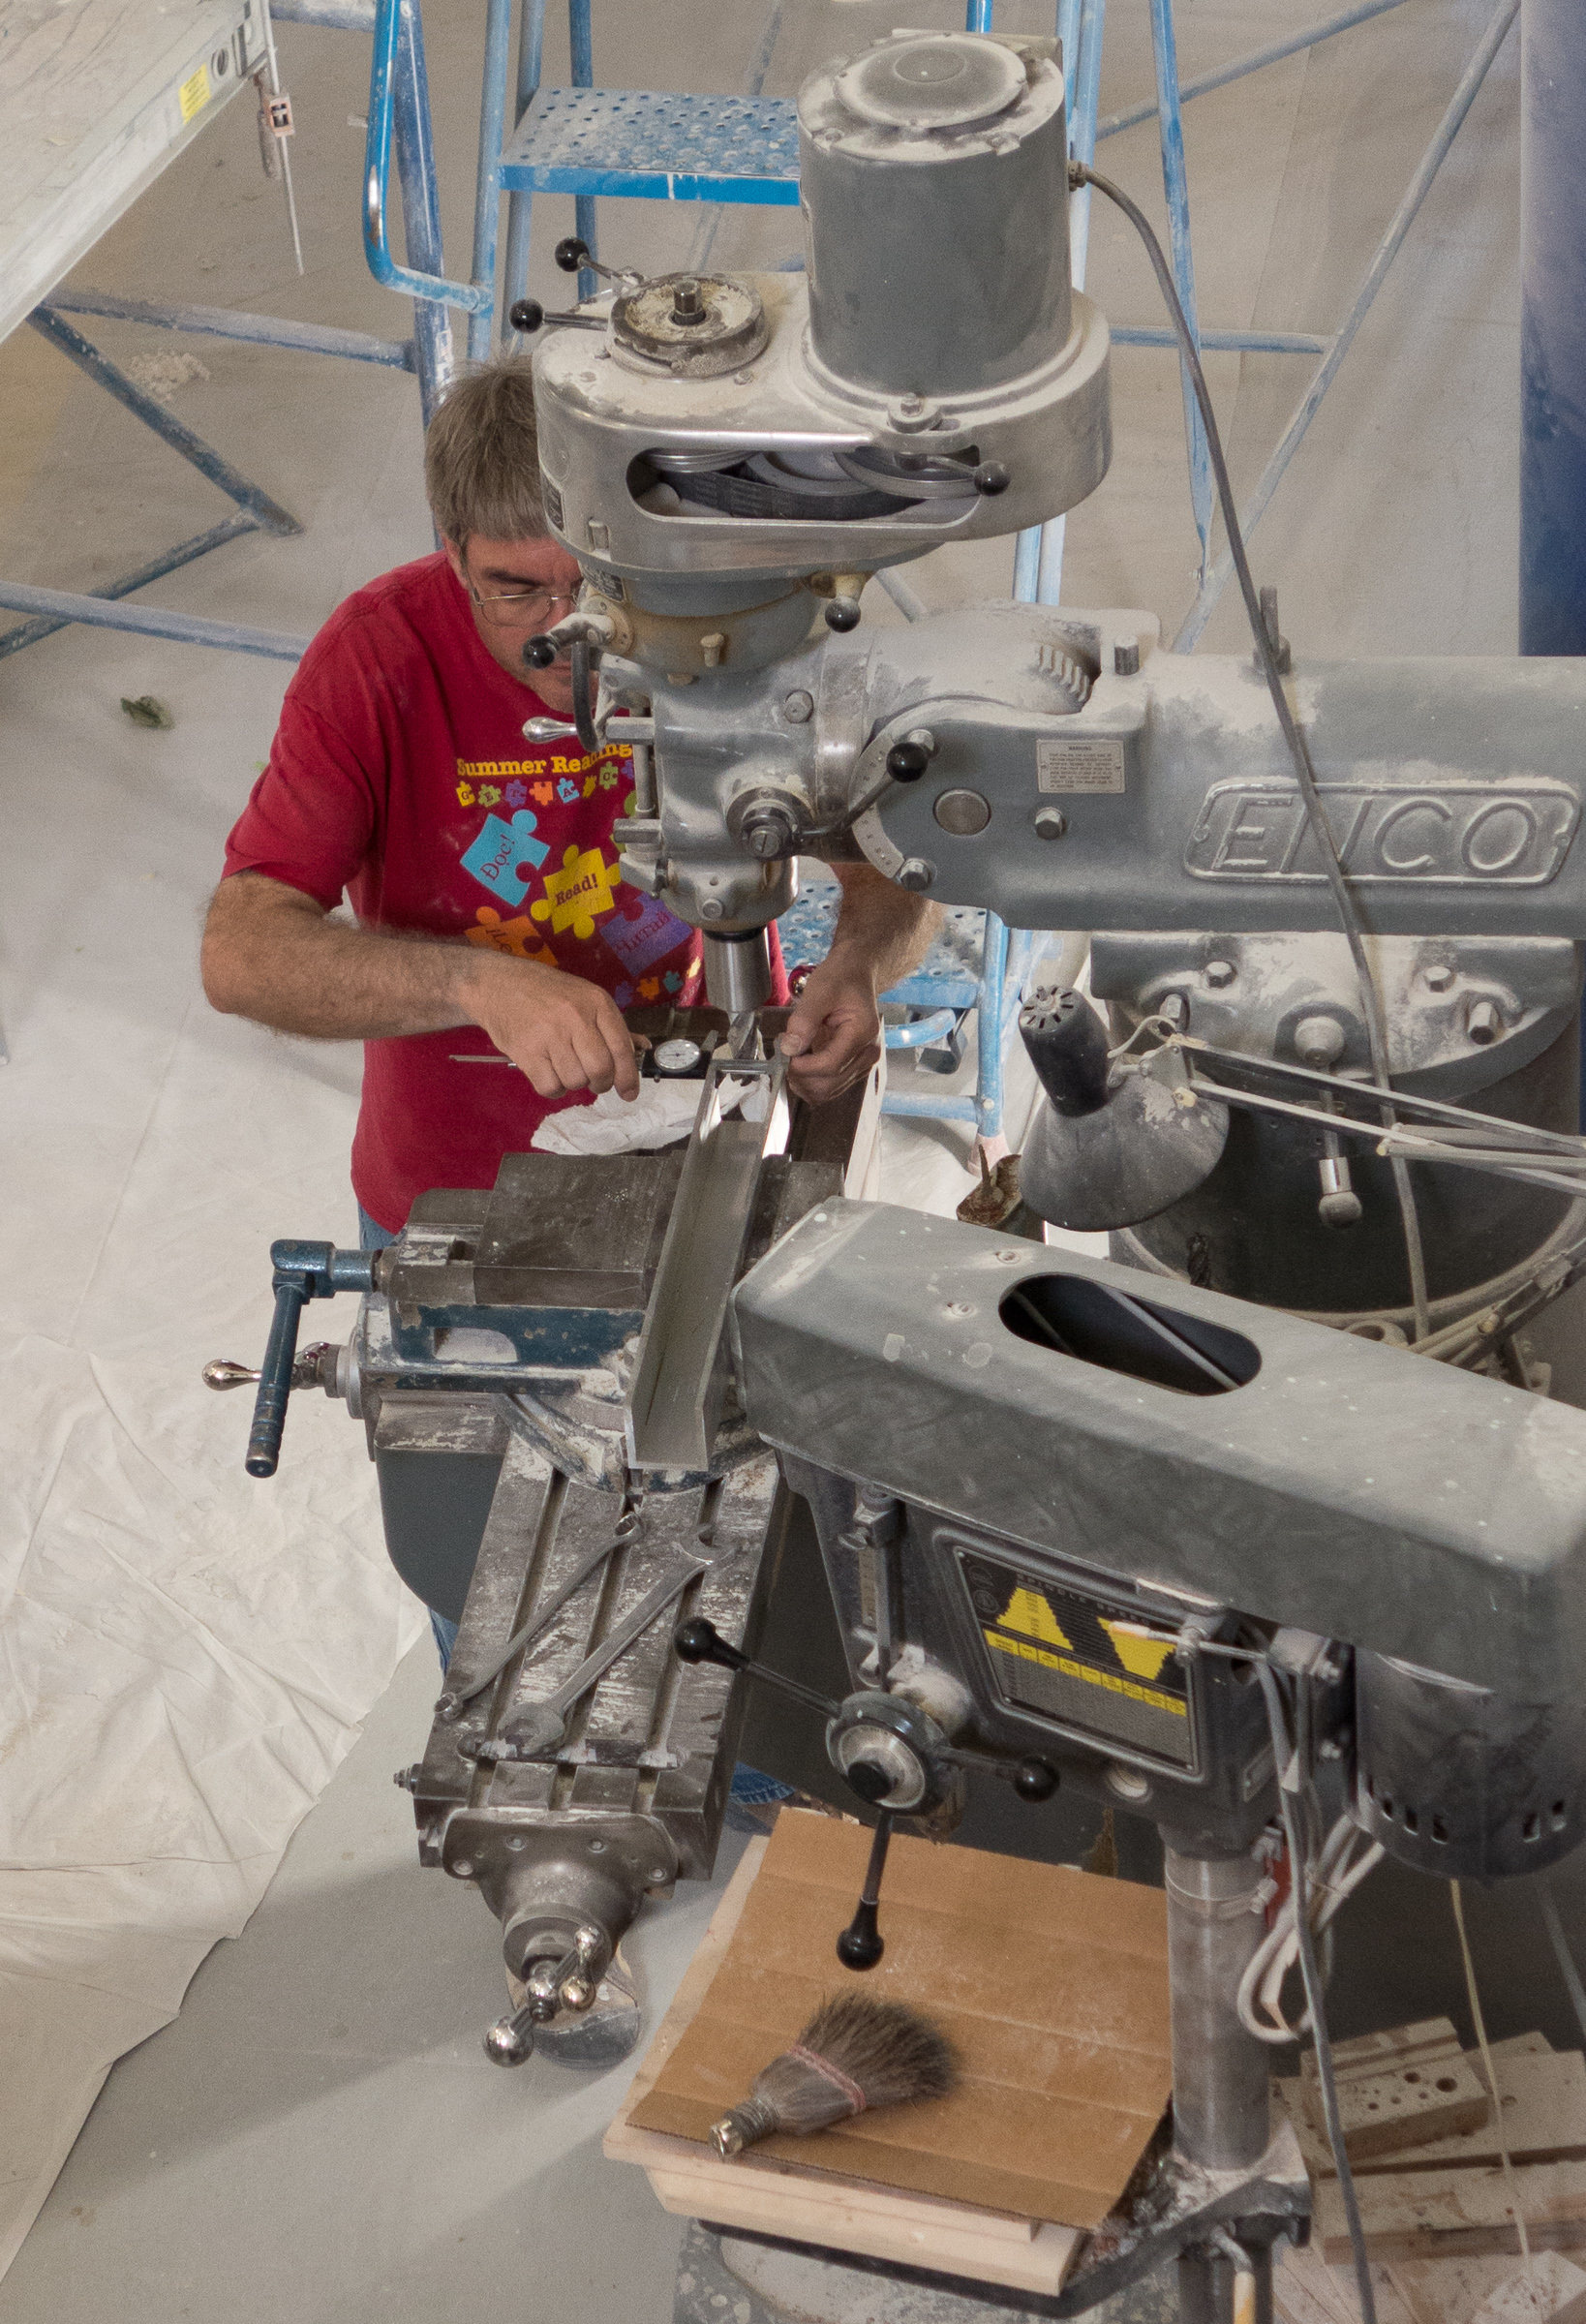
While Nina had all the fun I sanded the hatches for painting and then I worked on the new mast head. It will allow the spinnaker halyard and block to work better.
Bill milling the new mast head.
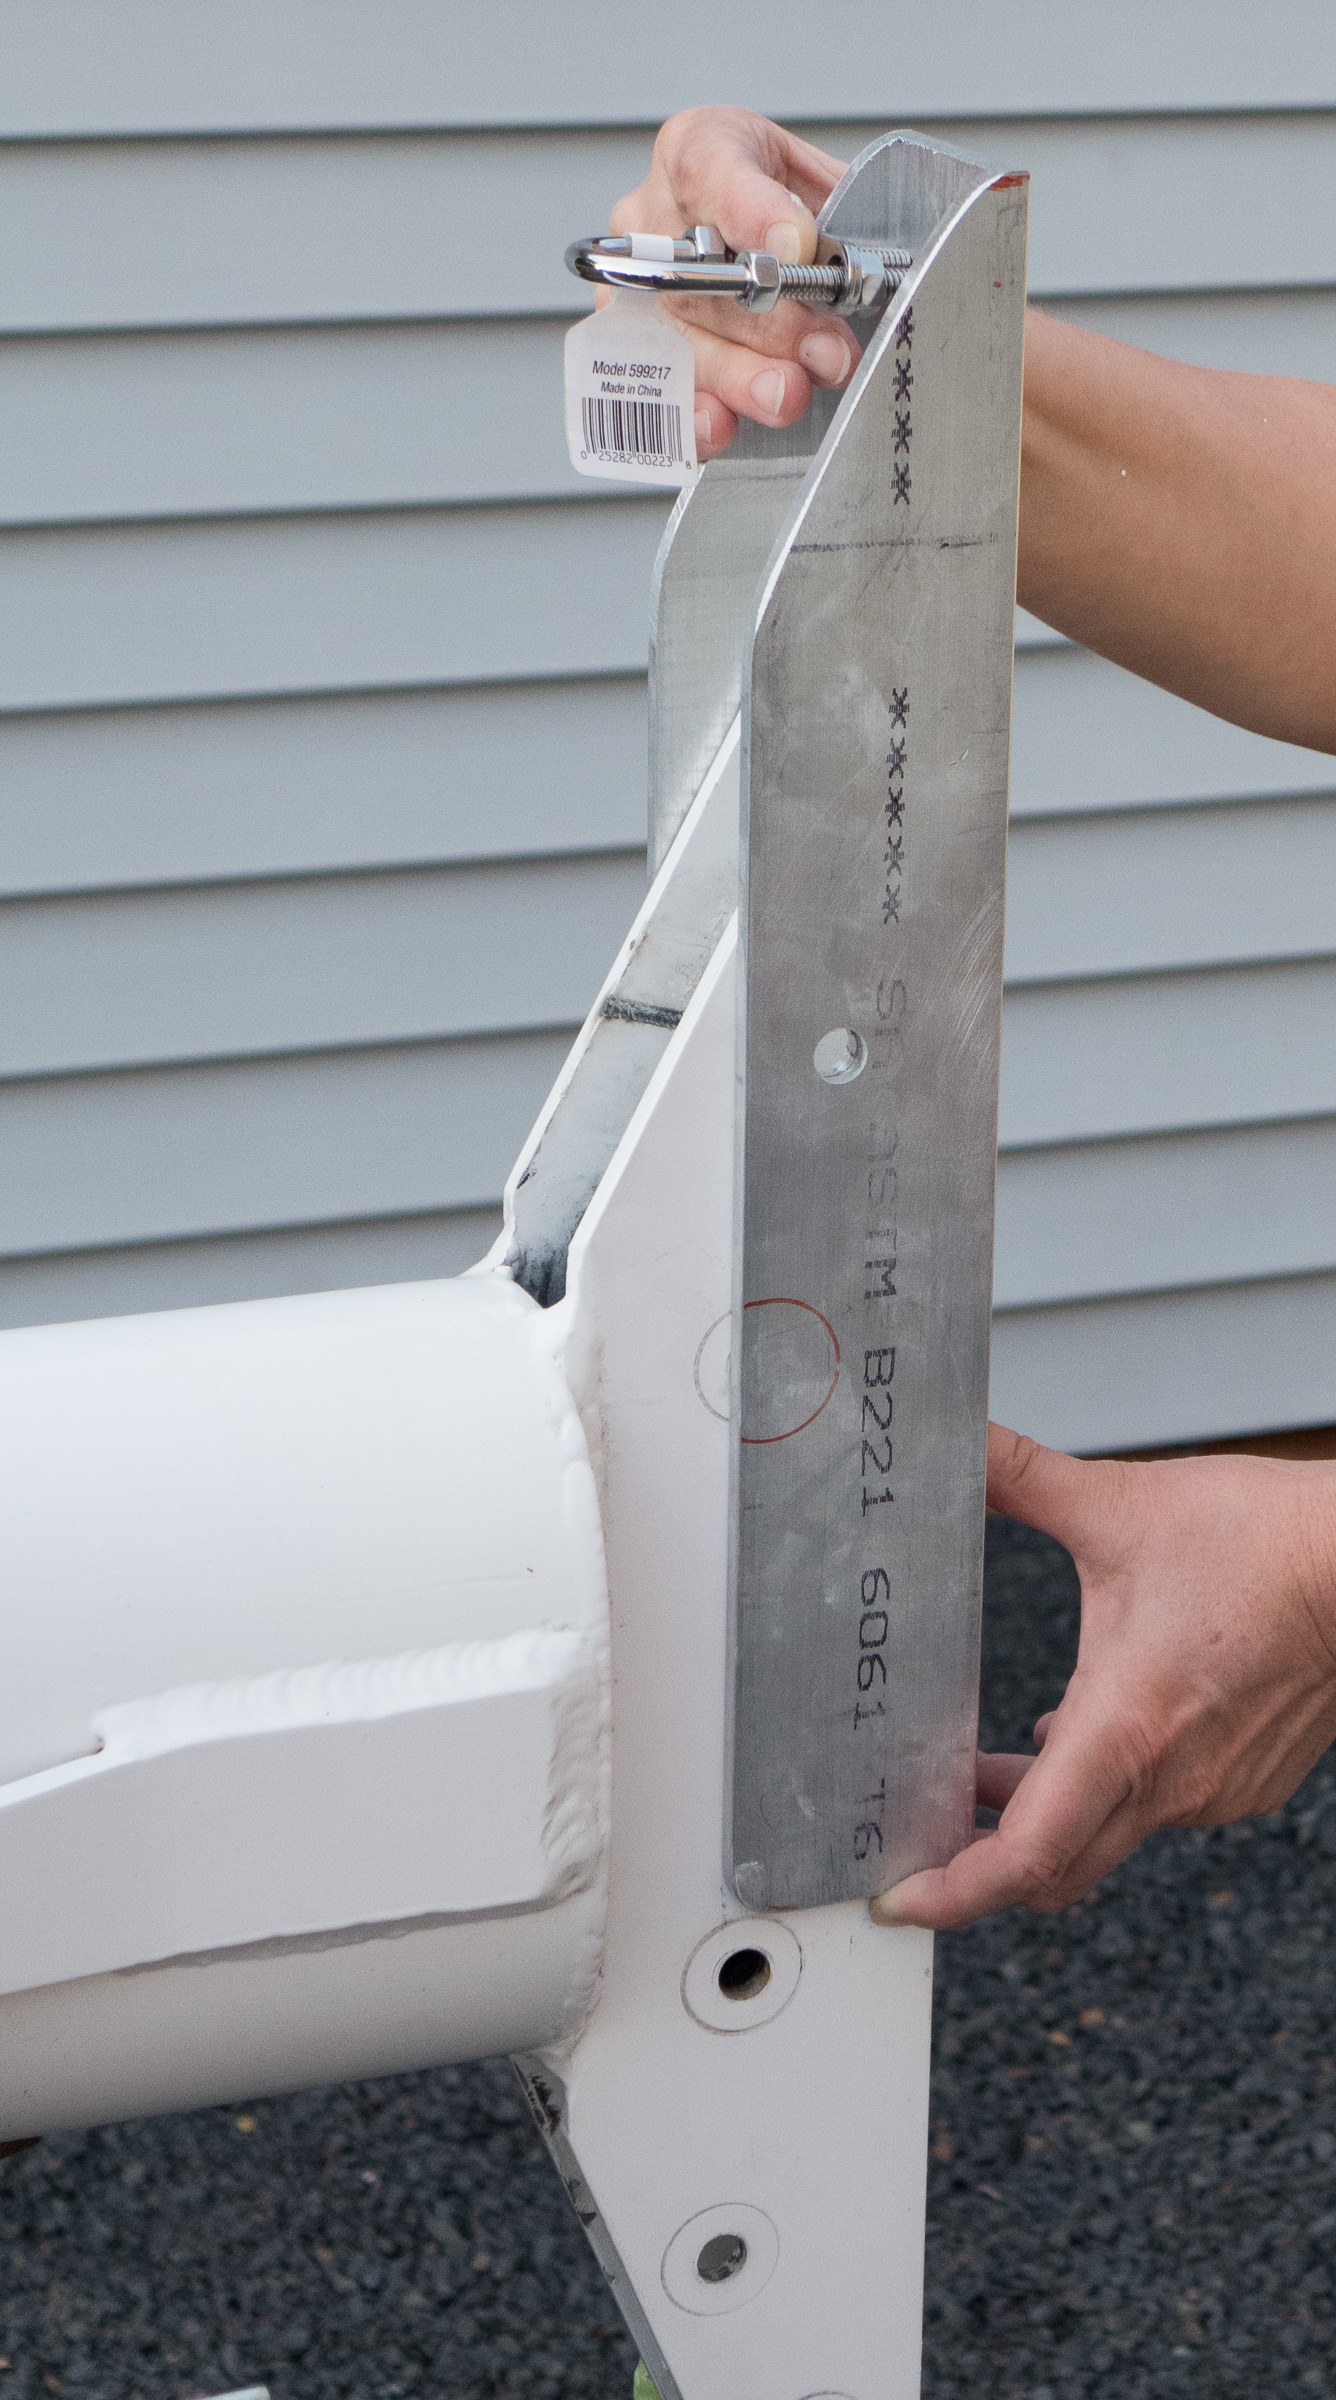
This is how it will fit on the top of the mast.
The spinnaker will be moved a couple of inches forward to get it clear of the forestay.
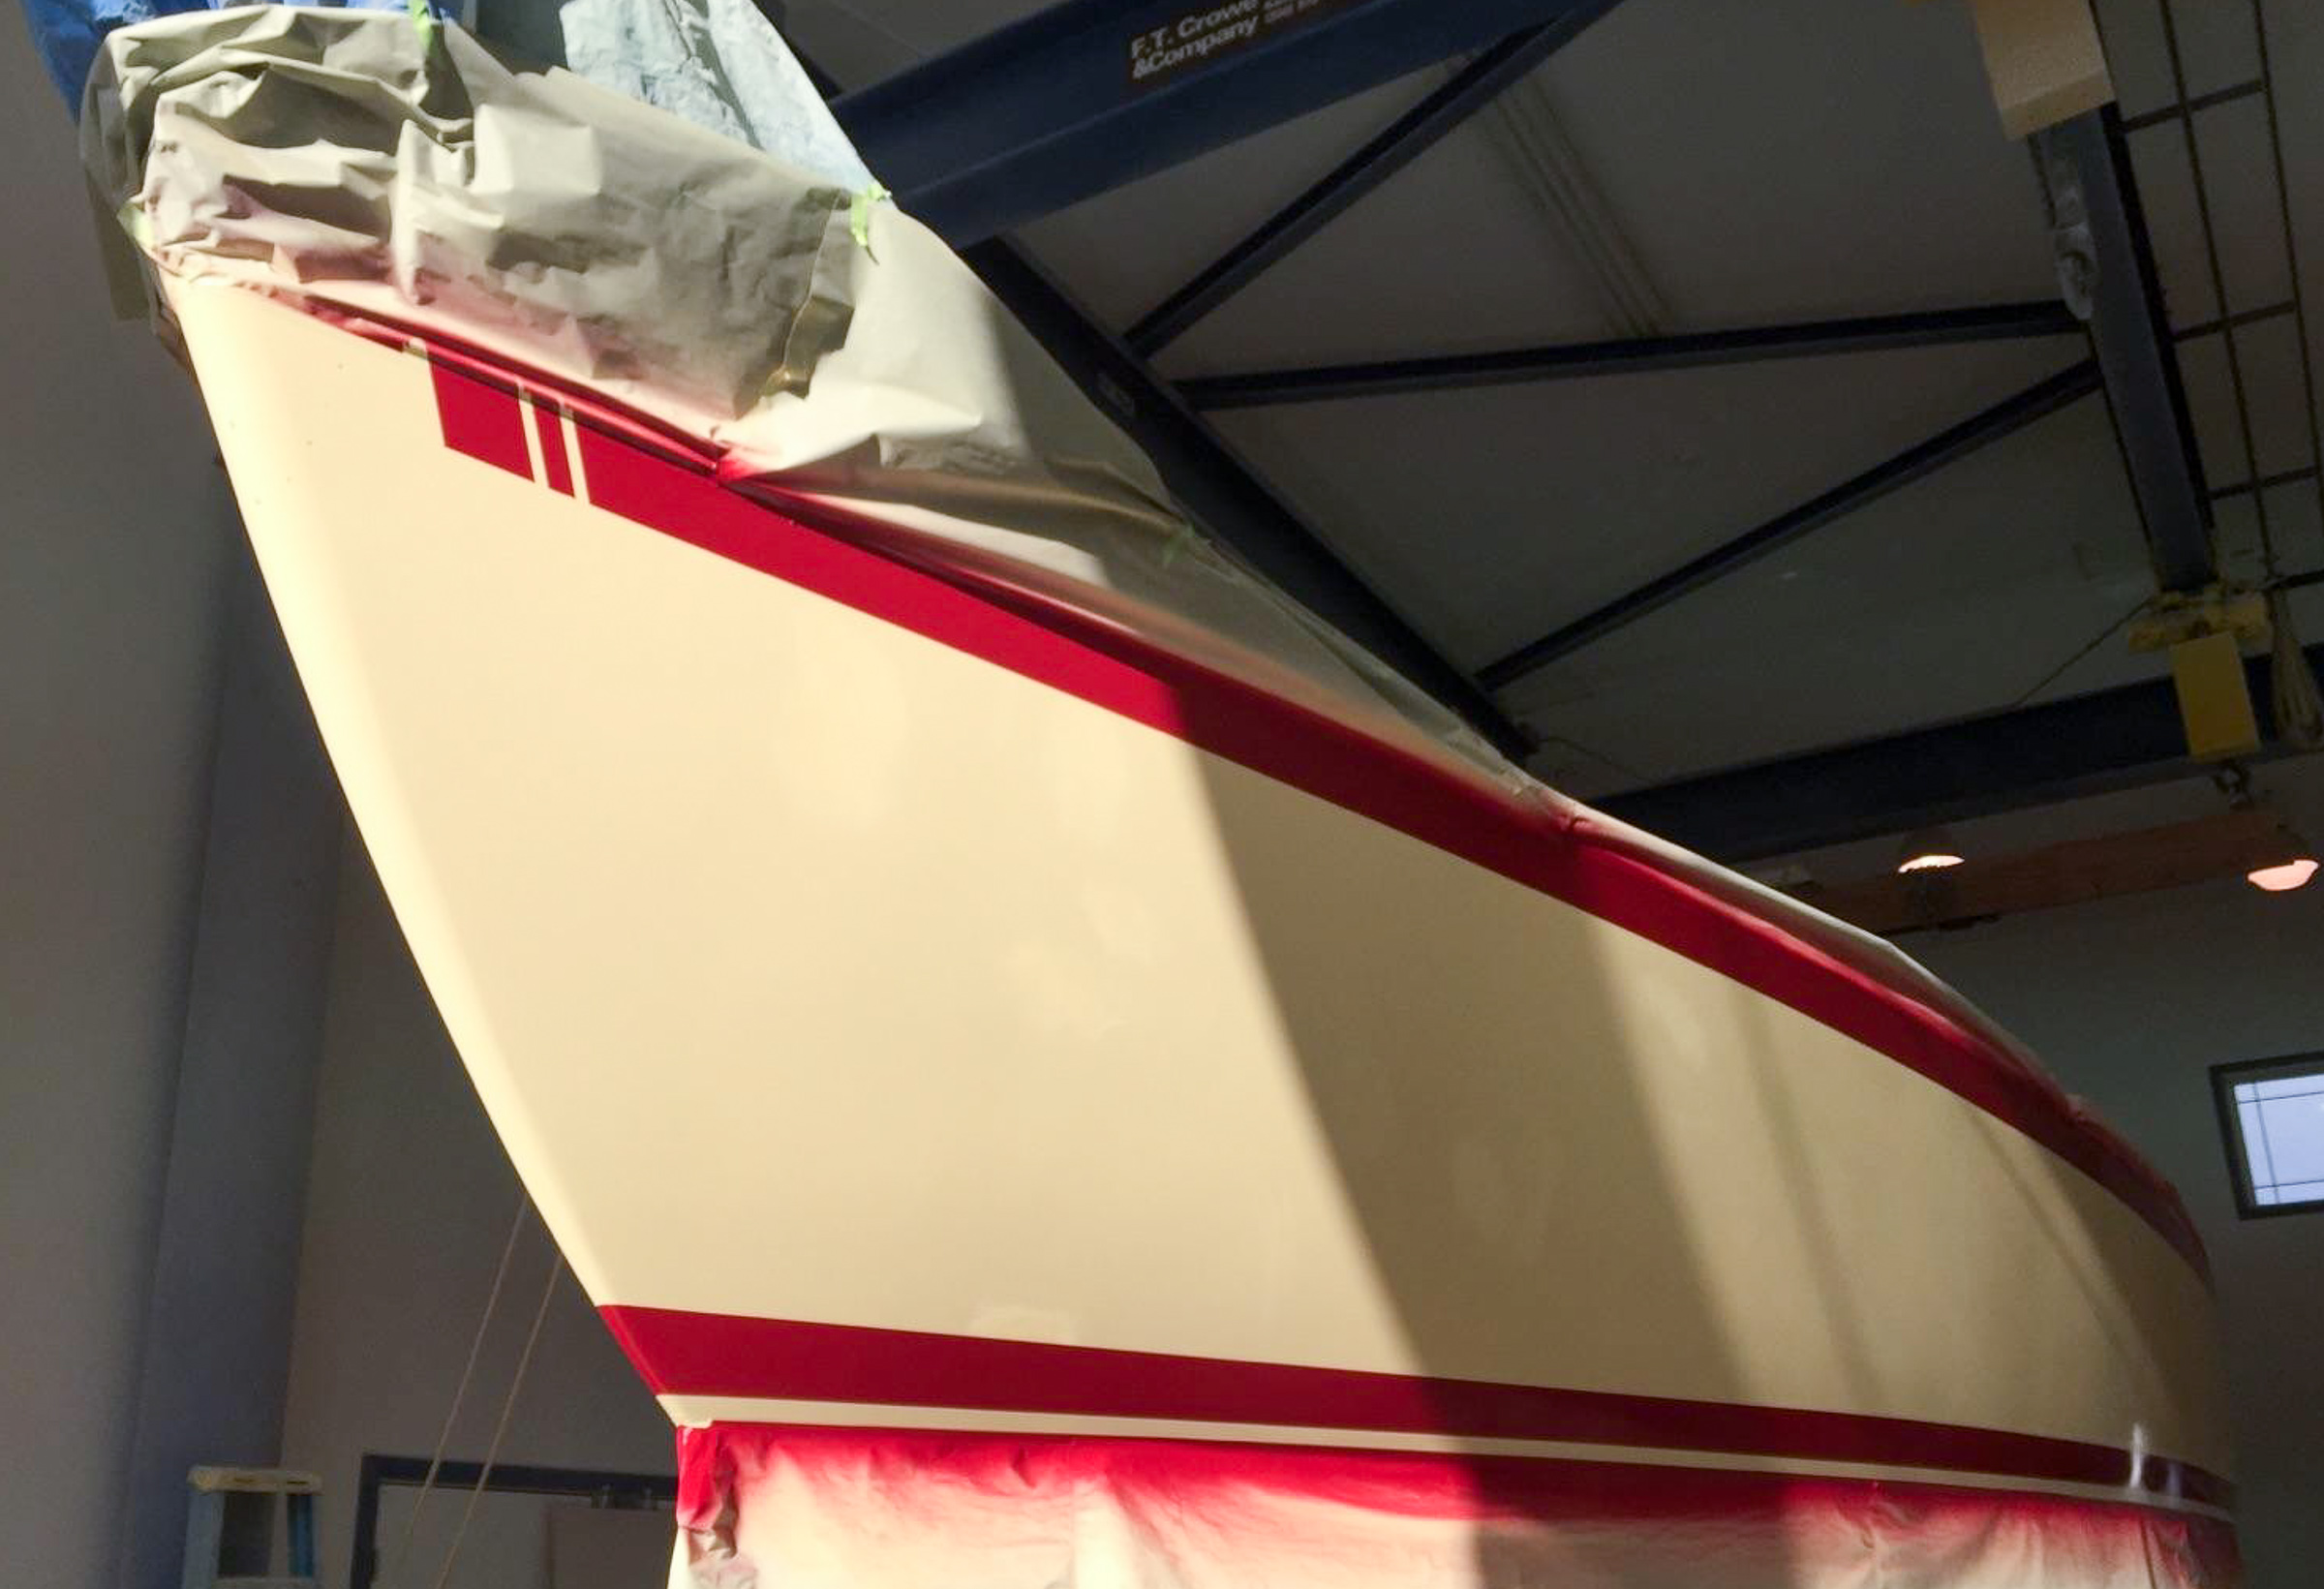
Now what you have been waiting for: the foreshadowed color. We have only seen this via email so we are as excited as you are. Here are the photos that came today of Gypsy’s hull being painted.
Gypsy ready to paint. Everything is masked off. This is what she looked like when we left Monday evening.Bow shot showing the stripe detail.Stern with name.Tom painting the clear coat.
The color looks great and we are very pleased. I can’t wait to see the boat this weekend. And a big thank you to Chris for sending the last three photos.
This was the week for installing the rest of the deck hardware and getting ready to paint the non-skid. Long days at the beginning of the week and shorter towards the end.
Here’s what the autopilot shelf looks like with a coat of paint on it. Looking at the picture we realized that we’ll have to take the front piece off to bolt the hydraulic arm in place. This will have to get done before the fuel tank goes back in and blocks access to the front piece.
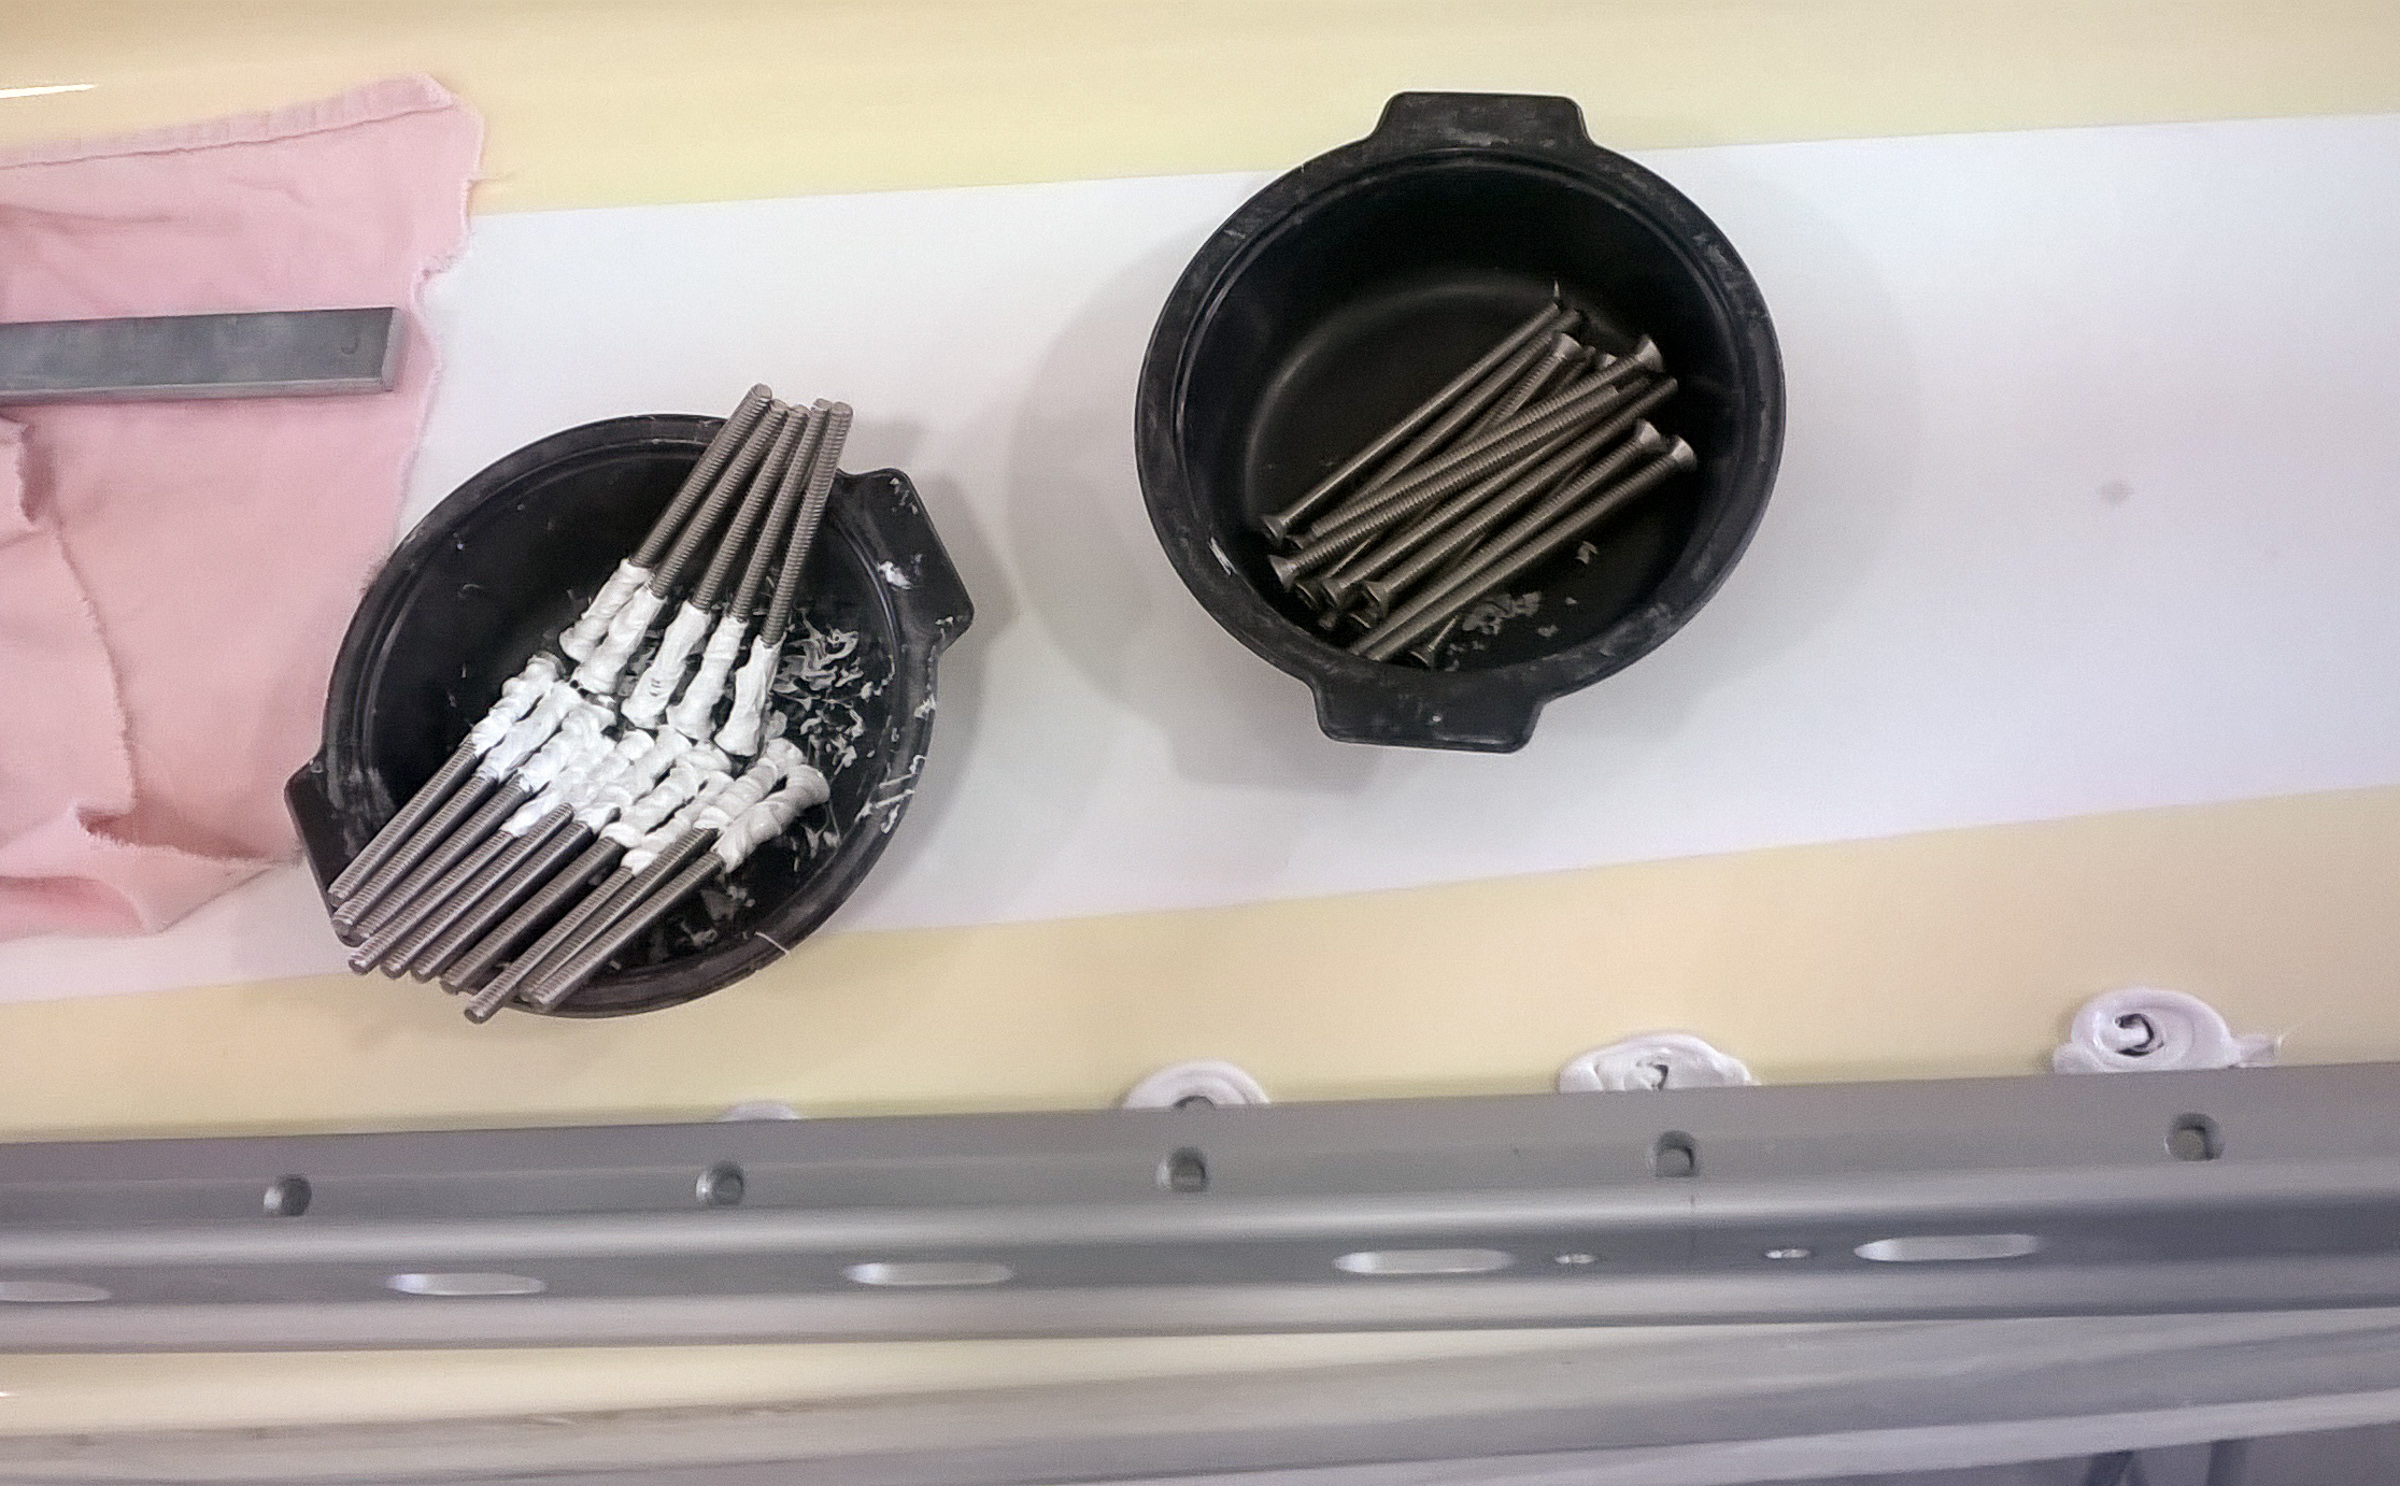
Also below are the hundreds of bolts that were used to install hardware. Bill went through with a die grinder and got them shortened so there are no gotchas when you reach in lockers.
Inside the starboard locker. Just a few bolts.More bolts, this time inside the cabin. The bar across the top is the staysail rail, with the toe rail bolts showing in the cubby underneath.
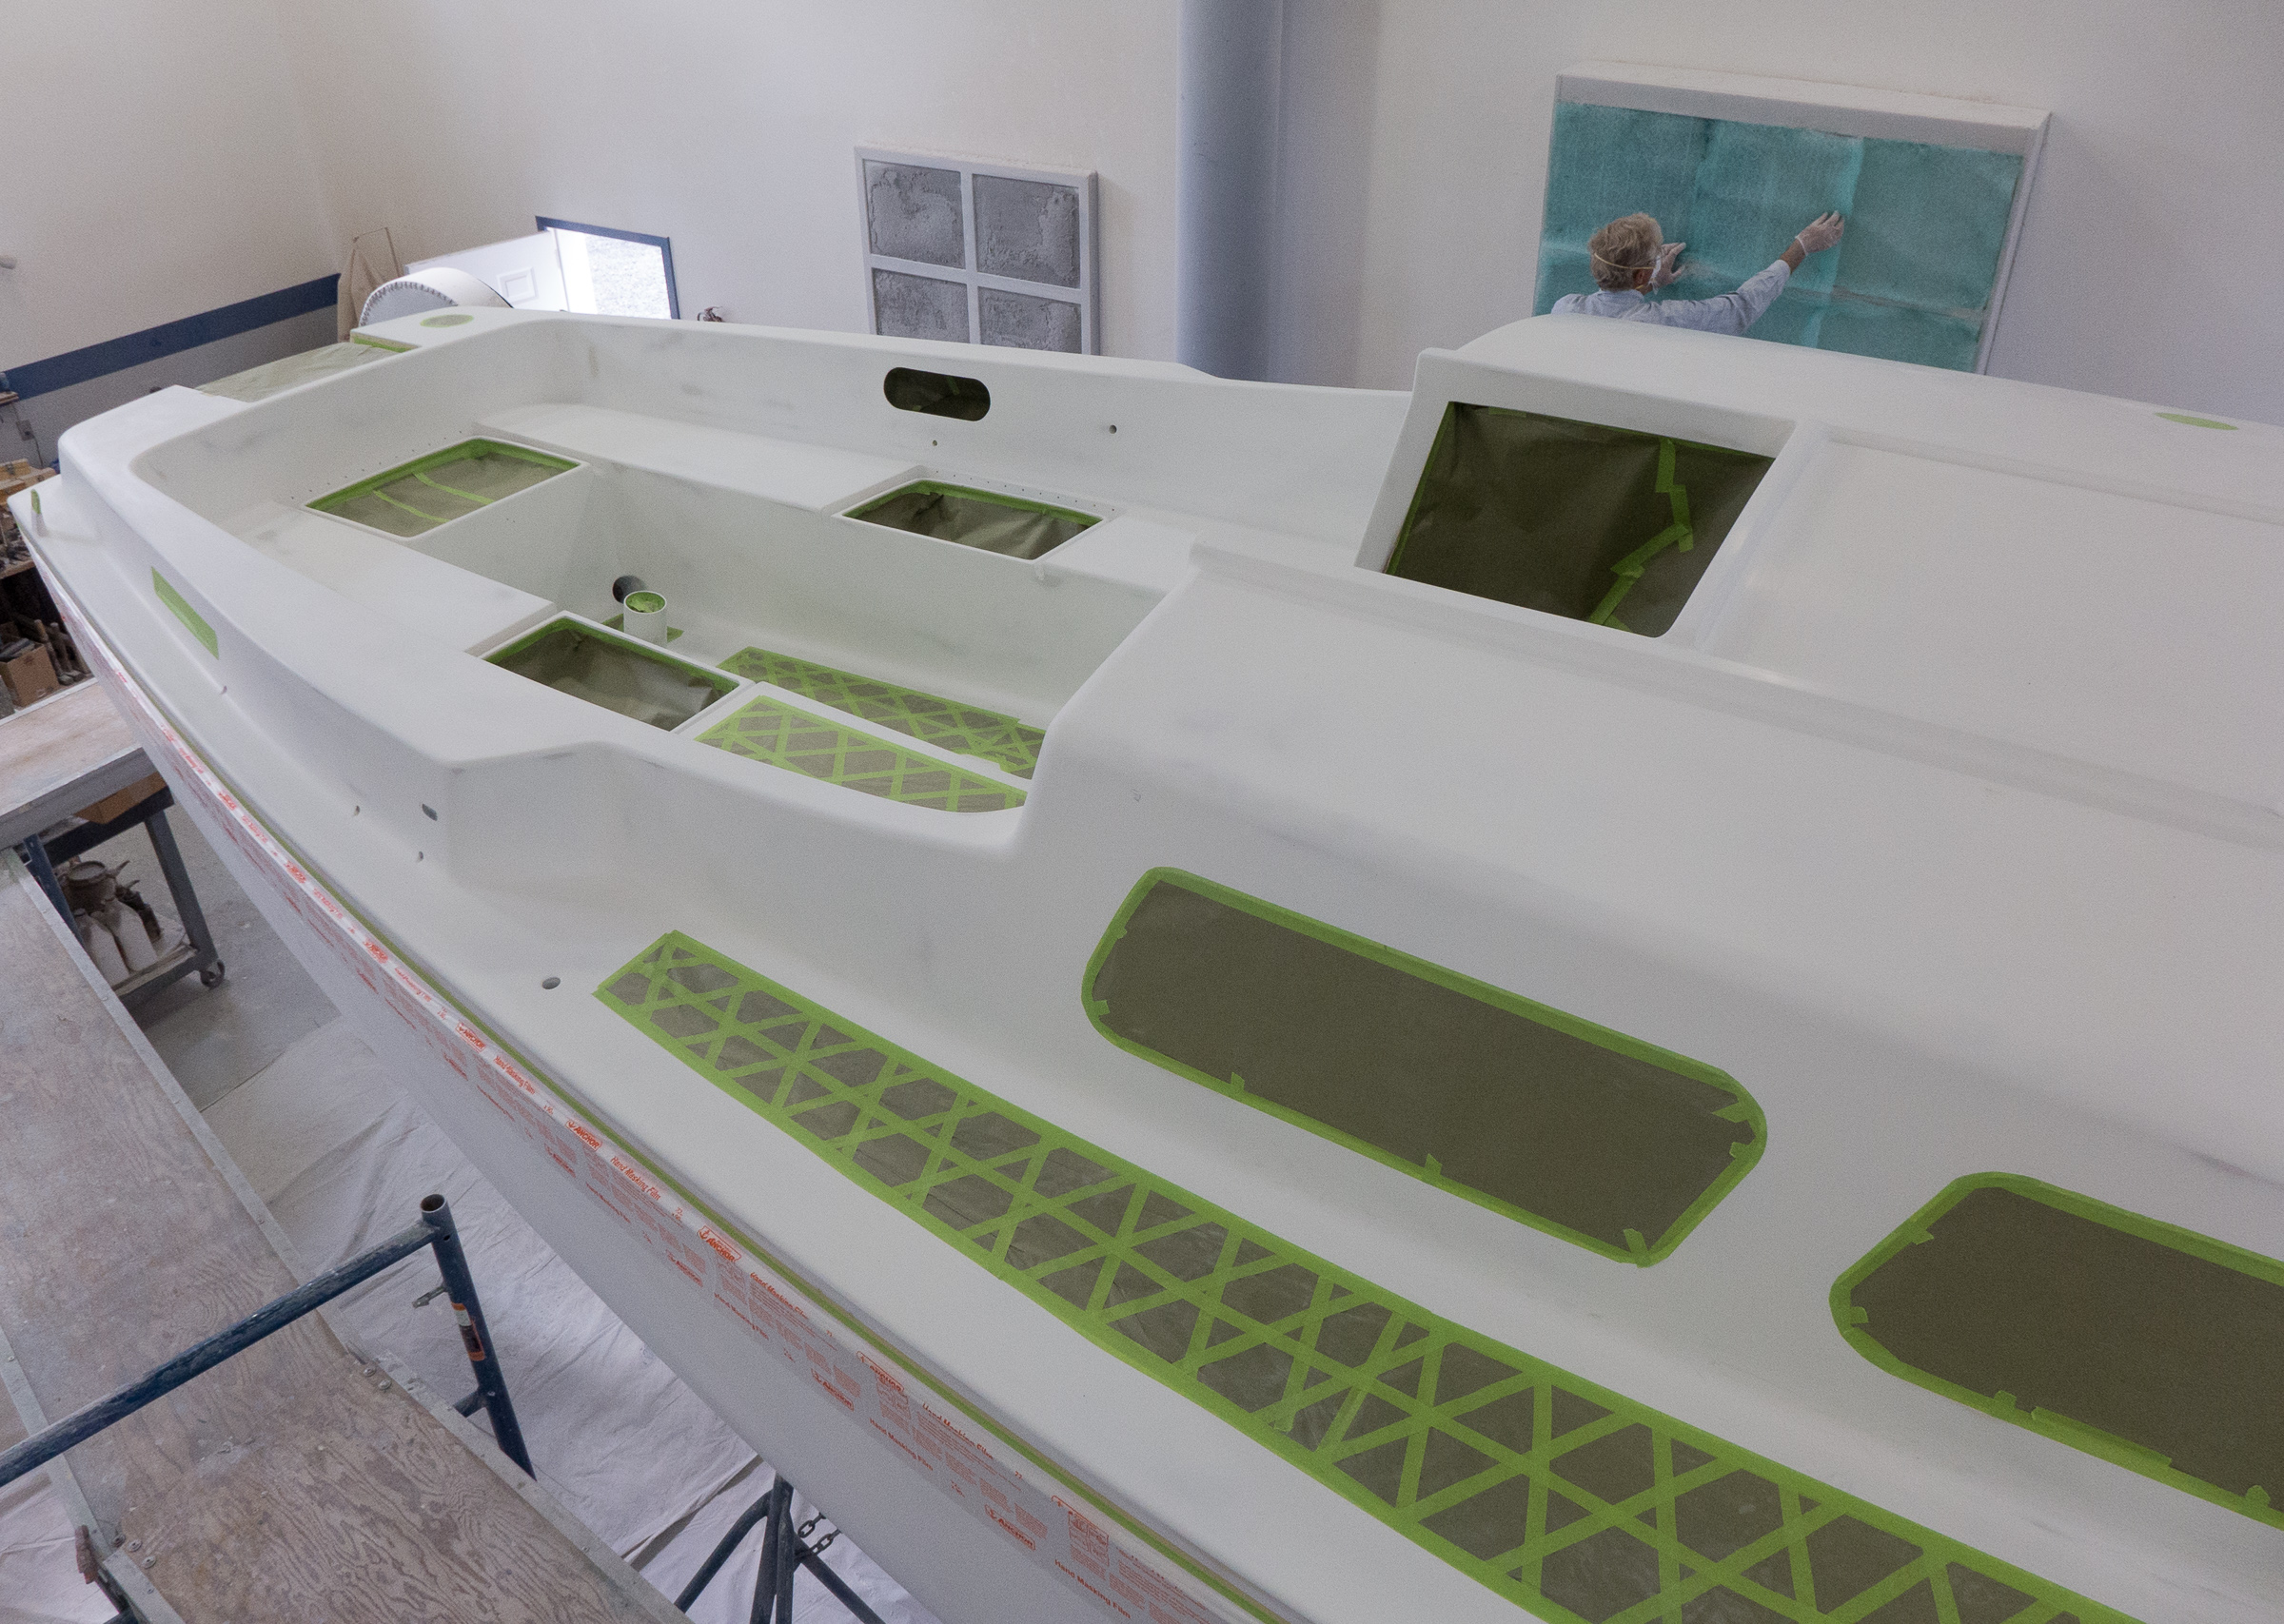
Putting on hardware is pretty straightforward. Once it’s all in place, you can then figure out where the non-skid will go. We thought we’d done a decent job taping off, but Chris straightened us out (literally) the next day. You want nice round corners with consistent radii, minimal fiddly looking areas, and you want really straight lines so that the eyes beholding the job don’t have weird visual moments. Achieving consistency when you have to consider three dimensions, not just two, is an exercise in practice and patience. Wide tape helps, too.
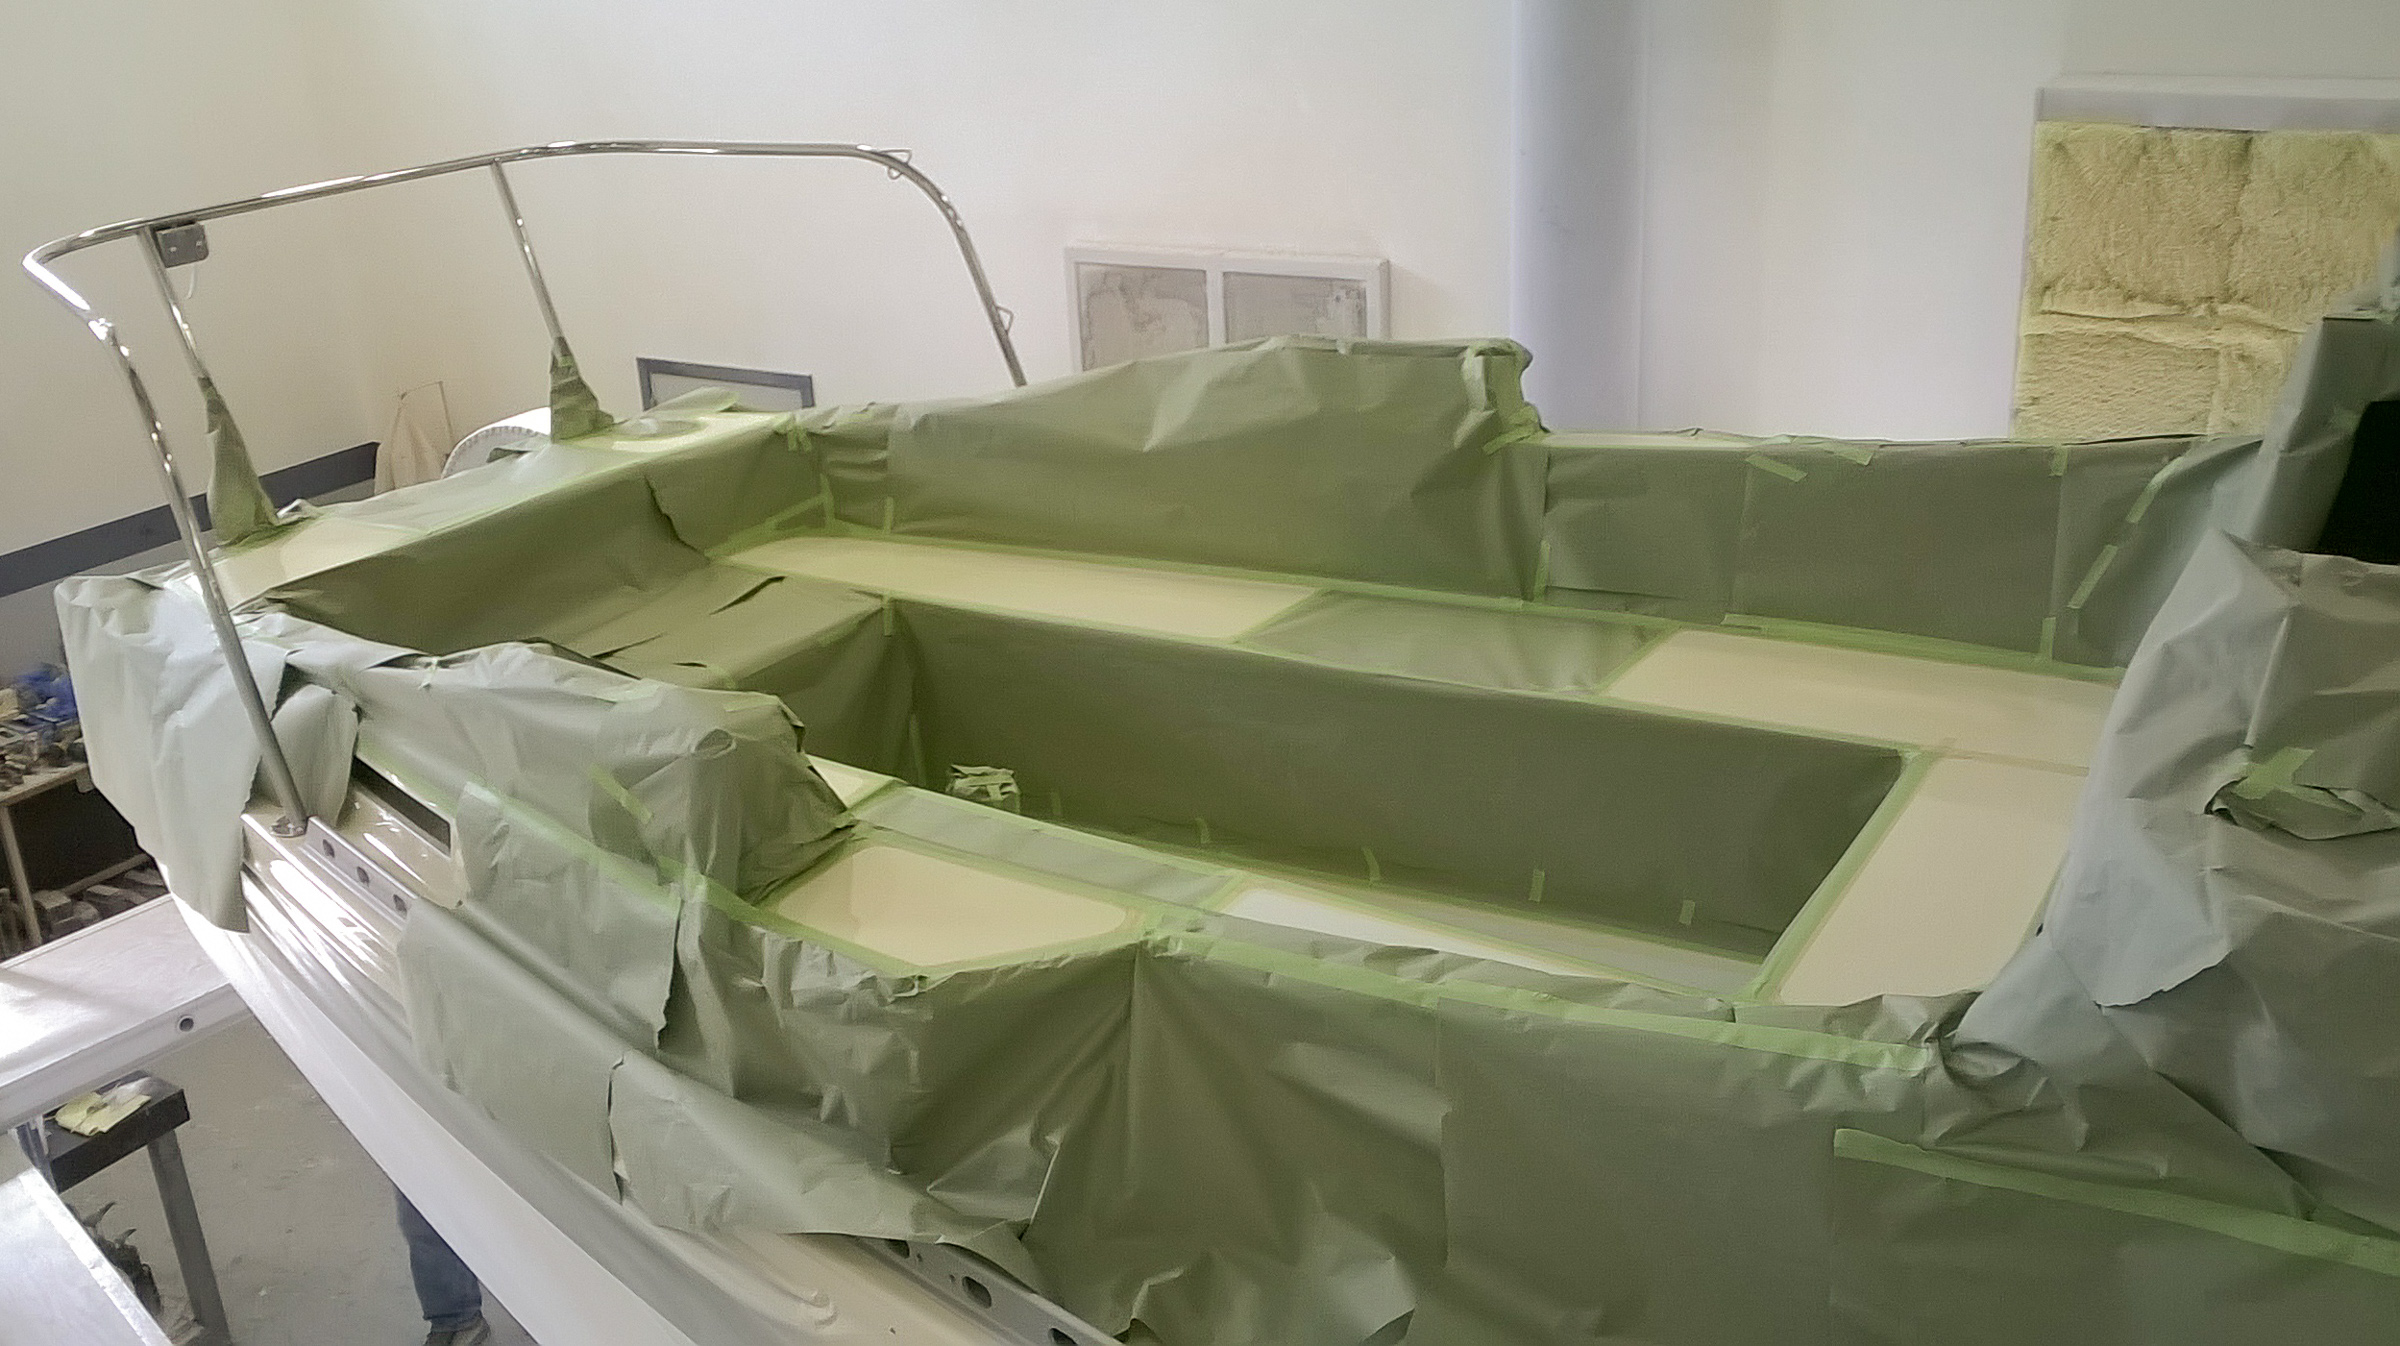
Foredeck masked off.Taped for non-skid and ready to paint.Cabin top after the non-skid was painted on. The slightly pinker parts are where the non-skid is. The luggage rack looking thing on the left is the oar rack for the dinghy.
So, you get all the hardware on, tape off where you want the non-skid to go, and then you put masking paper over everything that is remotely adjacent to where you will be painting. And then, you get to take 80-grit sandpaper to the areas that you will be applying non-skid paint. There goes parts of the expensive paint job. It feels like two steps forward, and one step back, but it must be done.
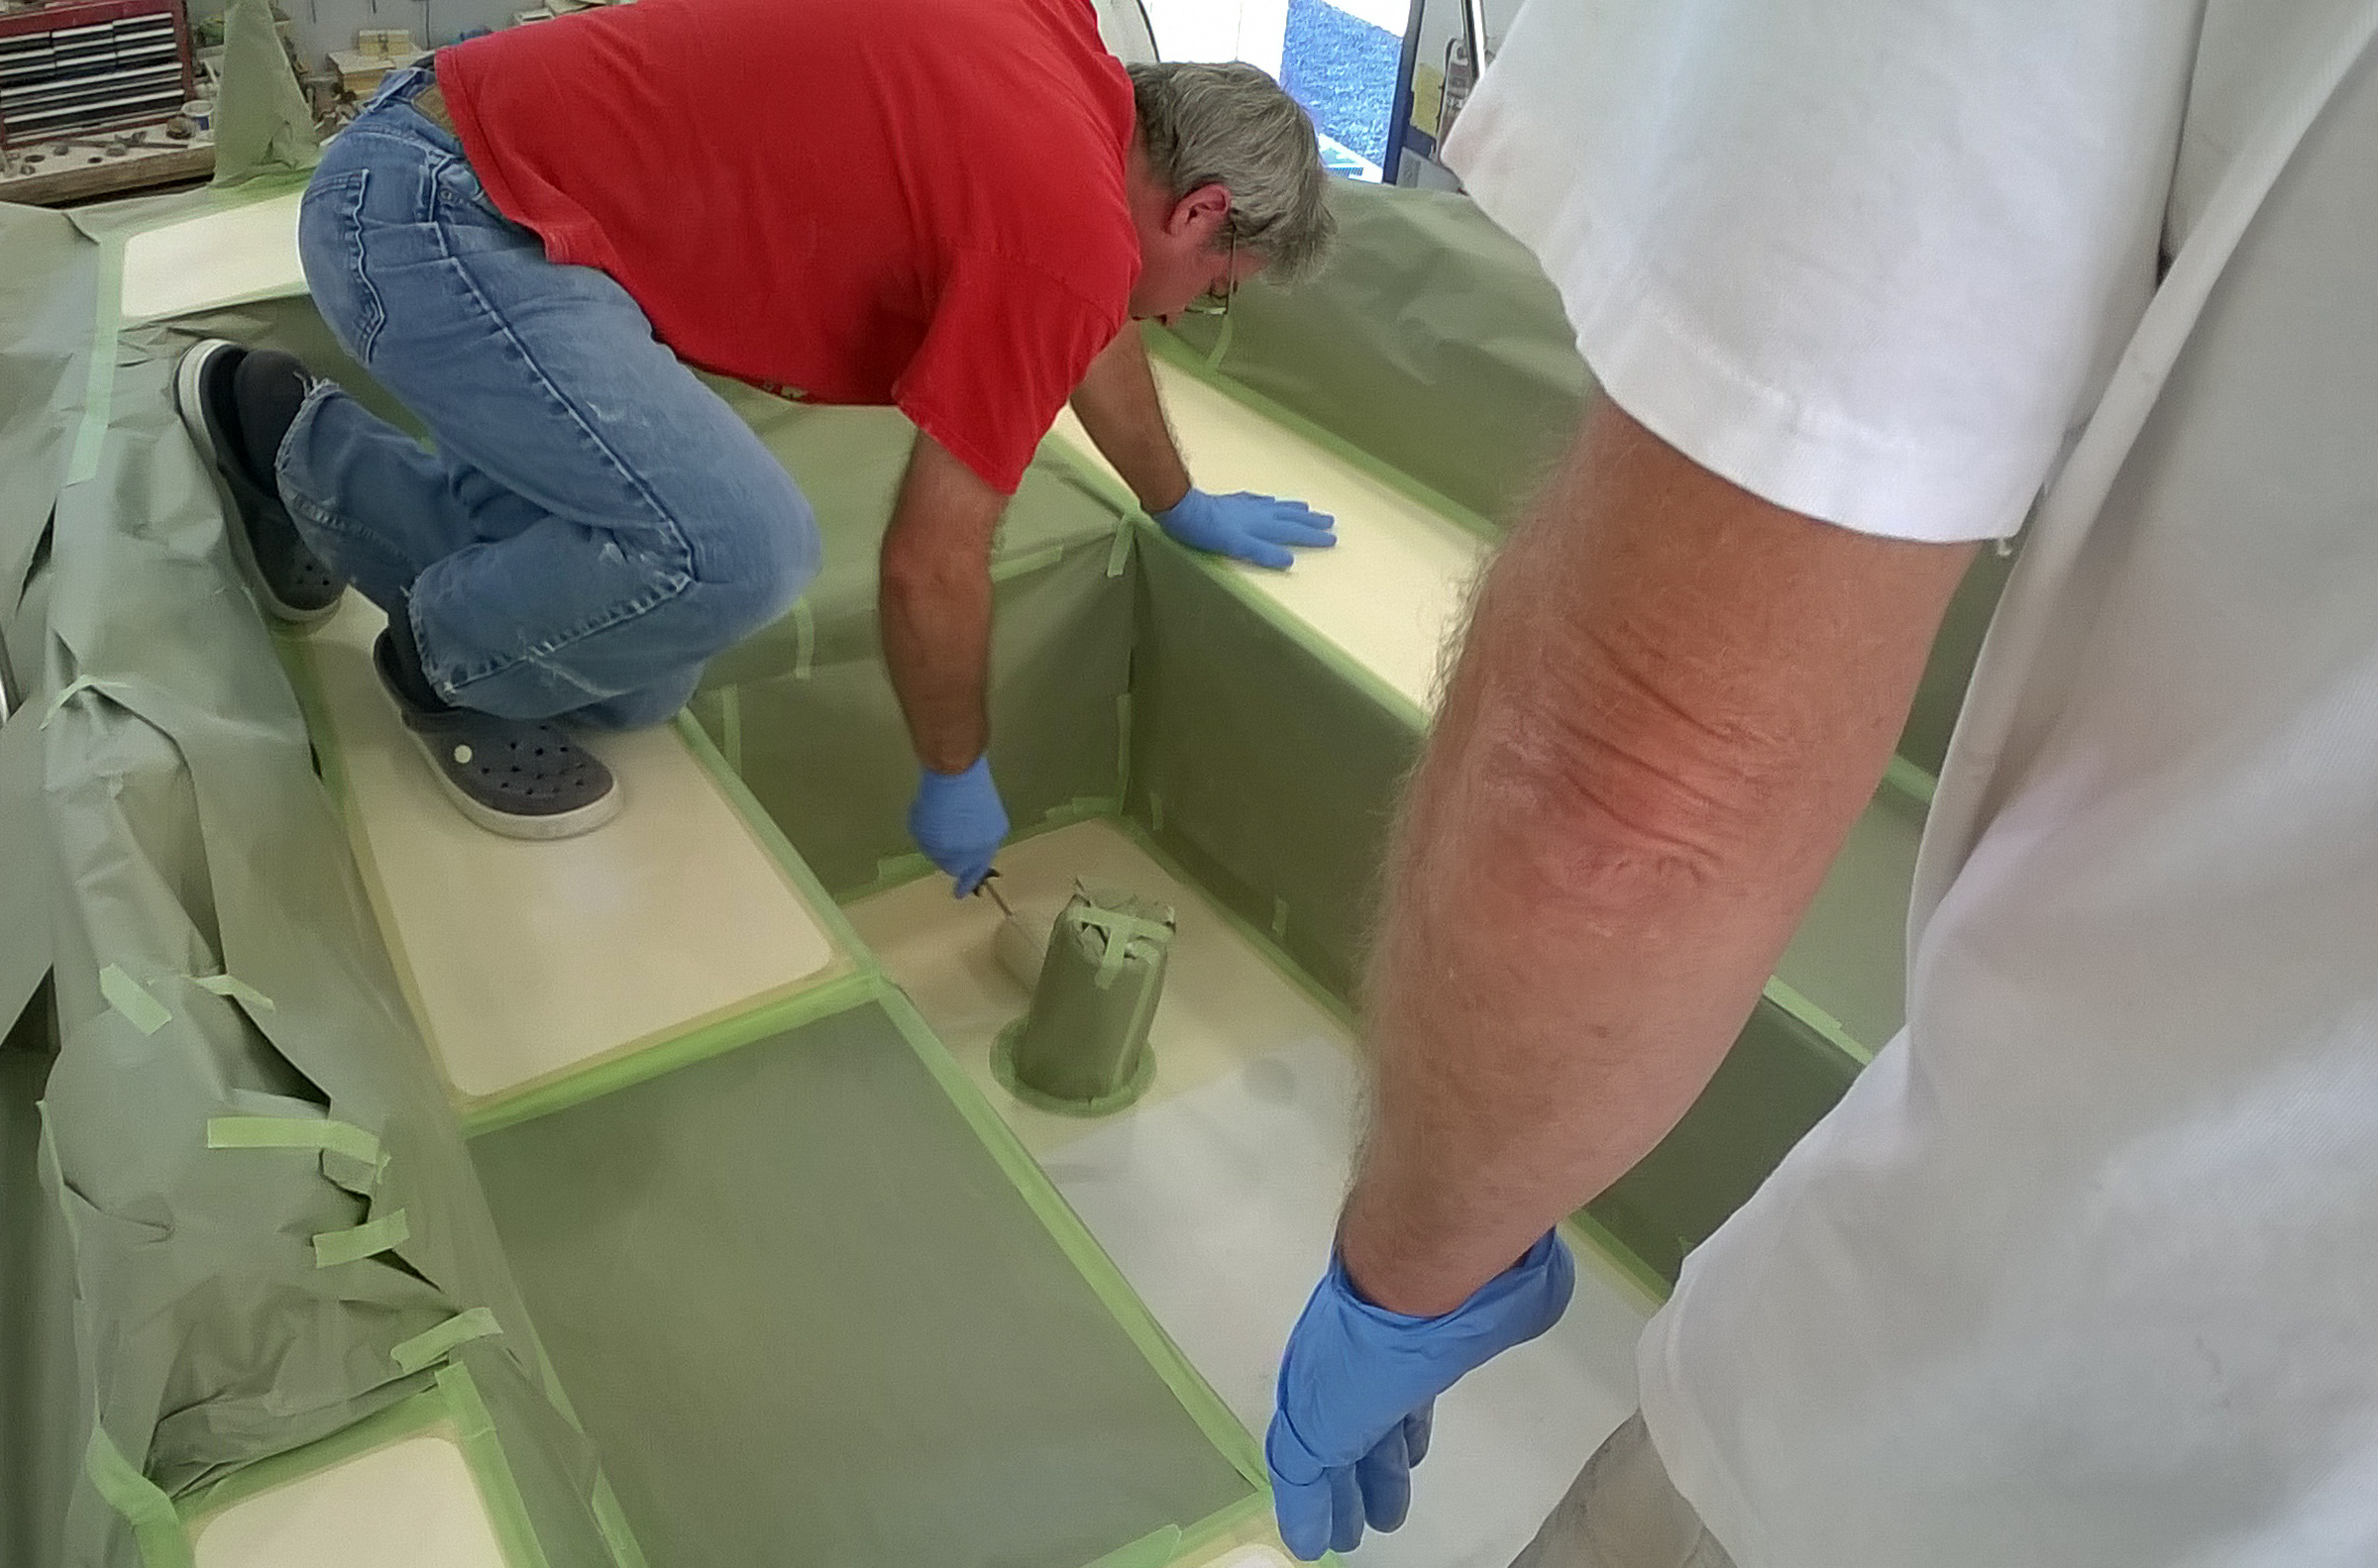
Wednesday, our friend Randy came to help us with the Durabak, the paint we’re using for our non-skid. Durabak is a paint full of rubber bits and it has great traction. All the dust was removed and the surface wiped down with Xylene. Bill rollered the non-skid on, Randy was the spotter and paint mentor, and Nina got to mix and keep the roller tray agitated and full of paint. Lay down a first coat. Wait an hour and roller on another coat. Peel off all the tape and masking for the area painted. Three hours or so later, the cabin top and the cockpit sole were finished. On Thursday, Bill and Nina painted the foredeck and the cockpit seats and coming.
Bill rolling on the Durabak on the cockpit sole with Randy giving guidance and quality control.
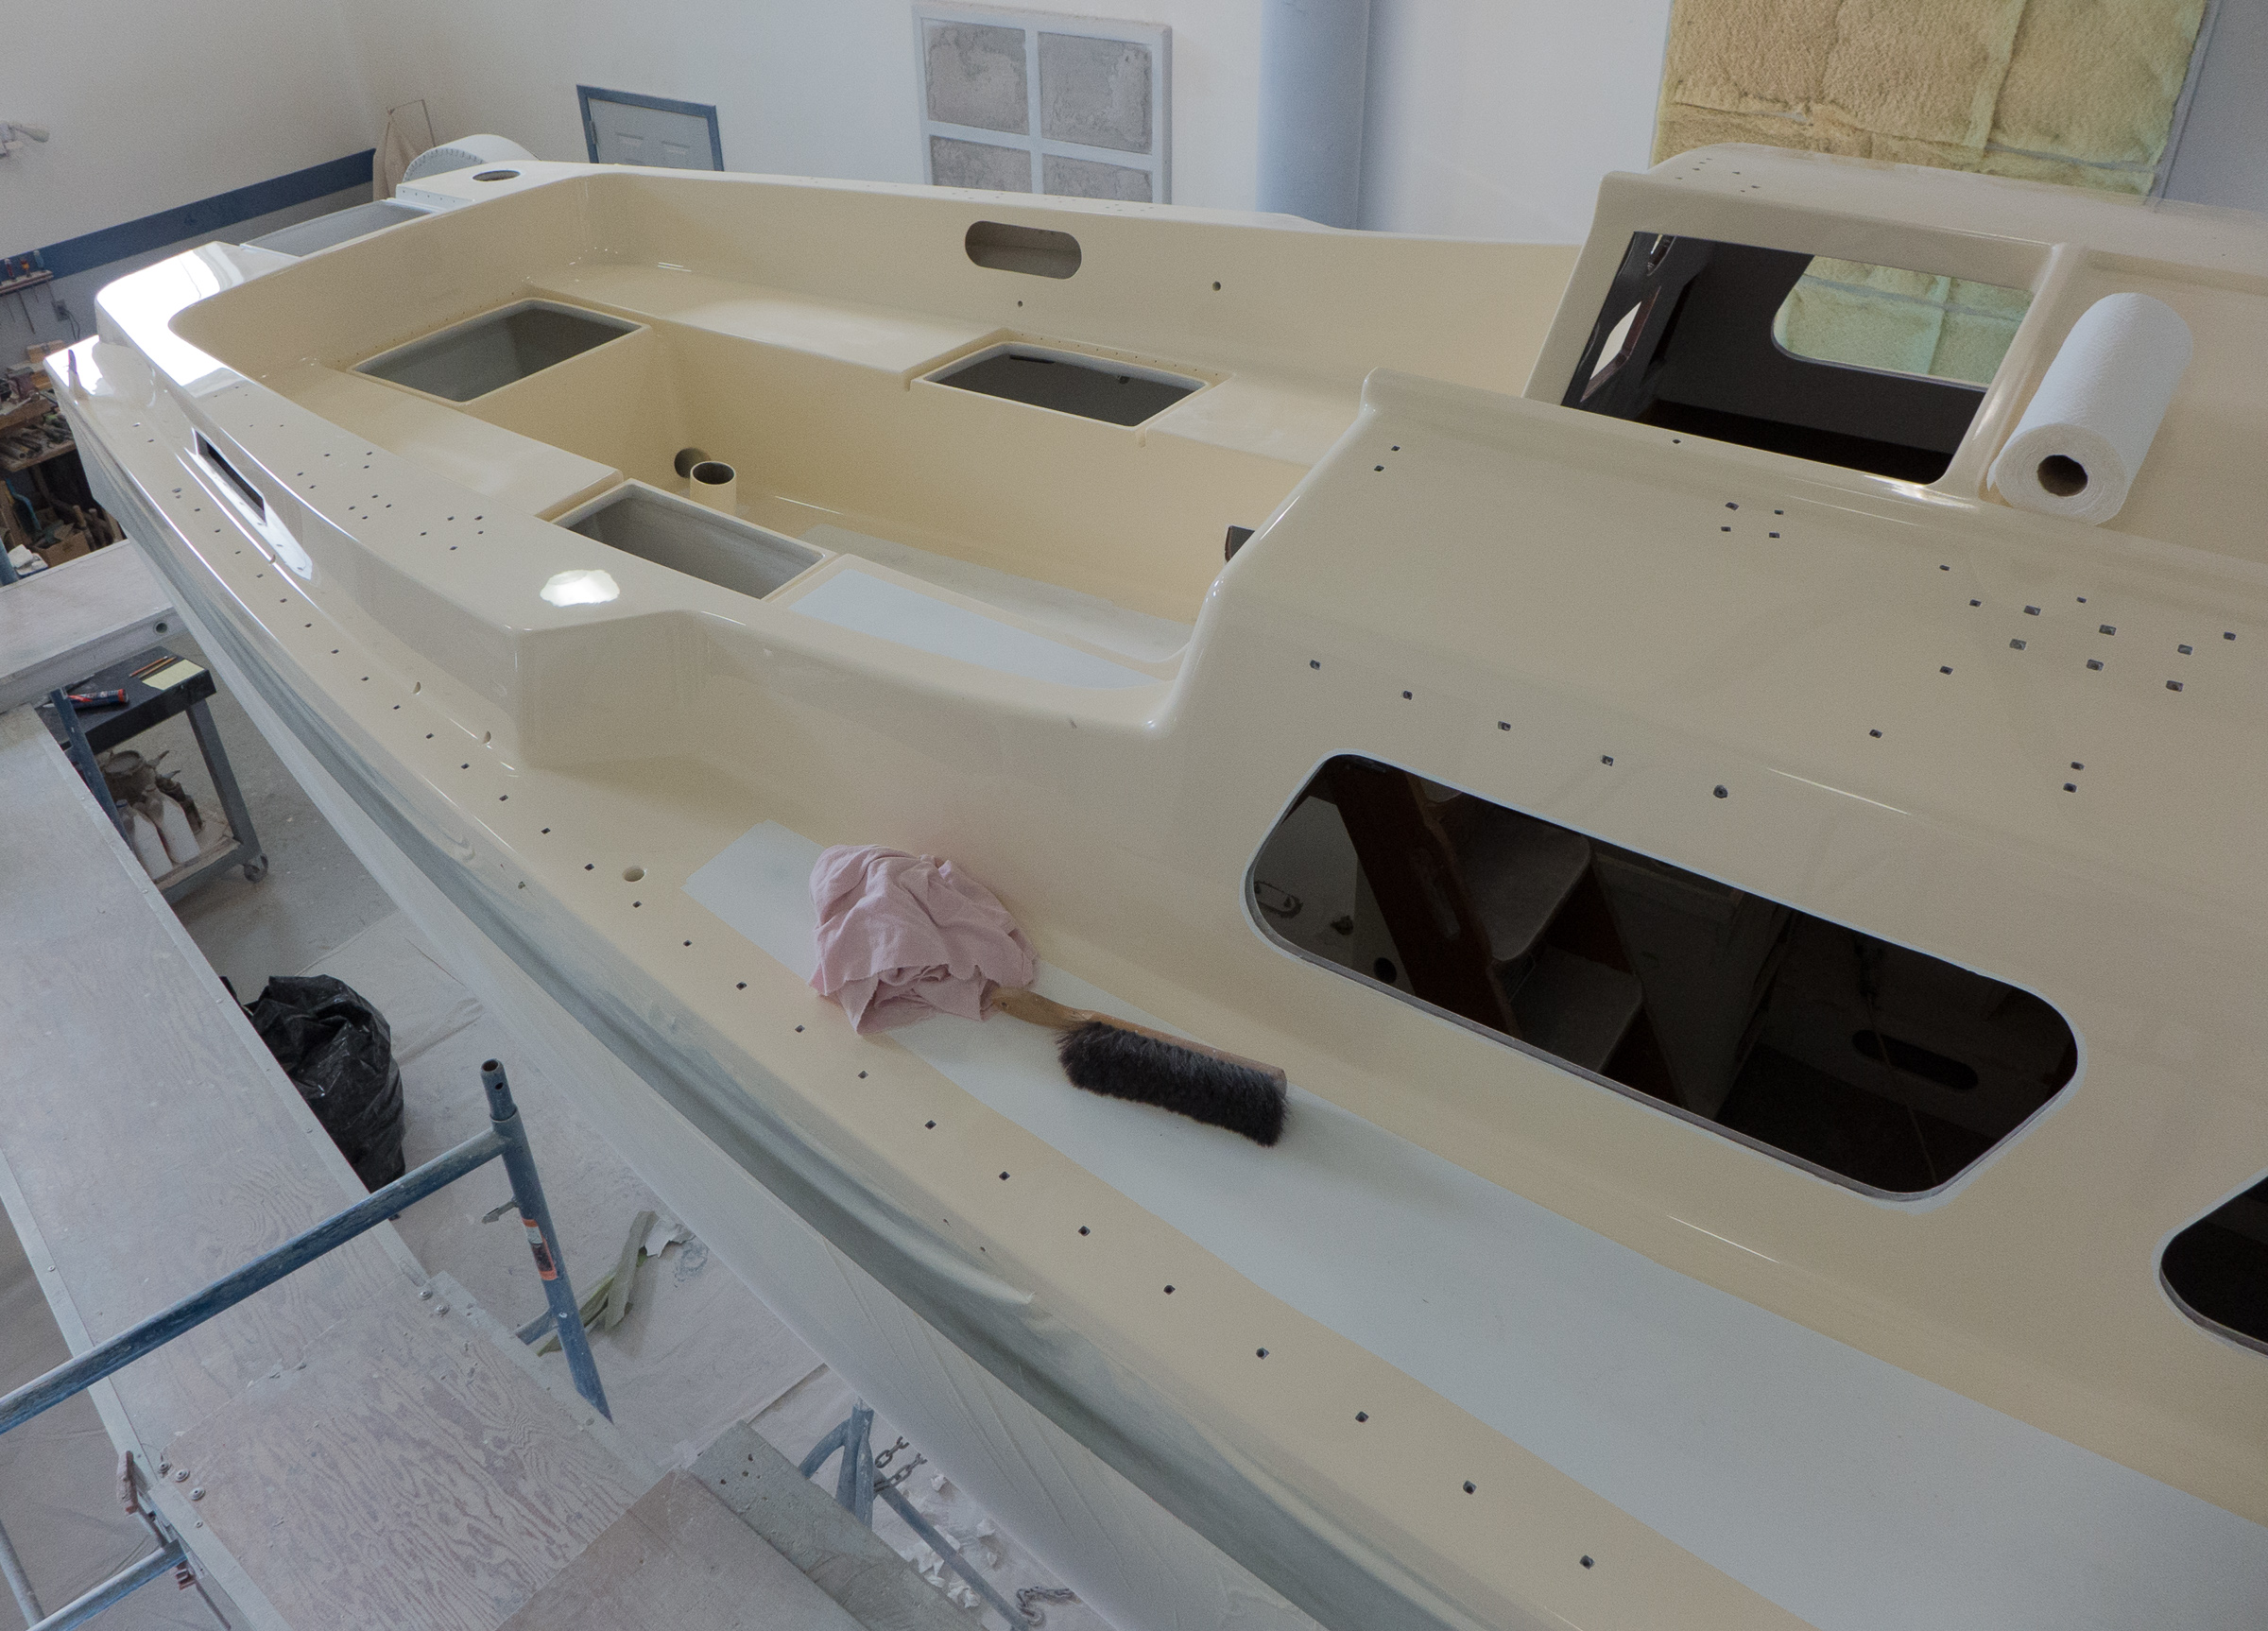
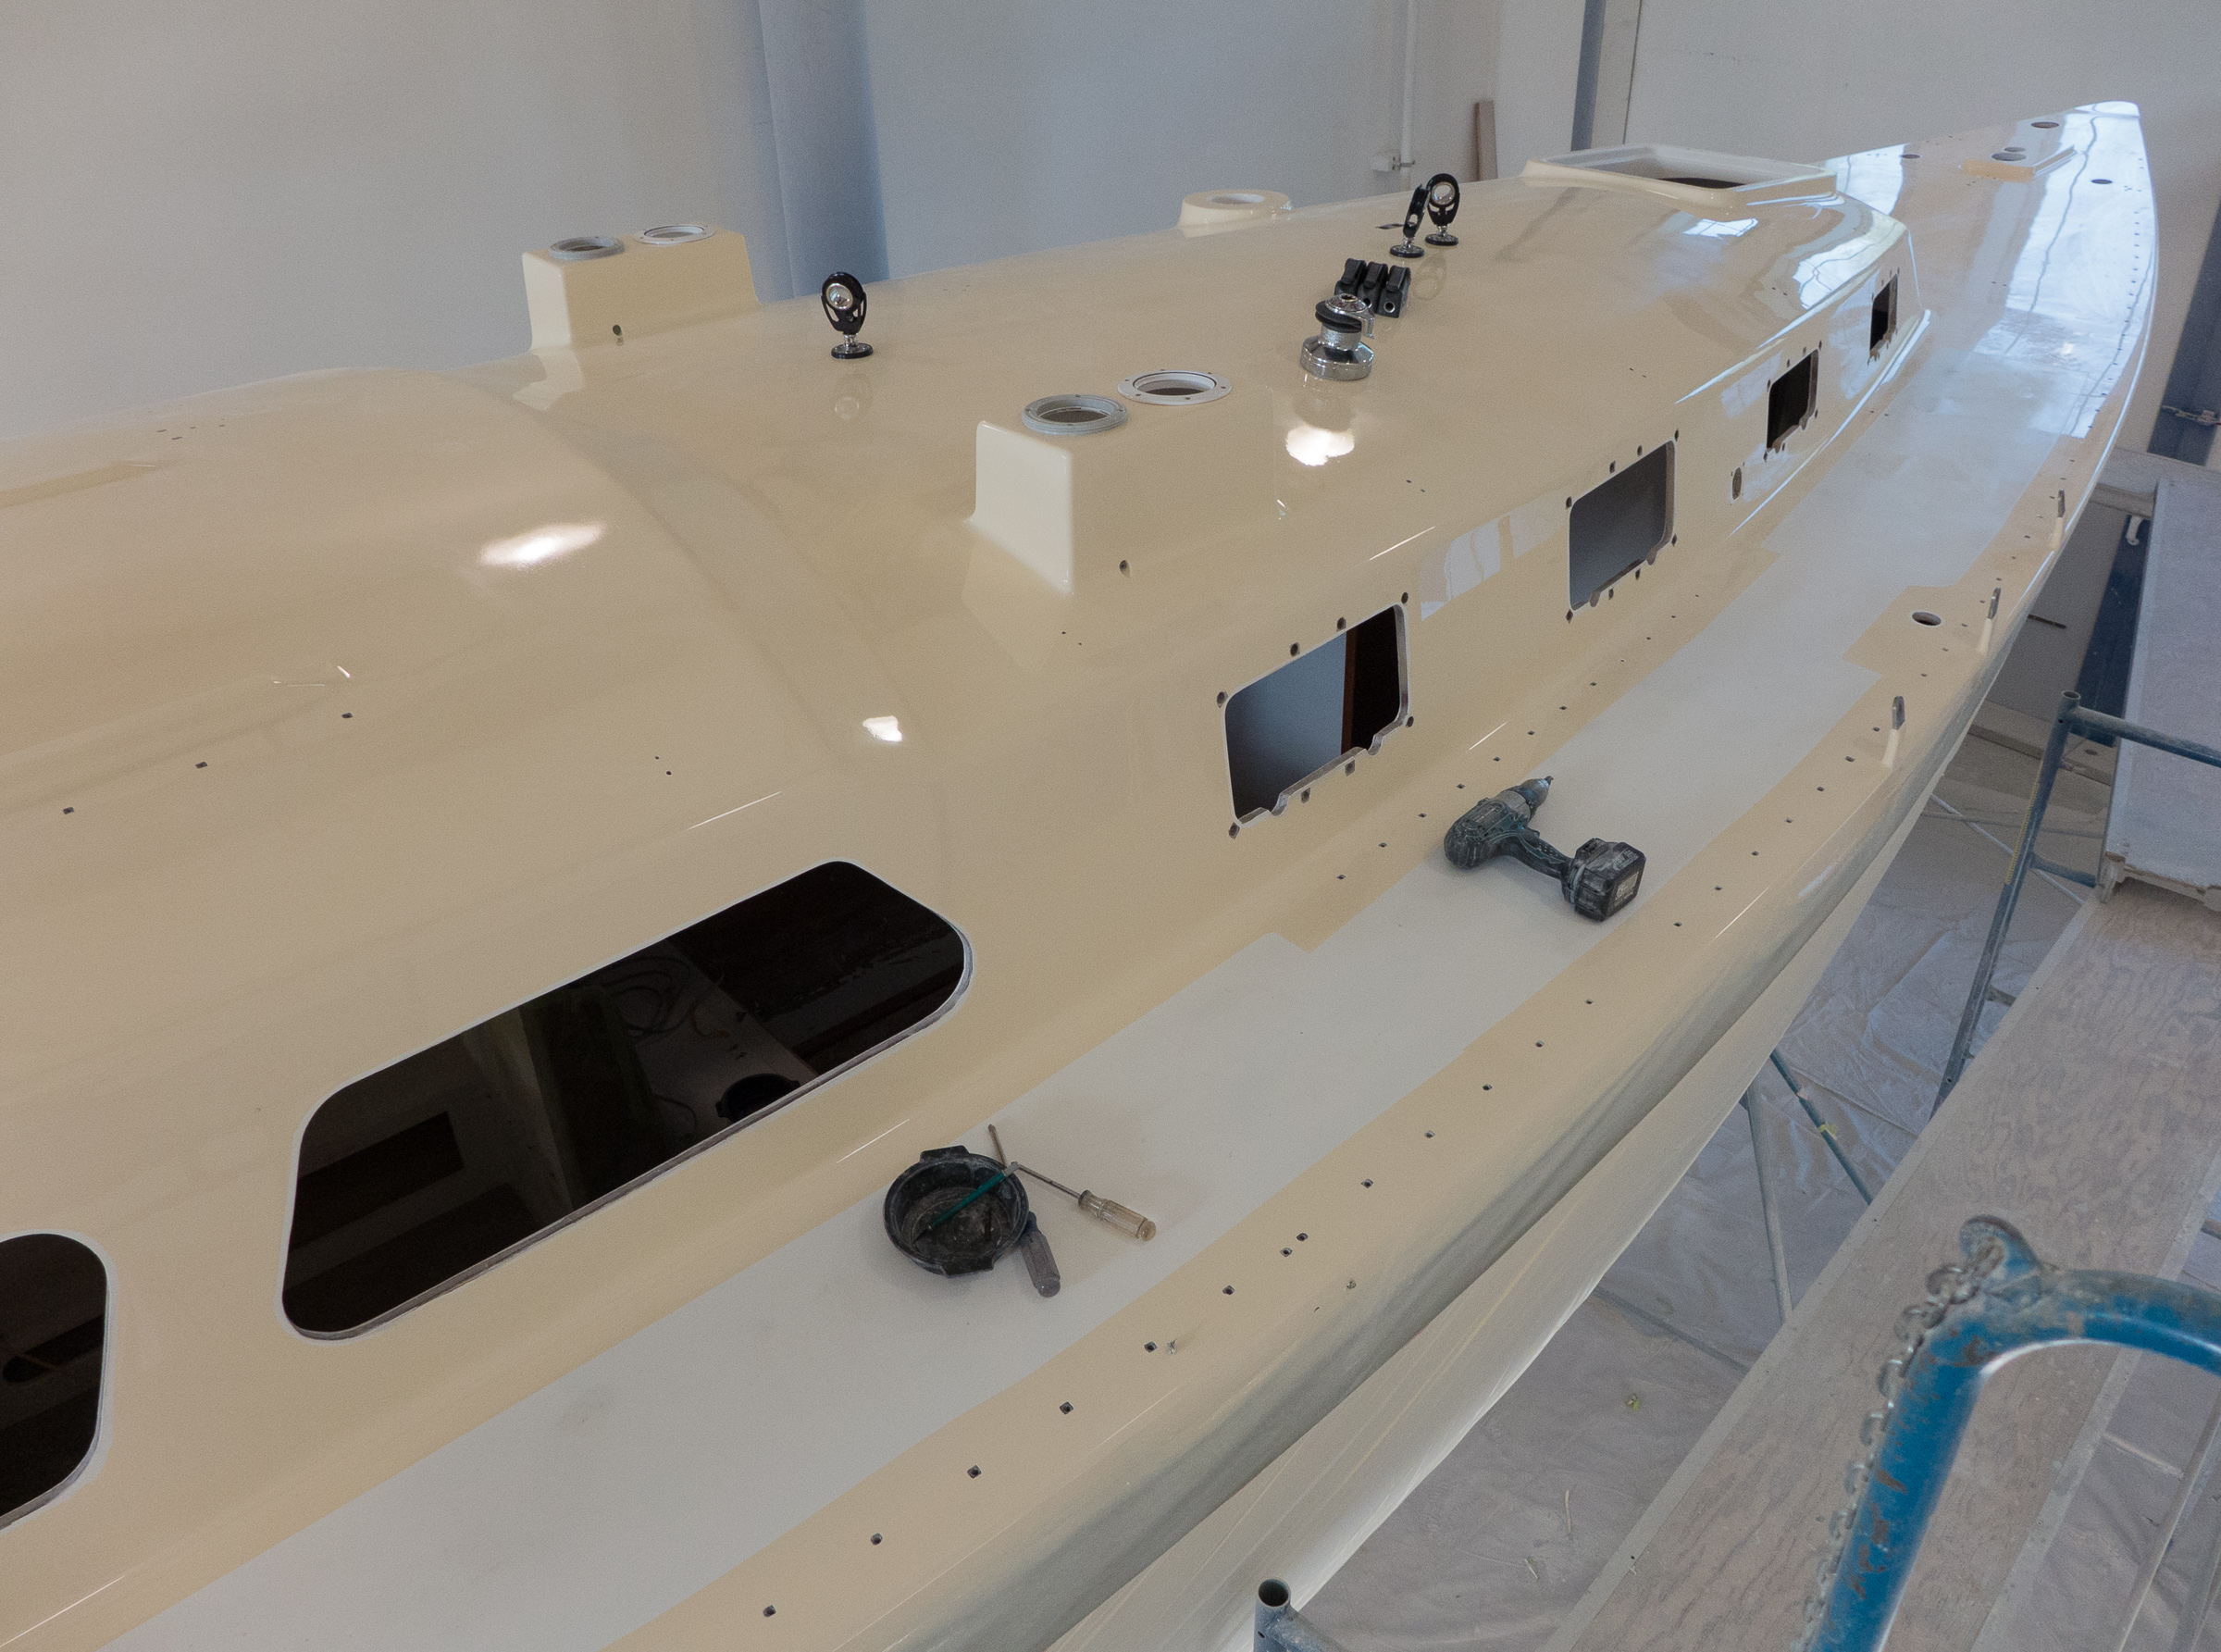
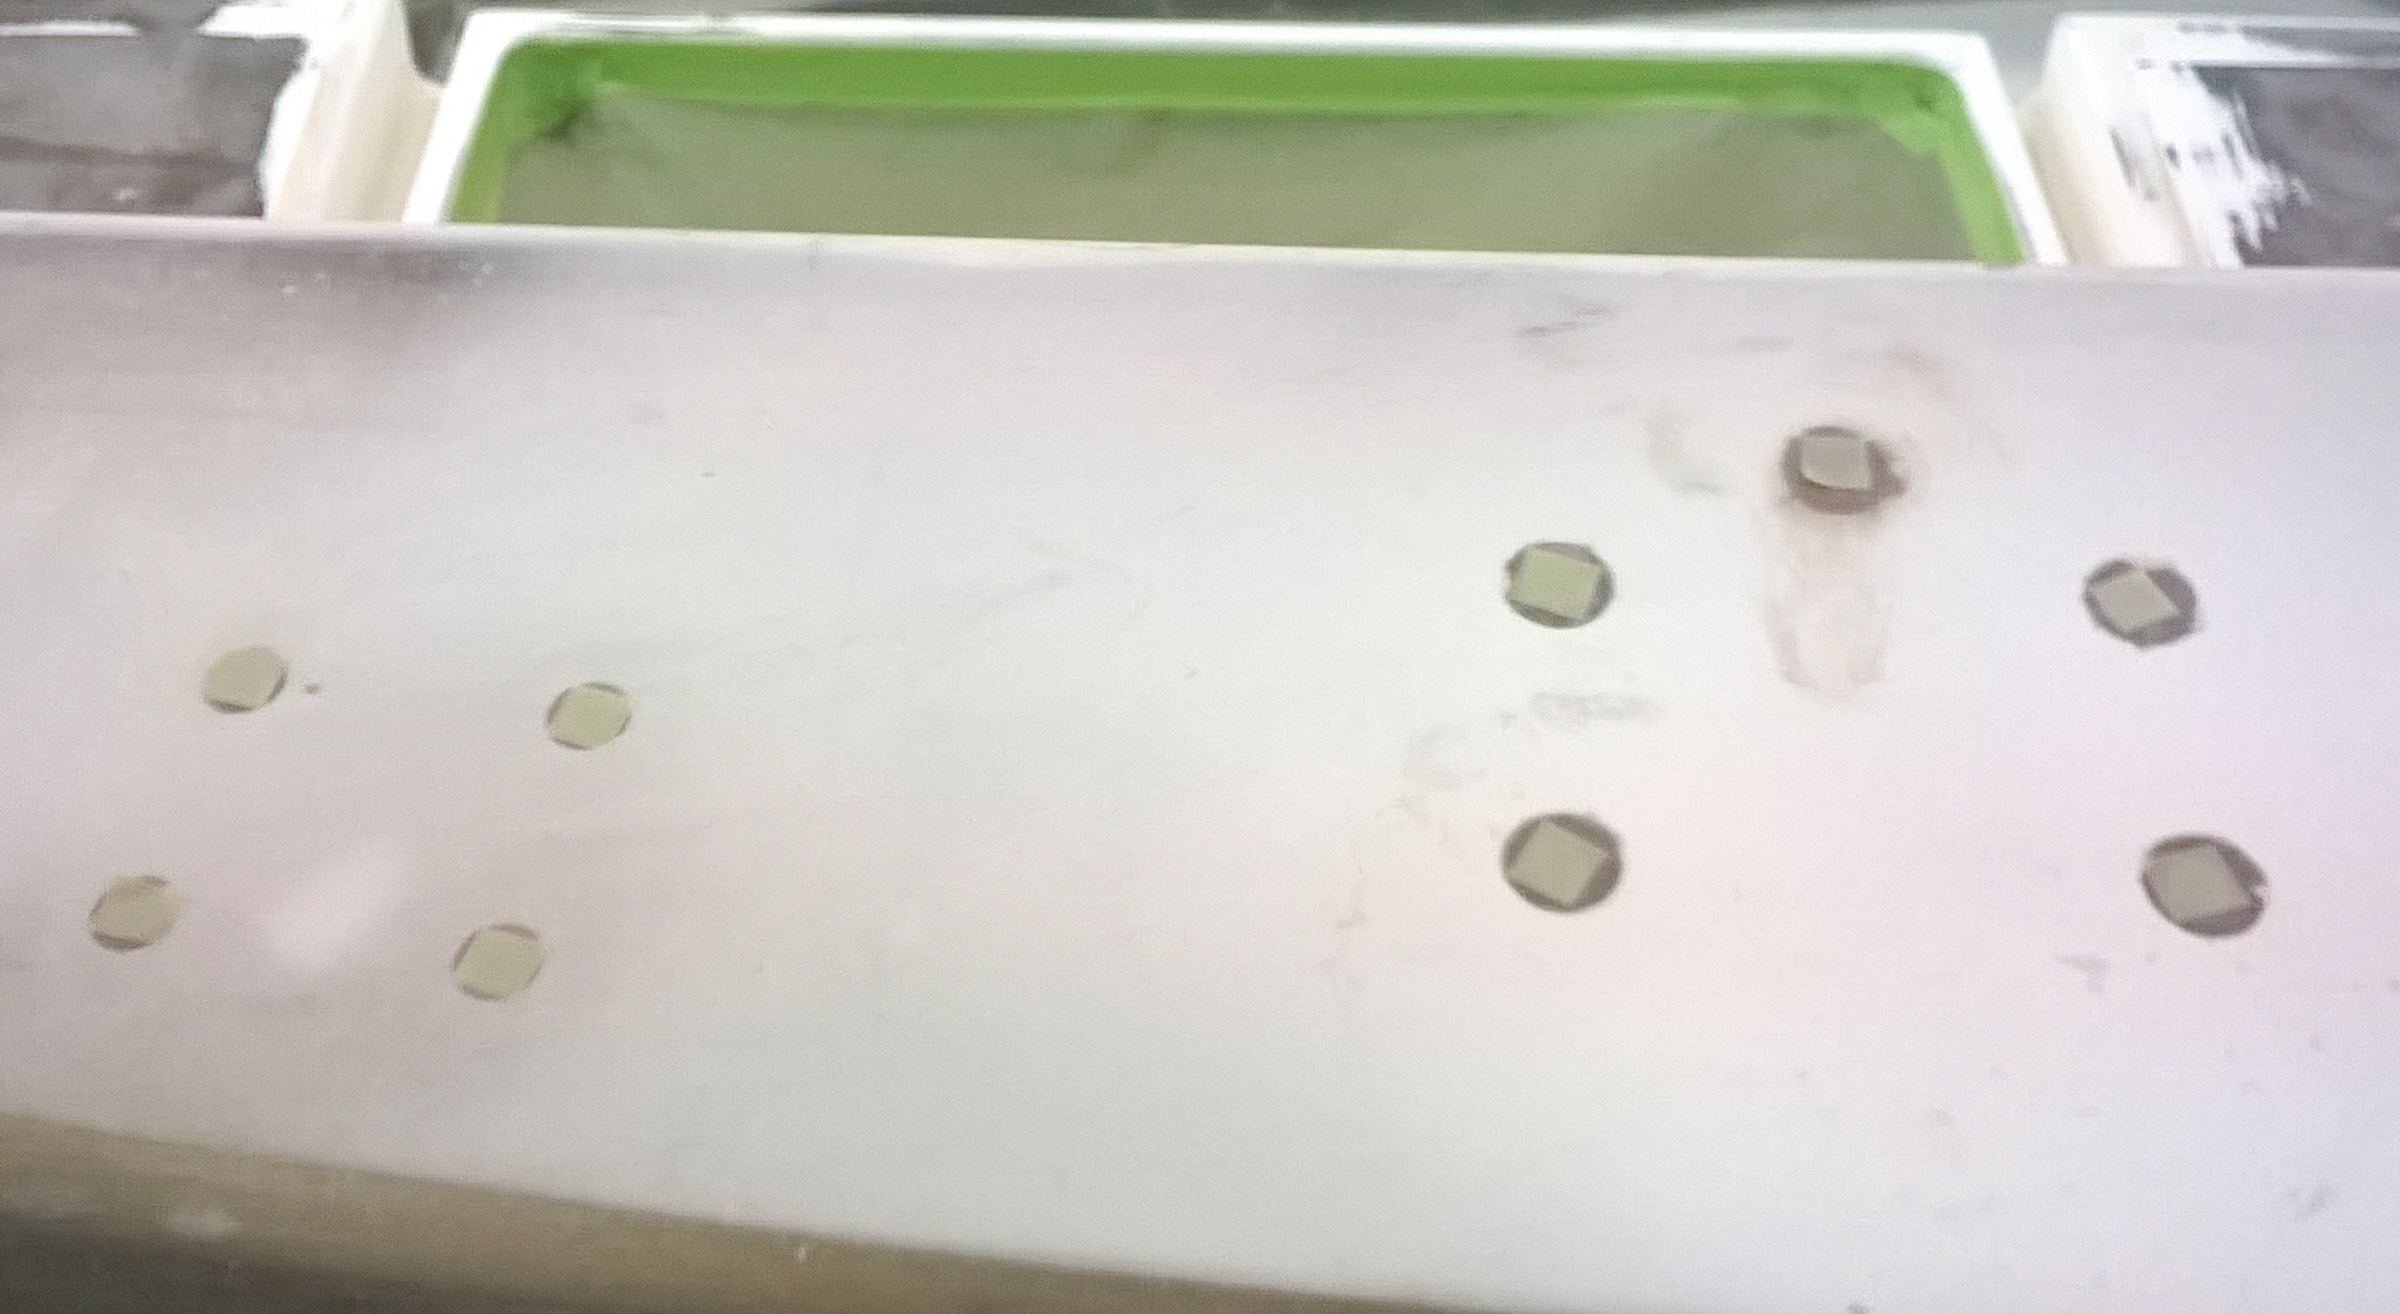
The deck paint is dry and we have been busy. There is lots of gear to put back on Gypsy. We’re taking a break from the day jobs to bolt on hardware. First task: find the bolt holes. Every hole had been covered with a little square of tape and then it got painted over. The holes should show up as bumps in the paint. Some just blended in. It takes a good memory or being able to find the holes from below. A good kabab skewer poked up from below, and out they pop. They then need to be cleaned up with an x-acto knife. There were hundreds of them. Each day, we’ve managed to find more. Four days in, we think we got most of them, although there are at least four of them we haven’t found yet, mainly because they are cast in and we can’t poke them out from below.
You can see some of the holes have been found.
We are very happy with the deck color. It looks like beige, but we prefer to think of it as a rich cream. We did not want to end up with a white boat. The non-skid paint we will apply is a bit lighter in a similar color. The non skid will end up covering about half of the deck and where the white parts are still showing.
Sunday we put on the mainsail reefing winch, turning blocks and line clutches. We also put the deck plates on the dorade vents and a block for the main sheet.Monday we put on the headsail winches and the mainsheet winch. We also installed the vang cleat, a Nicro solar vent above the galley and a line organizer for the mainsheet and vang line.
Tuesday we tackled hand rails. We had to cut new pipe for the long rails on the cabin top. The threaded backing plates worked very well for the handrails.
New hand rails.
We also installed the staysail track, shorepower AC inlet, staysail chainplate, anchor line cleat, anchor chain stopper and the anchor locker vent deck plate.
Foredeck with (L to R) vent ring, anchor cleat, anchor chain snubber, staysail chainplate and staysail tack attachment fitting.
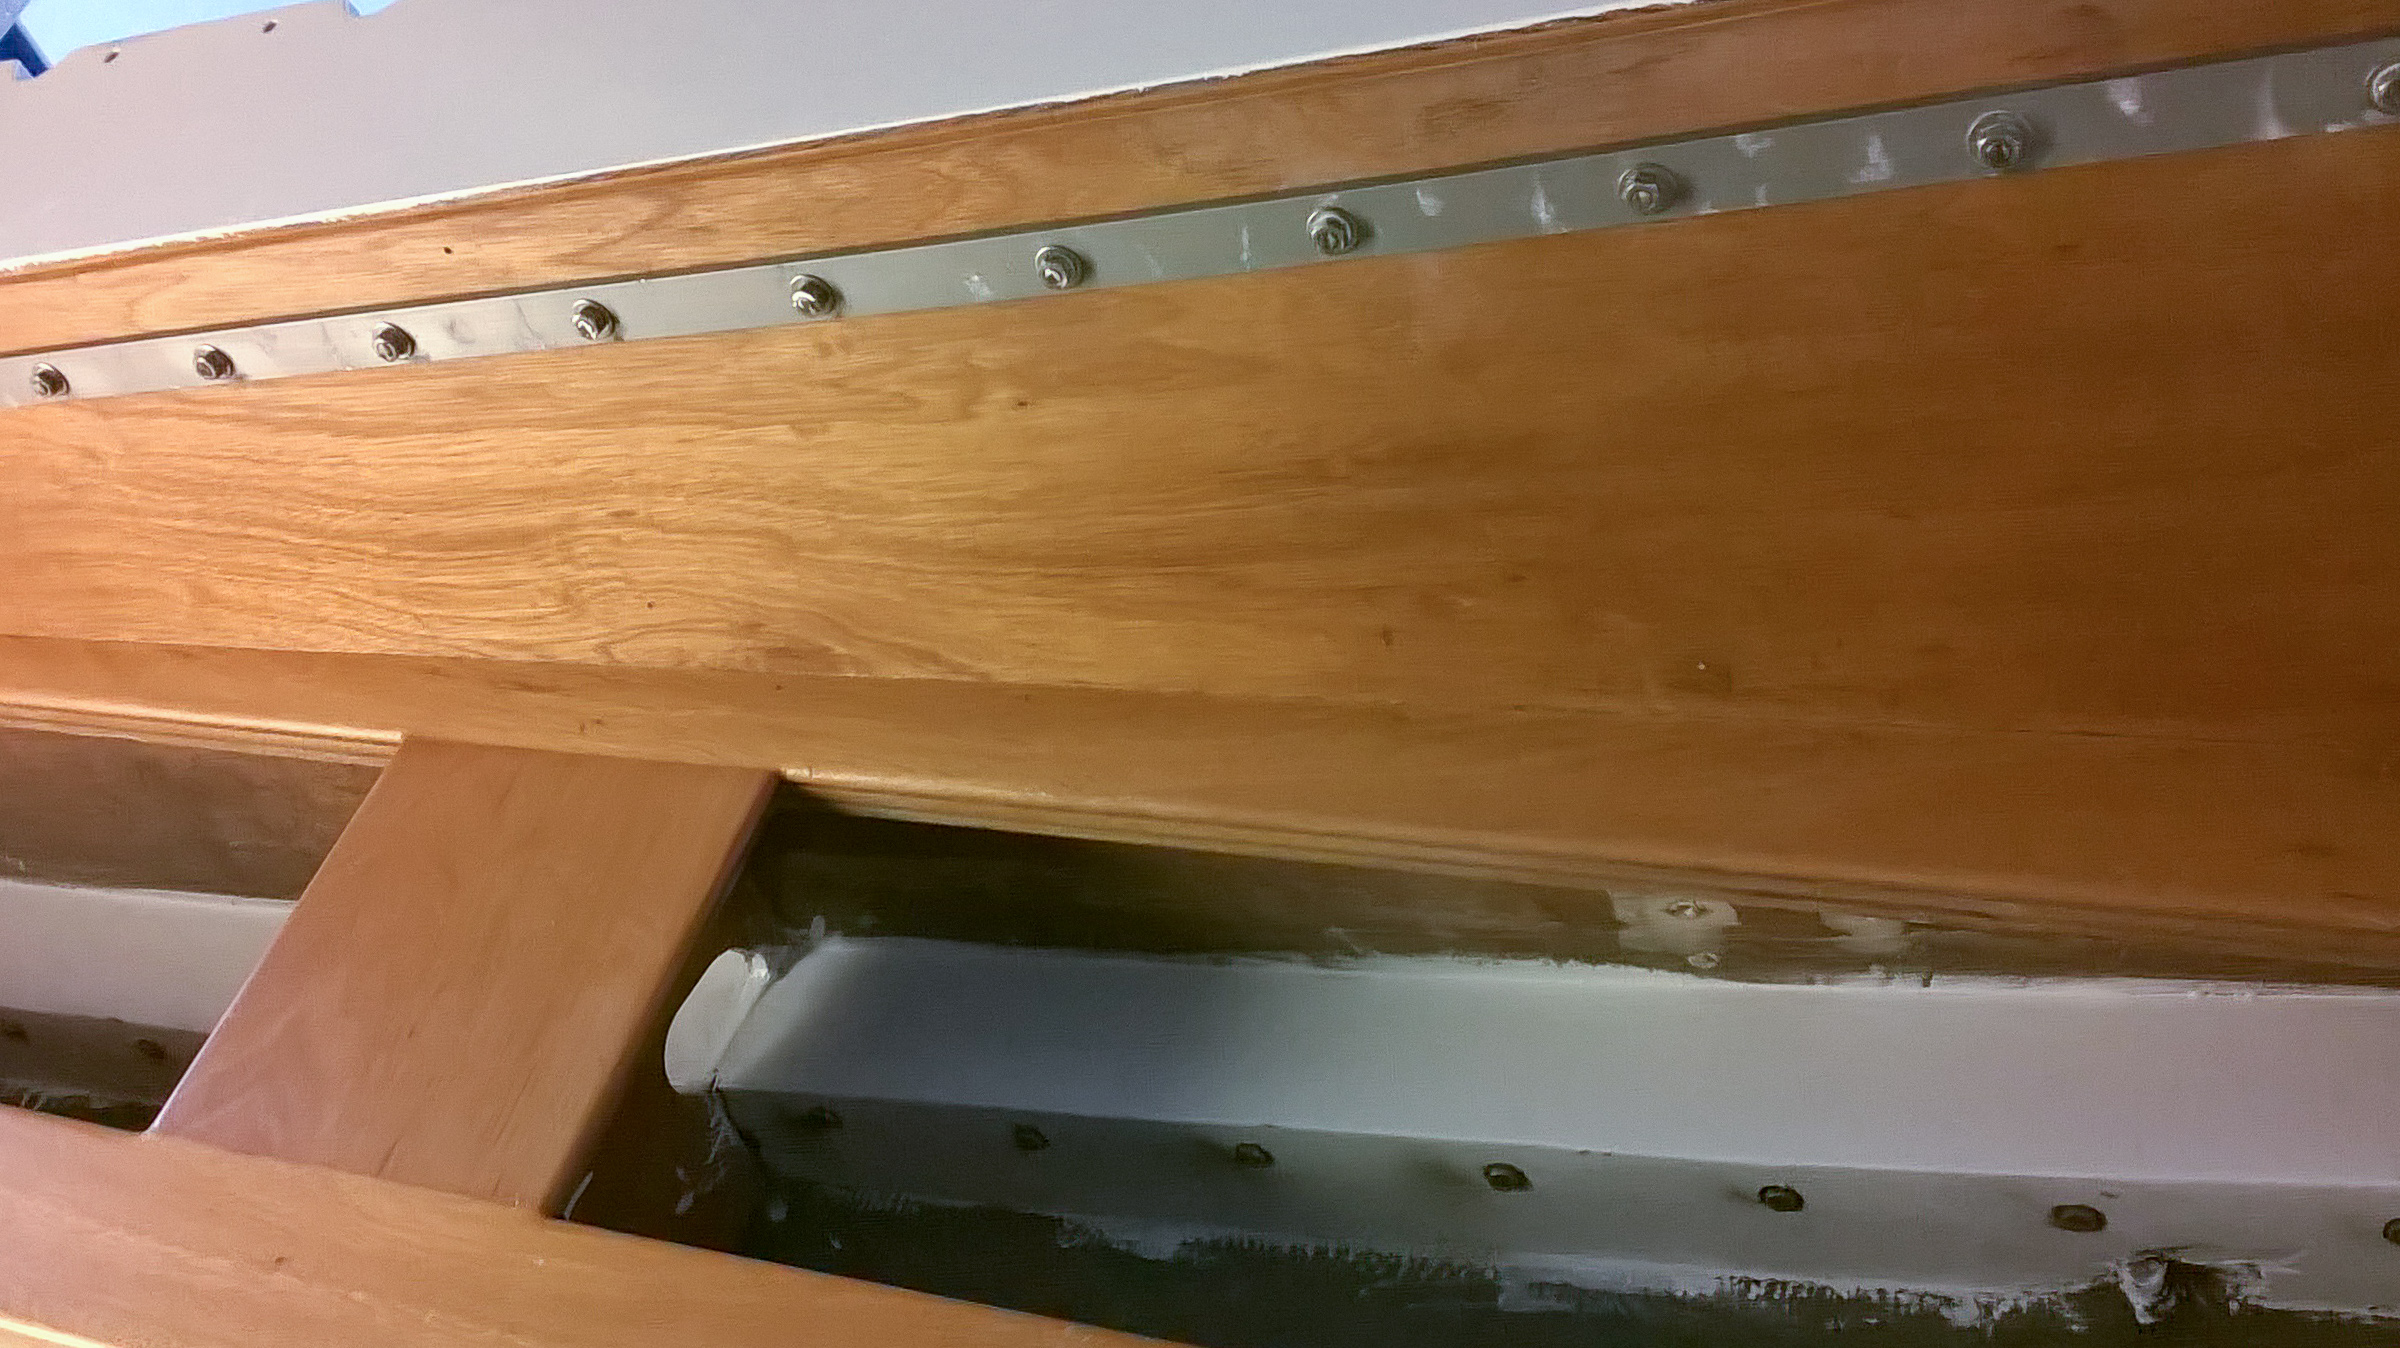
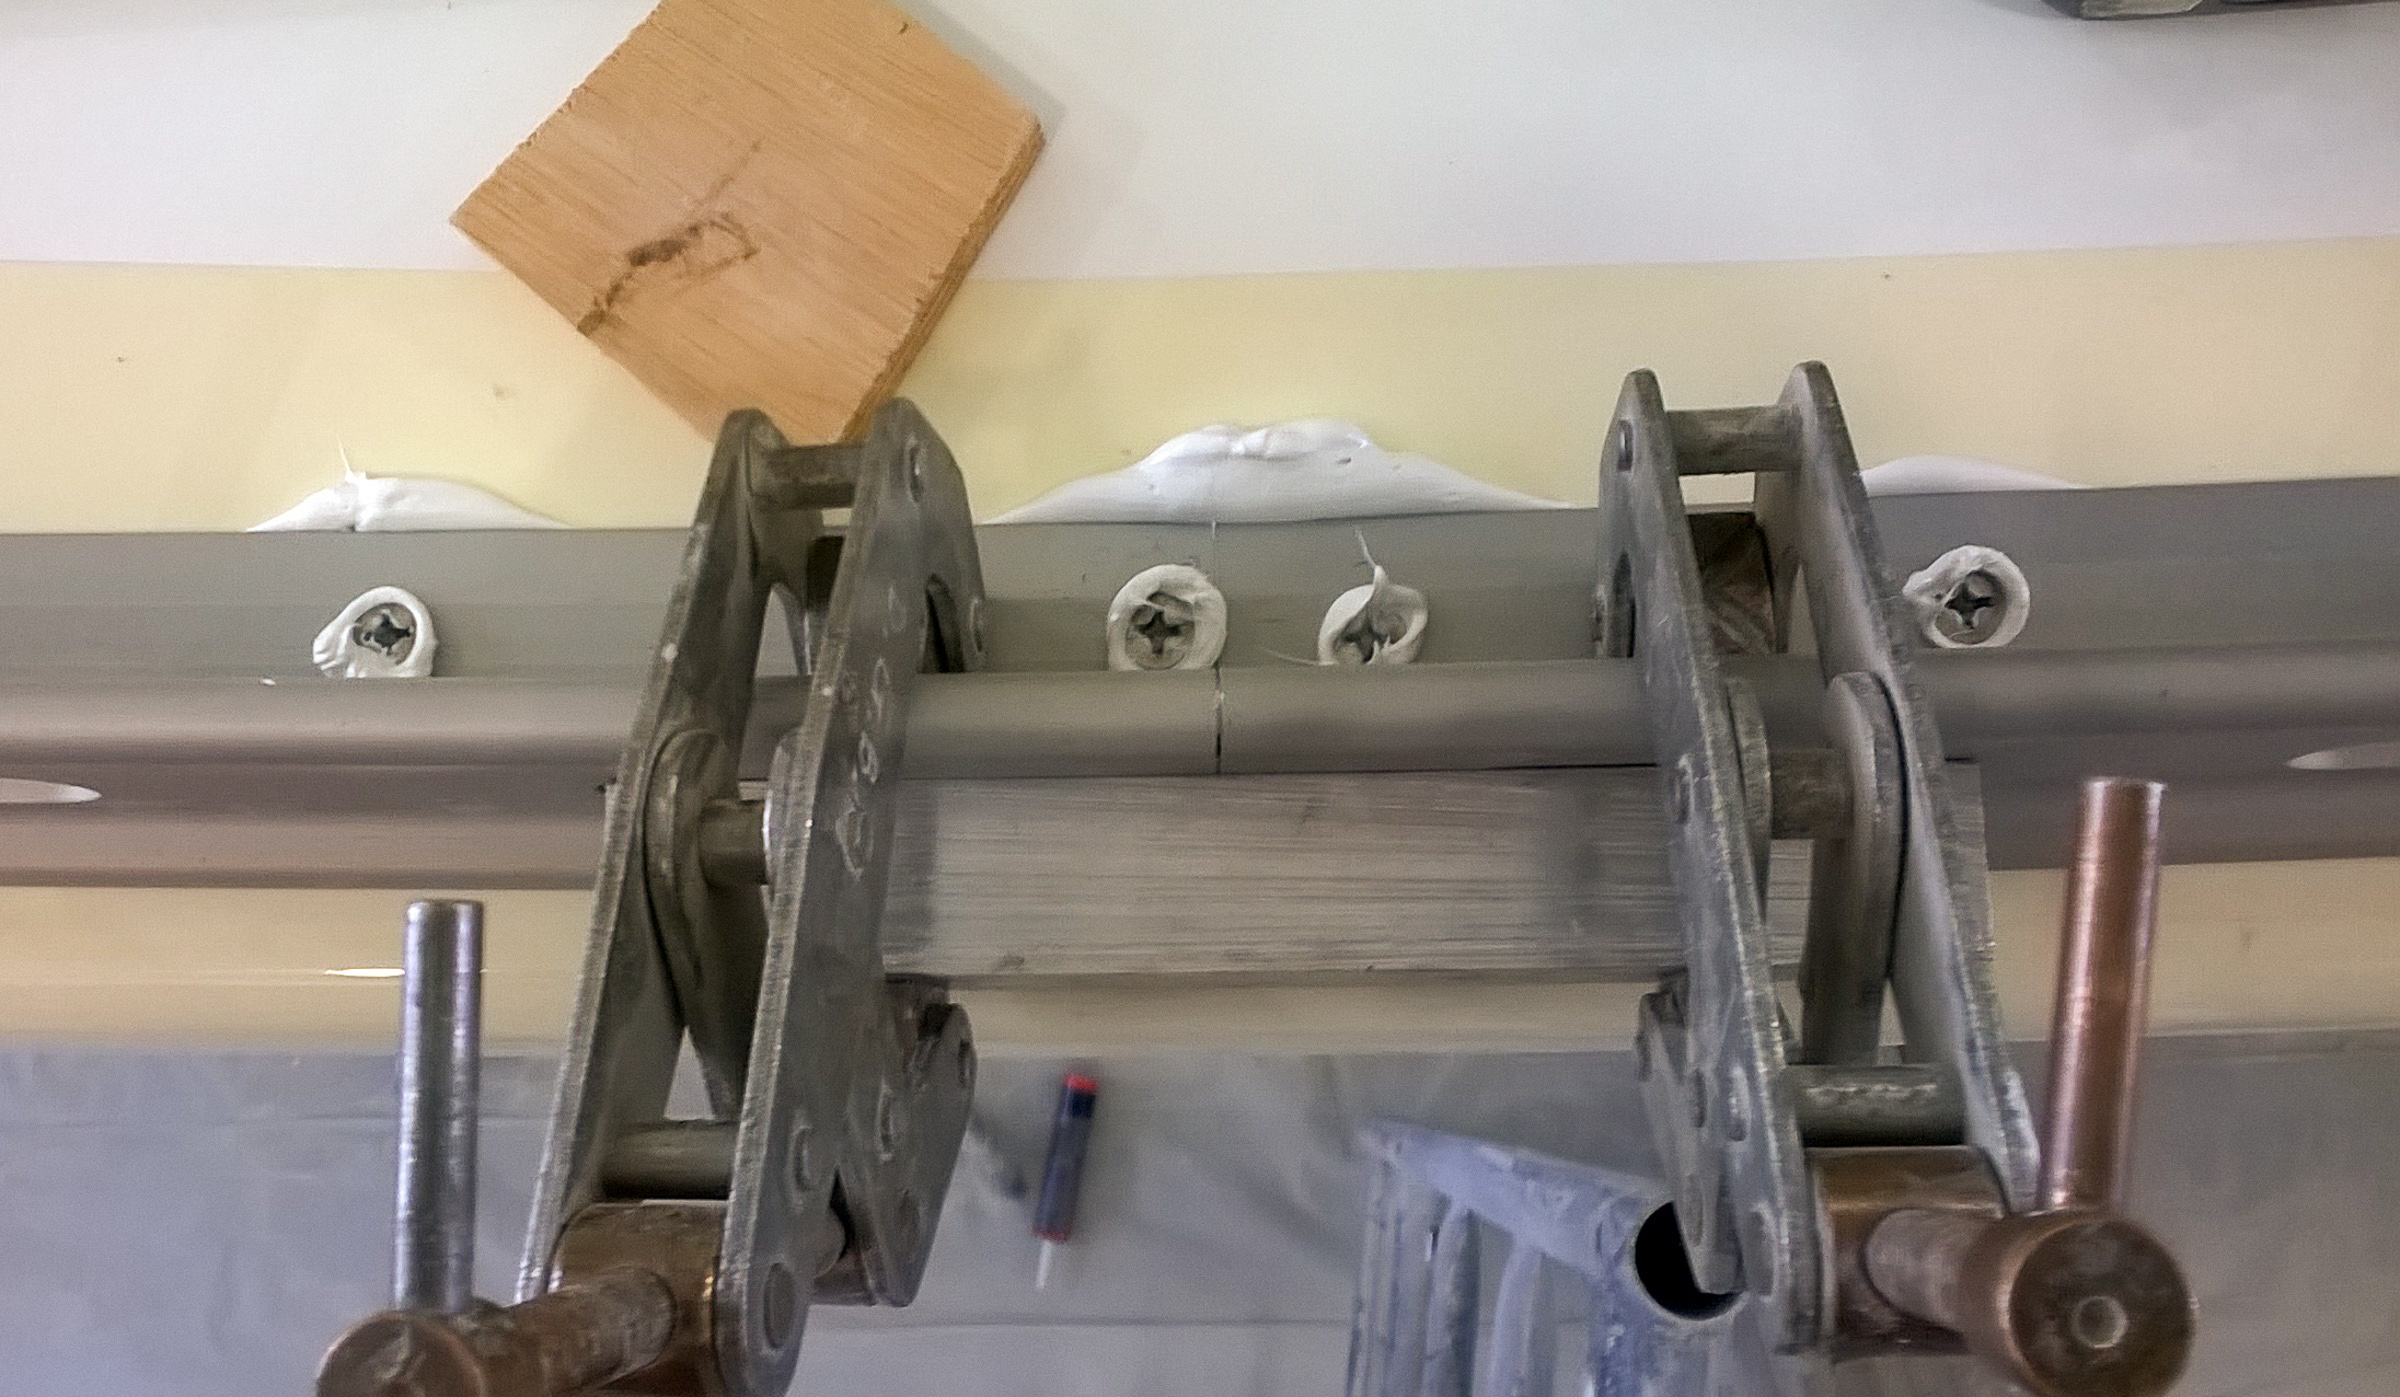
Wednesday we put the starboard toerail on. This required lots of caulk, 80-plus long machine screws and a lot of bolt tightening in awkward places. We also got the stern dinghy cleats and the upper brackets for the Monitor wind vane installed.
Today we put the port toerail on. 82 more bolts. It took just as long as the starboard rail.
Both rails are on.
How did we do all of this?
Bolt table, all of the bolts are organized by size.
Toe rail with caulk rings under around the bolt holes. The bolts are caulked too.After the bolts are tightened the extra caulk squishes out. The clamps are holding the forward and aft sections of the toe rail together.
The pictures show the basic steps except for bolt tightening and cleanup. All the gushed out caulk gets cleaned up. Everything that gets screwed into the boat gets lots of caulk and cleanup.
It is painting time. We checked out all of our colors, we opened the cans and looked, inside and out, and the colors still work. This is good news since I am not sure if you can send back paint if you don’t like it. The deck has been now been painted and it looks good.
The over spray makes the paper very sticky. The tape reinforcement lets Tom walk on the paper without tearing it.
We spent Sunday re-taping off the deck. There was enough over spray and dust on the old paper that we needed to cover it up or replace it. On Monday Tom and Chris painted the deck with the color and then with clear coat. This took them all day. Since they did not want us under foot and the paint fumes are toxic we spent the day out side working on the mast and in the basement sorting parts for reassembly.
When we go back on Sunday the deck will be done and we will start to put the hardware back on Gypsy. But first, remember all those small pieces of tape we put over all the holes we cast? We have to find them and carefully poke out the tape. Then we can put on hardware.
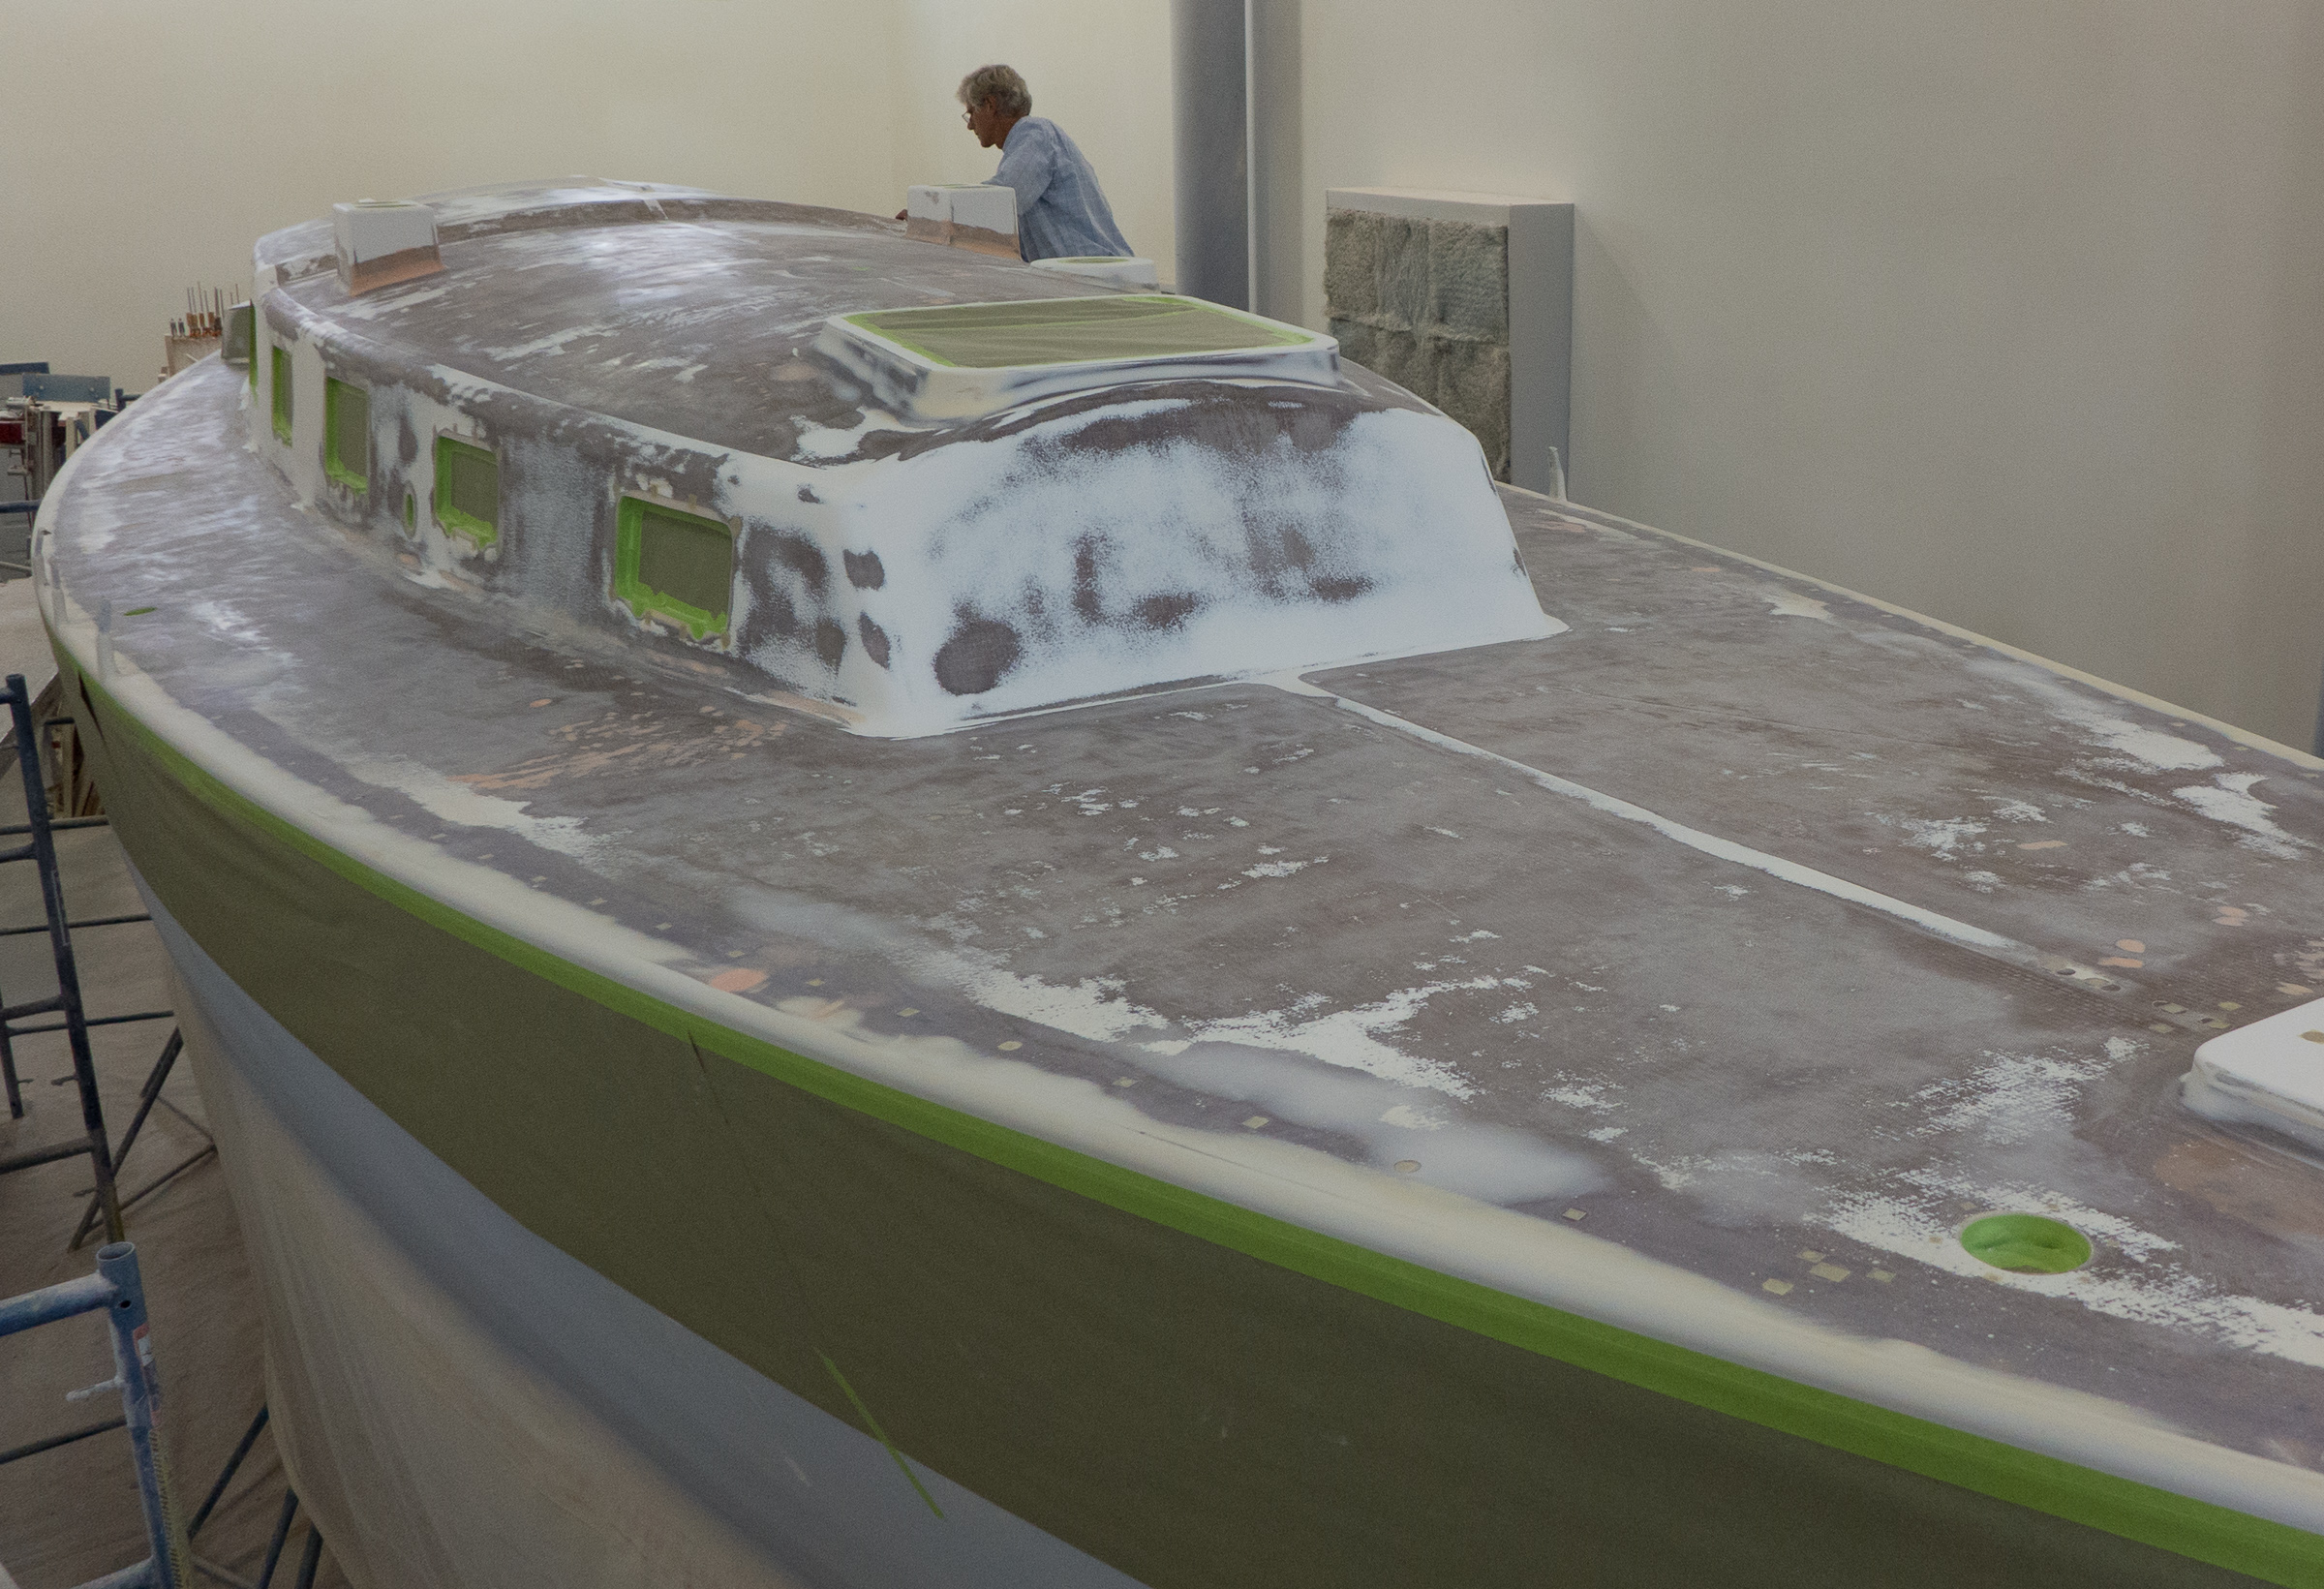
We had a couple of parameters we had to work around this weekend. The boat is all sealed off due to painting. Tom got the final coat of sealer on the hull and has been busy sanding all the remaining imperfections before applying the paint primer. Meanwhile, we were pretty much banished from the boat. This wouldn’t have been so bad except that sanding a hull means tons of dust and the temperatures have been in the upper 90s. So outside or into the basement we went.
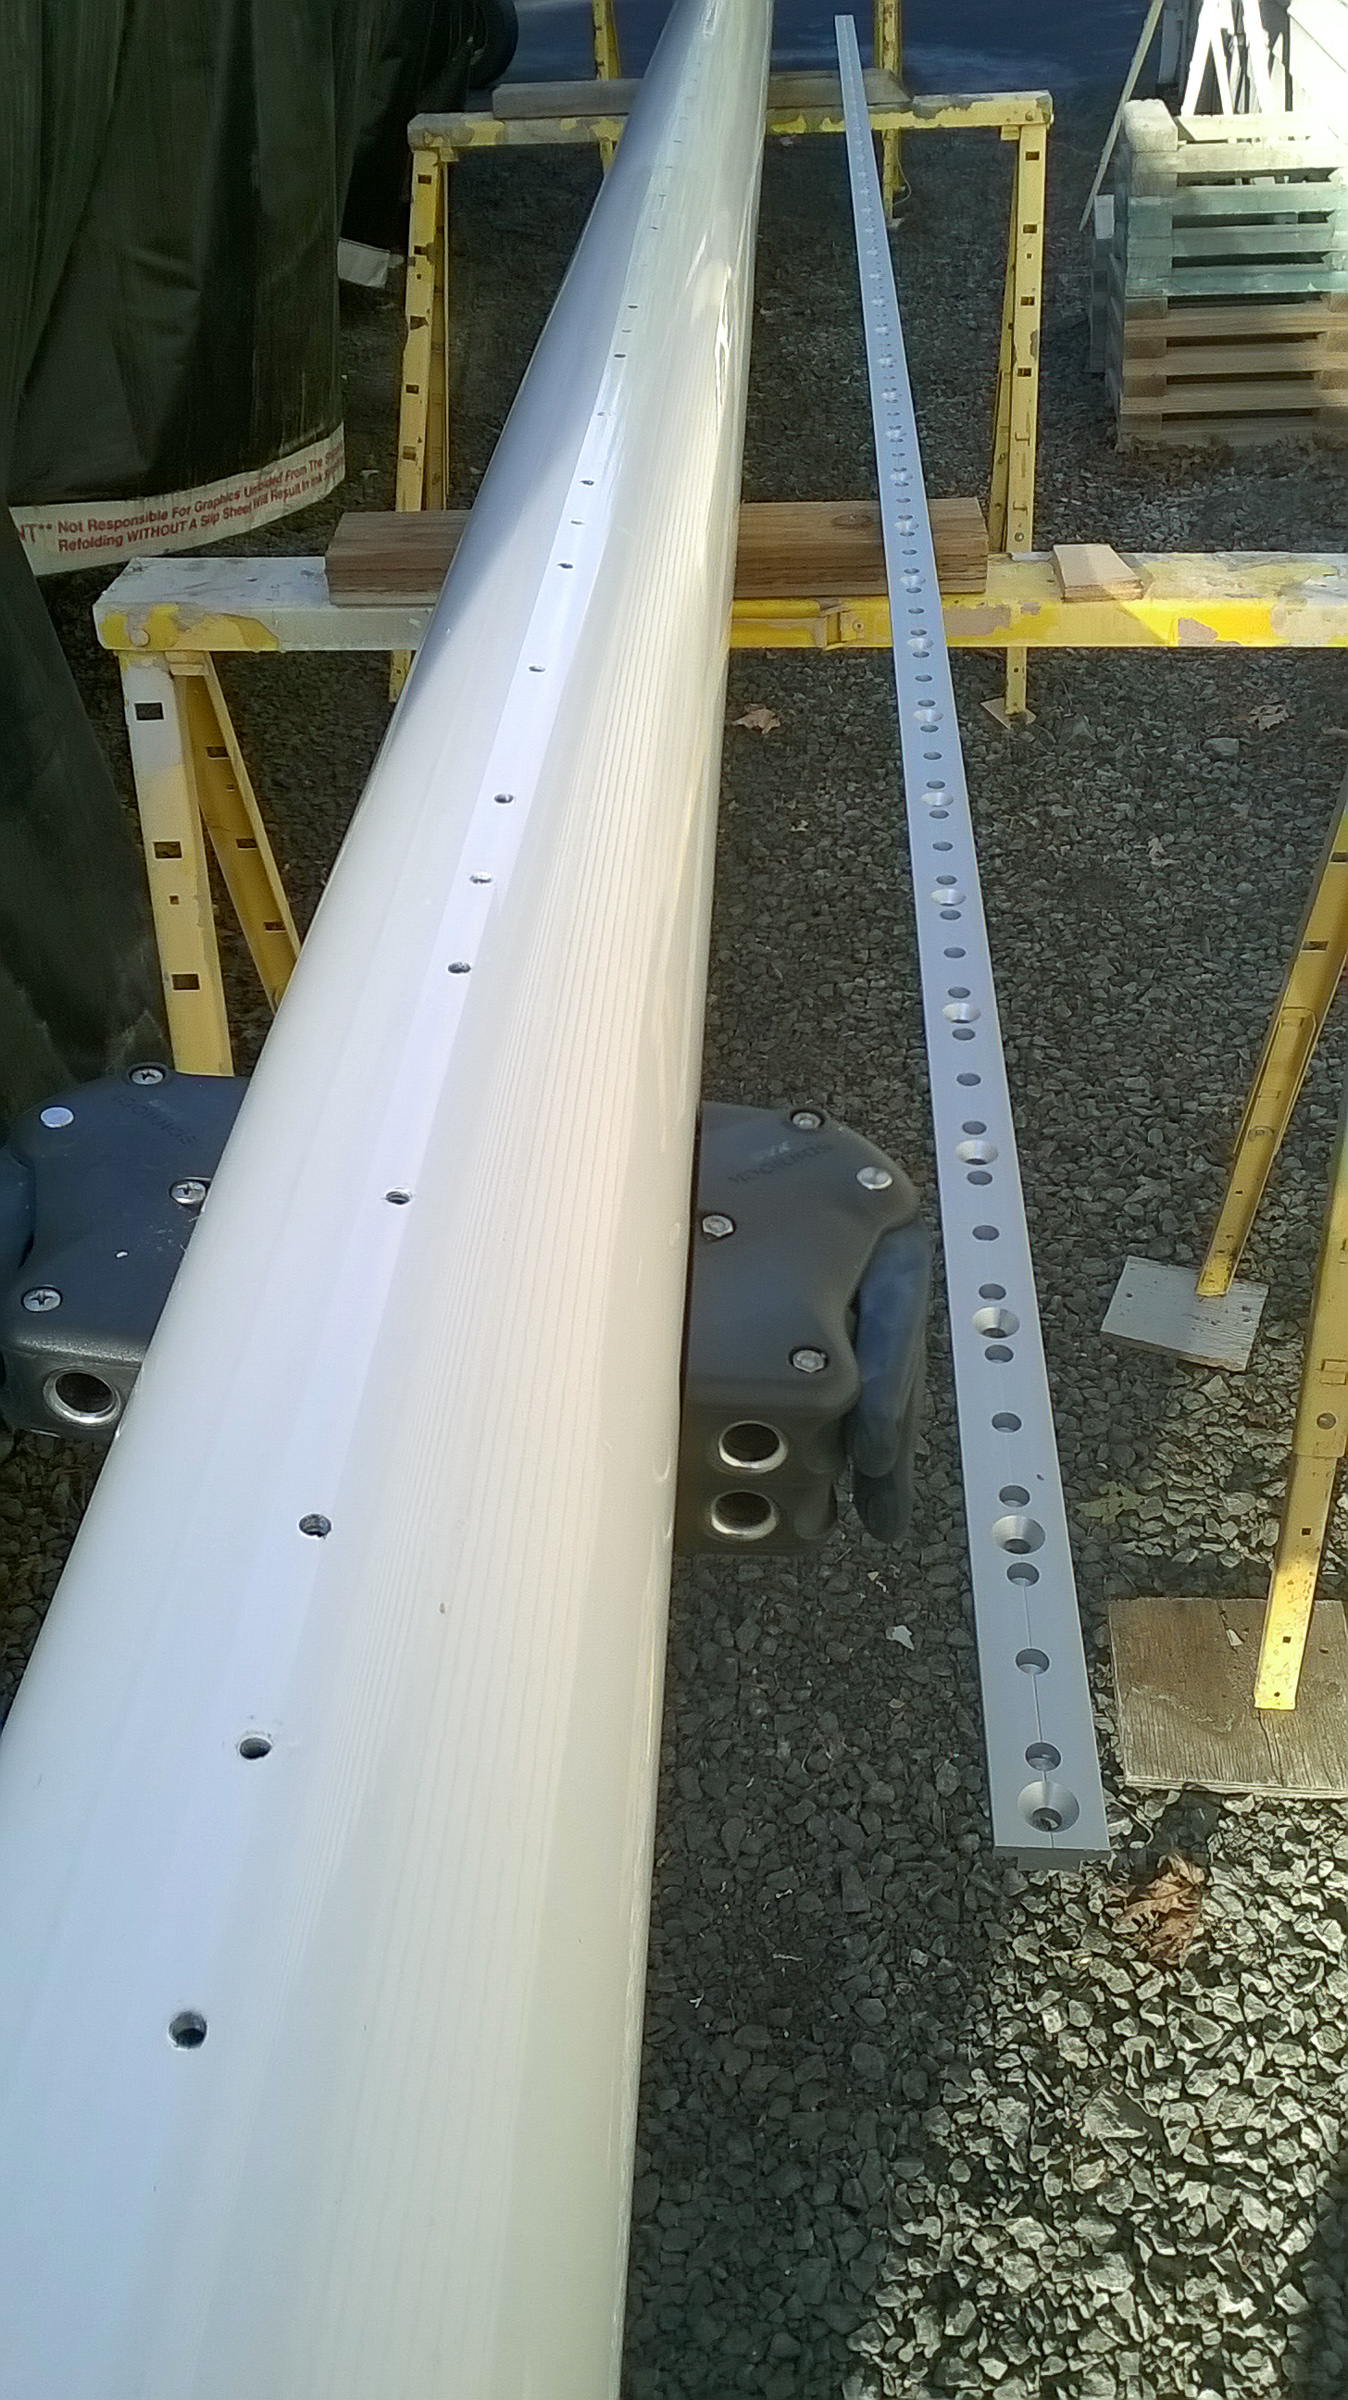
Bill’s project: the mast. It was outside but we did manage to move it into a shadier spot closer to the shop than it had been in. Bill worked on several projects on the mast: installing the new spinnaker track and grinding a pair of “ears” off up by the spreaders.
The mast and the new track for the spinnaker pole. Very few of the old holes lined up, so more holes were drilled.
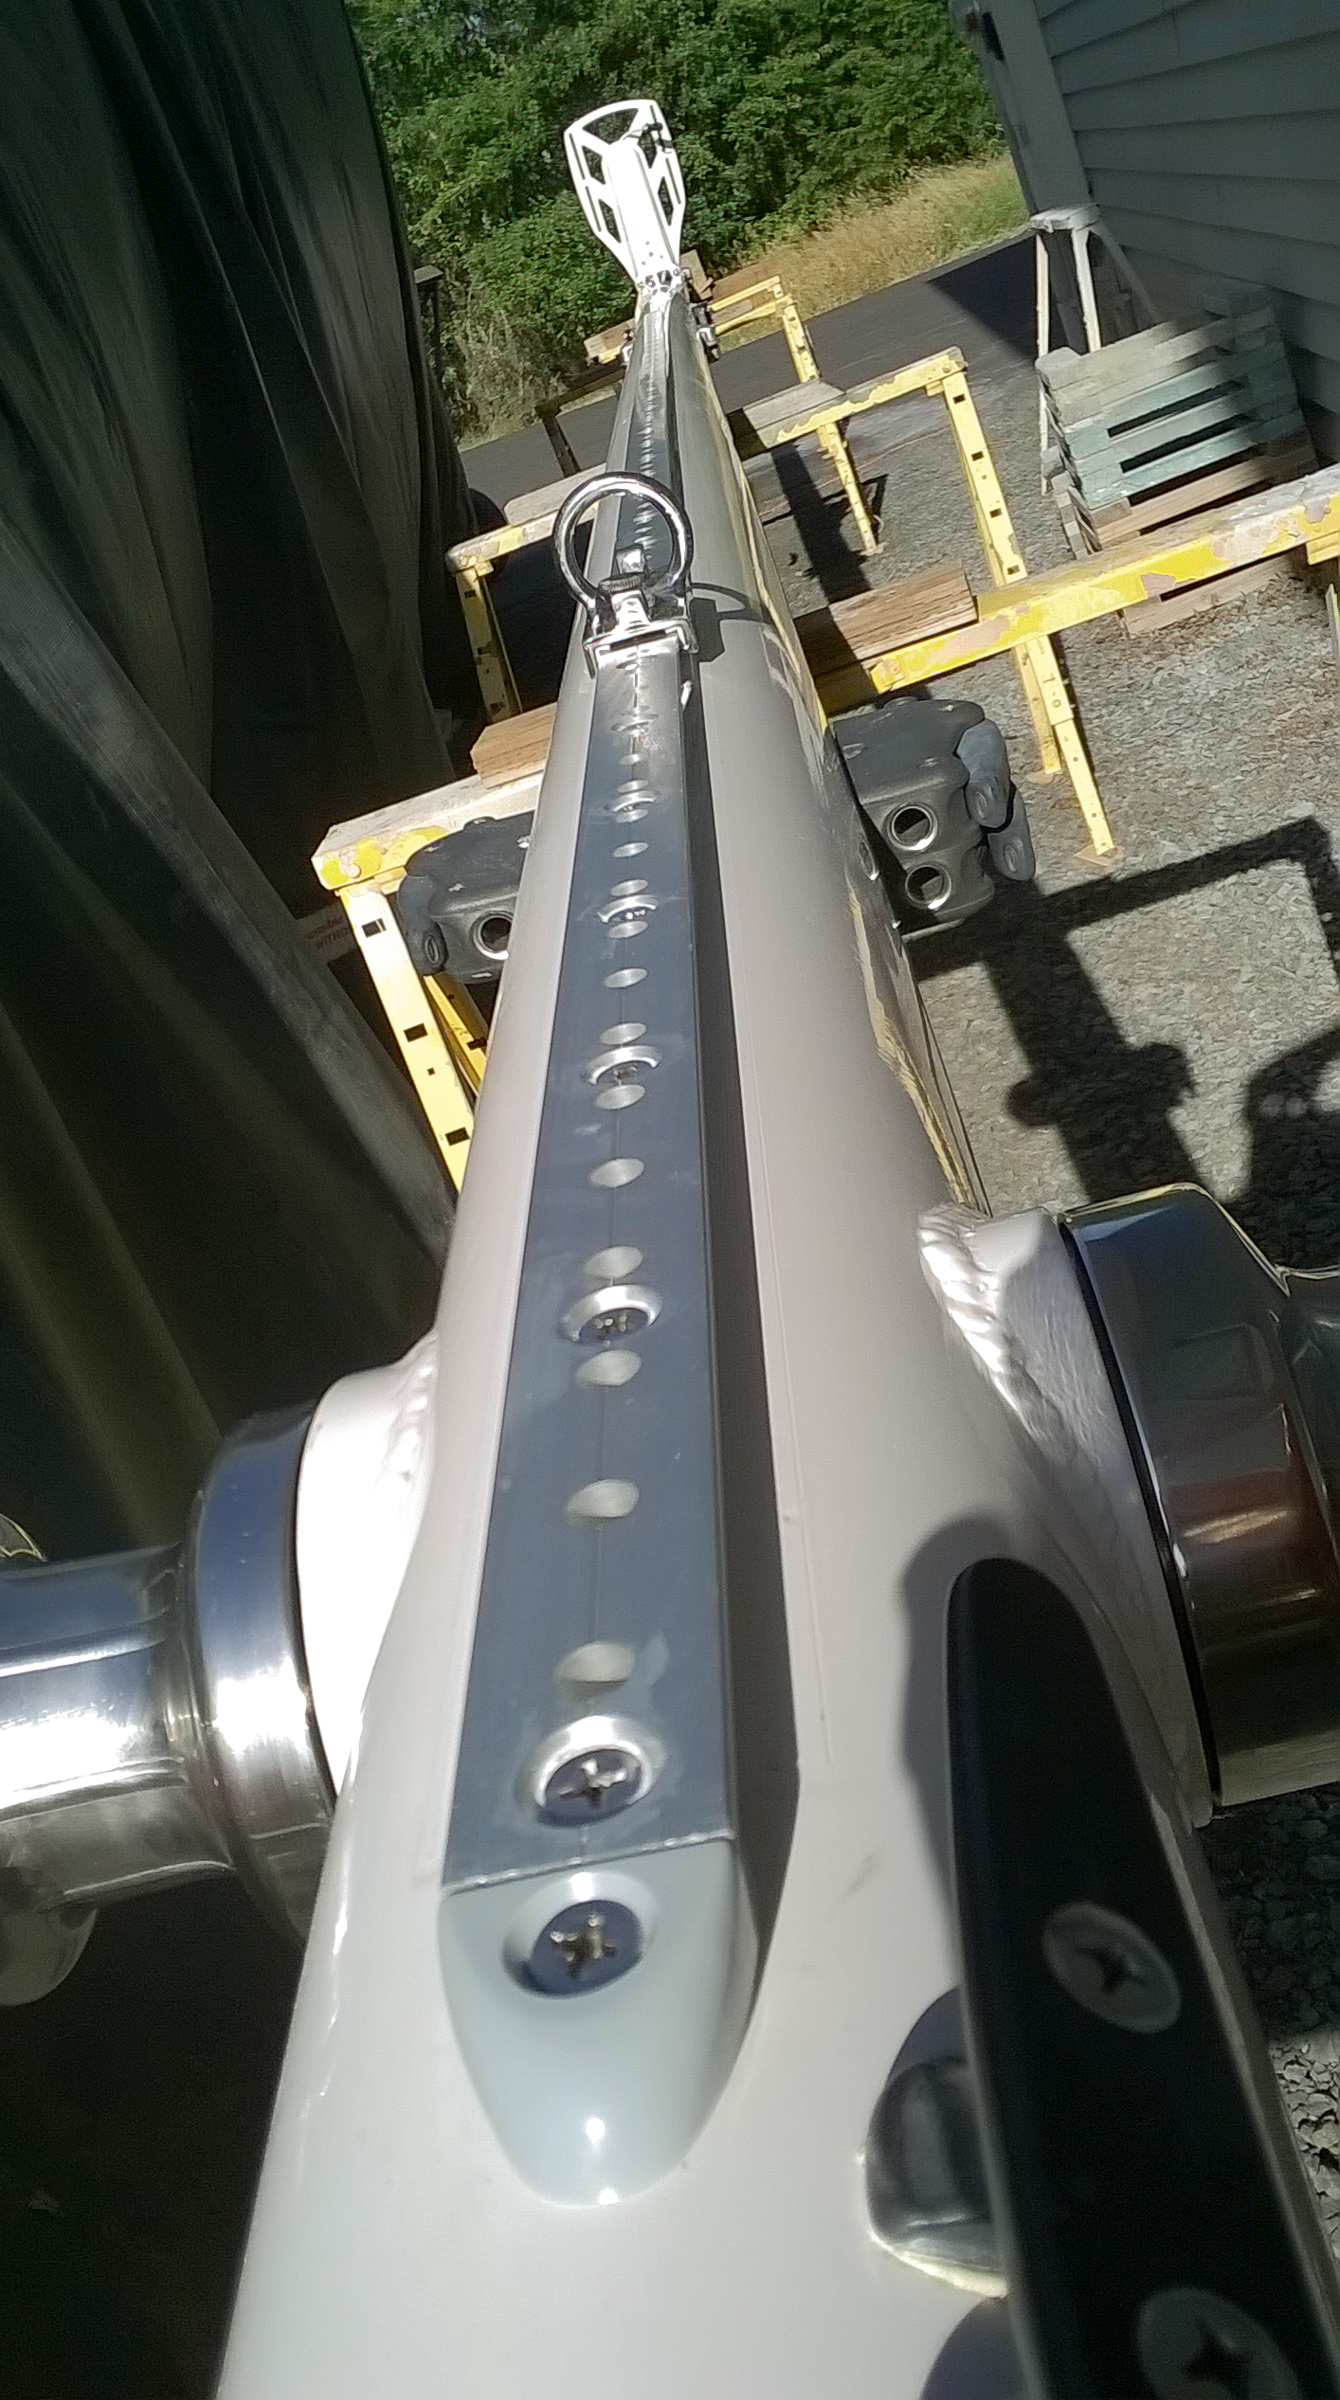
Here’s what it looks like installed.
New track on the mast with new ends. The lacrosse shaped thing towards the end is the radar mount.
The radar mount platform was installed. The idea was to install the radar to the platform and then take them off the mast as a unit for transport. The only snag was that the cable that goes to the radar could not be unhooked while the radar was bolted on. Easily fixed, but it will mean one more thing that will have to be put together in the yard when the boat is ready to float again.
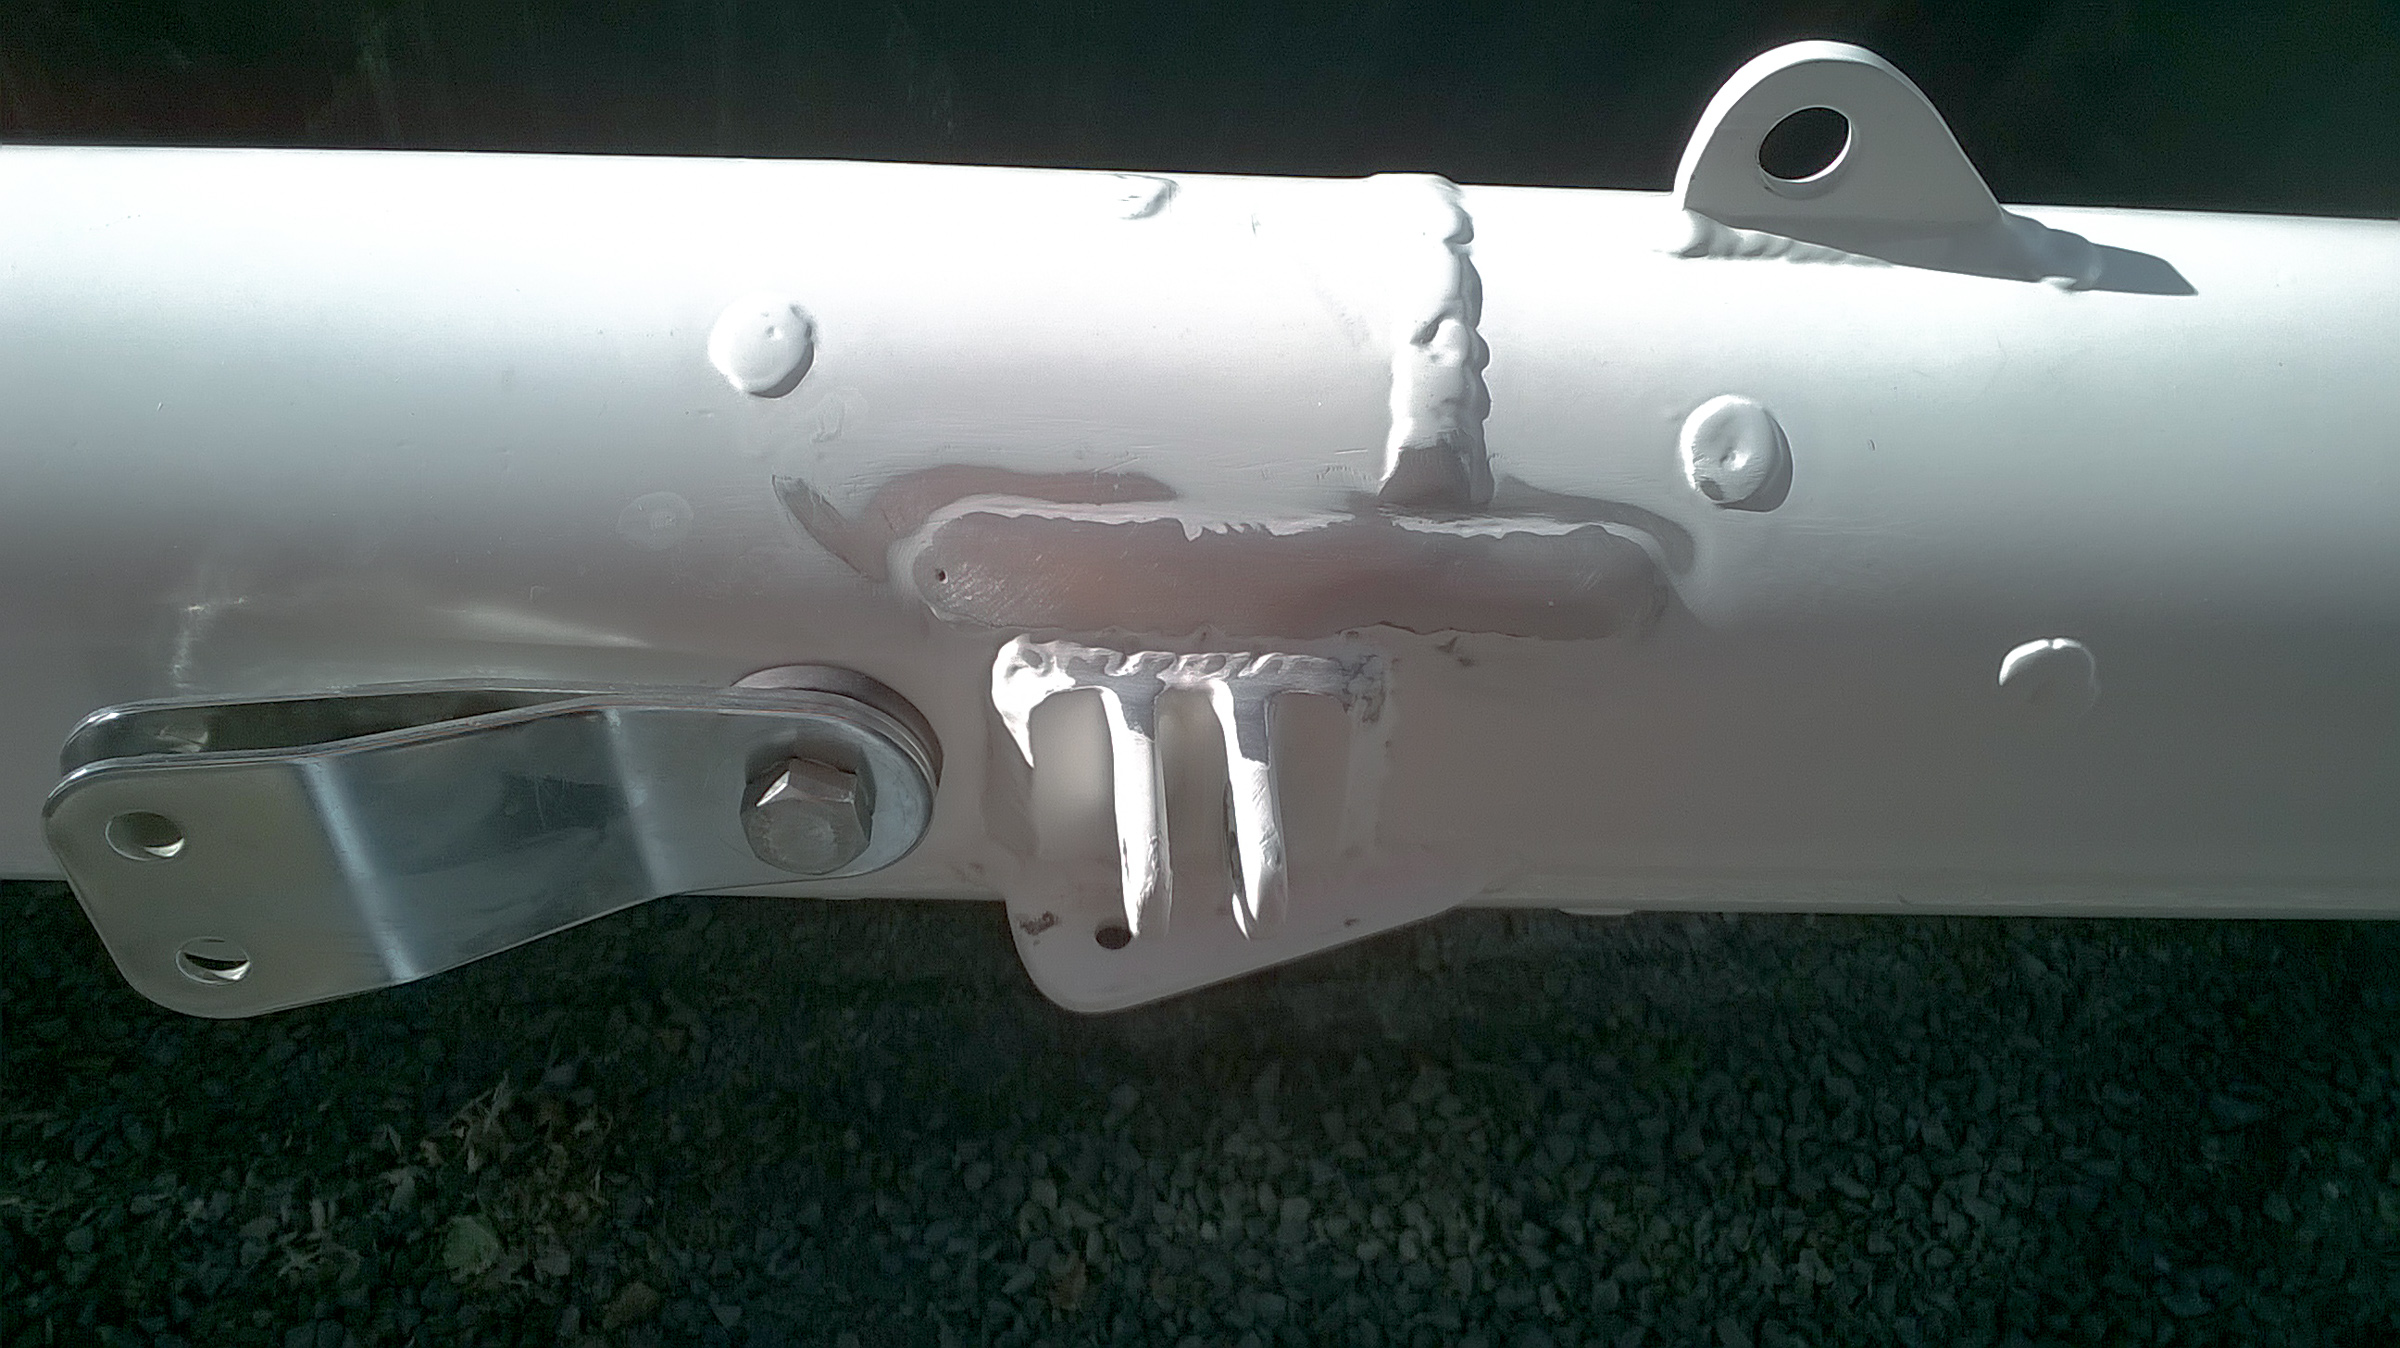
The “ears” on the mast were major line snaggers, so Bill got rid of the ones on the front of the mast. We’re keeping the aft set for when we add lazy jacks (lines that will catch the sails when they are dropped).
The horizontal scar looking thing – no more forward ears. The vertical things under it are where the spreaders attach.
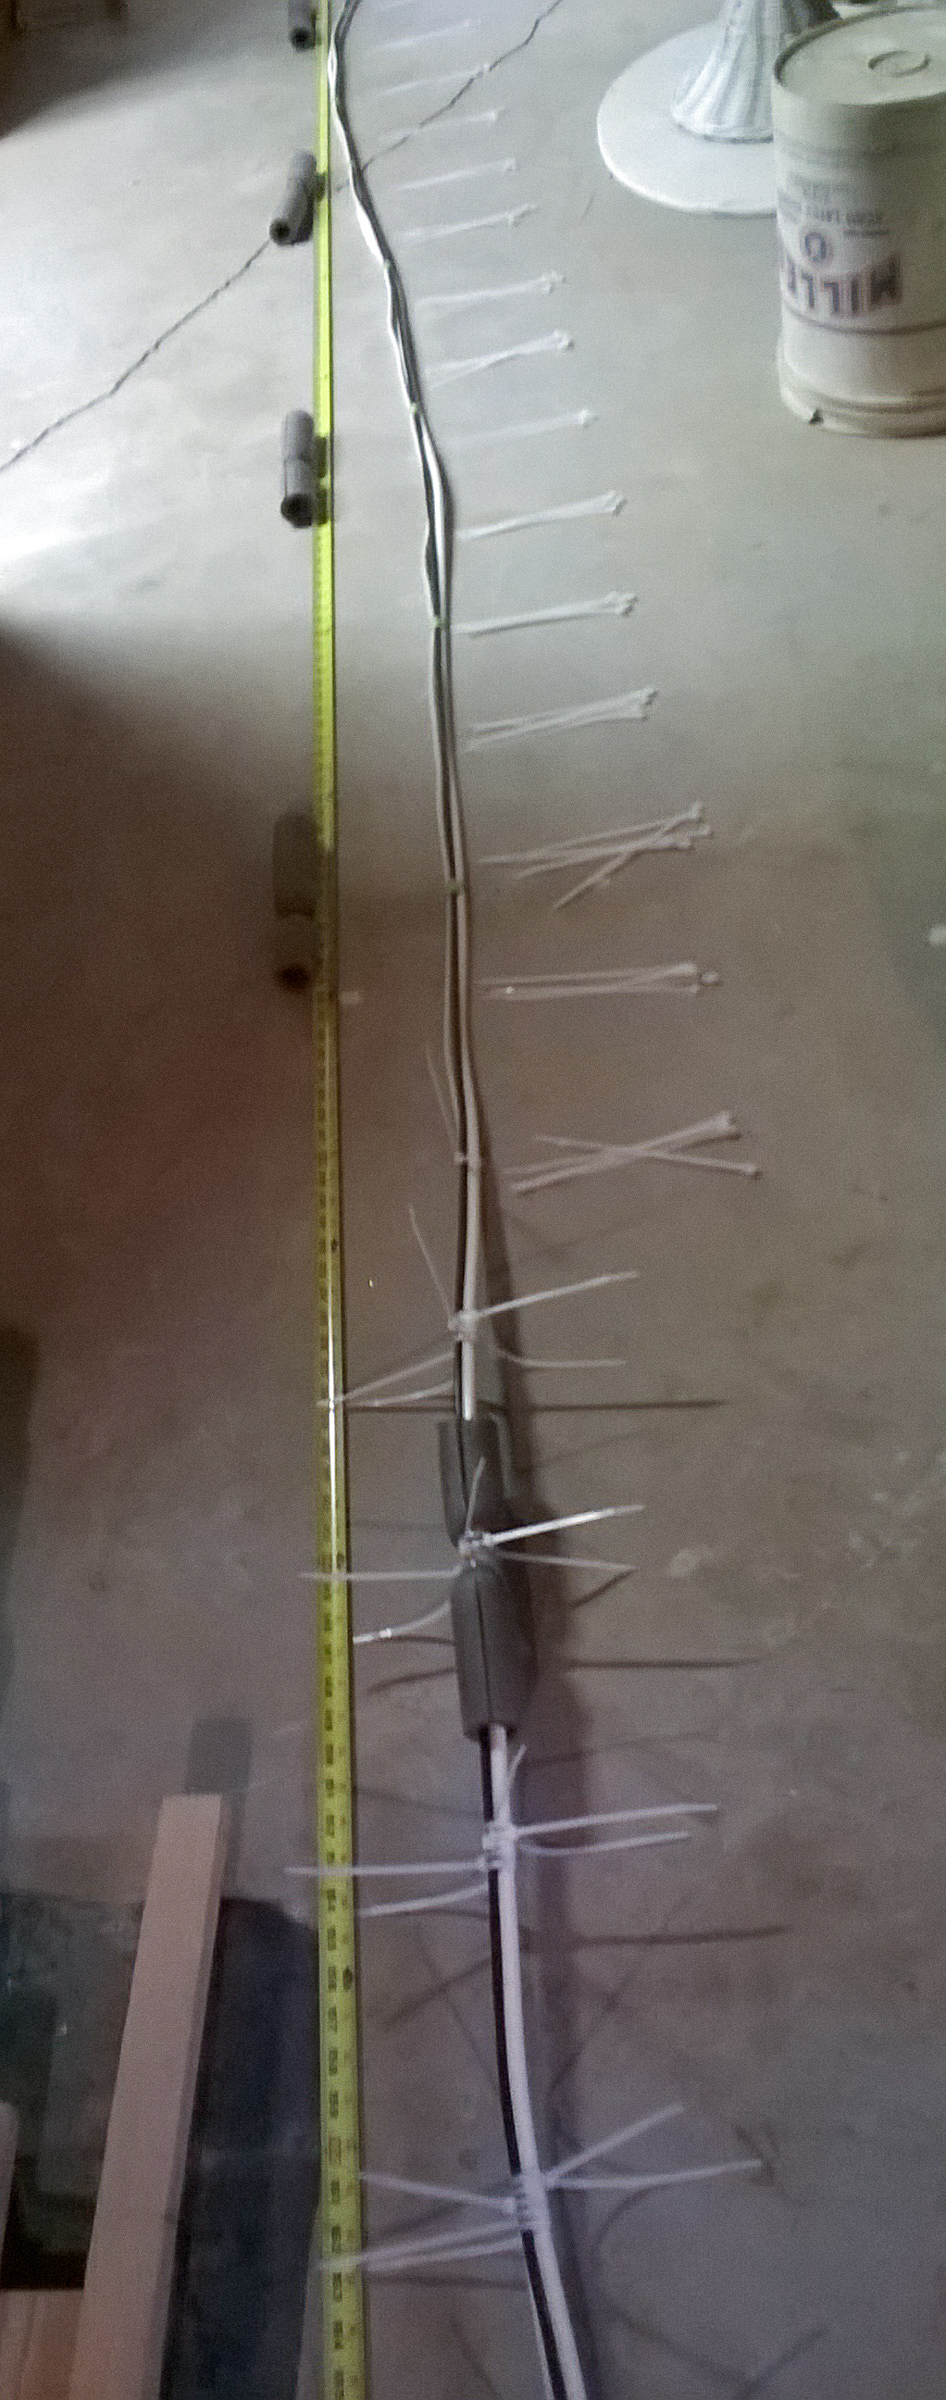
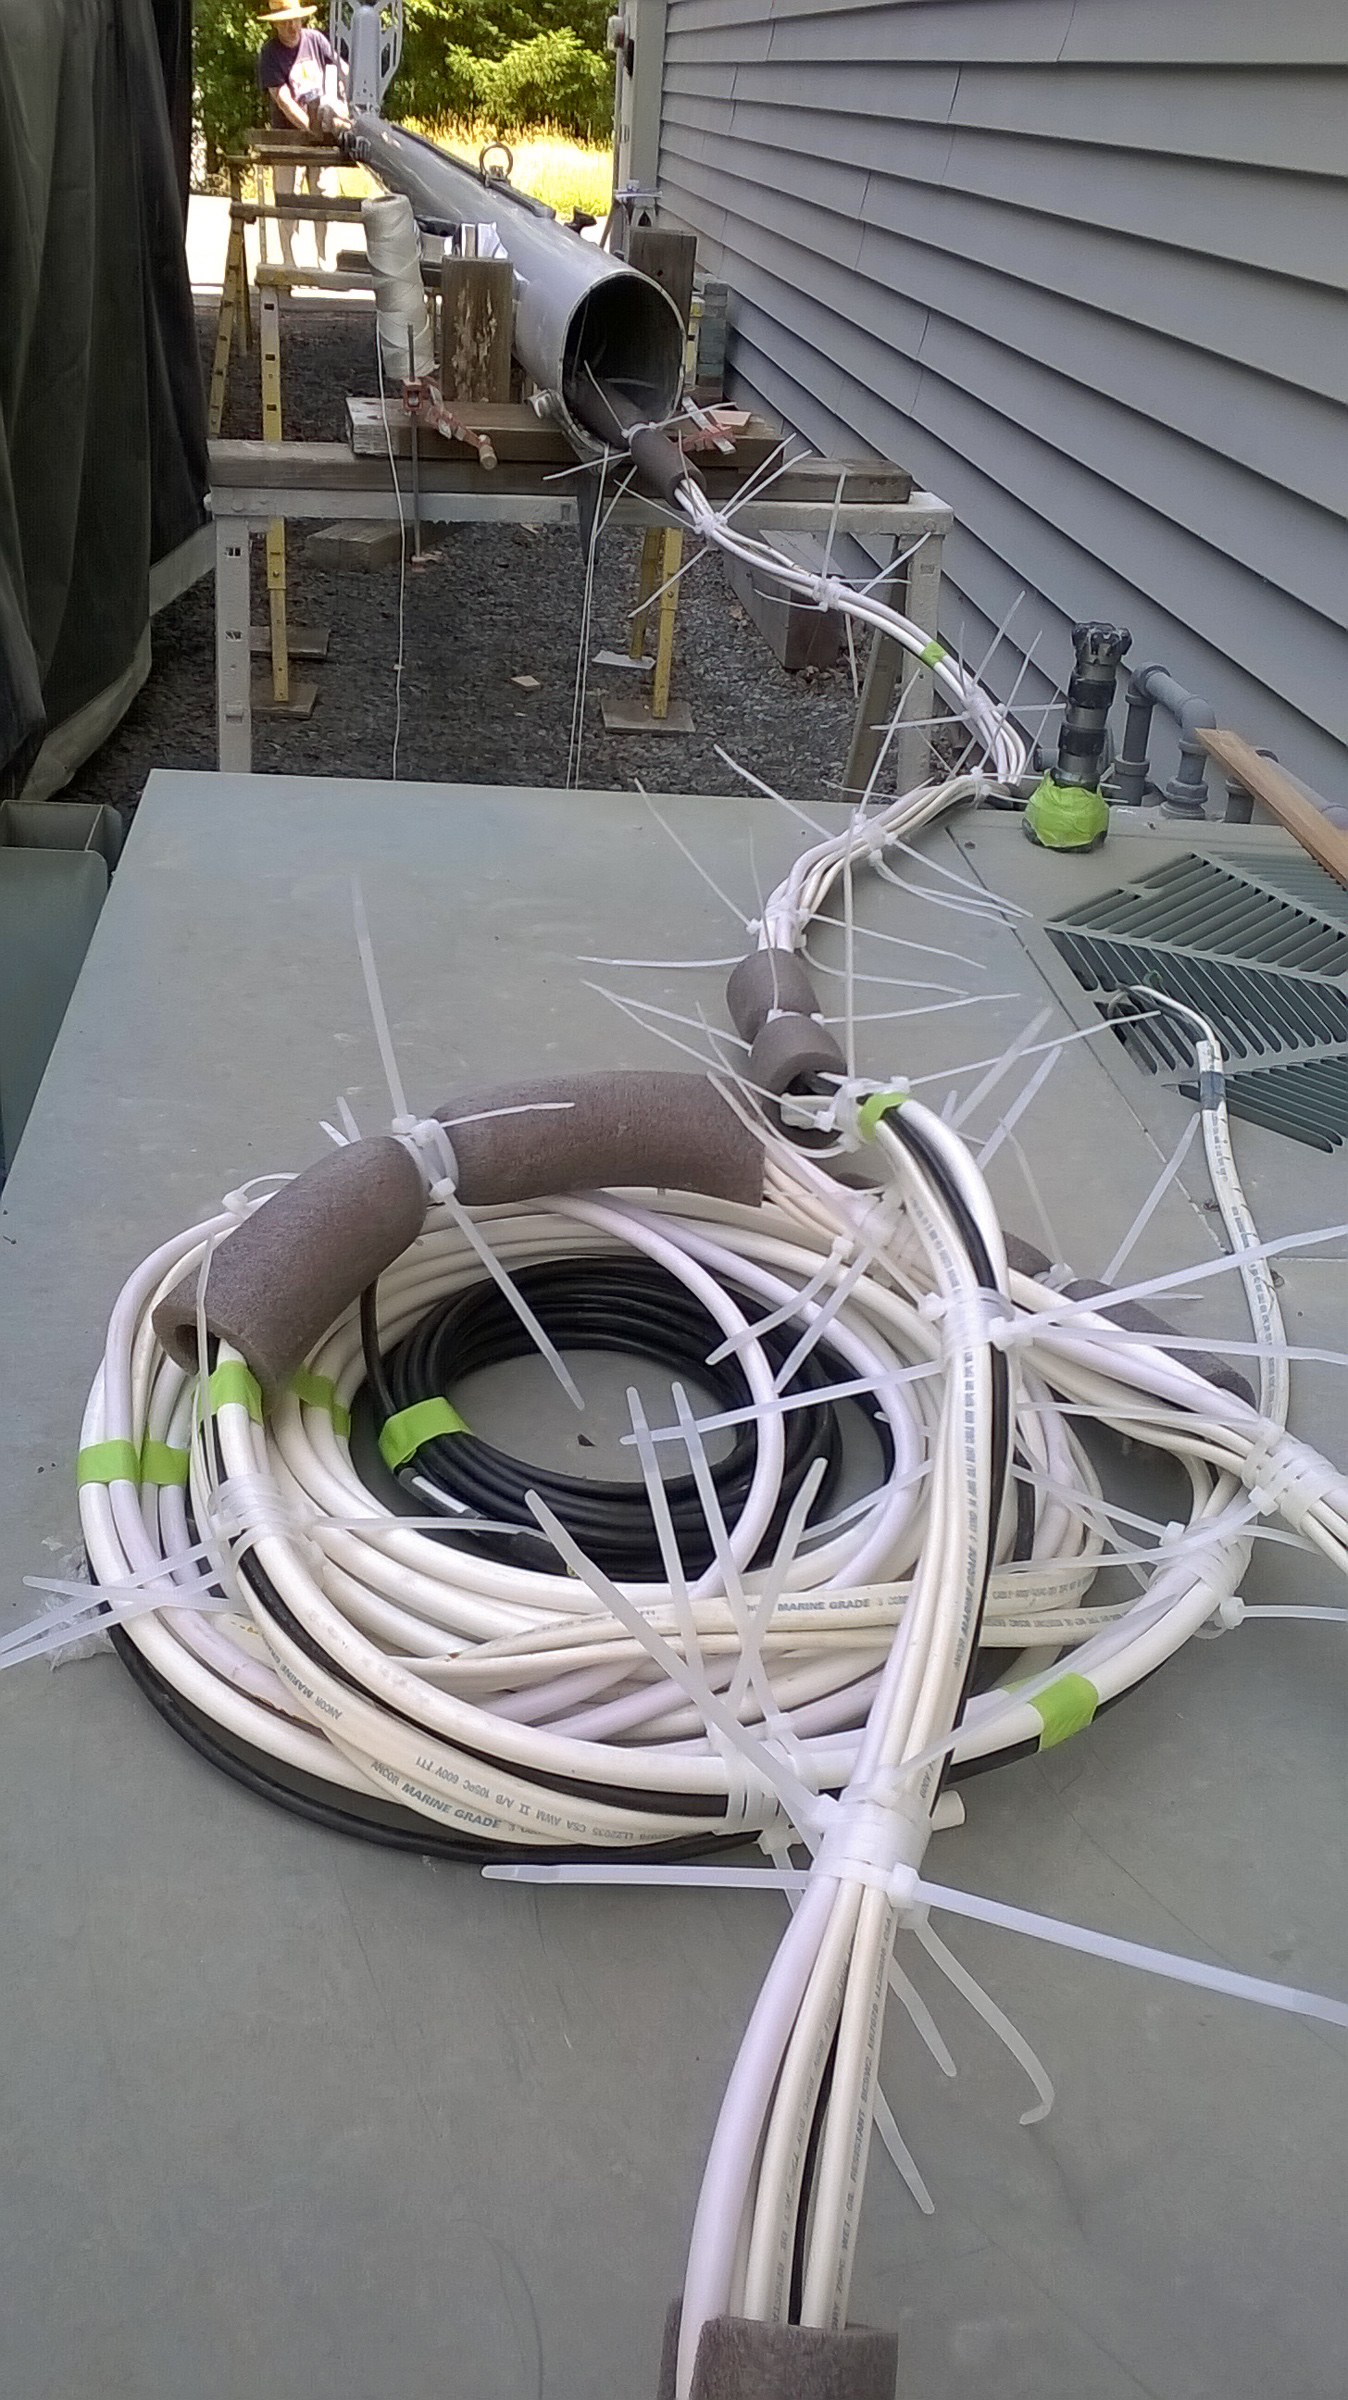
Meanwhile, in the cool of Tom’s basement, Nina got to work on the wires that go up the mast. So they don’t thwap around inside the mast, they had to be bundled.
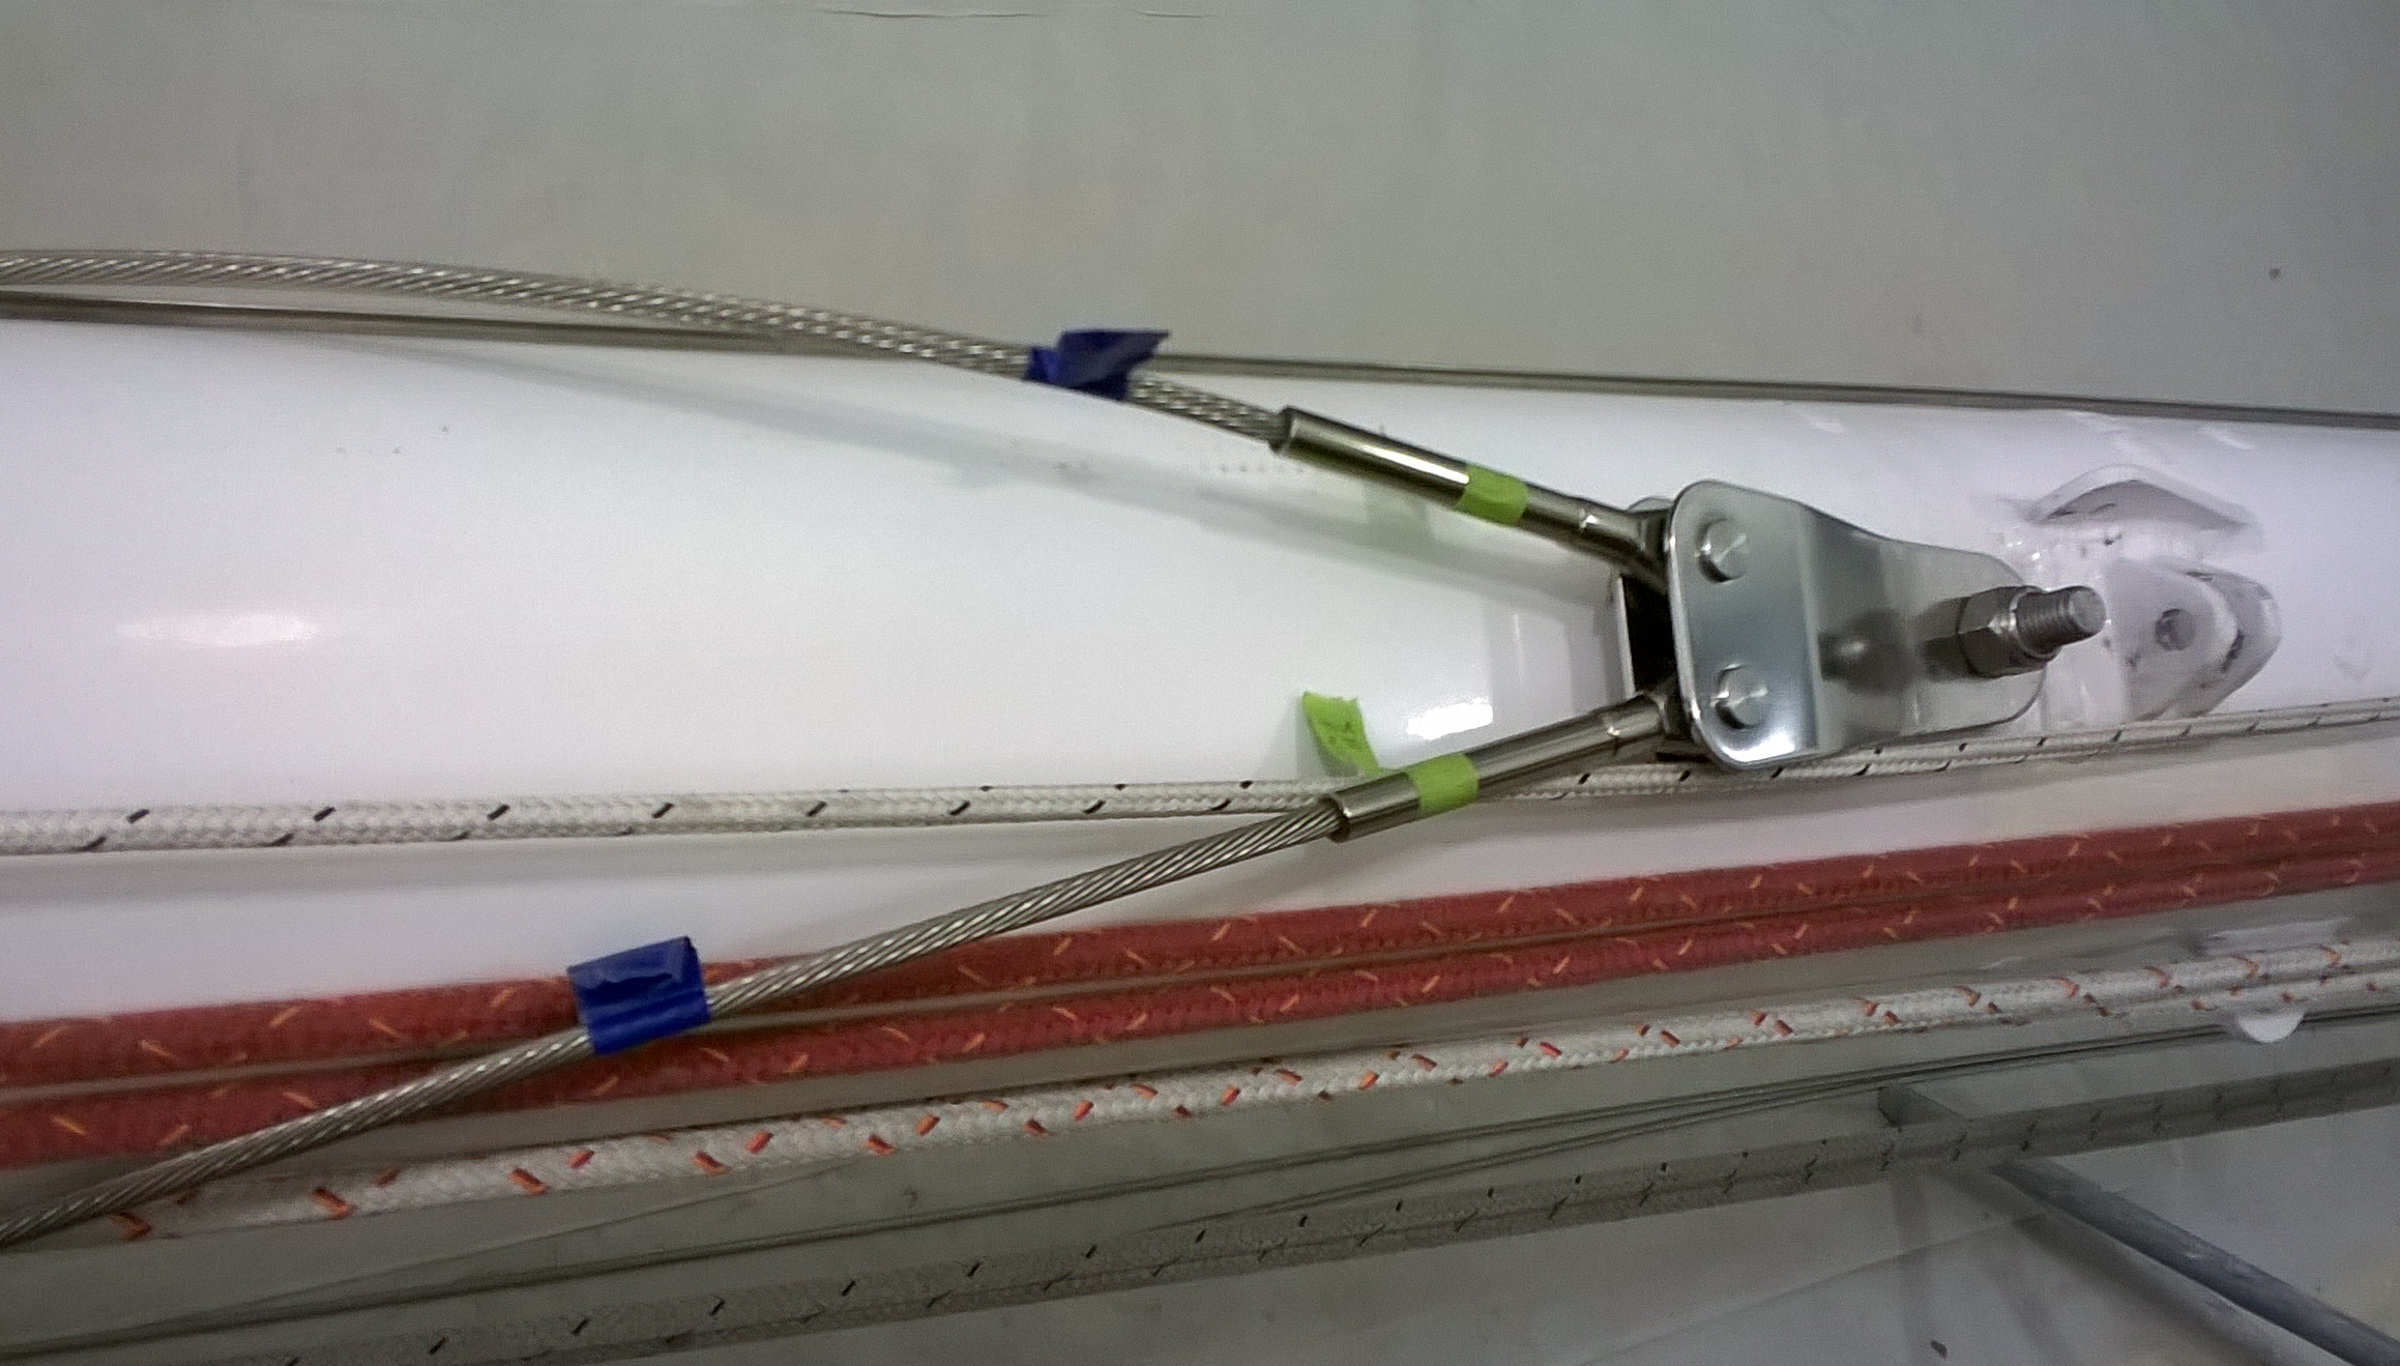
Wrapping the mast wires with cable ties and pipe insulation. Five cable ties, every 8 inches, with pipe wrap every fourth bunch. The lowers have been installed and the upper set are lined up waiting to be tied.
Yes, it was cooler in the basement, but crawling around on your hands and knees on a concrete floor for hours is rough when you are passed middle aged. After 287 cable ties, it was ready to be installed, or stuffed up the mast.
Mast wiring ready to go. Messenger lines were tied to the top and the middle set of wire to help pull them up. We did have to remove the middle compression post to get everything up to the top, but eventually everything ended up in the correct places.
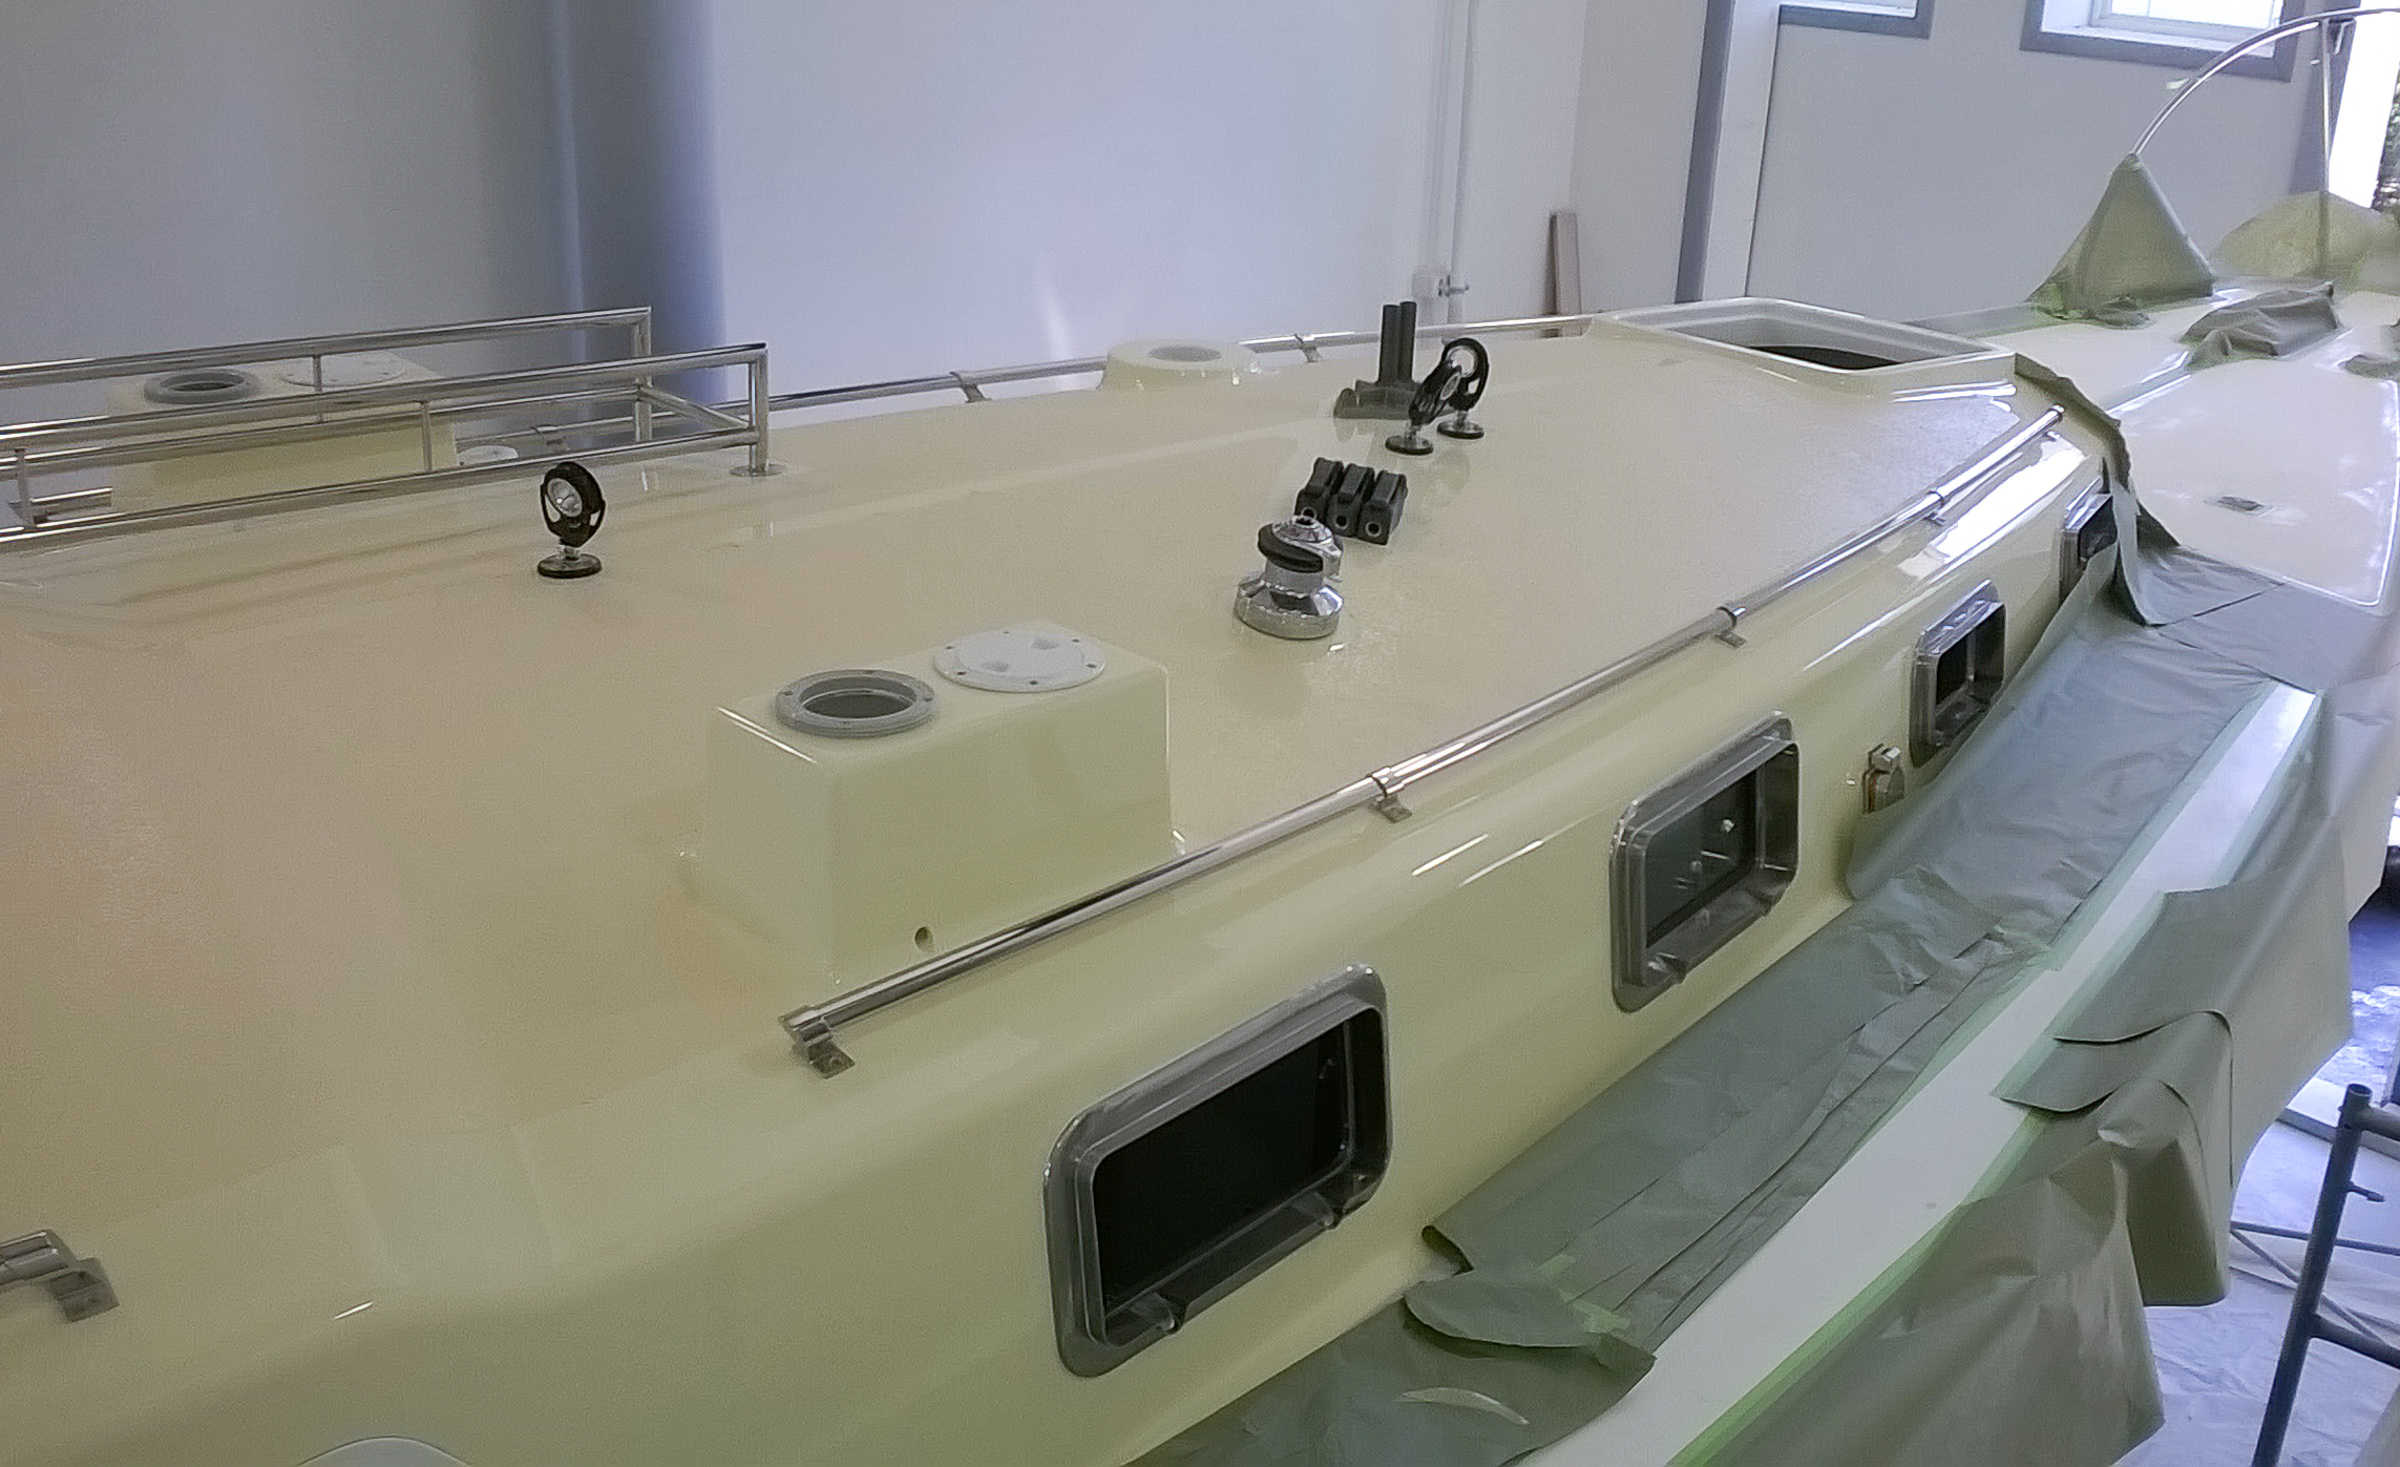
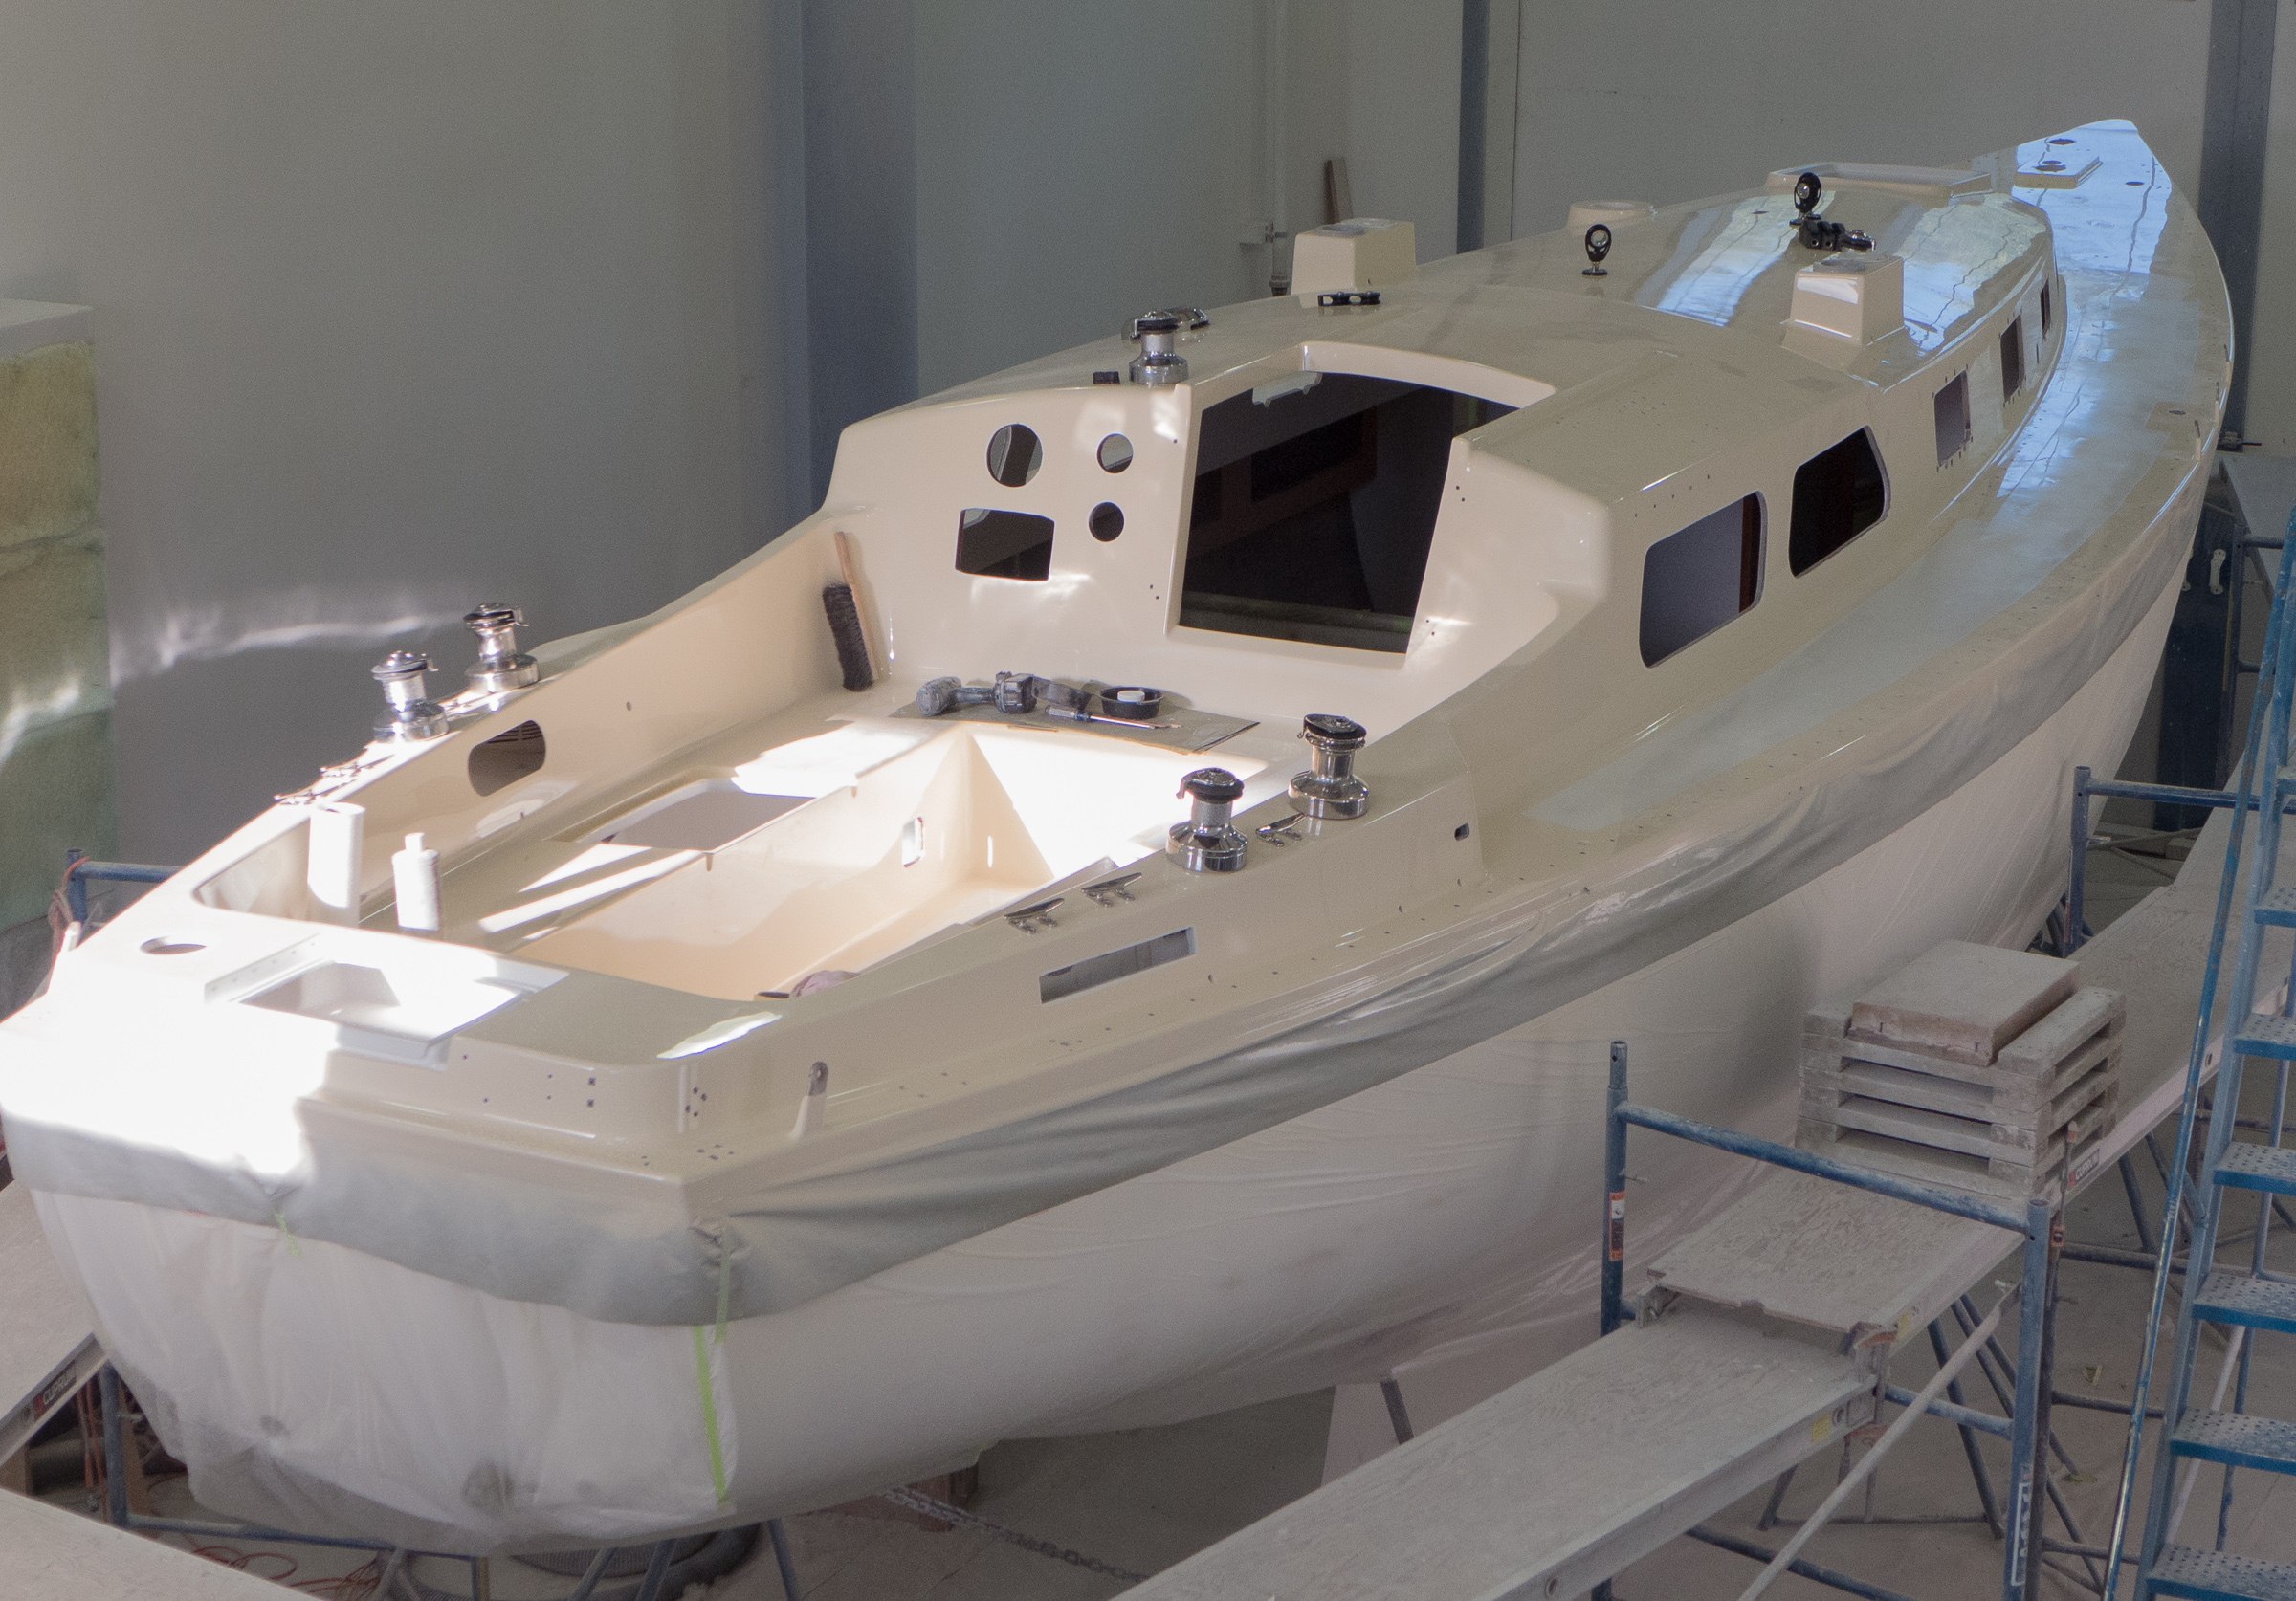
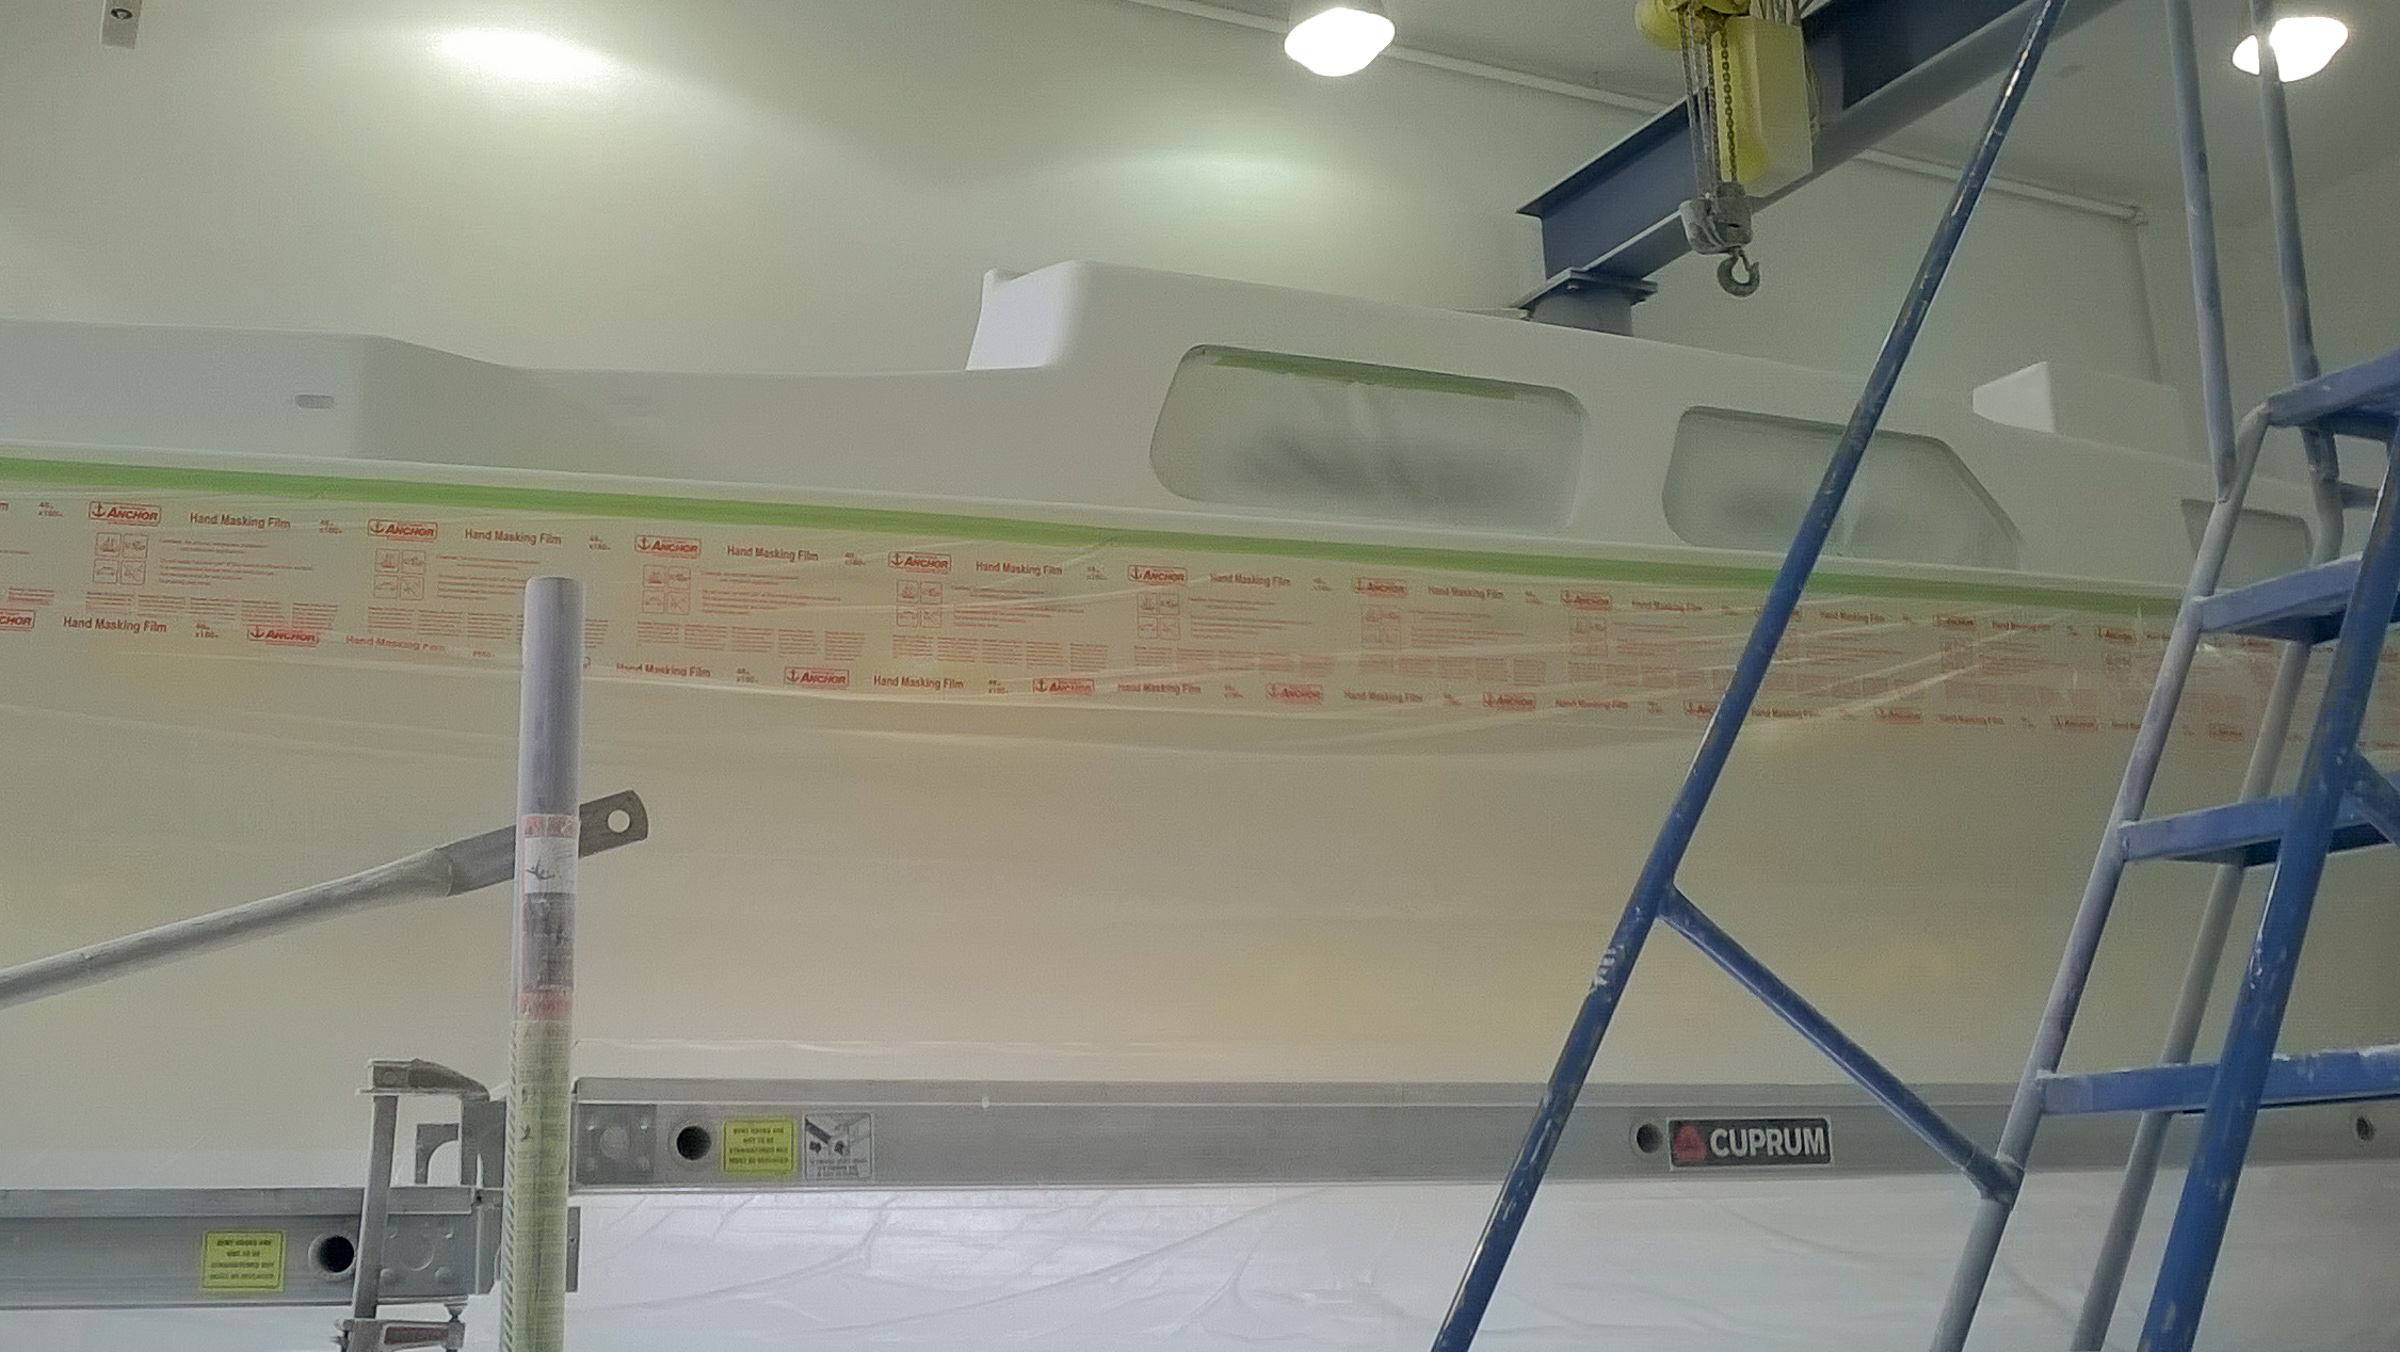
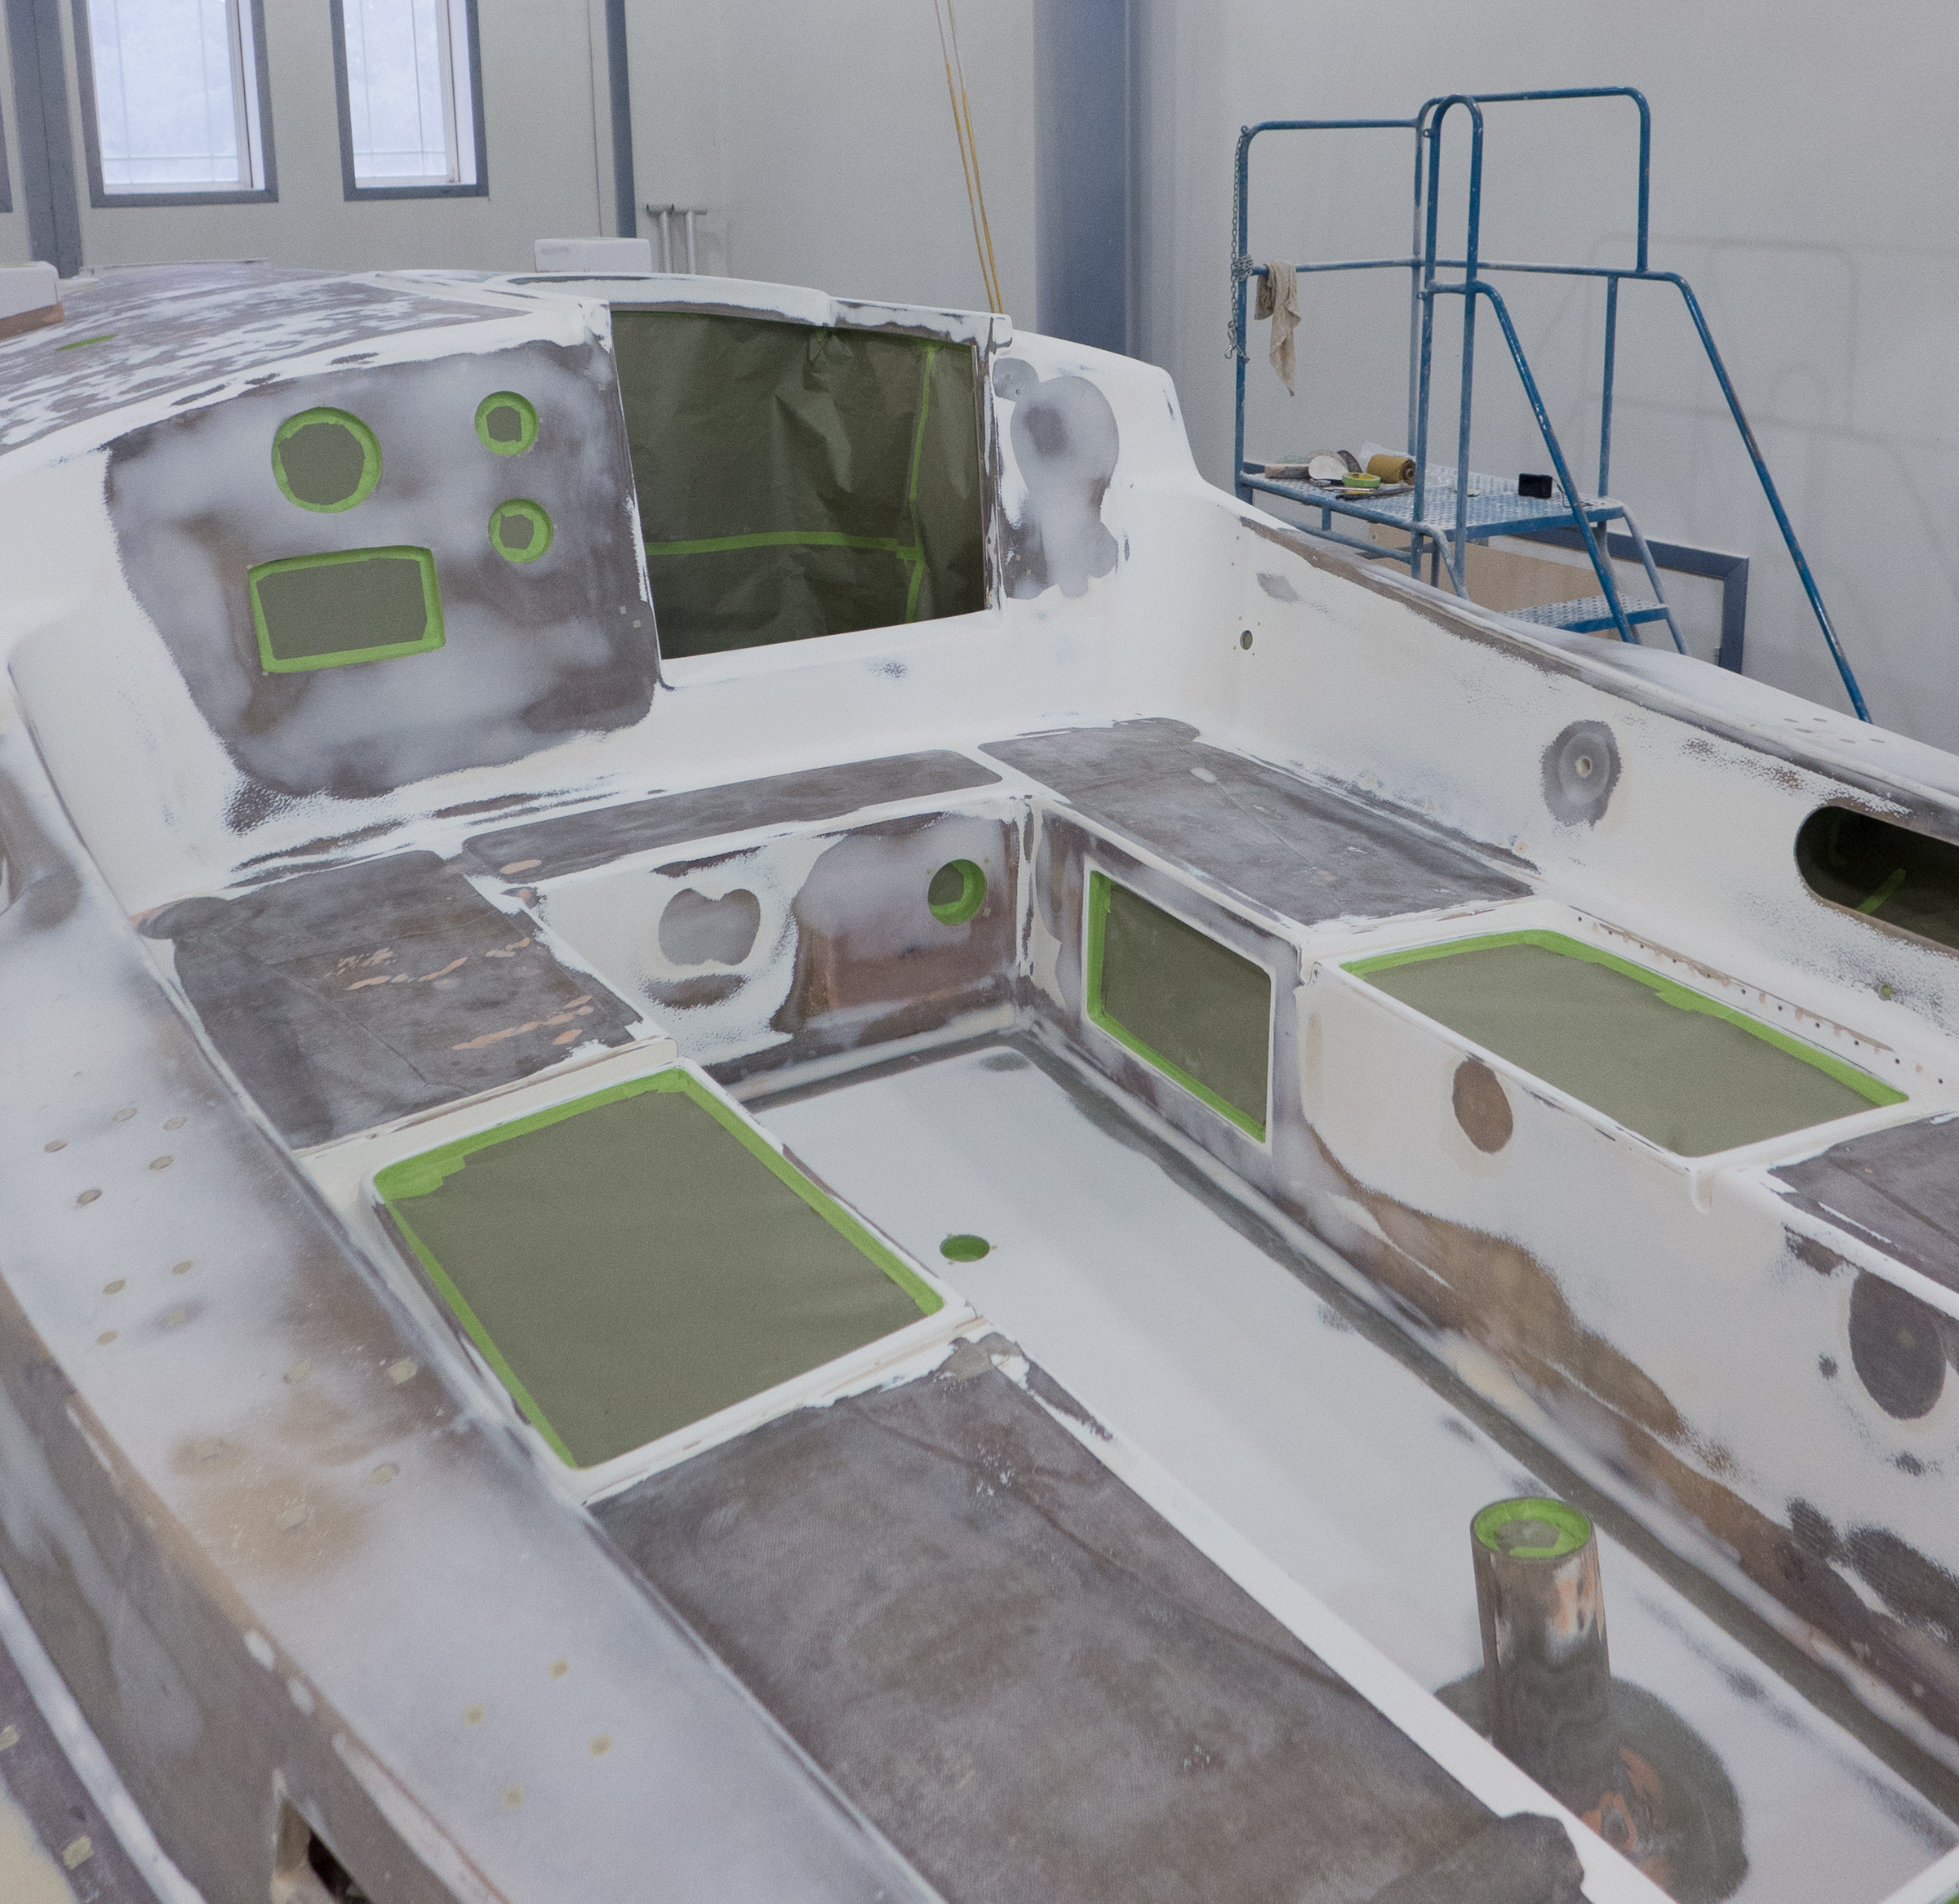
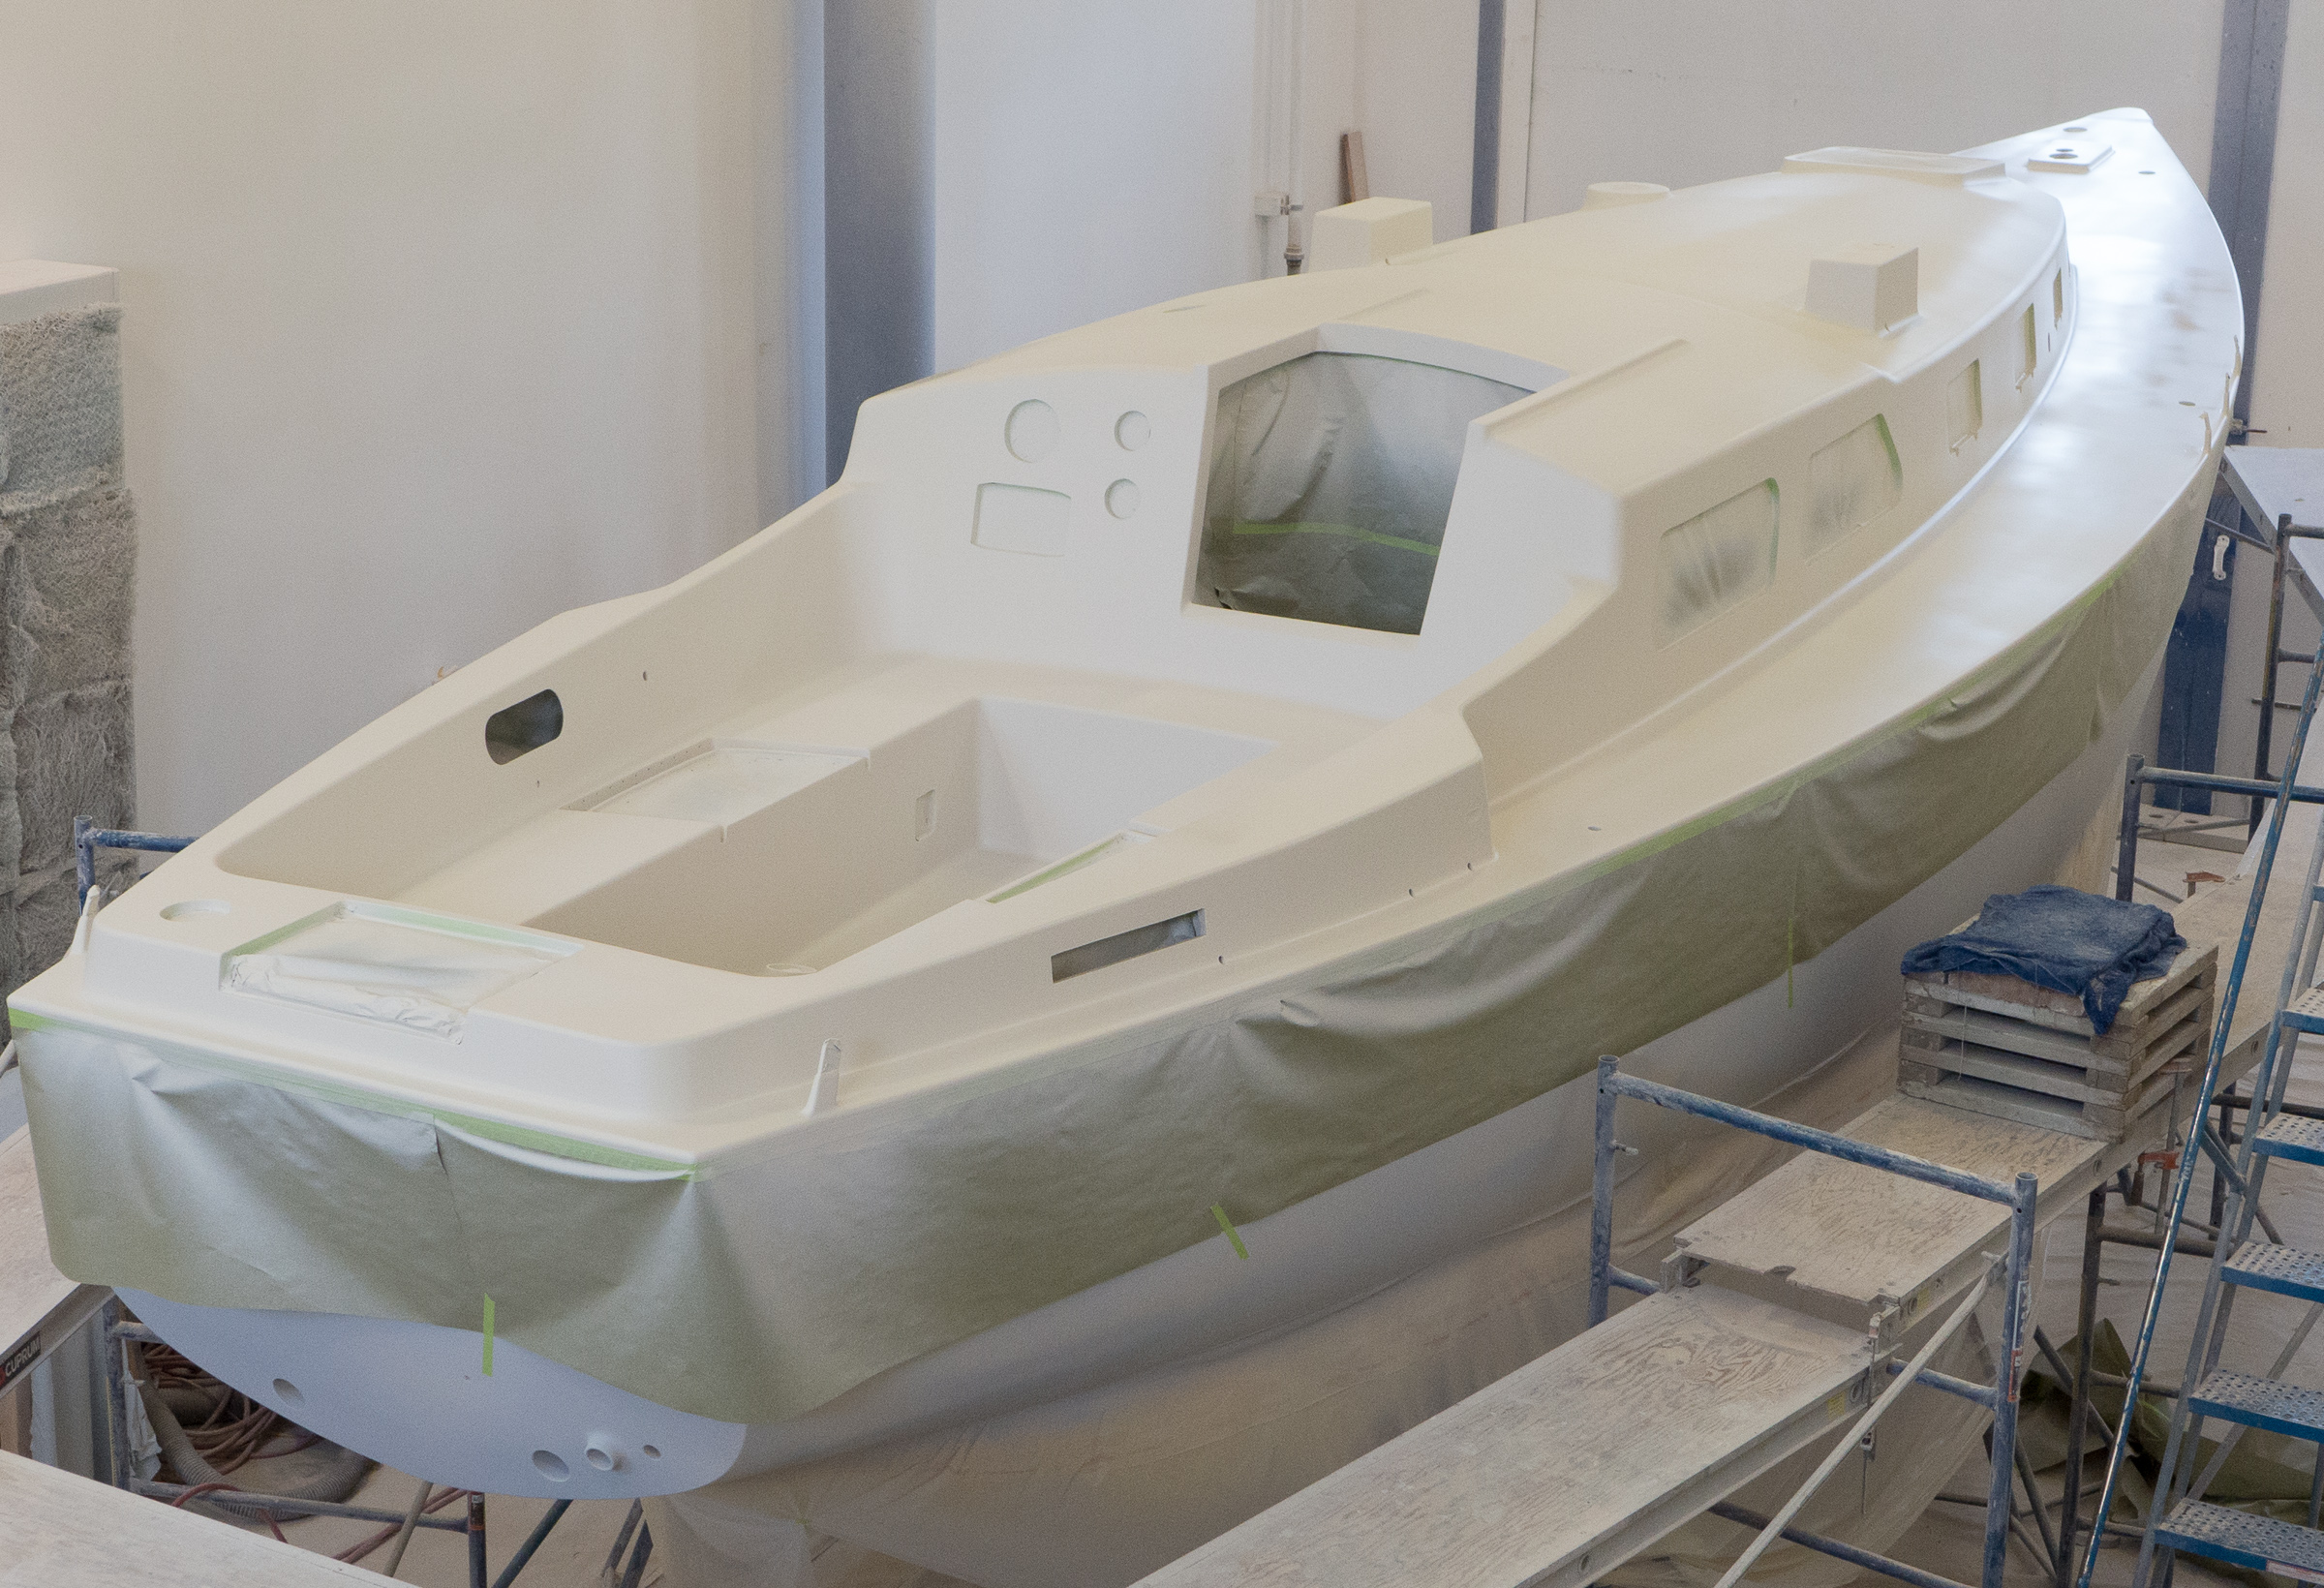
Ready for primer. Because of the way schedules are going, the top will be painted first. The hull is masked off with plastic. The top of the boat really looks different when it’s all one color!
There are times when you go from one stage to the next. This weekend was one. Sunday the task was to tape the deck for painting. We needed to tape over all the holes for the hardware so they would not get clogged with paint. We also had to paper all the openings; ports, hatches, instruments, you name it. Hundreds of little squares of tape plus paper and more tape until we got the deck covered. This took all day.
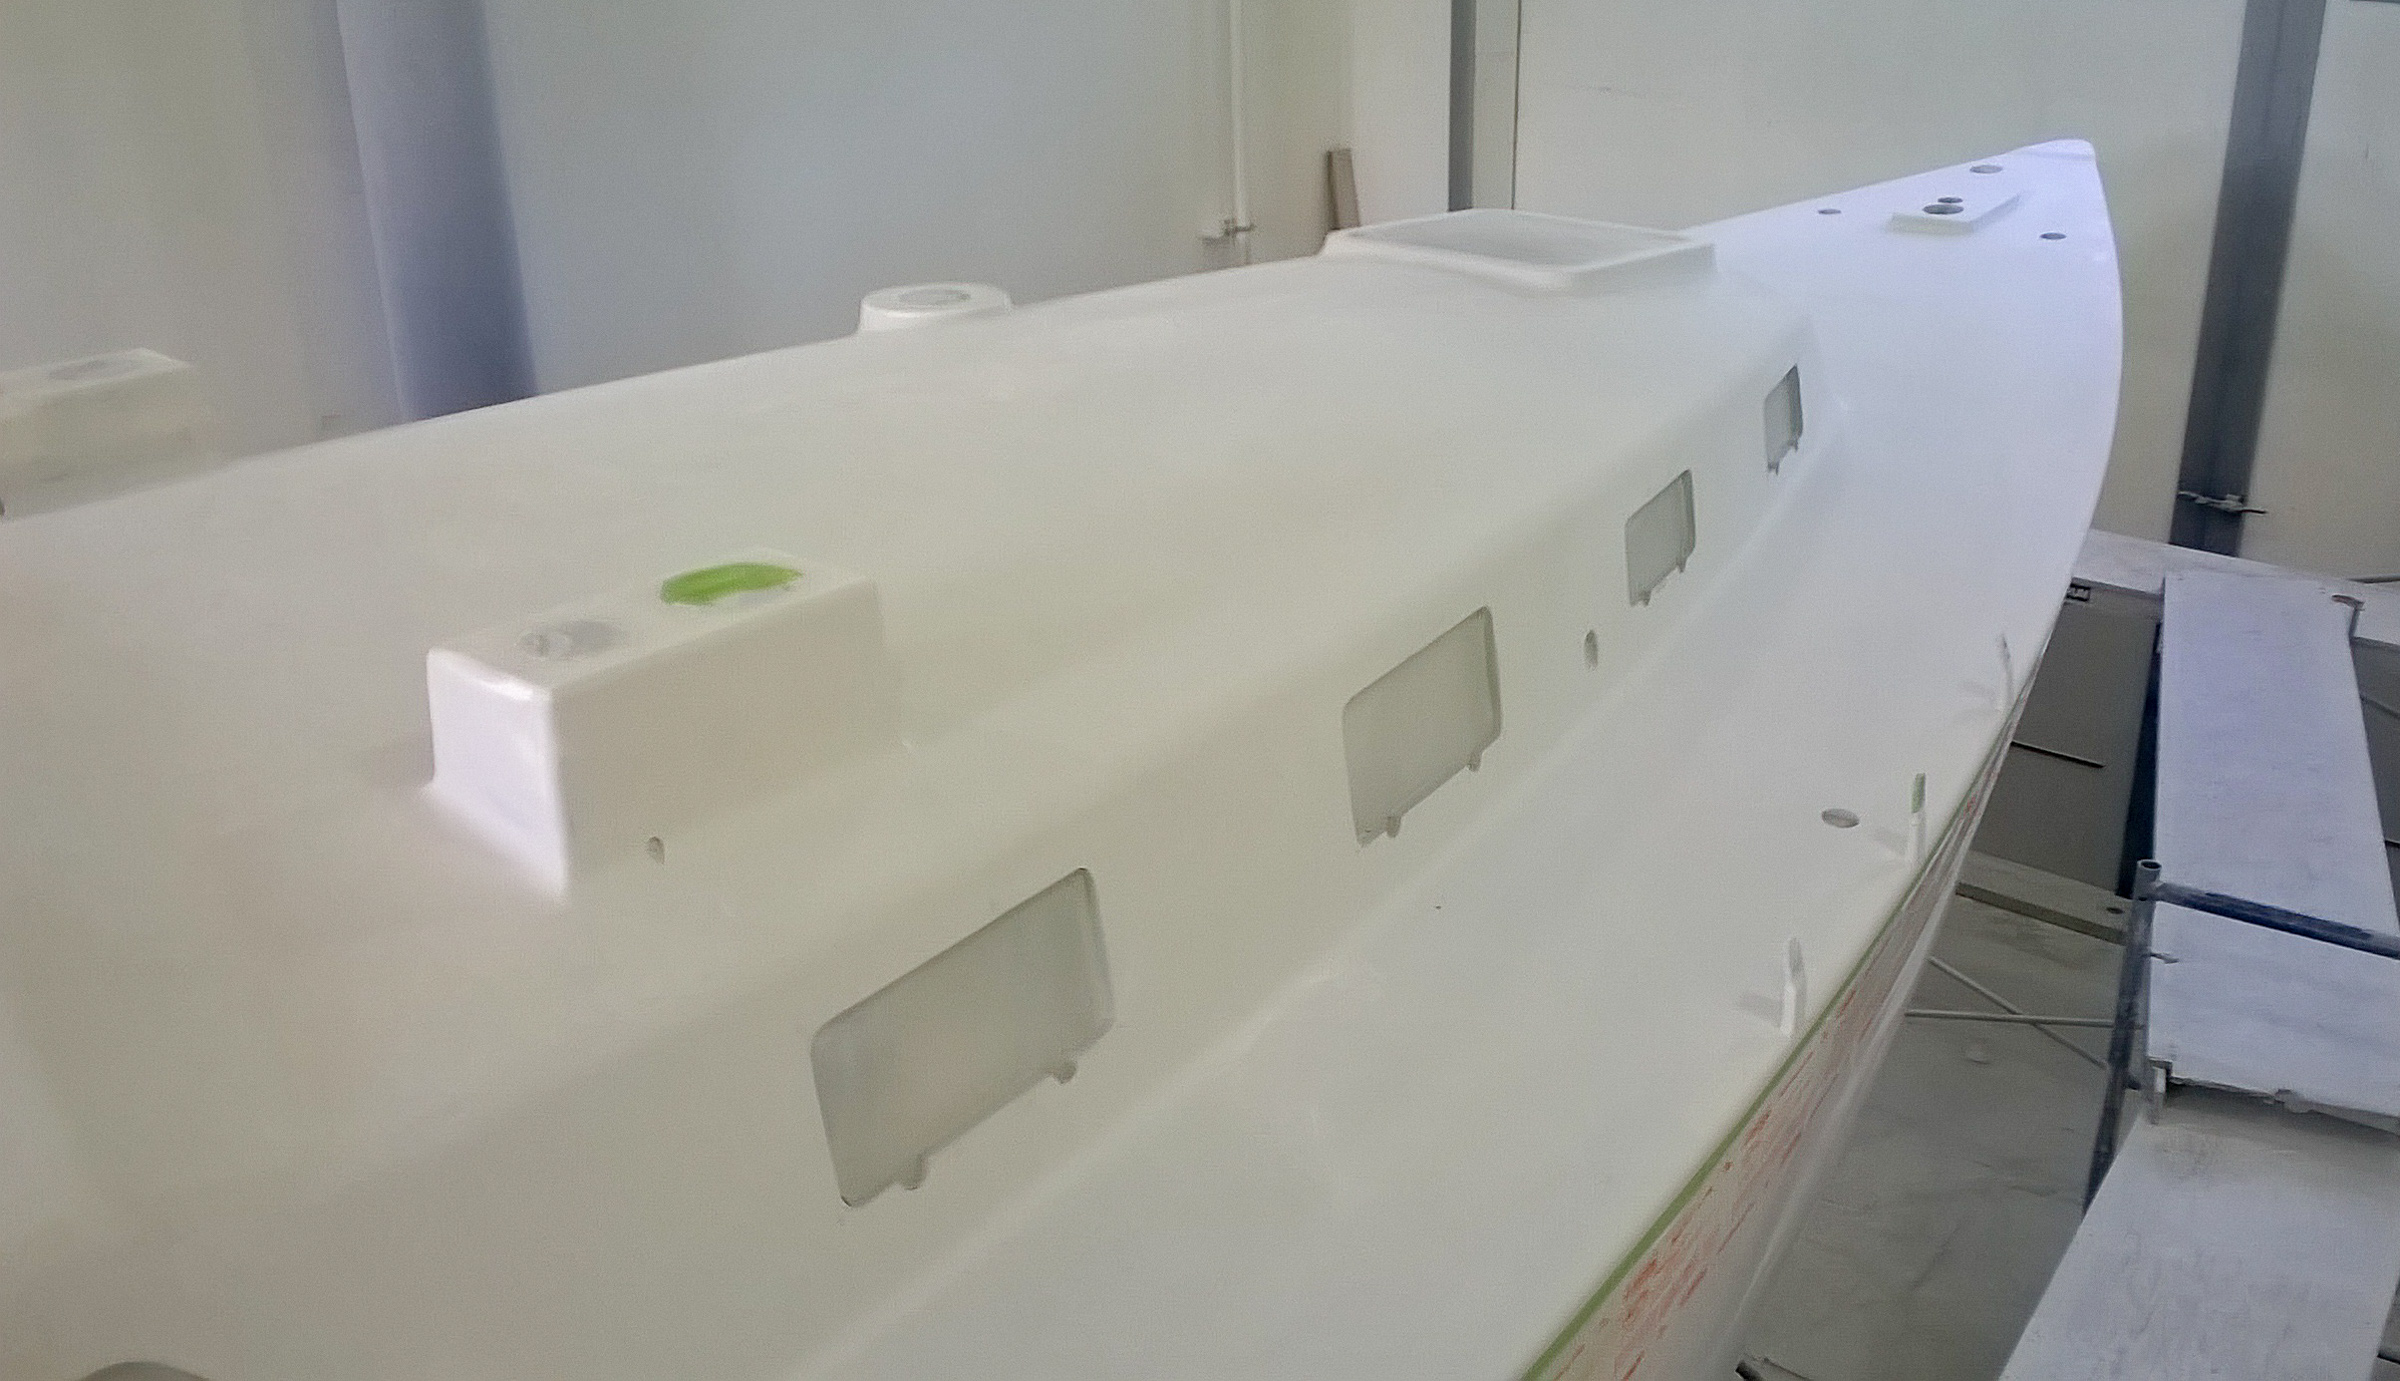
The deck has been sanded. You can see spots of putty that were used to fill imperfectionsThe cockpit got papered too.This shows the little tape squares, nine of the hundreds that we covered.Before: Whole boat, ready for paint.After: Primed, Gypsy is all one color, a very different boat.
Monday we helped with painting the boat. Nina mixed the paint and I kept the hoses out of the fresh paint while Tom sprayed the deck. We ended up using six gallons of primer. Nina got to mix it up one quart at a time. Once mixed, the paint had about a 15 minute time limit before it started to cure. The primer paint goes on thick and it fills in minor imperfections in the surface.
After painting, we thought about working on the mast but it was too hot. Nina got the spinnaker track off and the mounting bracket for the windex and decided to call it a day. Bill got his moment of excitement after we discovered wasps starting to make a nest in the boom. He stuffed paper in the ends and made it away unscathed.