It was a shorter week of boat work for us. My sisters came out from the midwest for a visit and we took a couple of days off to do sightseeing. I felt very guilty not working on Gypsy. I even felt more guilty sleeping in to 8:00 am on a Sunday morning. We are usually on the road to the boat shop at 8:00. After weeks of non stop work and boat work it was very nice having a real weekend. The itinerary included wine tasting, Columbia Gorge waterfalls and a Portlandia Tour including Voodoo Donuts and Mississippi Ave. We made up for our time off guilt by staying late on Tuesday.
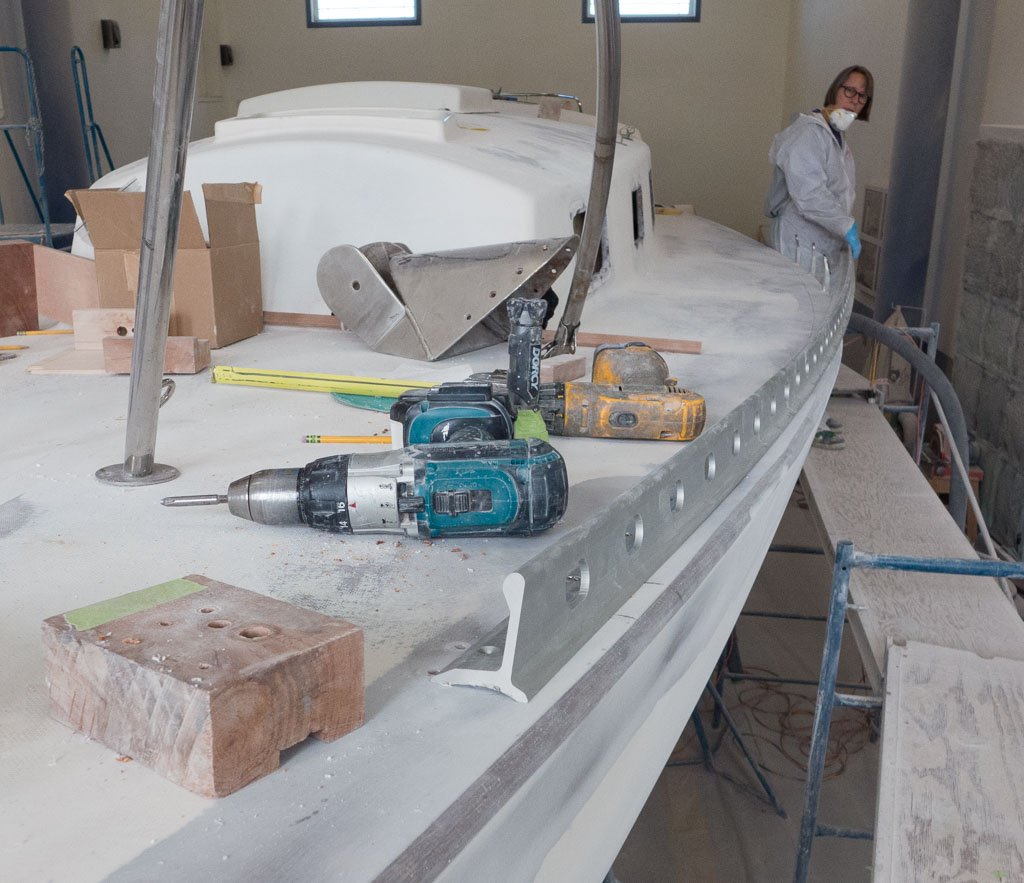
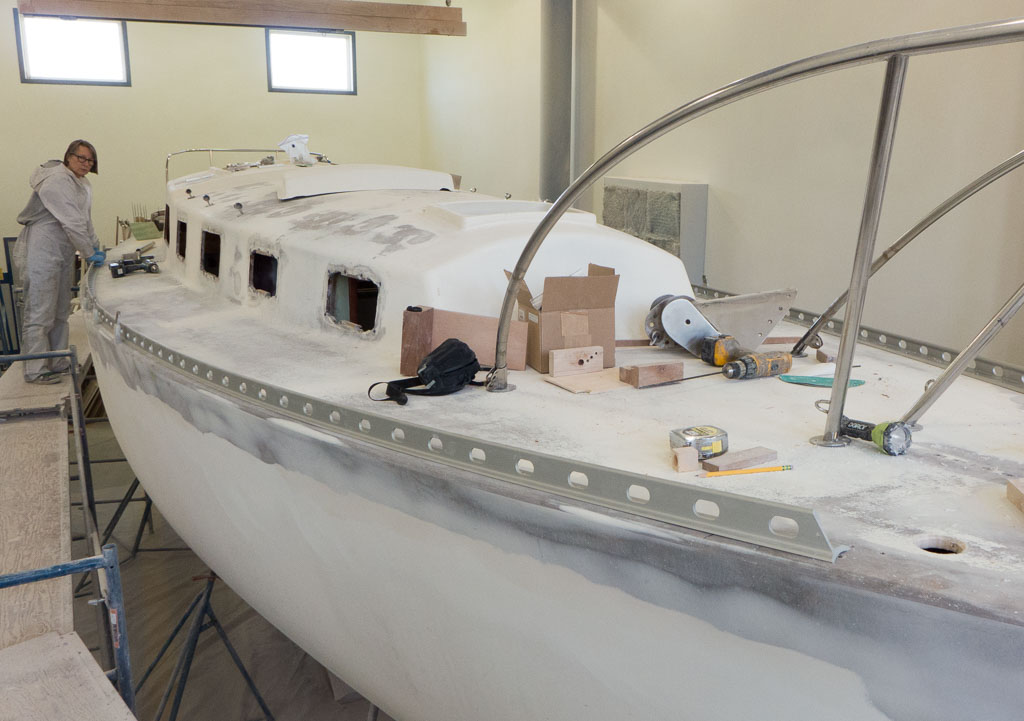
If you remember back a couple of weeks we had cast the port hole openings into the cabin sides. Friday I drilled out the bolt holes for the ports and then test fit the ports to check the holes. Nina sanded the shear clamp wood so we can paint it before the bolts for the toe rail are installed. When we had returned Tuesday the cockpit drains and fore hatch had been started.
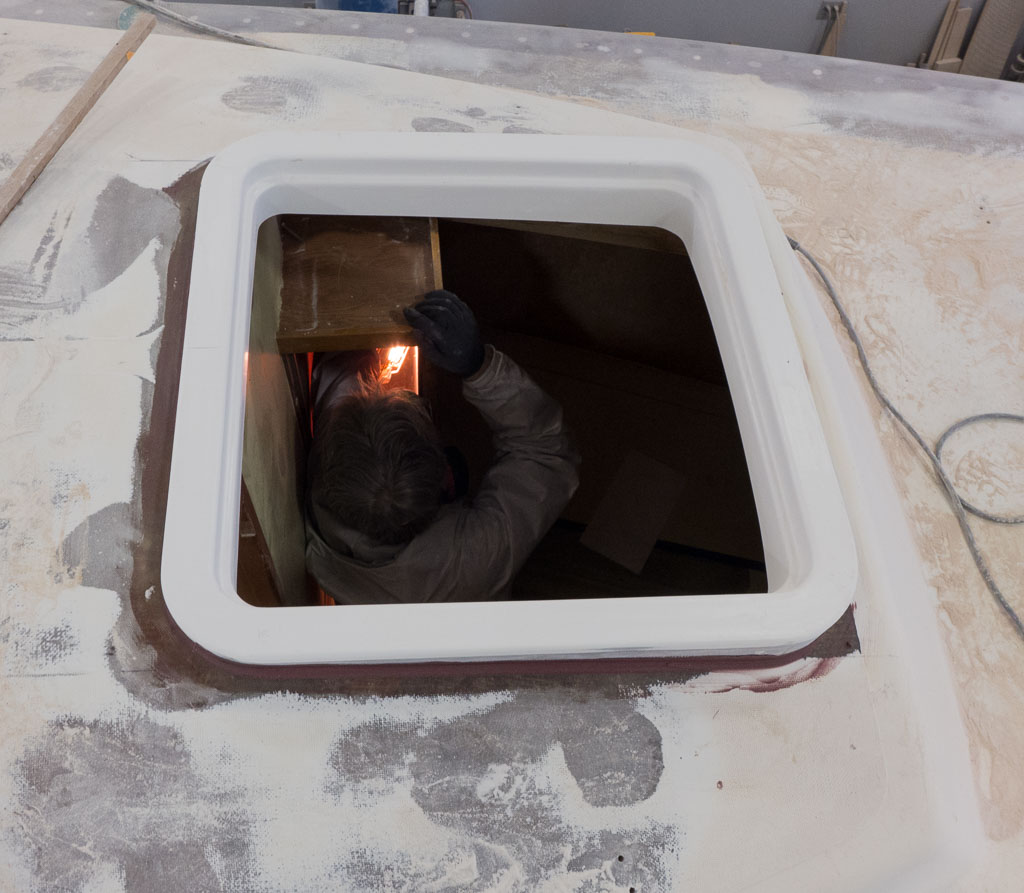
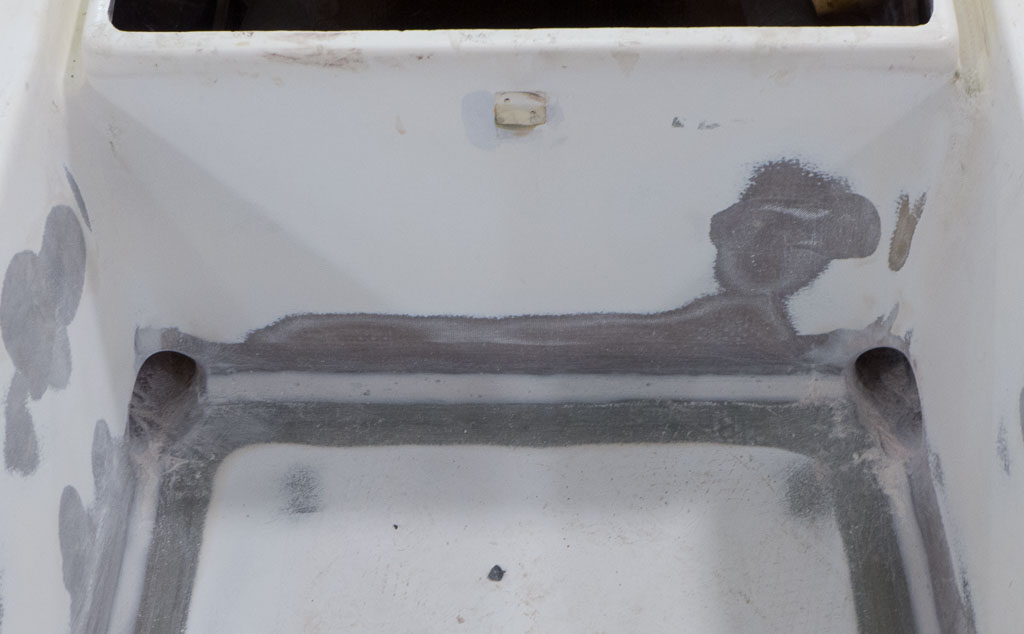
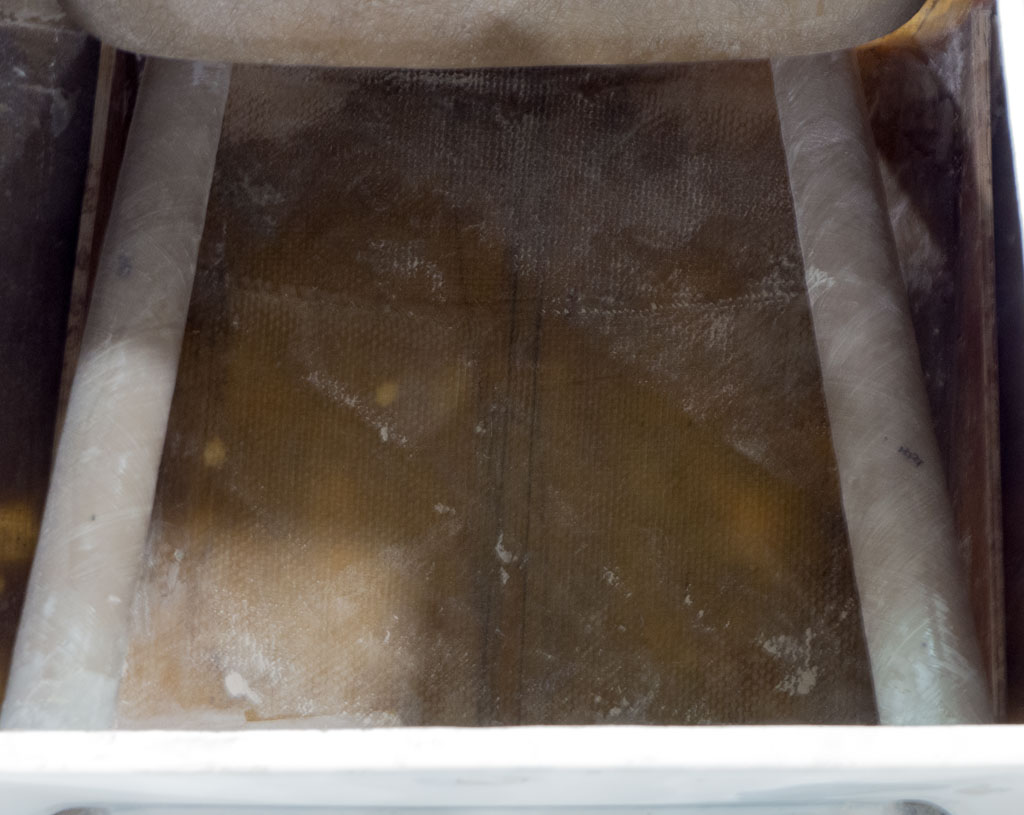
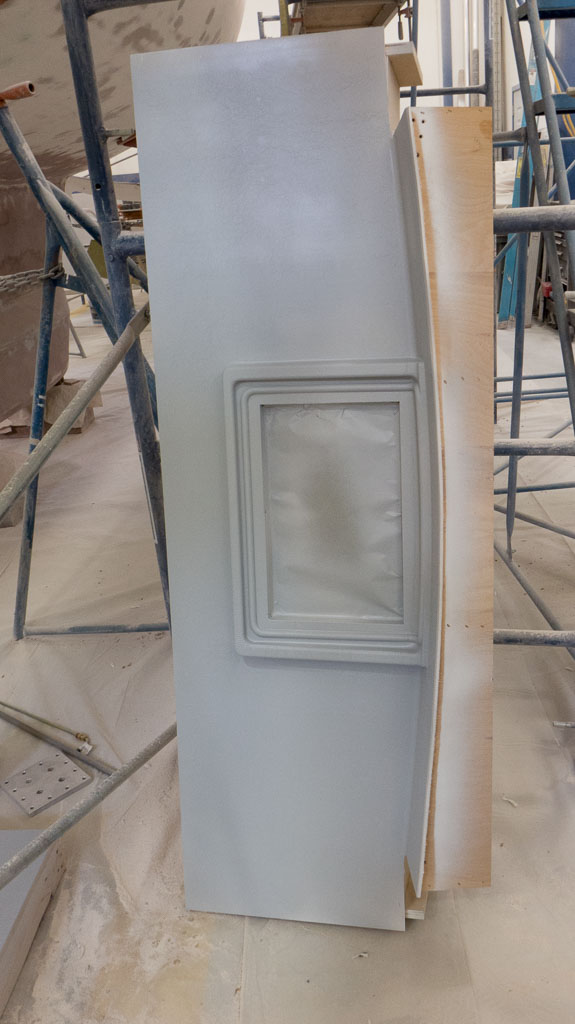
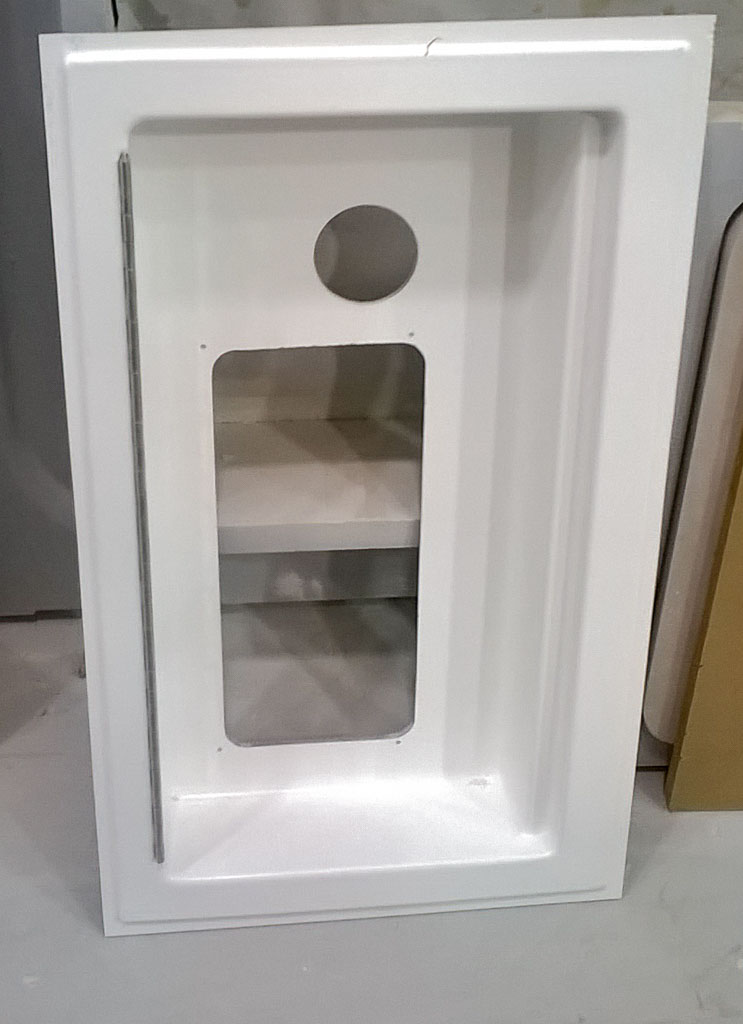
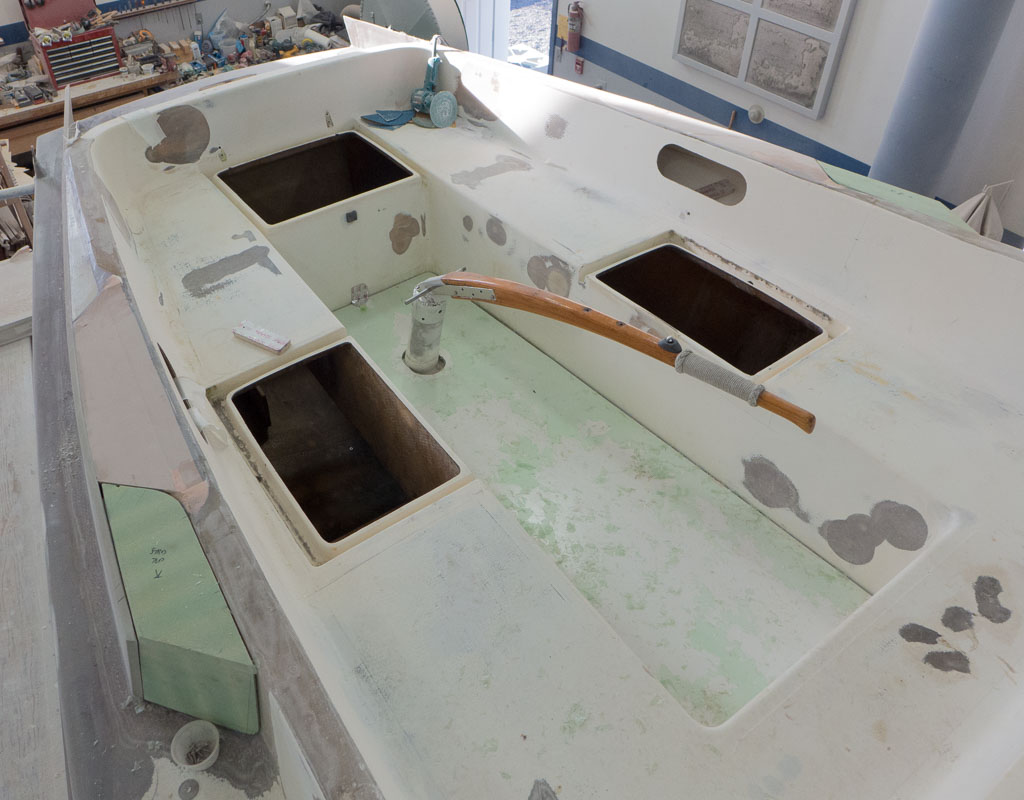
Base for the Lewmar Ocean hatch which has an aluminum frame and plexiglass top. It will be a big improvement over the old wood hatch. We will also get lots of light with the new hatch.Cockpit drains, the 3″ drains will not only take care of rain. They will also empty the cockpit fast if we get pooped by a big wave.Drain tubes heading for the transom, (back of the boat).Dual drains! pretty cool, huh?
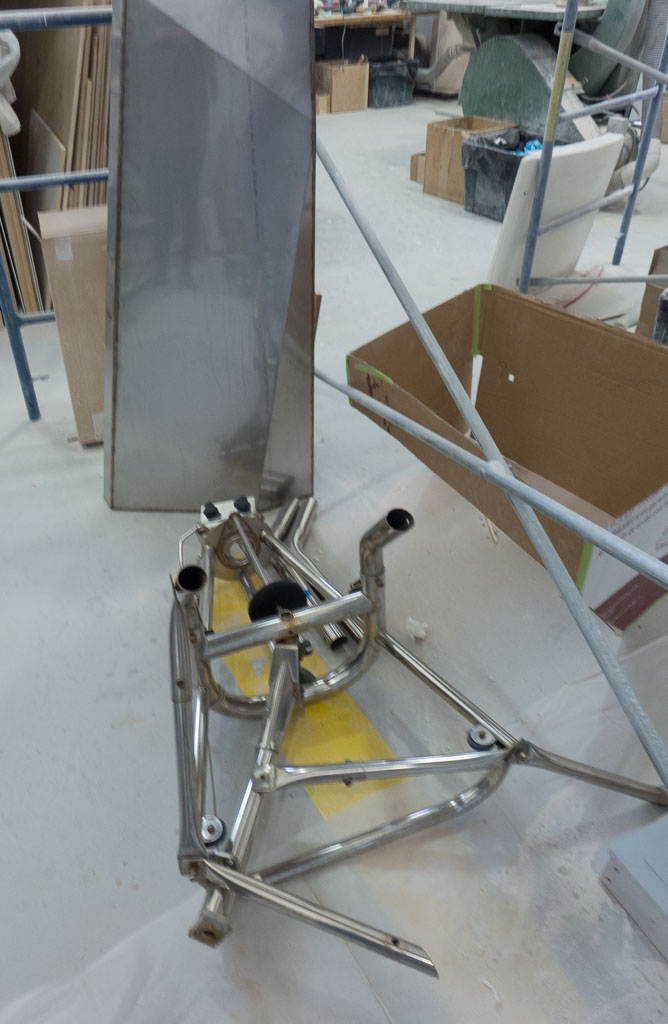
Other stuff that also happened was our oar rack got built and Marsden polished it. Tom has also been working on the propane locker/aft deck/ and cockpit combings to finish the stern of the boat.
Locating where the oar rack will go. The rack gained improvements that will make it stronger and more functional, but they required adjusting the location of the rack.Aft deck and propane locker lid mold.Monitor wind vane and the new water tank await installation.
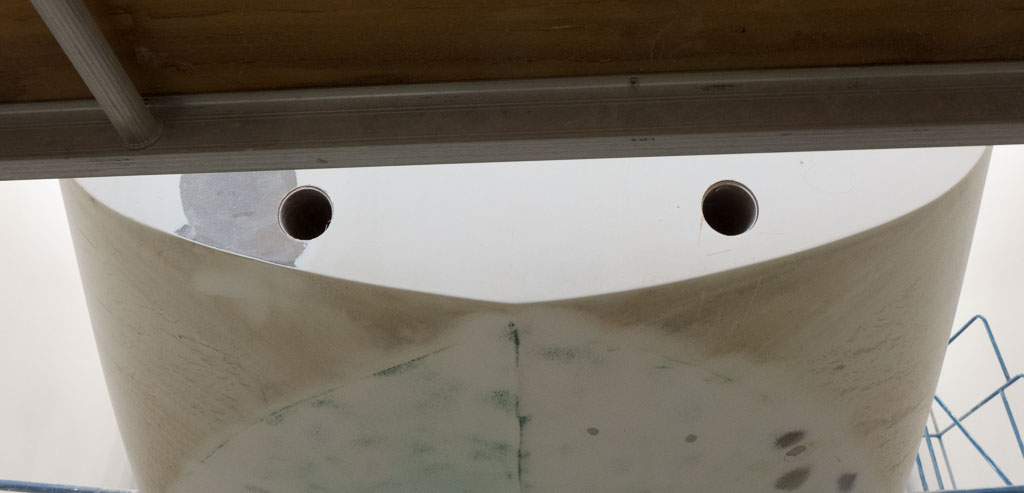
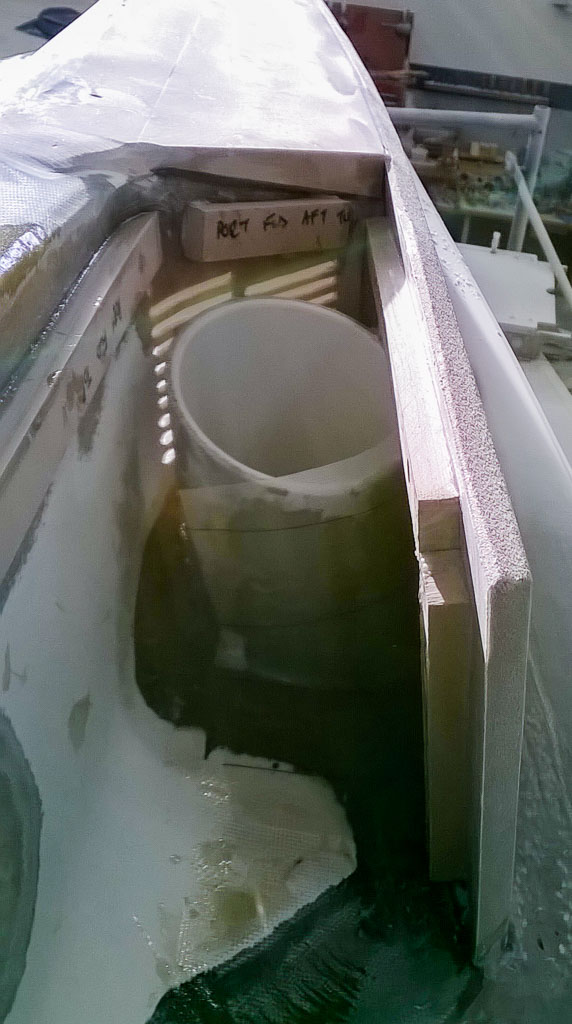
Anchor windlass platform installed and drilled. The hole upper center is for the cowl vent to keep the anchor locker smelling fresh and the lower right hole is where one of the foot switches for the windlass will be mounted.
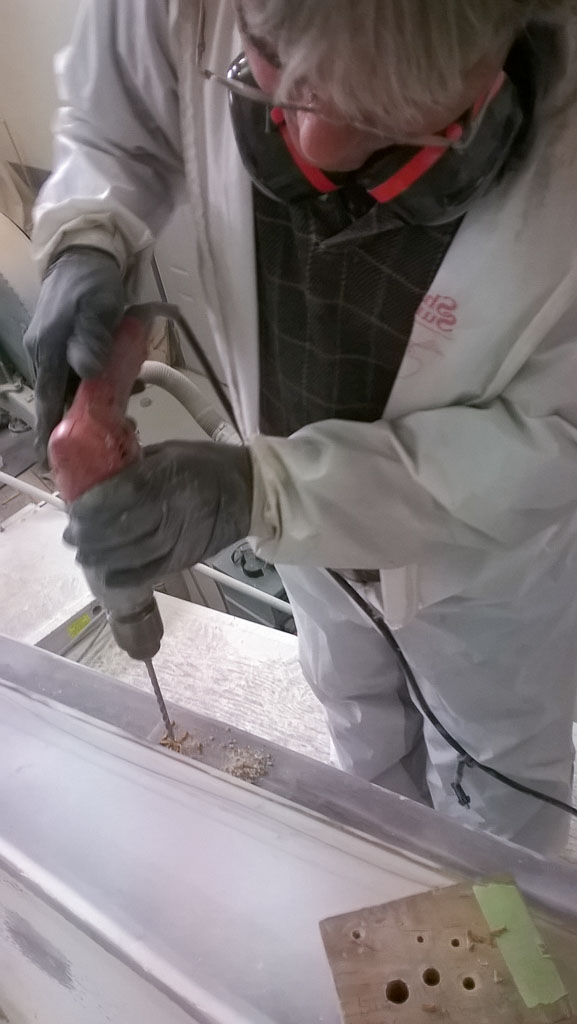
This week we’re starting from the front and working back. In sailing terms: forward to aft. Tom fiberglassed the new platform for the windlass in place and Bill drilled the really big holes. The platform was needed to get the chain feed from the anchor roller to the windlass level. Nina is looking forward to having an electric windlass so that she will no longer need to be the cranking lass to get the anchor up or down.
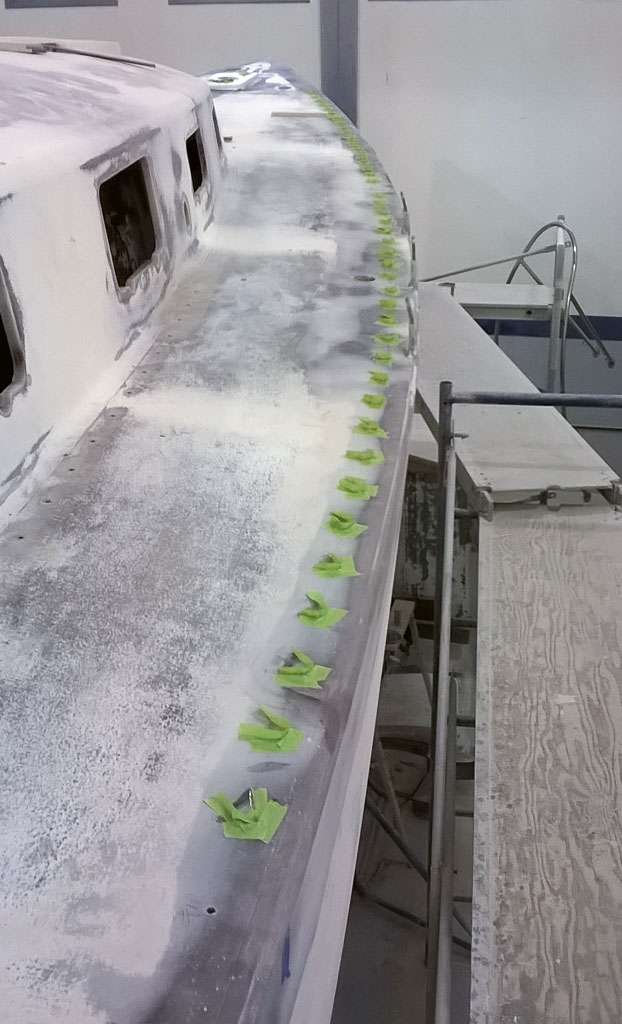
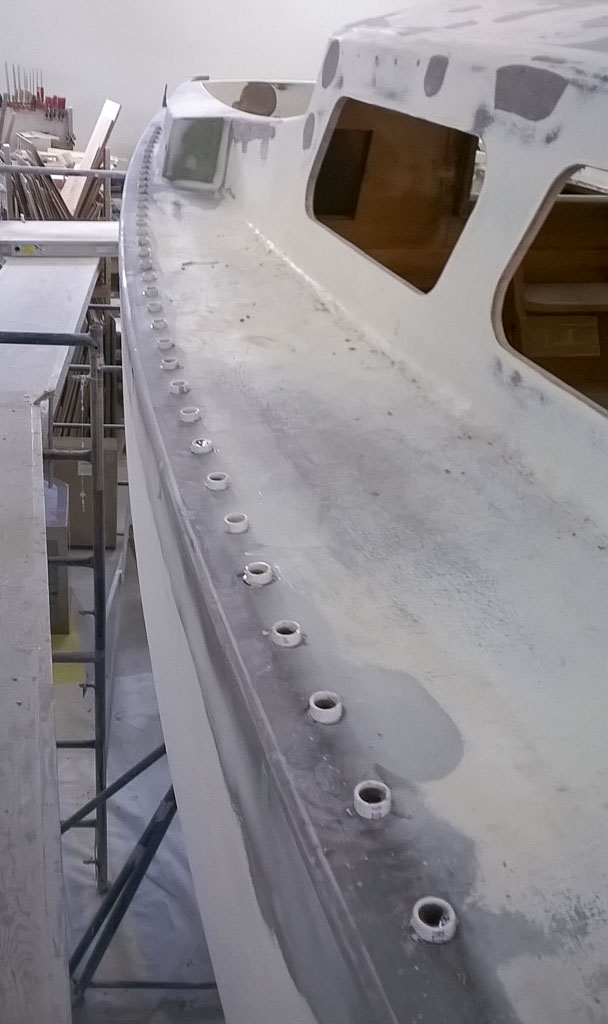
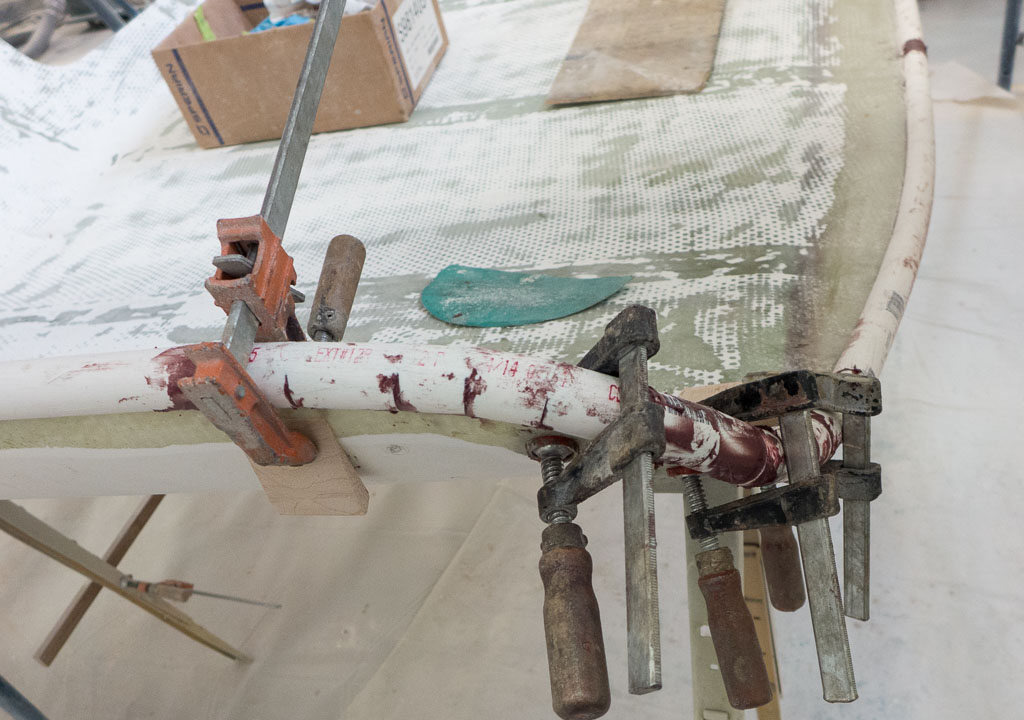
Tape dams for the toe rail holes.Dams for toe rail holes made out of pvc pipe. They are glued down with dabs of Bondo.
All of the holes for the toe rail got drilled out this week with a 5/8″ bit. That’s 164 holes! Drilling went much faster after Bill learned how to sharpen drill bits. The pipes work better and are faster to install than tape, and leak less than tape, at least on top. The height helps get rid of epoxy bubbles from air escaping the wood. We had a couple of holes that that kept on being leaky nuisances inside the cabin, but they’ll be fixed this coming weekend.
Chris put together a welding jig for the stanchions. Marsden bent and polished all the pieces on the lathe and milling machine. These will bolt into the toe rail and the side of the hull and we will have very stiff, safe stanchions.The bulkhead installed with fillets for glassing.
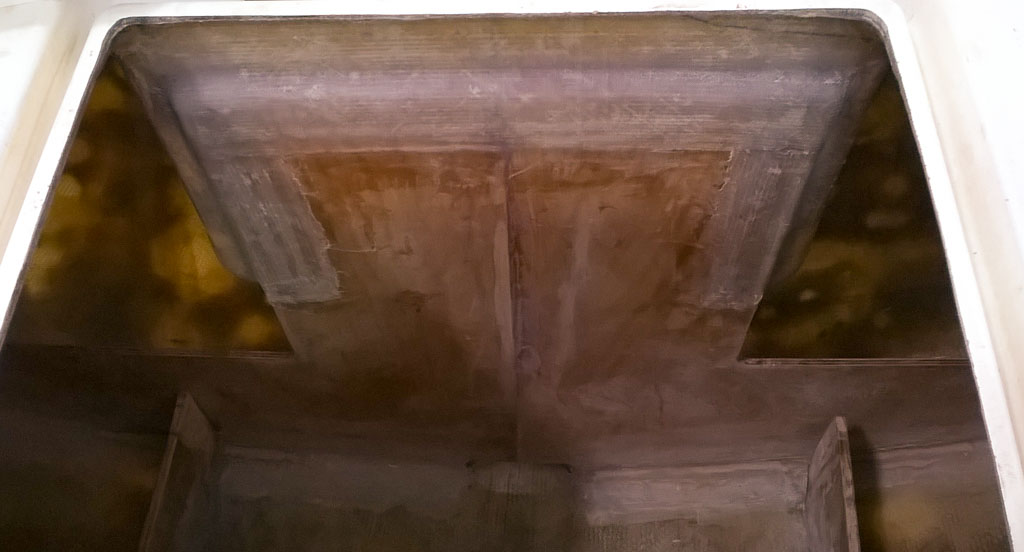
Nina’s bulkhead project was installed! The pieces of wood were epoxied together with a spline and glued to the after end of the cockpit. She also made fillets on both sides at the bottom to make fiberglassing them in place easier. They were sanded to smooth them up for the glass cloth and resin, and sanded once the glass was in place and cured. She was quite pleased to be told by Tom that she’d done a good job!
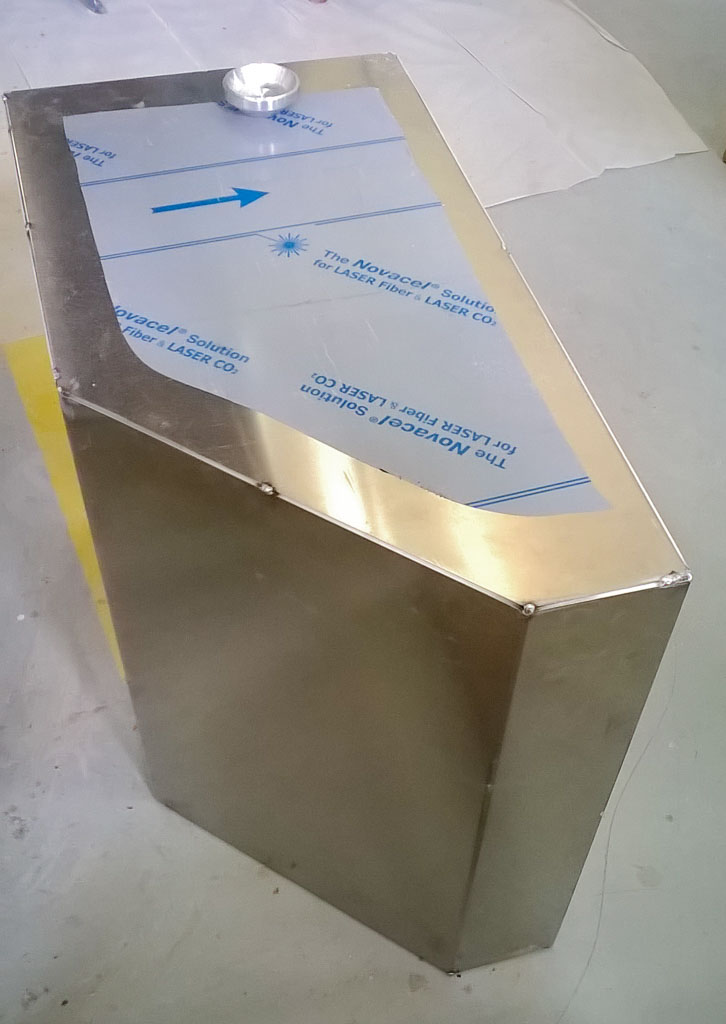
Fiberglassing in progress.The fillet done on the starboard side.View of the bulkhead from the engine bed. This view will never be seen again once the fuel tank is added. The tank will sit in front of the white area. The post going down the middle is the rudder post.The fuel tank. It fits! It will block the view of the bulkhead. It has a 60 gallon capacity. The angled side will be the after bottom side. (It is on its side in the photo).The dodger edge fiberglassed and the sanding begun.
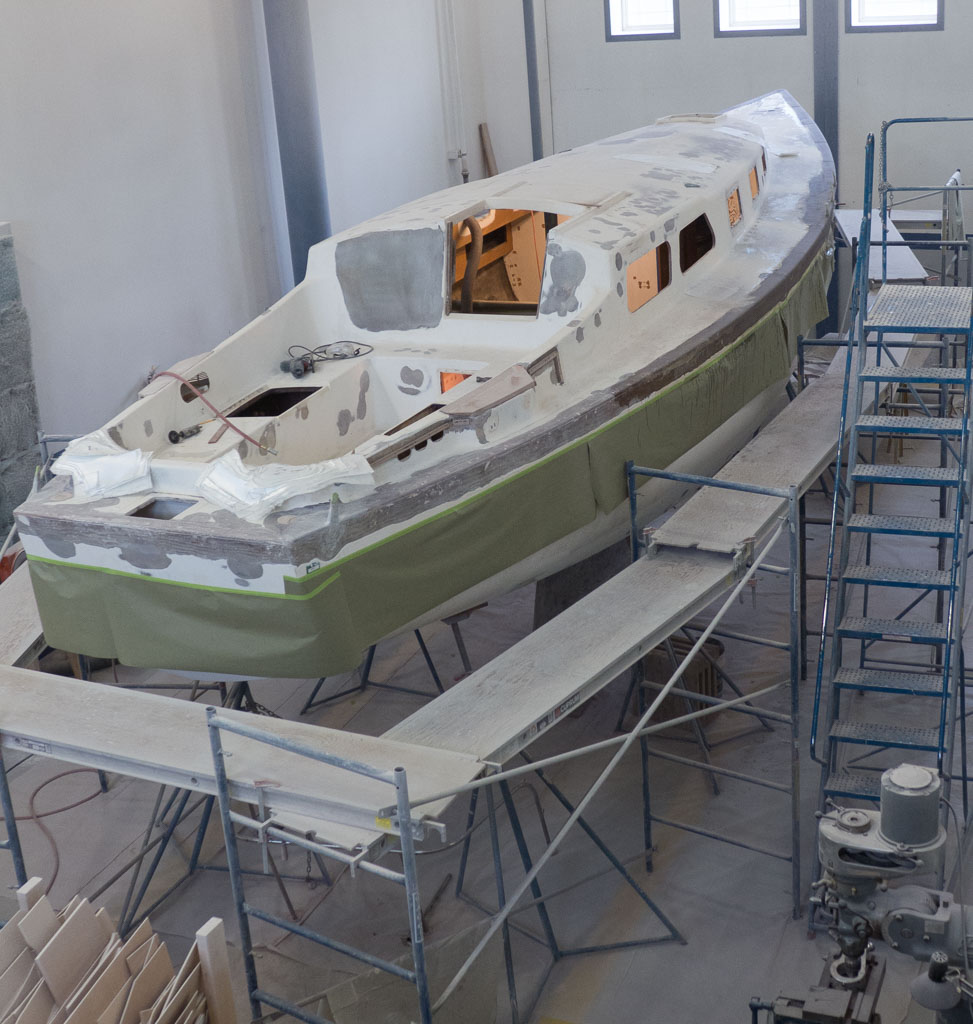
The boat is really starting to feel like it’s going back together rather than being torn apart. That being said, we don’t have much time left to get it to a state where Tom and Chris can begin prepping for paint. Once that starts, we’ll need other projects to work on, like the mast.
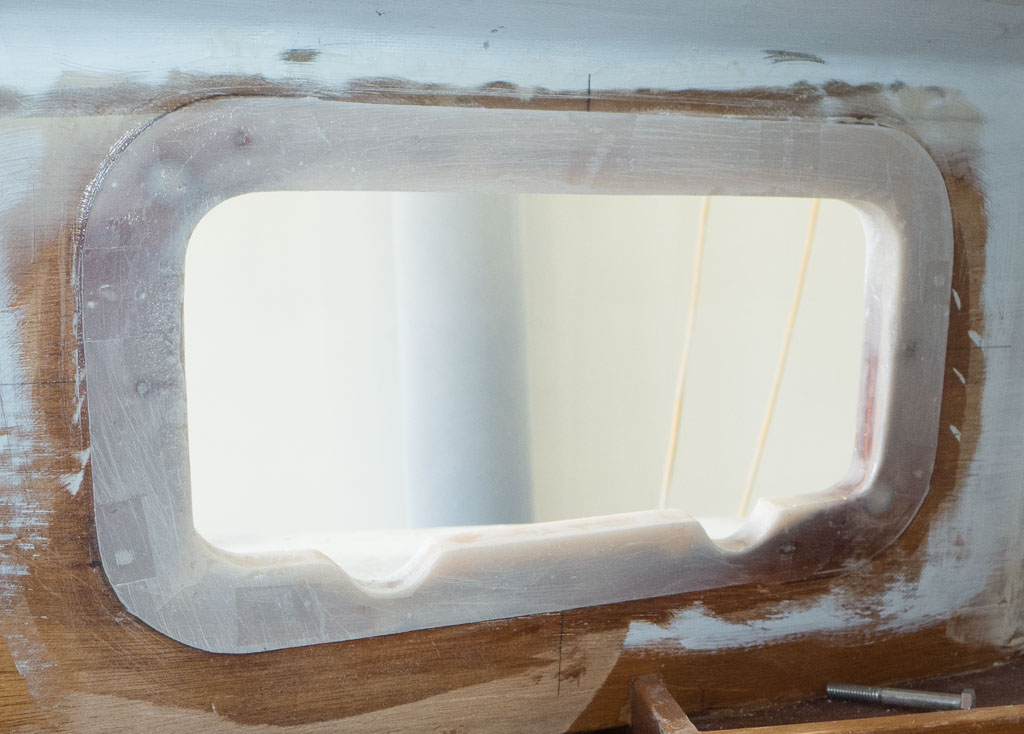
We have been busy and it is starting to show. For awhile it has seemed like not much was happening. This week progress has been more apparent, which means all that prep is paying off. We have finished filling in the gaps around the holes for the ports so that they will have solid, tight fits. We have even made shims on the inside of the cabin to create a flat spot in the curving sides of the cabin for the forward-most ports. This should mean trouble-free and leak-free ports.
The inside view of the forward porthole opening. The shim gives a flat surface for the port to mount to.
The dodger got glassed. The edge stiffener and hand grip that we have been working on has been covered in fiberglass. Last week we were gluing on the PVC pipe. Chris smoothed all the curves and we gave it 3 layers of glass cloth and one layer of mat. It’s a nice, strong edge. Now it has to get sanded and finished.
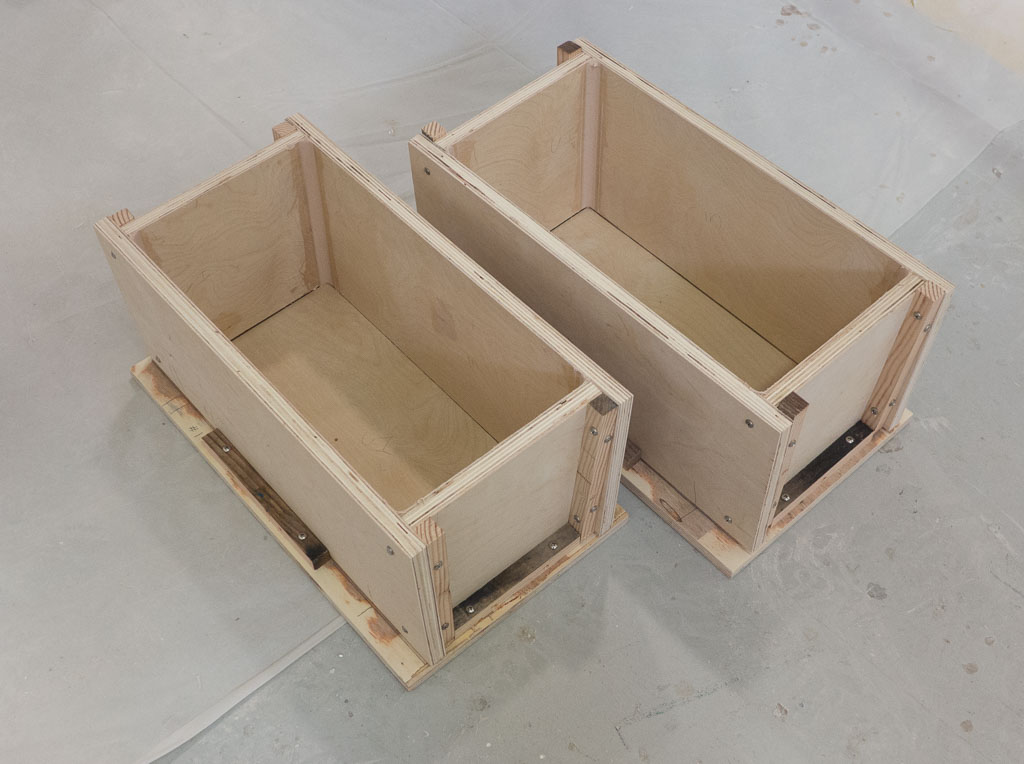
Papered to catch the drips we are ready to start glassing.After glassing. Lots of resin drips, but the glass work looks good.The molds for the dorades. Bill still needs to add a fillet around the bottom edges before starting to glass them.
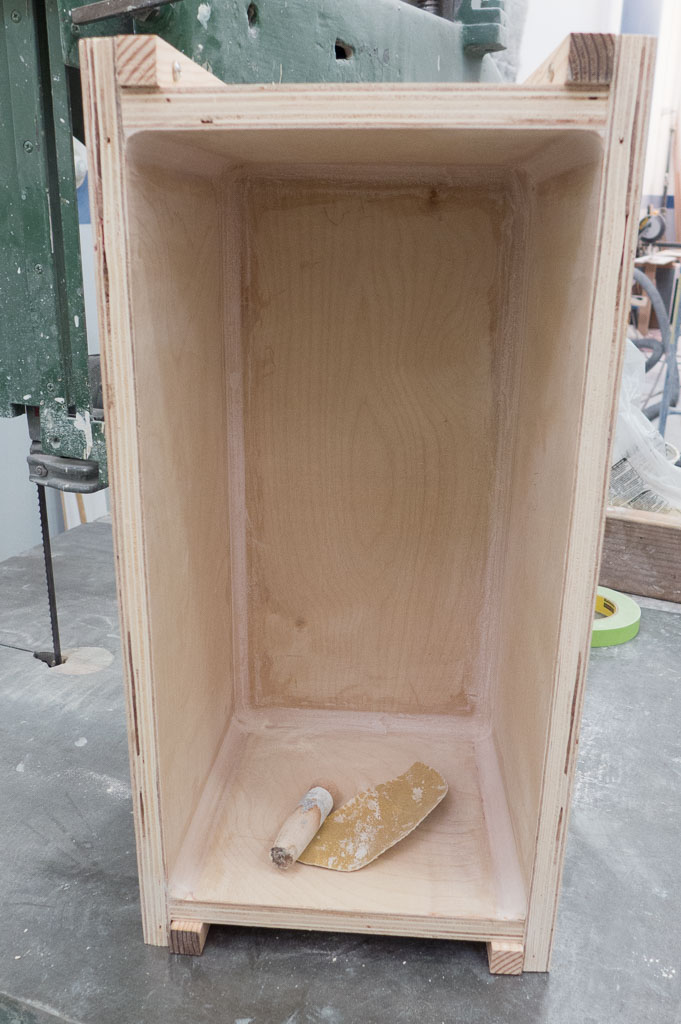
Dorades are another project we need to get done. These are water trap boxes that ventilation cowls will be mounted on. This lets us get fresh air in the boat even if it is stormy. The old wood boxes were showing their age so we are making fiberglass replacements that will get glassed to the cabin top.
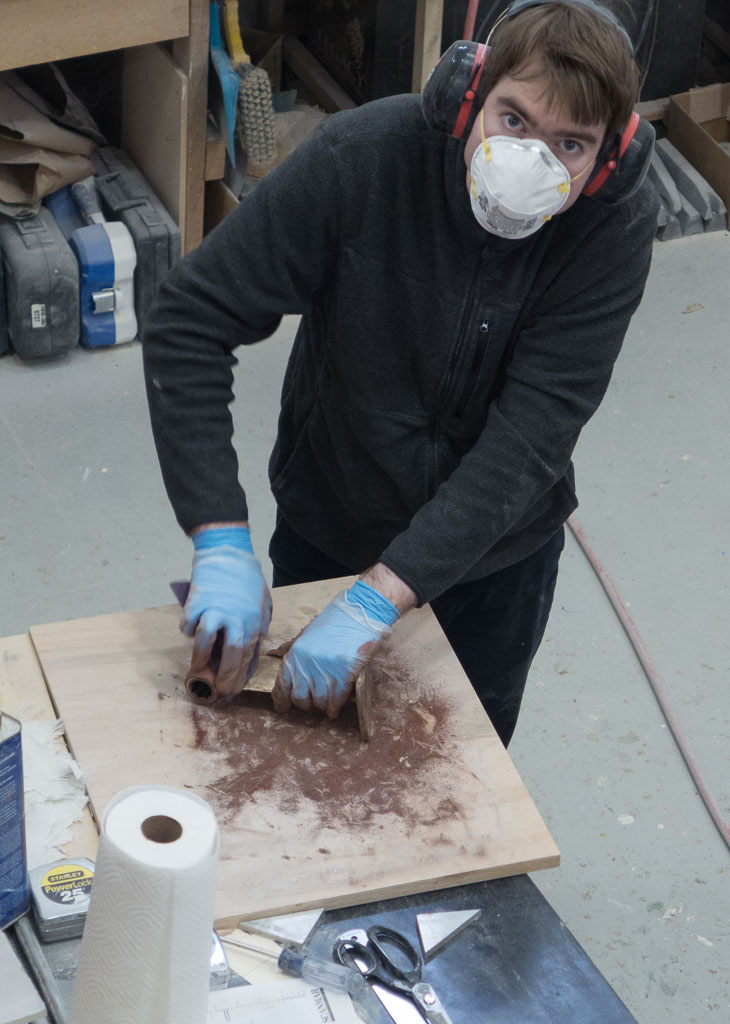
Sanding the fillets in the mold. I use sandpaper and a dowel. To get them right I will fill with putty, sand, refill and sand.
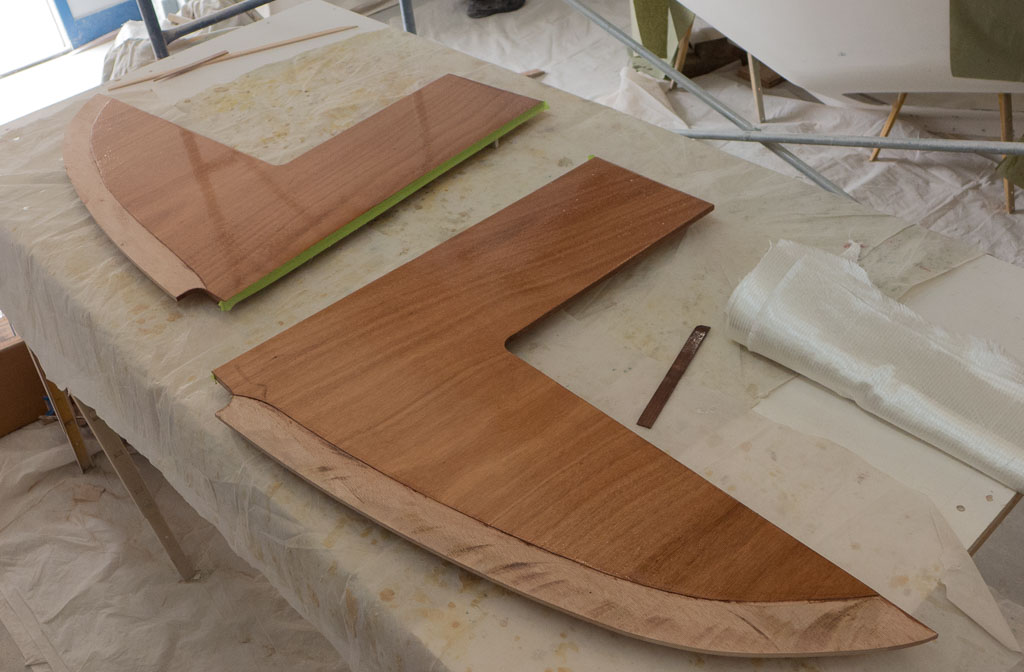
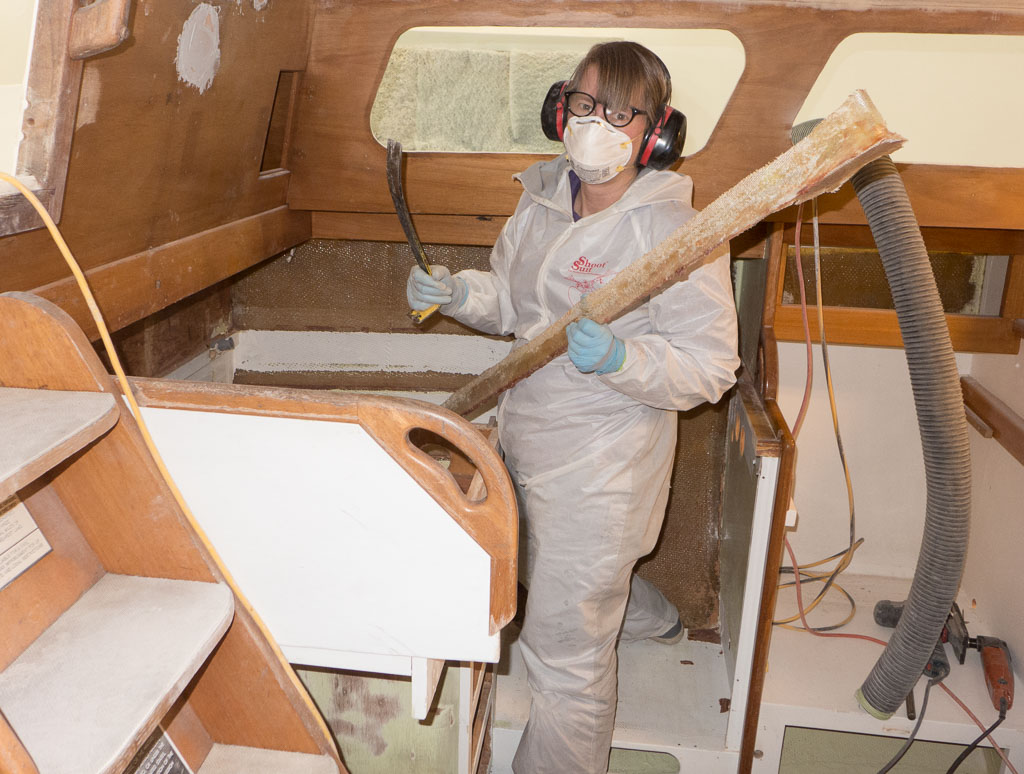
Nina has been working on the bulkhead that will go at the aft end of the cockpit. It will provide support for the cockpit. The cardboard template has been cut out in plywood and fitted to the hull. It is made in two parts so it can fit into the boat. They will be glued together with a spline and epoxied to the hull. Her last job for the week was to prep the hull with 36-grit sandpaper (full bunny suit, goggles, respirator and many layers of gloves while creating storms of fiberglass dust in a small enclosed space. She’s glad that’s over.)
Ready to install. It has been coated with epoxy to protect it from moisture.
Other things that have been happening this week.
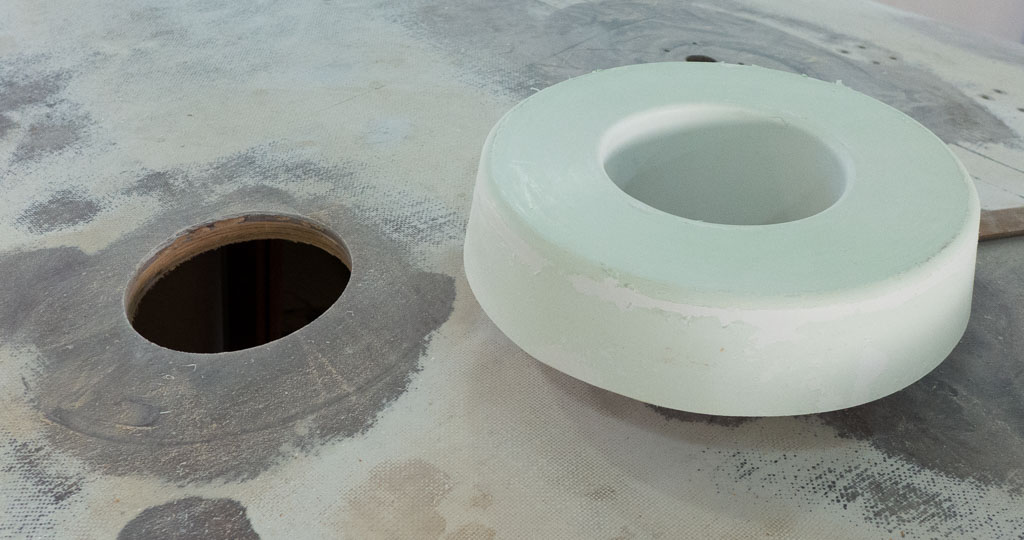
PVC mock up of the oar rack. It will hold oars, and the dinghy mast, boom and seat.Head vent base. Having a composting toilet requires a dedicated, always-on vent. The doughnut shaped piece will have a solar powered fan/vent screwed into the top of it.
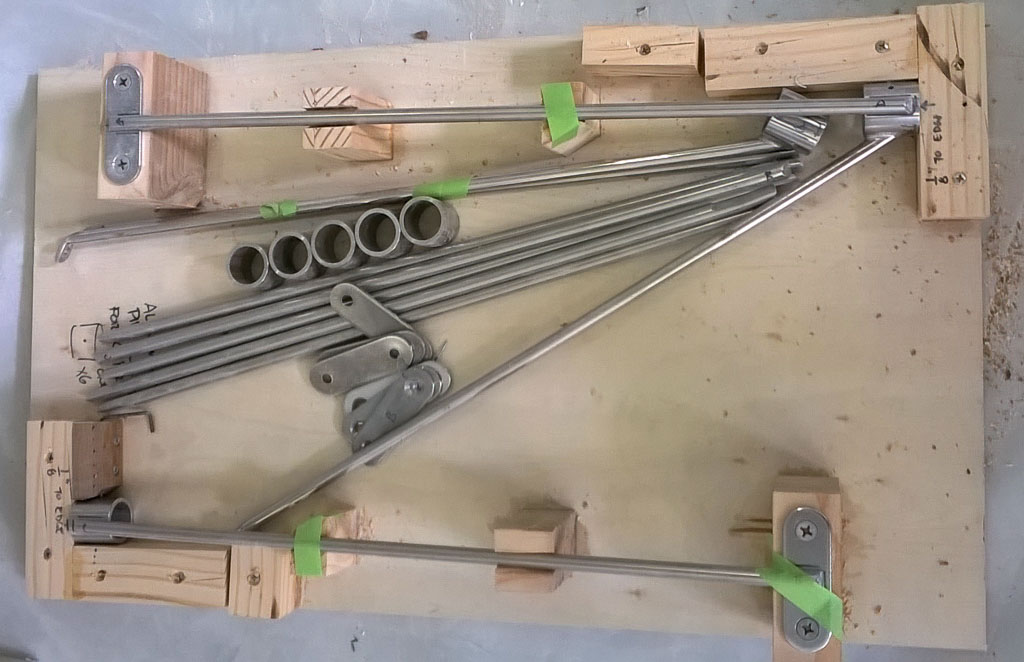
Marsden meanwhile, has been working on stanchion brace parts. He’s milled the straight pieces, bent them to shape and smoothed out the rings and prepped the mounting brackets. They’ll all be sent off to be welded. Hopefully the new stanchion posts will arrive this week.
It has been a five day weekend at the boat shop. We made progress on several fronts. The propane locker got its holes and top joint glassed again and is now done. The engine beds logs are prepped for glassing and the mounting holes for the deck hardware on the fore deck and cabin top have been cast and drilled out. Marsden made a new floor for the anchor locker. The new engine panel mount has been made. Now it needs to get installed in the cockpit.Nina has spent the last two days crawling in and out of the cockpit lockers with cardboard and tape and she now has a template for the cockpit support bulkhead. This will stiffen up the cockpit and prevent problems in the future. It also gives us something to mount the under deck auto pilot to.
The plywood bulkhead will need to be split down the center to fit into the boat. It will of course need to be glassed into place.
While we have been working Tom and Chris have been finishing the cockpit combings. We will be able to comfortably sit on them as well as have real estate for winches and cleats.The dodger has been moving along. We epoxied PVC pipe to the curved parts. This took a bit more clamping.
You can see the saw kerfs that let the pipe bend.The epoxy makes everything slippery so lots of clamps are needed.After sanding a fillet was applied so when we fiberglass the glass will lay down nicely. More frosting bags of epoxy.
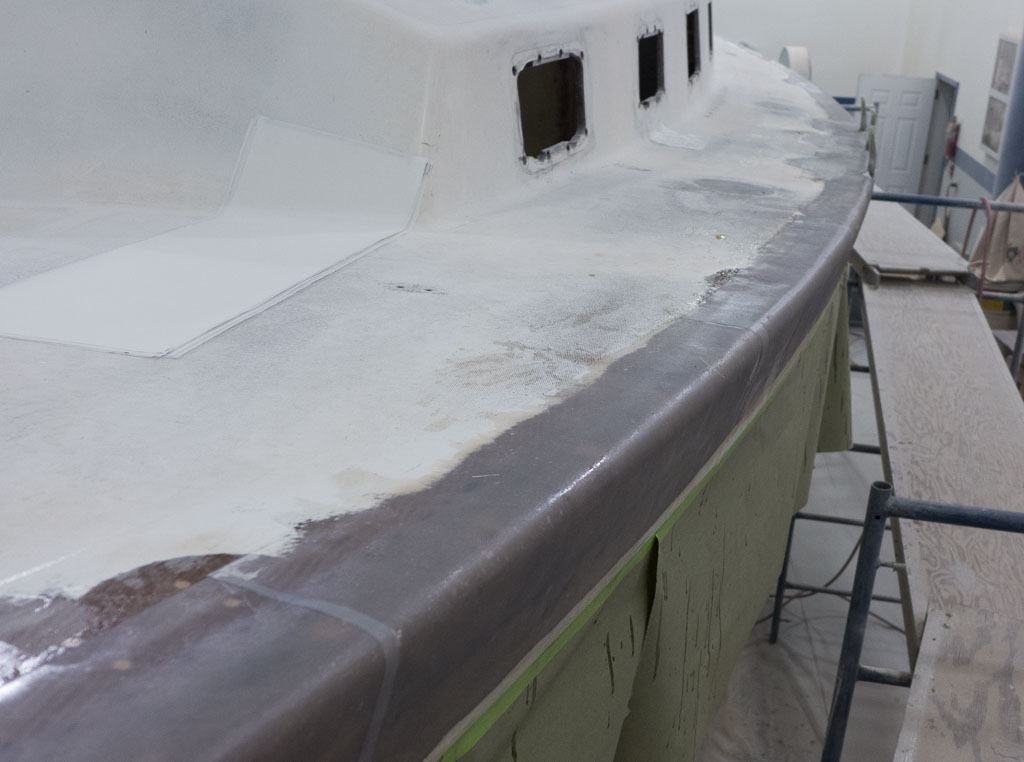
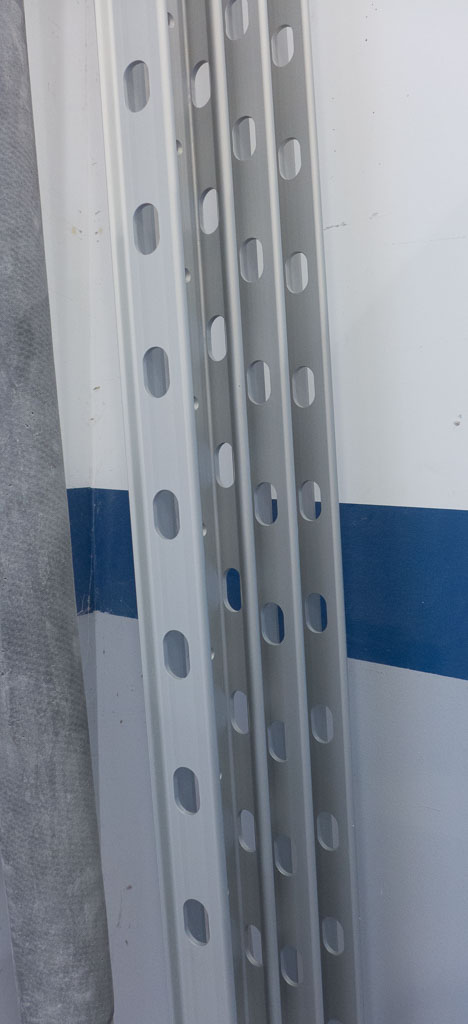
The toe rail has been fit all around the deck. It is beautiful. Nina would like to add that it’s really gorgeous, even after it’s been put on twice now to fit the aft end of it, to locate the stanchion braces and get ready to drill the big holes.
The screw holes being drilled to fit to 1/4″ bolts. They will be over drilled to 1/2″ and filled with epoxy. Third time’s a charm for putting the toe rail back on to redrill the proper sized holes for the final fit.Bill is counting the toe rail holes – only 82 per side. No wonder it took awhile to drill all of them.
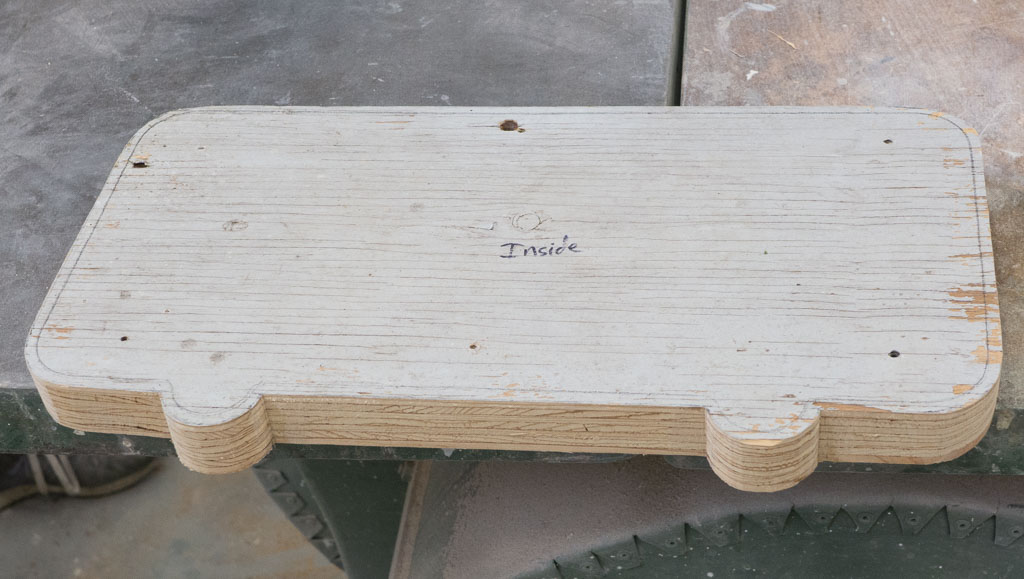
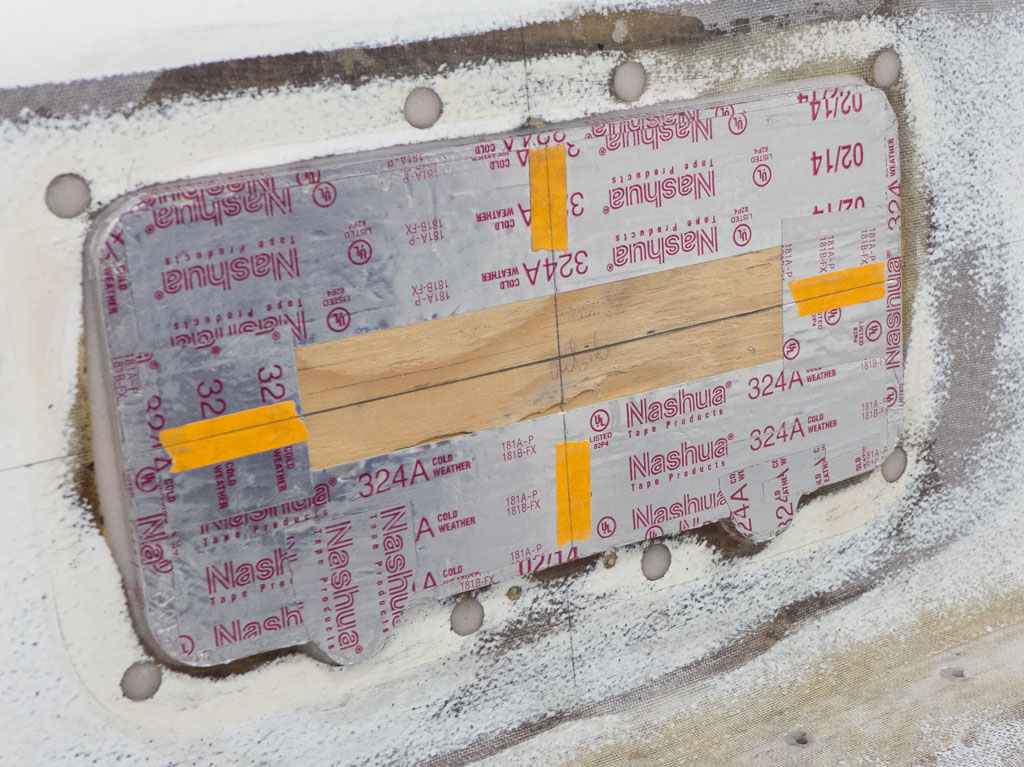
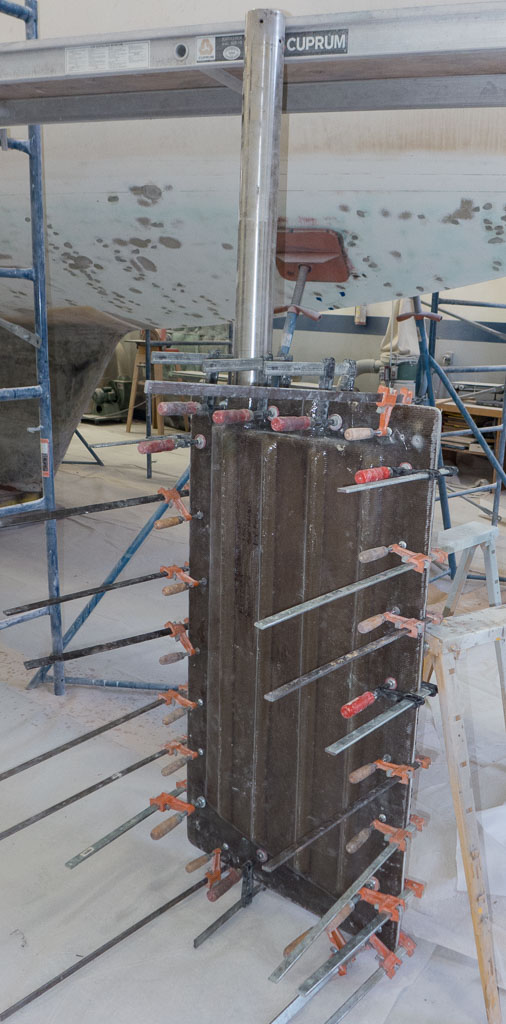
We have also been working on the holes in the cabin sides that the ports mount into. Gypsy had had a couple of different styles of ports prior to the opening ports we installed. The cabin sides had holes that were sort of butchered and rescued. Bill made molds to fit into the port opening so epoxy putty can be formed around them.
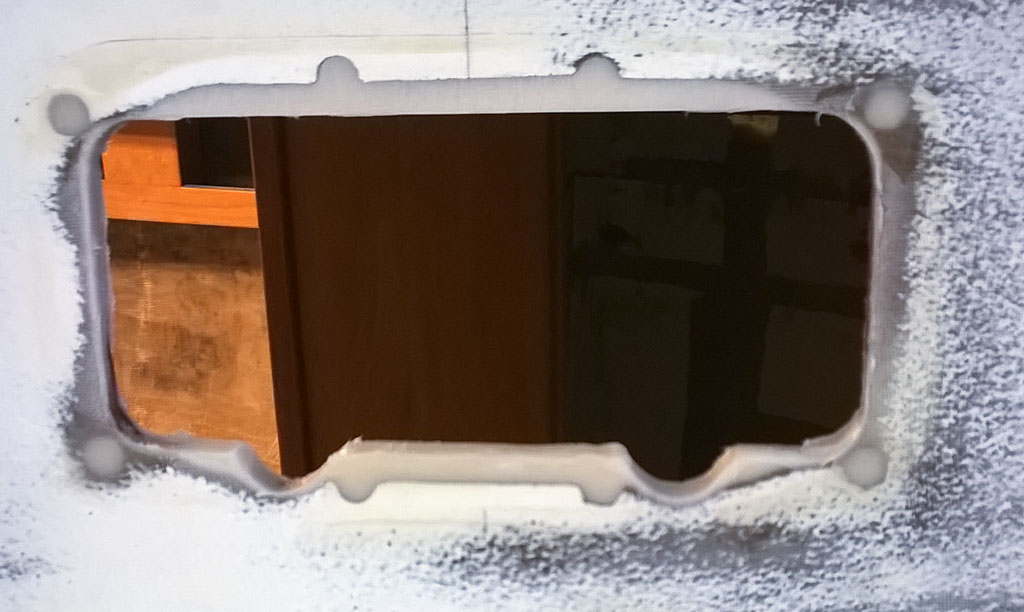
Port mold made out of plywood.The mold is covered in metal tape, waxed and mounted in the opening. Then the gap is filled with epoxy putty. A pastry bag works great. Even with the wax and a tapered shape to the mold it takes several good blows with a mallet to get the mold loose. Epoxy is great glue.Finished port opening. The excessive gaps are now filled and the opening is now much easier to fill with caulk. No more butyl rubber!Boat work is fun, but our poor yard is begging for attention. We will have to see if the fruit trees get pruned this year.
This week had its ups and drips. We plodded along both making progress and getting set back while cleaning up epoxy leaks. Then came Monday and we started on fitting the toe rail. What a great day! The toe rail looks fantastic and the fitting went very smoothly. This was one of those moments when you know that the hard work will be worth it.
Bending the toe rail into place and screwing it down.The starboard side is also fitted. Now we will decide where the lifeline stanchions will go. The toe rail will then be removed so we can cast all of the holes with epoxy. And then we’ll put it back on again!The dodger with its new pvc reinforcement on the straighter parts. We still have to do the tight curves.
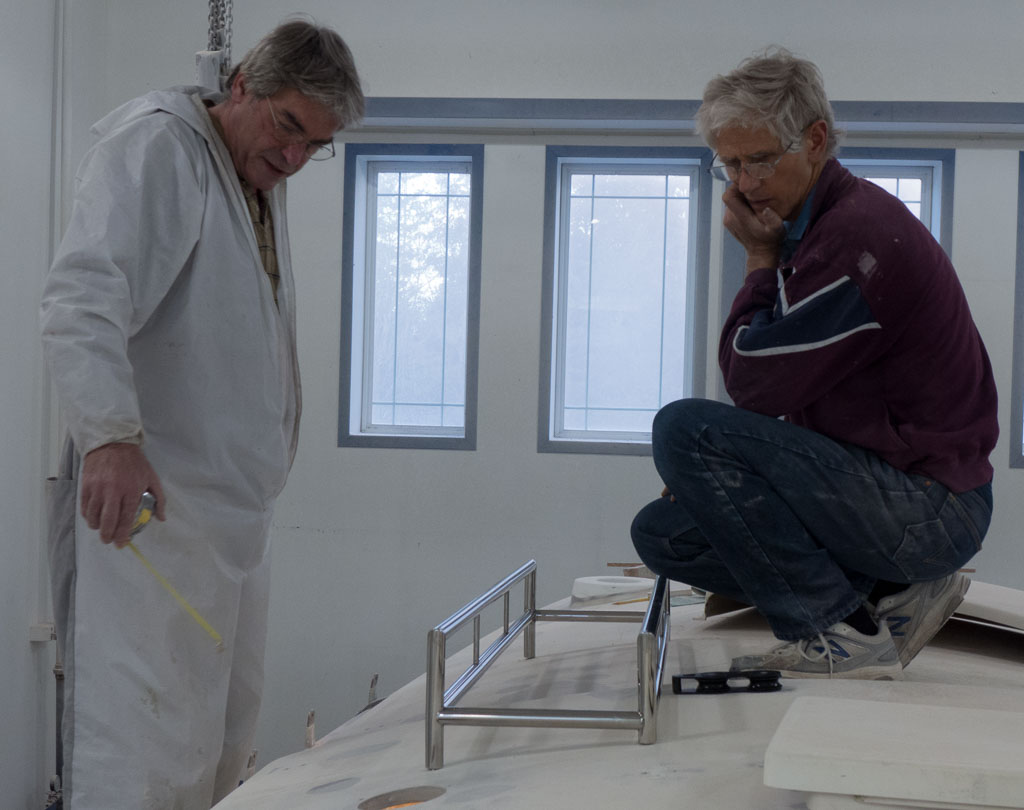
Before starting on the toe rail we had to layout and fit the fore deck stuff. This included the bow pulpit, the mooring cleats, anchor cleat, where the anchor windlass and its foot switches and chain stopper will go. These holes had to be over- drilled and cast with epoxy, which led to more epoxy leaks and subsequent clean up. Lesson learned, vacuum up the saw dust beforehand. Epoxy and saw dust is much harder to clean up than just rivers of epoxy. We sanded the epoxy blobs on the deck and re-drilled the correctly sized holes for the gear. While this was going on, the inside hand rails on the inside of the cabin top were getting fitted. On the dodger, we also epoxied sections of PVC pipe onto its edge which will be fiberglassed over to strengthen it and provide a better hand grip. If you want to know how you fill a tube with thickened epoxy so it can be glued on, the answer is, you use a pastry bag – frosting sized, not chou pastry.
I was talking to a friend who said “the blog was not as exciting last week”. I have been dealing with this too. In the beginning there were big changes and progress was easy to see. Then we got into that middle ground where things were happening to Gypsy, but it was hard to show progress. Well progress is still illusive, but to quote one infamous politician of my youth, there is now light at the end of the tunnel. What I am trying to say is we are now into the reconstruction phase. The destruction is over and we are working on rebuilding Gypsy. It takes a while to realize that this corner has been turned.
There was more grinding on the dodger.
We have a completed new rudder, the cockpit is taking shape. The new cockpit sole is going in and the combings are starting to get finished. We have glued all of the extra wood to the shear clamp, which was a two weekend project. The deck hardware is getting located and the bolt holes for it are getting cast with epoxy. The propeller shaft strut was aligned this week. We discovered that it has been out of alignment since the boat was new. So lots of little things are starting to come together. There are of course pages of to-do list yet to complete so there will be no rest for any of us for a while.
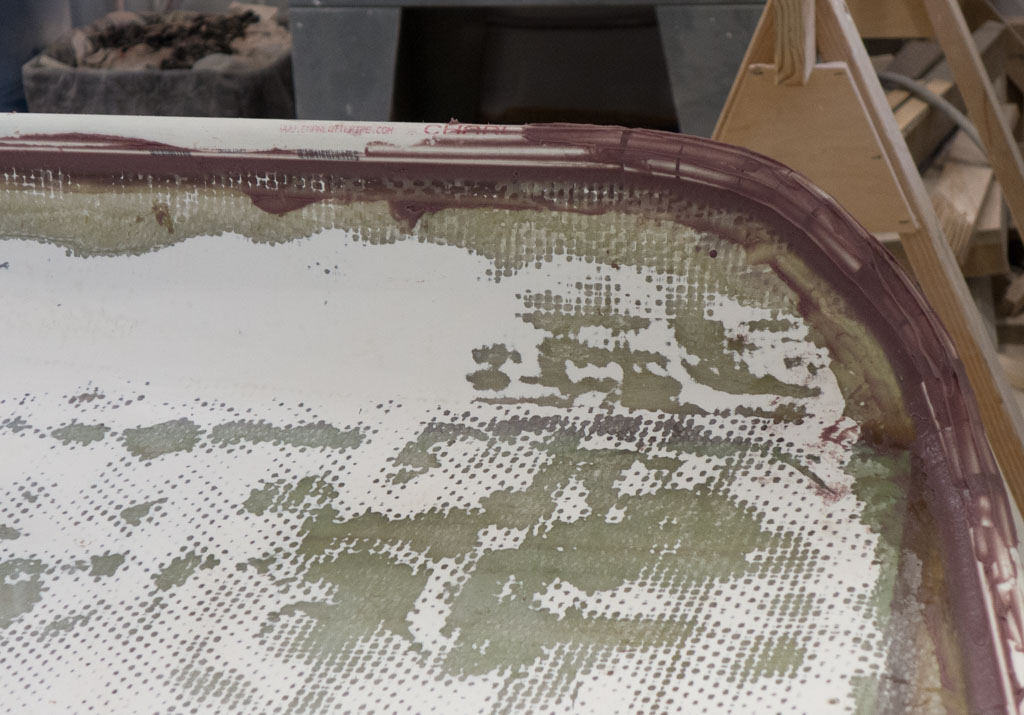
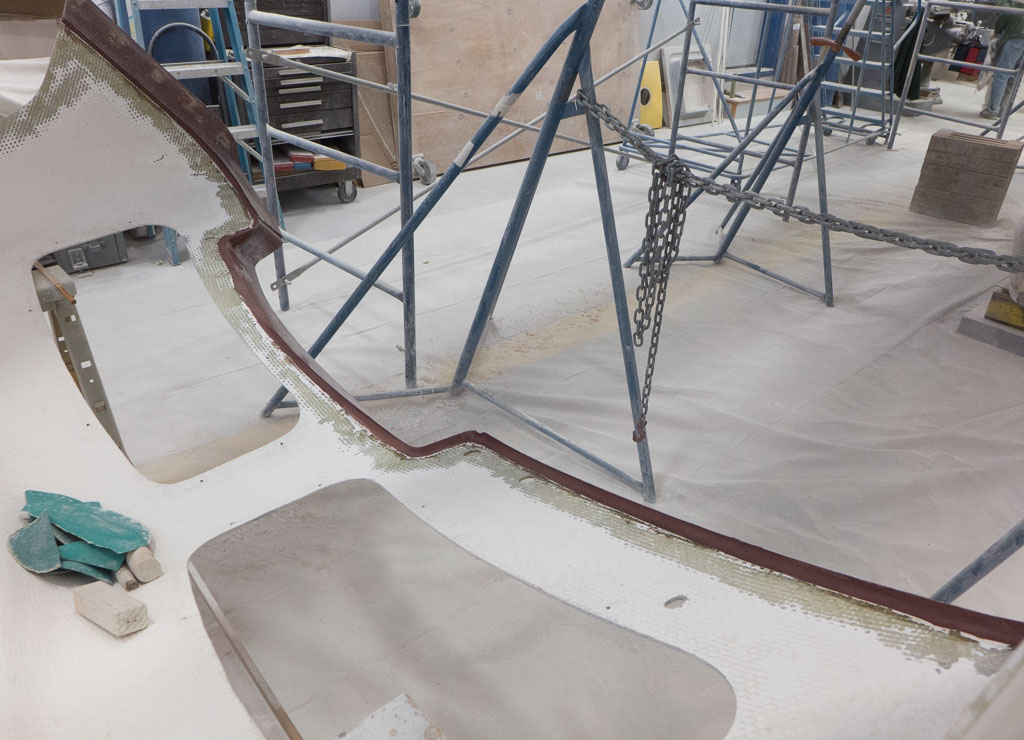
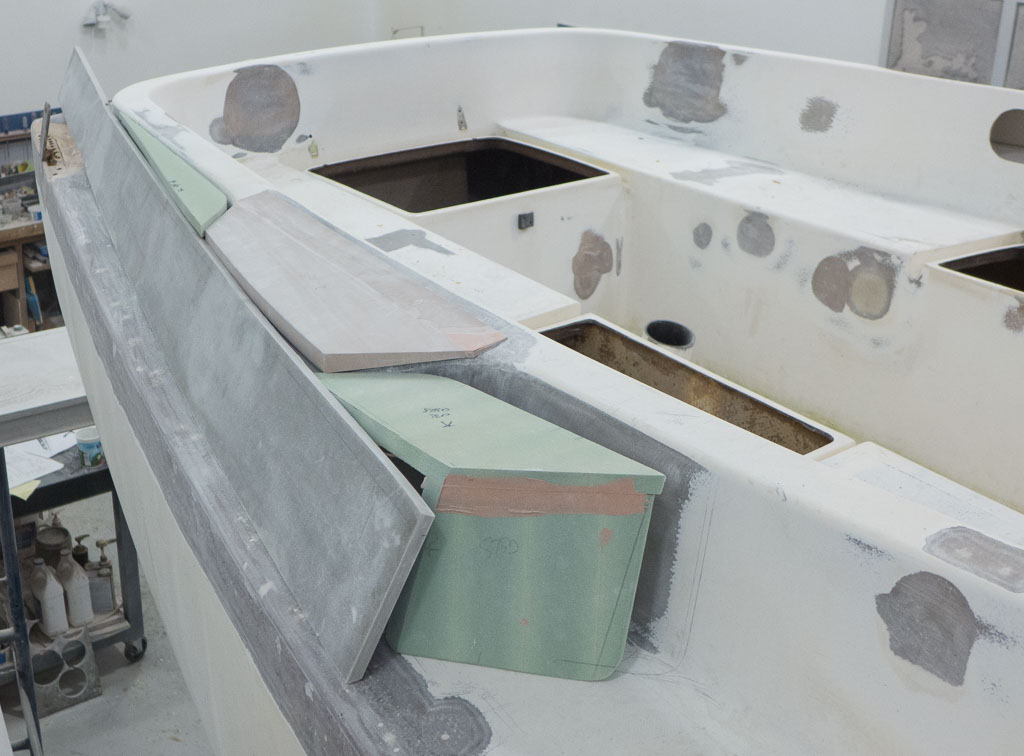
Cockpit. the green stuff is the mold release wax.Shear clamp epoxied into place. We added Marsden to the project and it went much more quickly.Dorade vents are hidden in the combing.Keel is faired to hull. The budget won’t support a foil shape, but at least we will be smooth.
The other thing I am learning is scale. I used to buy a gallon of epoxy to do little repairs on Gypsy and it would last 5 years. This last weekend we were going through a gallon of epoxy a day. That is just one illustration of how the scope of this project dwarfs our past experience. But what experience we are getting!
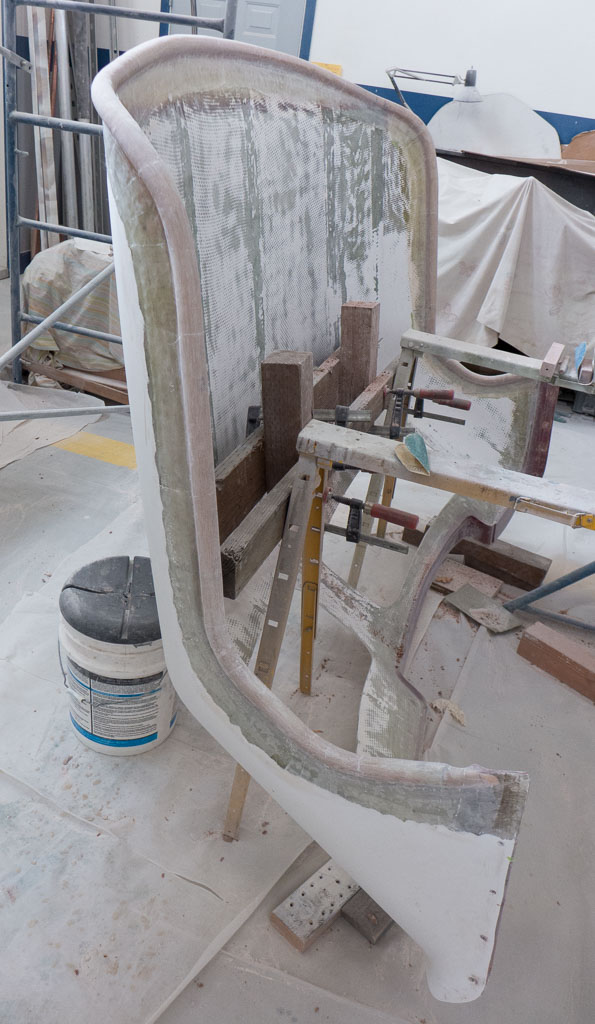
When we left off last week we had molded the dodger to the cabin top. Friday when we got to the boat shop we unscrewed the dodger and popped it off. It actually took a bit of banging and pulling before it came free. We now have a nicely fitted fillet.
This is what the fillet looked like after a lot of hand sanding.
On Sunday we added two layers of fiberglass cloth over the top side of the fillet. On Monday Bill got to once again sand the new glass to get an almost finished fillet. It still needs some touch up putty. Marsden also got to sand on the dodger. He ground off gel coat to smooth the under side of the dodger which was pretty bumpy.
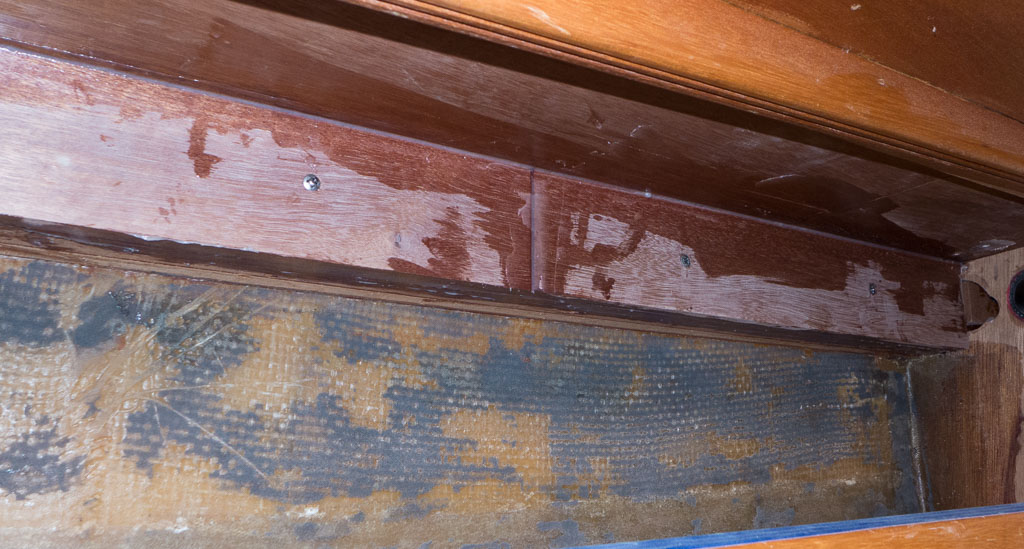
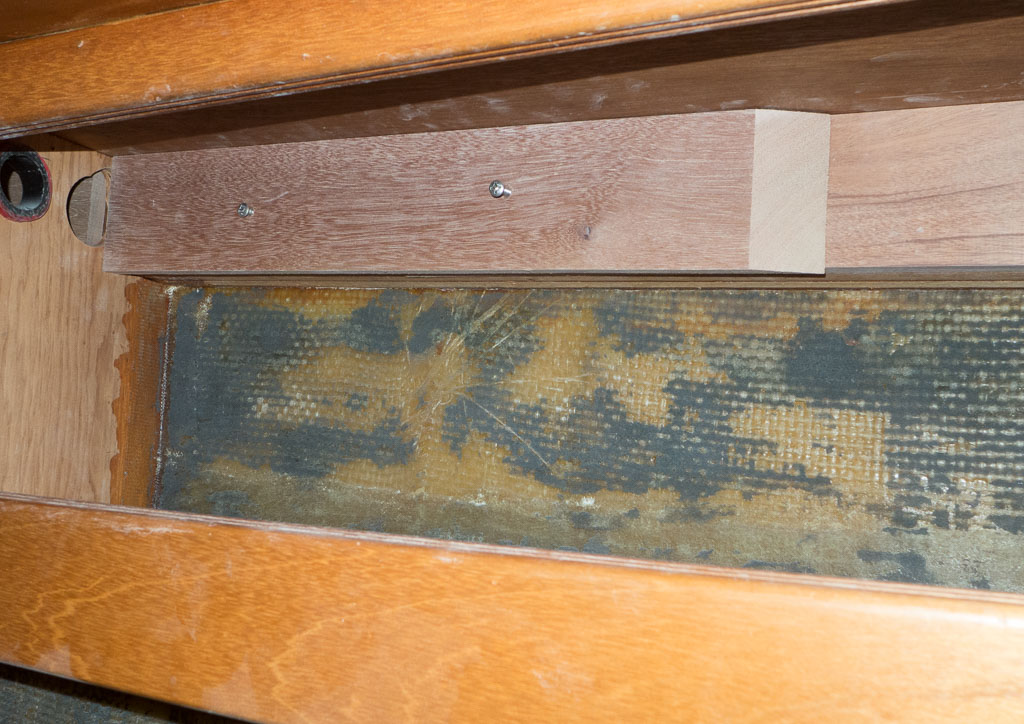
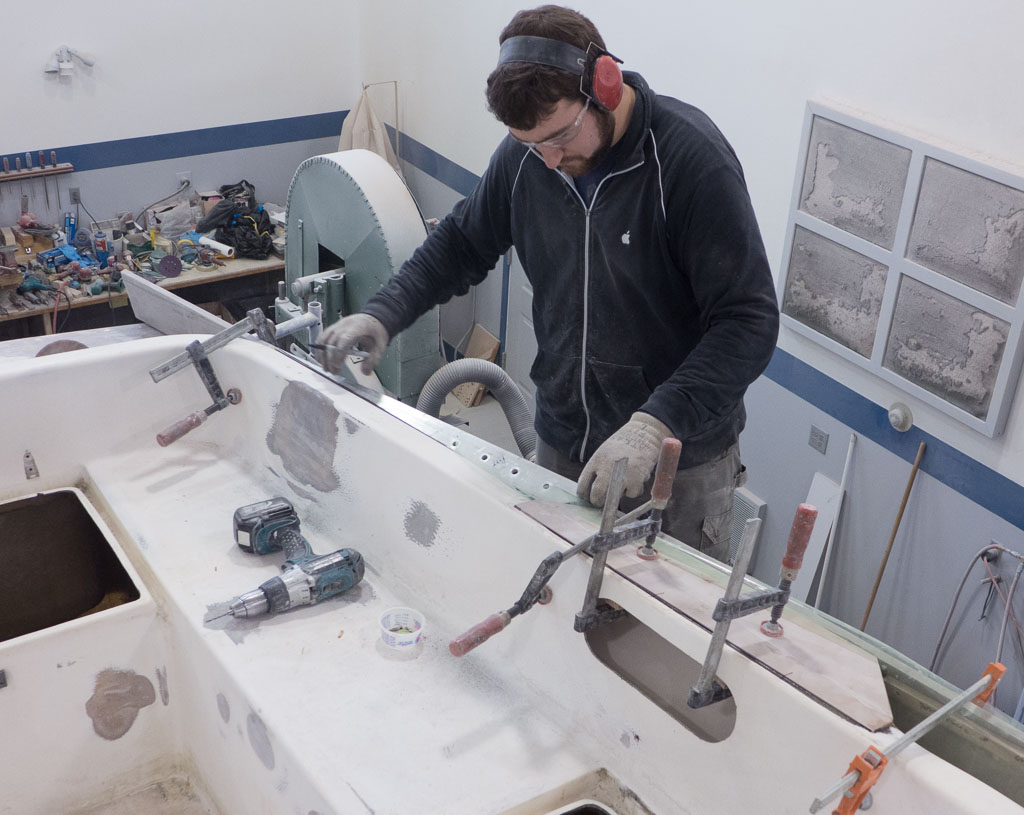
A couple of weeks ago we showed off our new aluminum toe rails. Well the bolt holes are too far inboard so we need to beef up the shear clamp under the deck that they are going to bolt into. Nina has spent the last four days fitting the new mahogany pieces to extend the clamp. There are over 100 screws holding the new wood in place. It all now has to come off, get sanded and glued back in.
Each piece had to be fitted to the curve of the deck. The pieces had to be split to fit into the lockers.
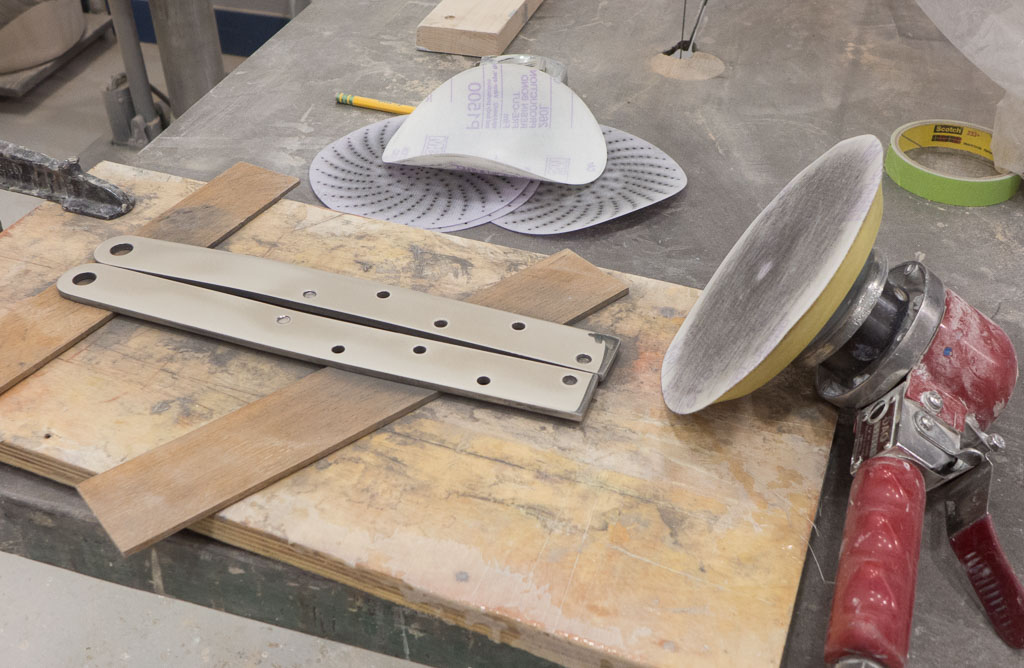
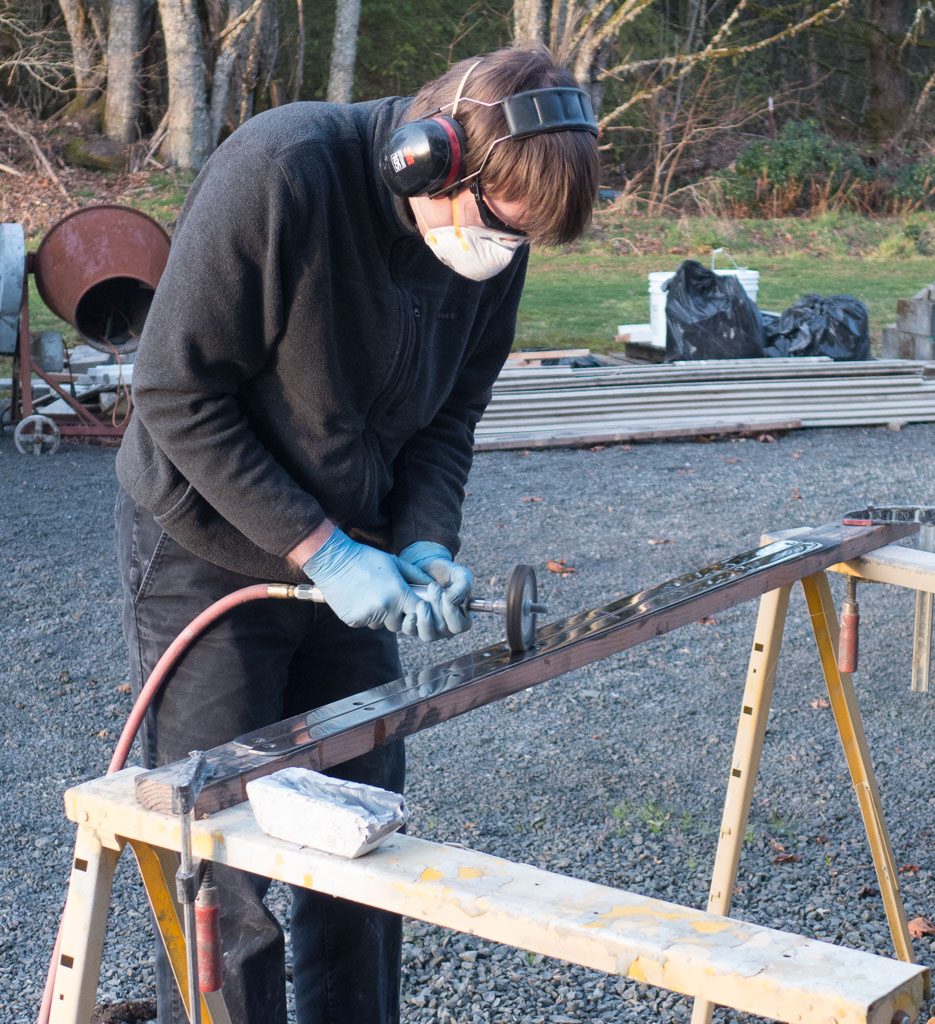
There is no end to grinding and polishing. Marsden found more steel to bring to a shine.
That’s 1500 grit on the sander. These are the straps that connect the tiller to the rudder.
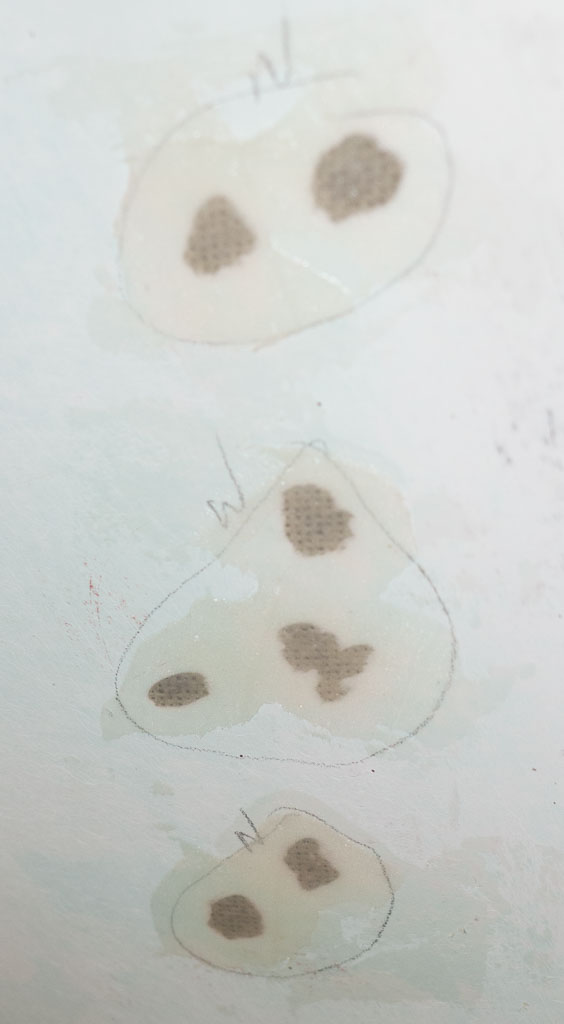
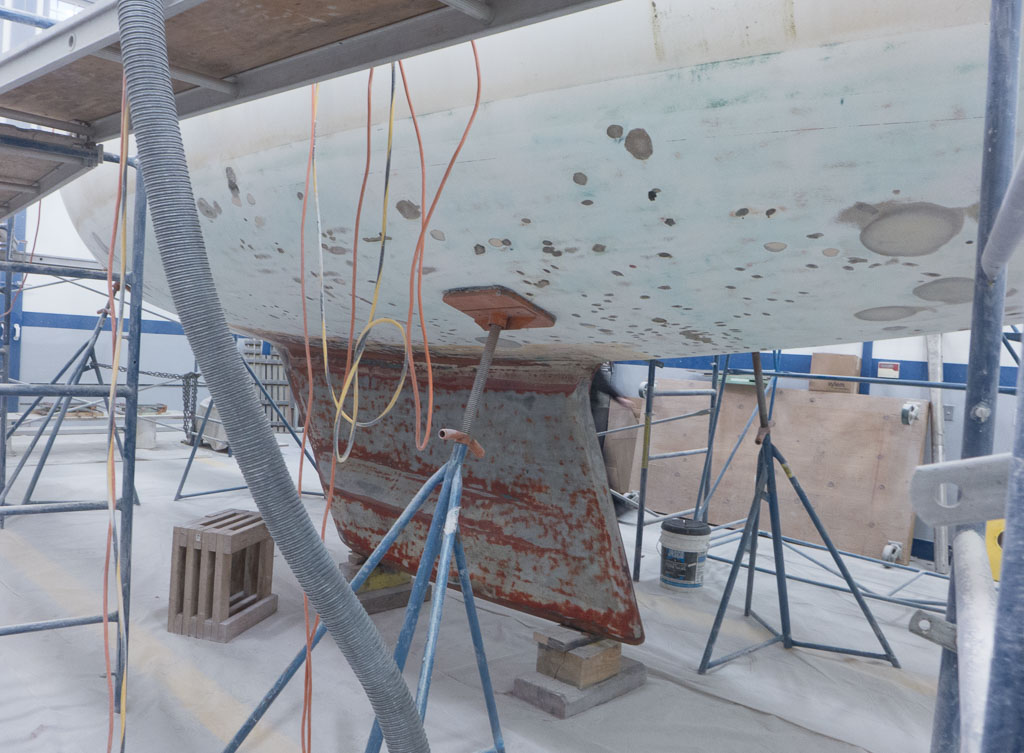
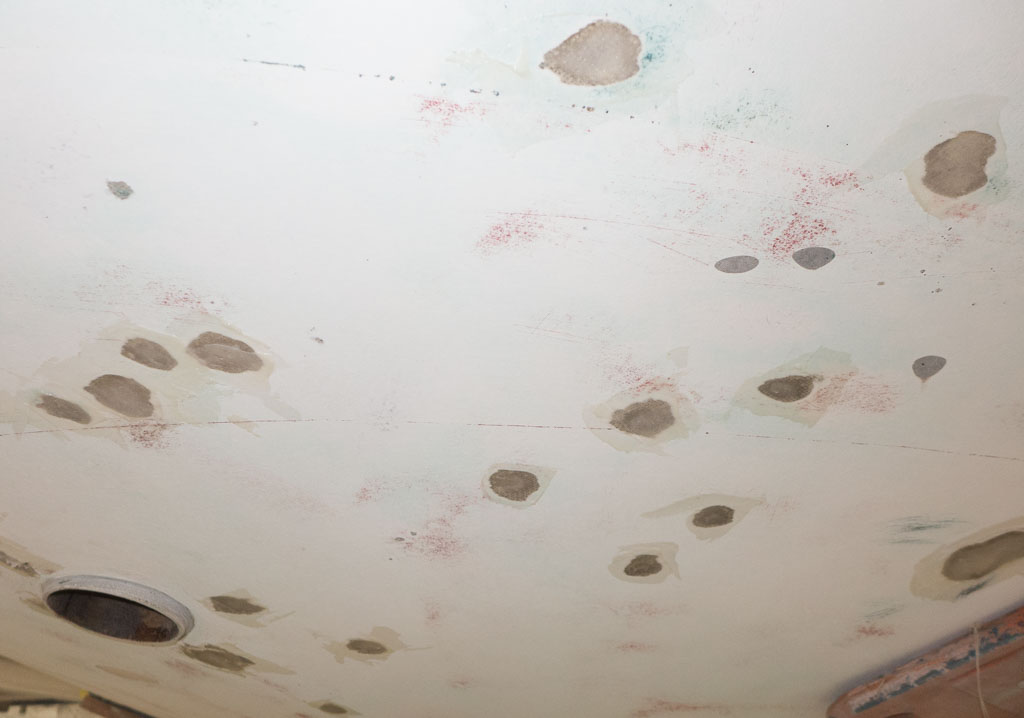
Bill finally has all of the blisters on the bottom filled with epoxy and ground smooth.
This is what a blister looks like. These have been filled with epoxy and ready to sand. Each of those blisters is the size of a quarter.
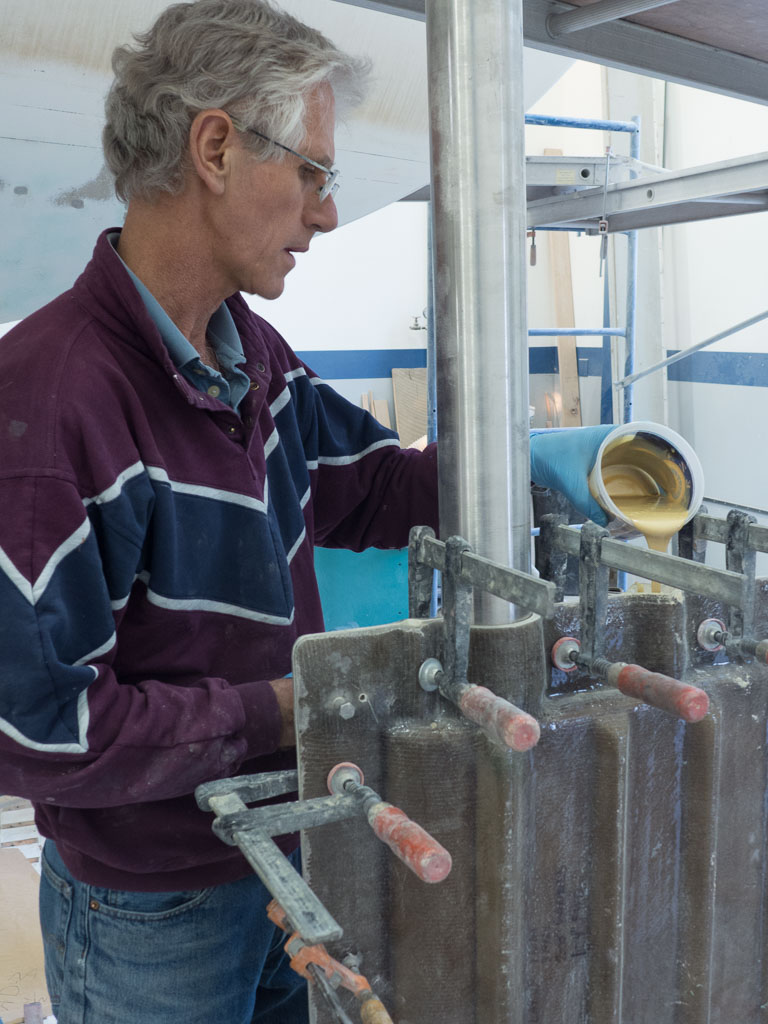
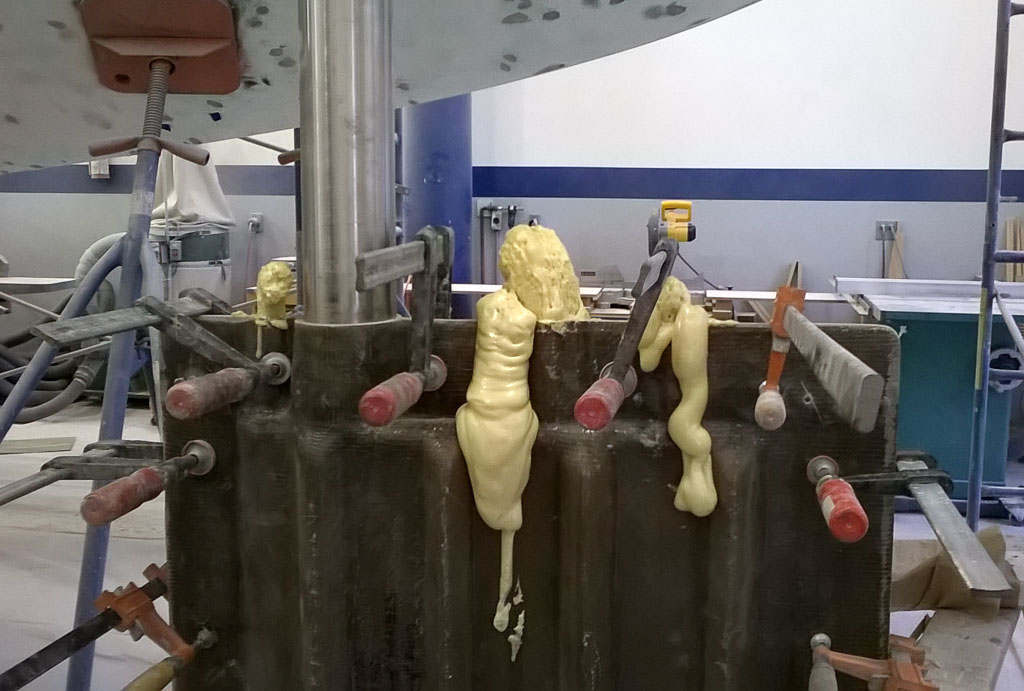
We also continued to cast all of the holes for bolting down deck hardware with epoxy. This can cause unforeseen problems. We started to fill the voids in cabin top where the slides for the companionway hatch mount. We glued tubes to one of the holes and started to pour epoxy in. All of a sudden Nina yelled that we had a leak. We had multiple epoxy waterfalls raining down into the cabin. We used half a roll of paper towels mopping up the mess. The good news is neither of us was wearing any of it this time.
The tall tubes create a lot of pressure to help the epoxy escape in our case.
The rudder is moving along. It got wrapped in glass cloth and epoxy and then covered in faring compound.
Just needs a final sanding.
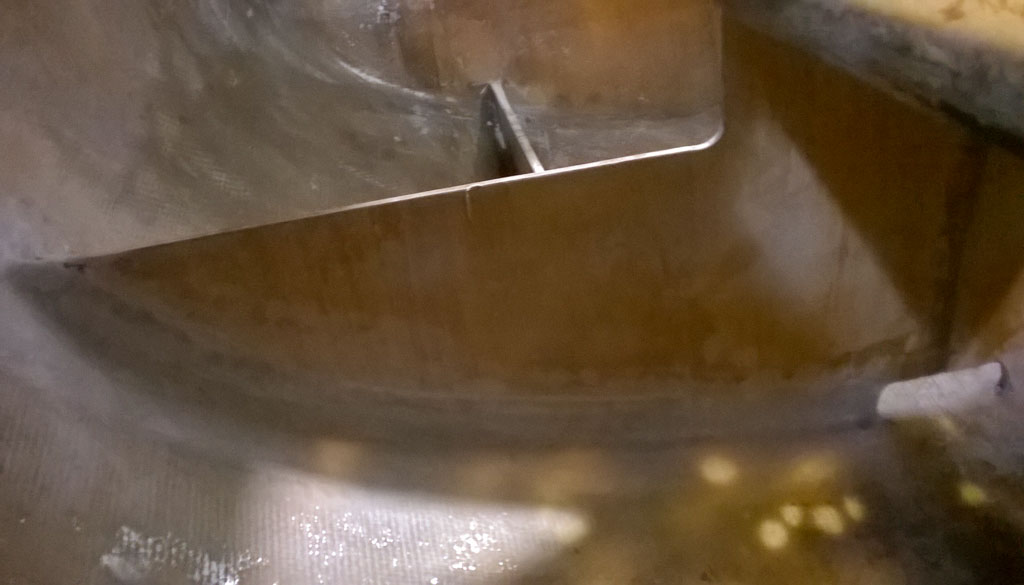
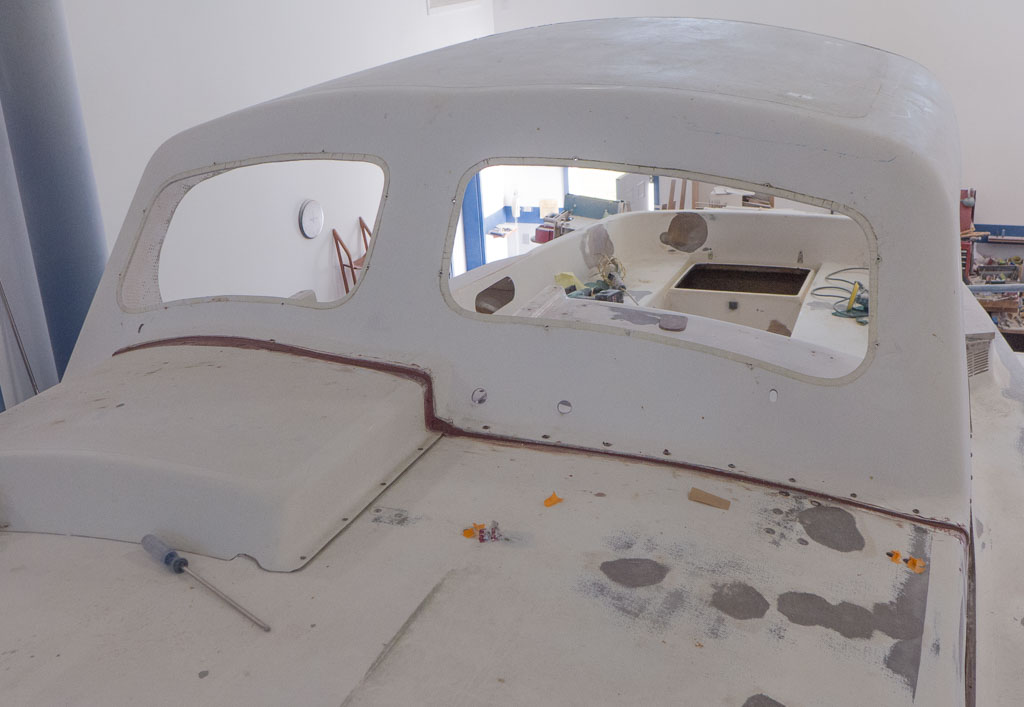
Our cockpit floor also is starting to shape up. We are adding a sloped wedge to raise the height of the cockpit sole and help water to drain out the aft end of the cockpit, where we are putting in big drains.
The start of the cockpit sole.
We are six weeks into the project and Tuesday marked our 30th day at the shop. The boat is progressing at a rapid clip. We are just trying to get everything we need to do done before we start painting, which should be early April.
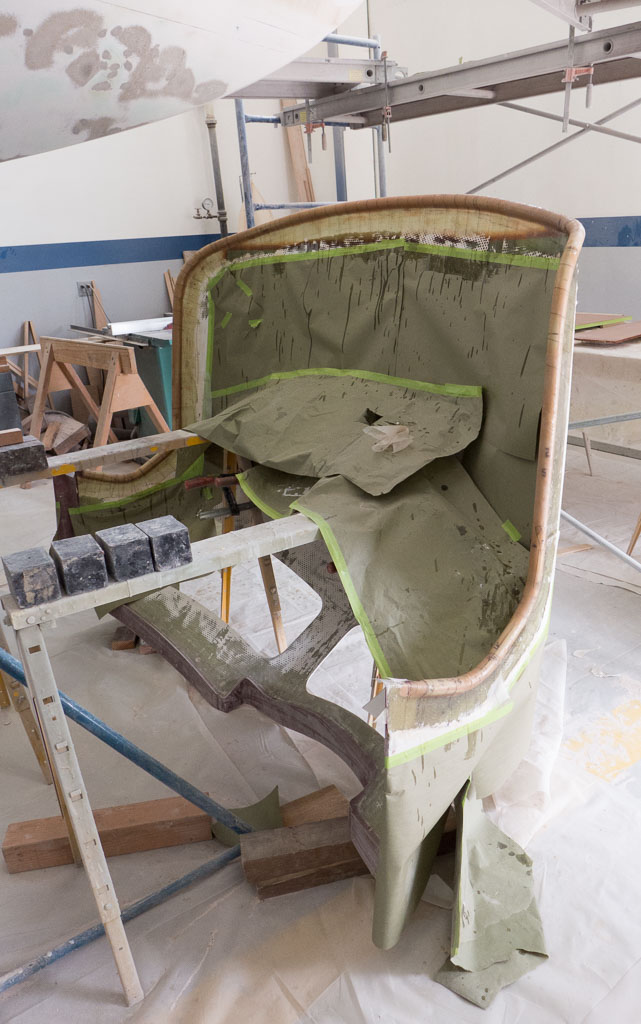
This week we will touch on dams: tape dams to be precise. They are the teaser so you will have read through the rest of the blog to find out about them.
Our week started on Friday. Bill was busy sanding off the epoxy filler that is now filling the blisters on the bottom. You won’t believe how quickly an 8′ 40 grit grinder pad gets dull. He’s probably a wimp, but new sand paper makes the job go easier. He also ground the blisters on Saturday and Sunday. Thirty-six feet by about ten feet wide, and only 15 blisters per square foot. No wonder it took forever.
Nina removed old gasket material from the top of our propane locker. The sides of the locker were glassed to the hull and were gas tight, but the top edge had failing caulk. She removed the old caulk and on Sunday she got to glass the joint. This was Nina’s third experience with fiberglass taping. It was her first in a tight space glassing over head. She did manage to pour a good deal of her resin on her arm (not enough arms to hold the tape, the brush and the resin), but she got the job done and did not glue herself to the boat.
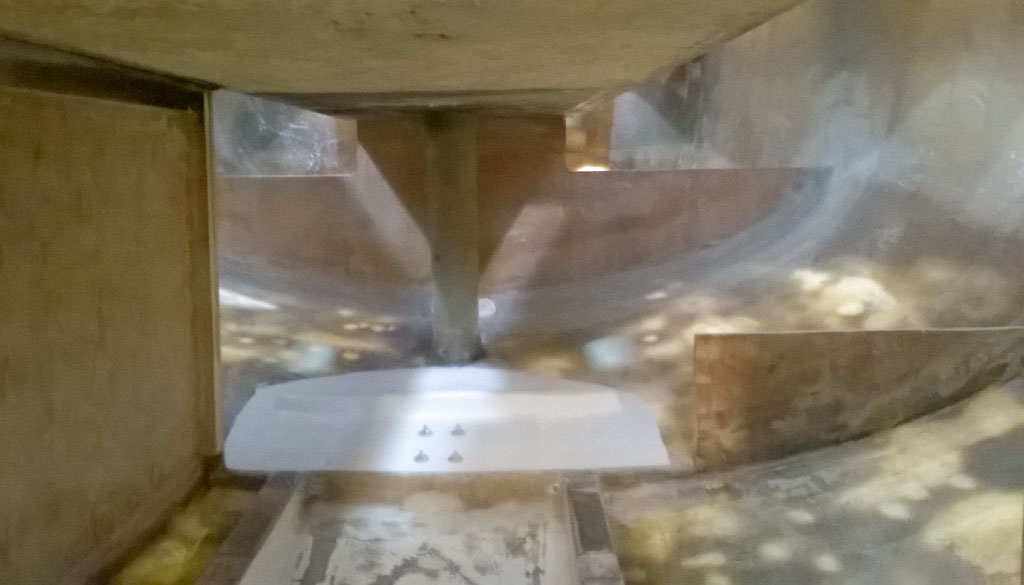
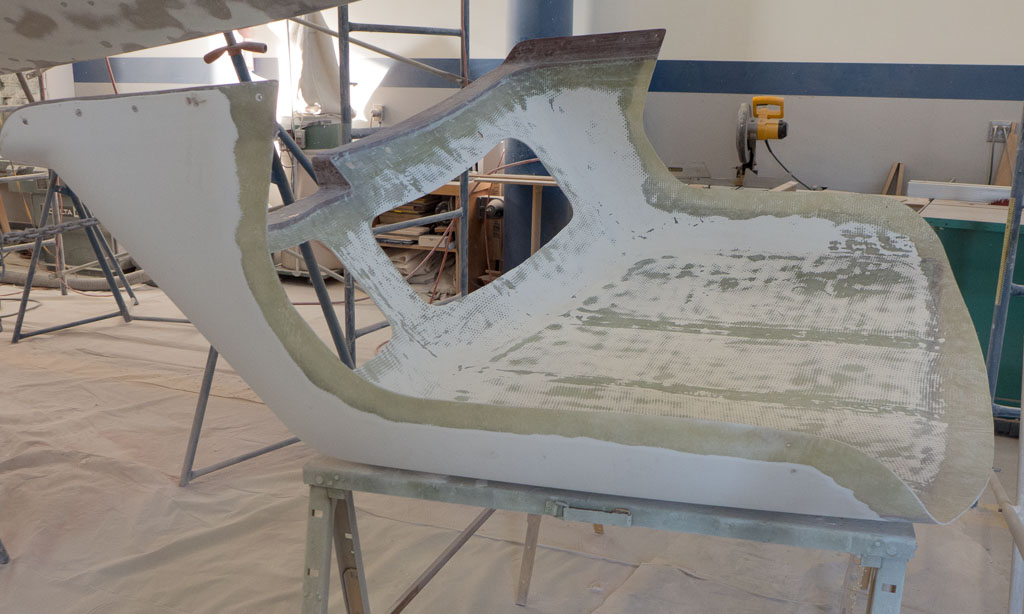
Gypsy has a fiberglass dodger that provides protection from sun and spray in the cockpit. Marsden ground the edges of the dodger to prep it for fitting to the cabin top. We had had a rather large gap between the dodger and the cabin top that had been filled with caulk. The gap also filled with gunk – dirt and mildew. To fix that, we covered the cabin top where the dodger fits with aluminum tape. Then we waxed the tape so the fiberglass would not stick to the tape and boat. Two layers of glass were laminated on top of the tape. On Monday we sanded the tape and covered it with almost a gallon of epoxy putty, which looked just like chocolate frosting. Then we set the dodger down on the putty and screwed it into place. We now have a perfect mold of the cabin top and the dodger will fit tight. There is still a fair amount of work to do on it, but we are off to a good start.
The fillet is the chocolate colored line.Another view of the fillet. The black rectangle at the back of the cockpit that you can see through the dodger window is where Nina had to climb down in to glass the propane locker.
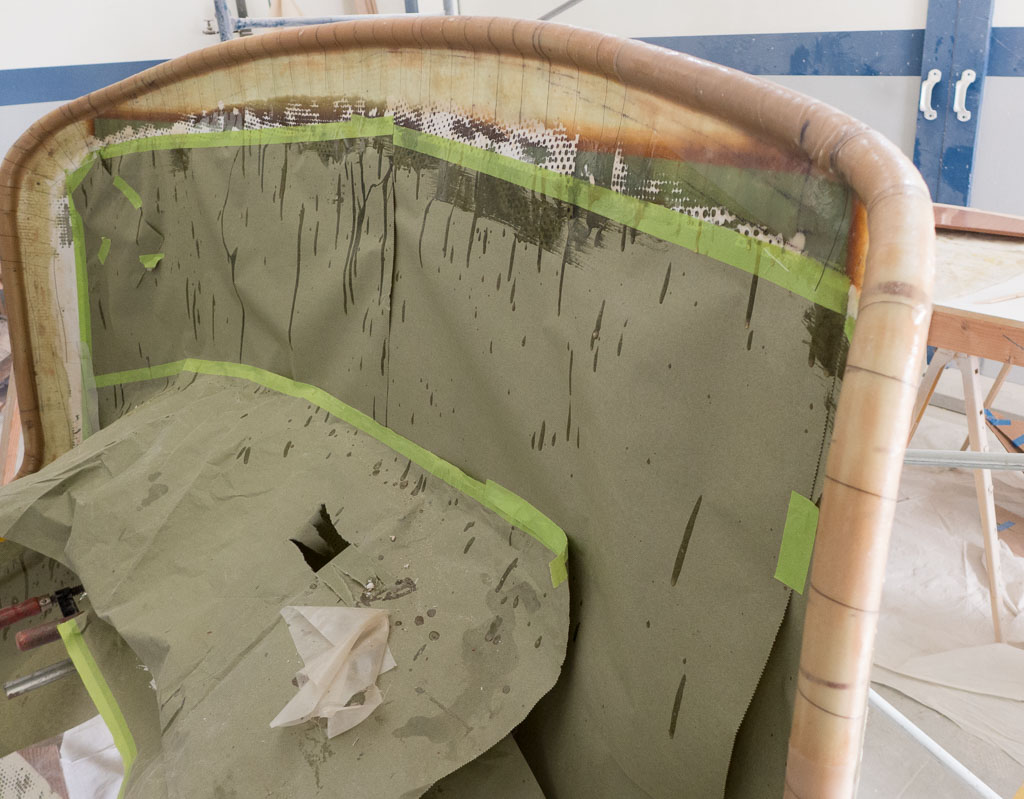
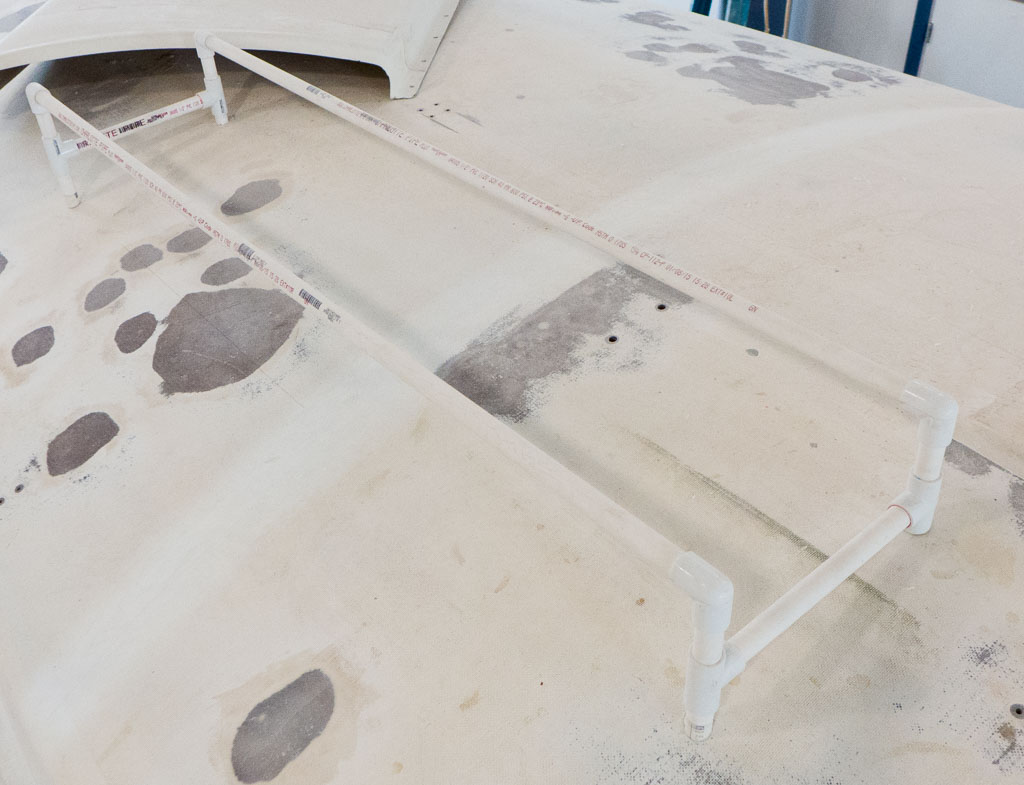
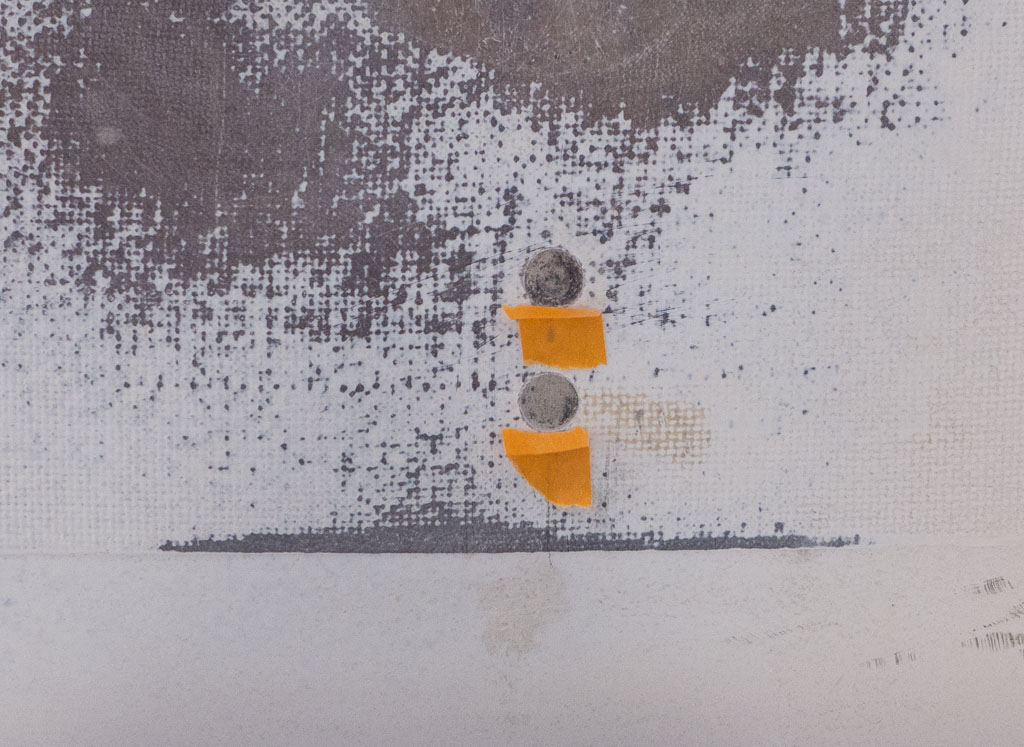
Marsden and Bill also located where the hand rails are going to go on the cabin top. They are moving outward about 6 inches. The new bolt holes now have to be cast in epoxy to protect the deck from any possible leaks. A locator hole is drilled and then you over drill your holes about twice as big as they were and fill them with epoxy. Filling holes on a sloping cabin top is not easy. You need to make tape dams to catch the epoxy and as we found out little dams don’t work. You need super dams.
Good tape dams. You can also see the aluminum tape and fiberglass for the fillet for the dodger.Our first effort at tape dams, they are too small. Two streams of epoxy to sand instead of one!
Marsden got to polish more metal parts. All three of us learned how to use a milling machine to smooth out the tiller cap that goes on the top of the rudder tube. It’s now smooth and ready to be anodized with the other aluminum parts Marsden has been working on.
It has been a busy week in the boat shop. Nina and I put in 5 days and Marsden did 4. On Friday we started glassing the hull to deck joint. This will make the whole boat one solid piece rather than the deck just being bolted to the hull. When the waves are big this means a much stronger boat.
Finished glass work.Rails have been glassed half way back from the bow. The green paper is a drip skirt to catch most of our drips.
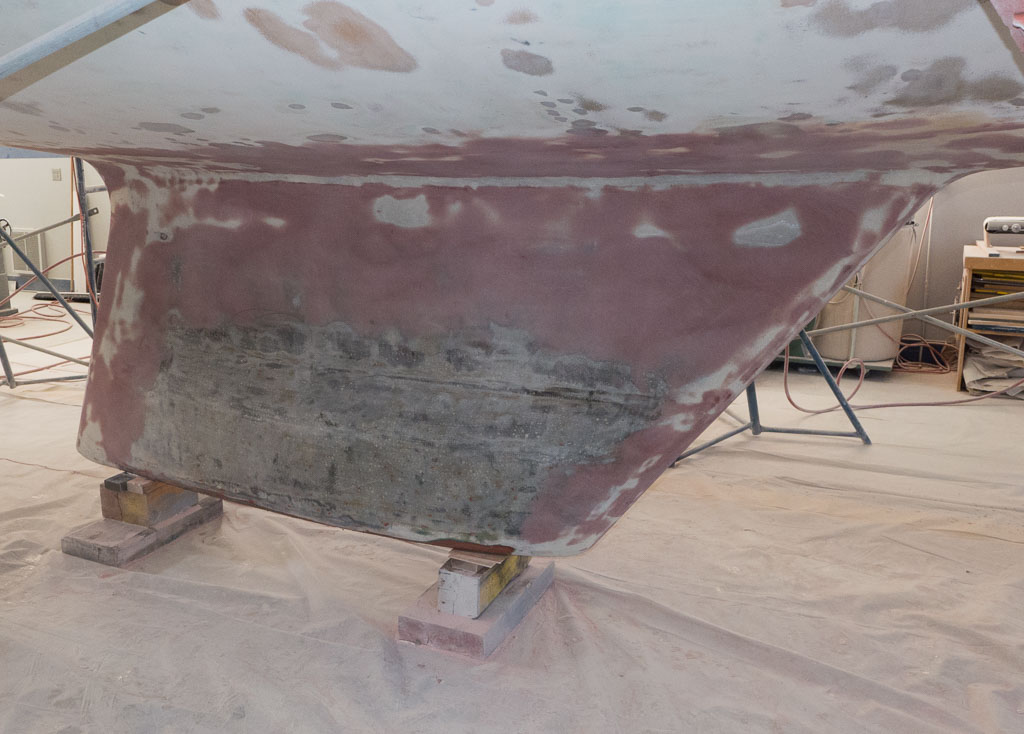
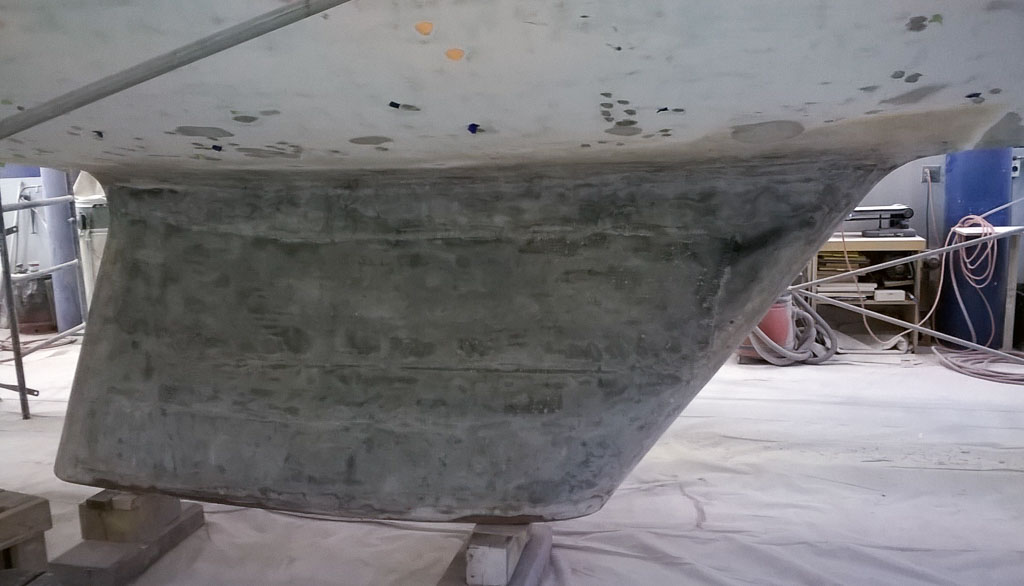
On Saturday Bill finished grinding the bottom paint off of the keel. The bottom is paint free! Now we get to repair the blisters, which means more grinding. Gypsy’s keel is very flat and so to make her sail better we are going to add a foil (wing) shape to the keel to make Gypsy sail better.While I was doing this, Nina continued to remove the galley counter and prep the engine bed logs. This means grinding old resin and paint off.
Sunday Marsden got taken off blister repair and put on the polishing metal task. He spent most of Sunday and Monday getting the companion way hatch rails polished to a mirror finish. Polishing is a slow process.
You can see yourself in the rails now.
Bill and Nina did more sanding and demolition in the cabin. If you are wondering about boat work, much of it is repetitive. On Monday the final demolition work prepping the space for the new diesel fuel tank was done. Nina cleaned more butyl rubber off the ports. This stuff is sticky and messy, but it dissolves nicely in lacquer thinner. The weather has been great so this can happen outside. Then we helped to finish the glassing of the hull to deck joint.
This gives an idea of the glassing. The piles of glass are going to be laminated on to the two corners of the transom with lots of resin. We will try not to drip too much.Nina is relaxing after glassing the hull to deck joint.
While we were doing this Tom was making our new rudder. He laminated new fiberglass skins in the two mold halves. Then he had to fit the rudder post to the mold and glue the two halves together. After glassing the hull to deck joint we watched as Tom filled the open space in the rudder mold with foam. The foam is made by mixing the two component parts together. Then you have a minute or so before the chemical reaction starts and the foam expands. To control the reaction we did three smaller pours instead of one big pour.
The rudder mold is assembled.Tom pouring the foam.Waiting.The mold is full.
Tuesday found Bill re-sanding the bottom blister epoxy fills. Nina getting rid of more old carpet glue and cleaning parts of old caulk and Marsden got to get the rust off of the engine bed plates. Luckily these are going to be painted so a mirror finish is not needed. While we did this Tom worked on grinding the newly glassed hull to deck joint into shape.
After grinding the deck joint smooth.
We also have decided to replace our wood toe rails with aluminum ones. The four 20′ rails came this week and they are going to be lovely.
We have finished another week and you may be wondering when we will be done? Well, if we are lucky and funds hold out we should be finished in June. Even though we have been racing along this is not a fast project. We are making progress. I finished sanding the bottom paint off and now I get to sand the keel to repair some poor glass work on it. While I work on the bottom, Nina is working on removing bulk heads, (dividers across the boat), in the cockpit lockers that we don’t need or want to move. She is also removing the counter top and some storage in the galley. This is in preparation for a new sink and refrigerator. Marsden has been fixing blisters on the hull. Blisters form when water makes its way into tiny voids in the fiberglass laminate of the hull. To fix them you need to grind out the blister and fill it with epoxy putty.
While we are doing our part Tom has been designing new water and fuel tanks as well as overseeing the project and Chris has been working on the improved cockpit combings.
Bottom paint is gone. The keel still needs work.Bill grinding on the keel. (Respirator removed for photo.)Counter top half off.Nina is willing to go to great lengths to get a good galley.Close up of blisters freshly filled with epoxy.Marsden sanding the bottom paint off the propeller strut.Combings are taking shape.Chris working on the combings.