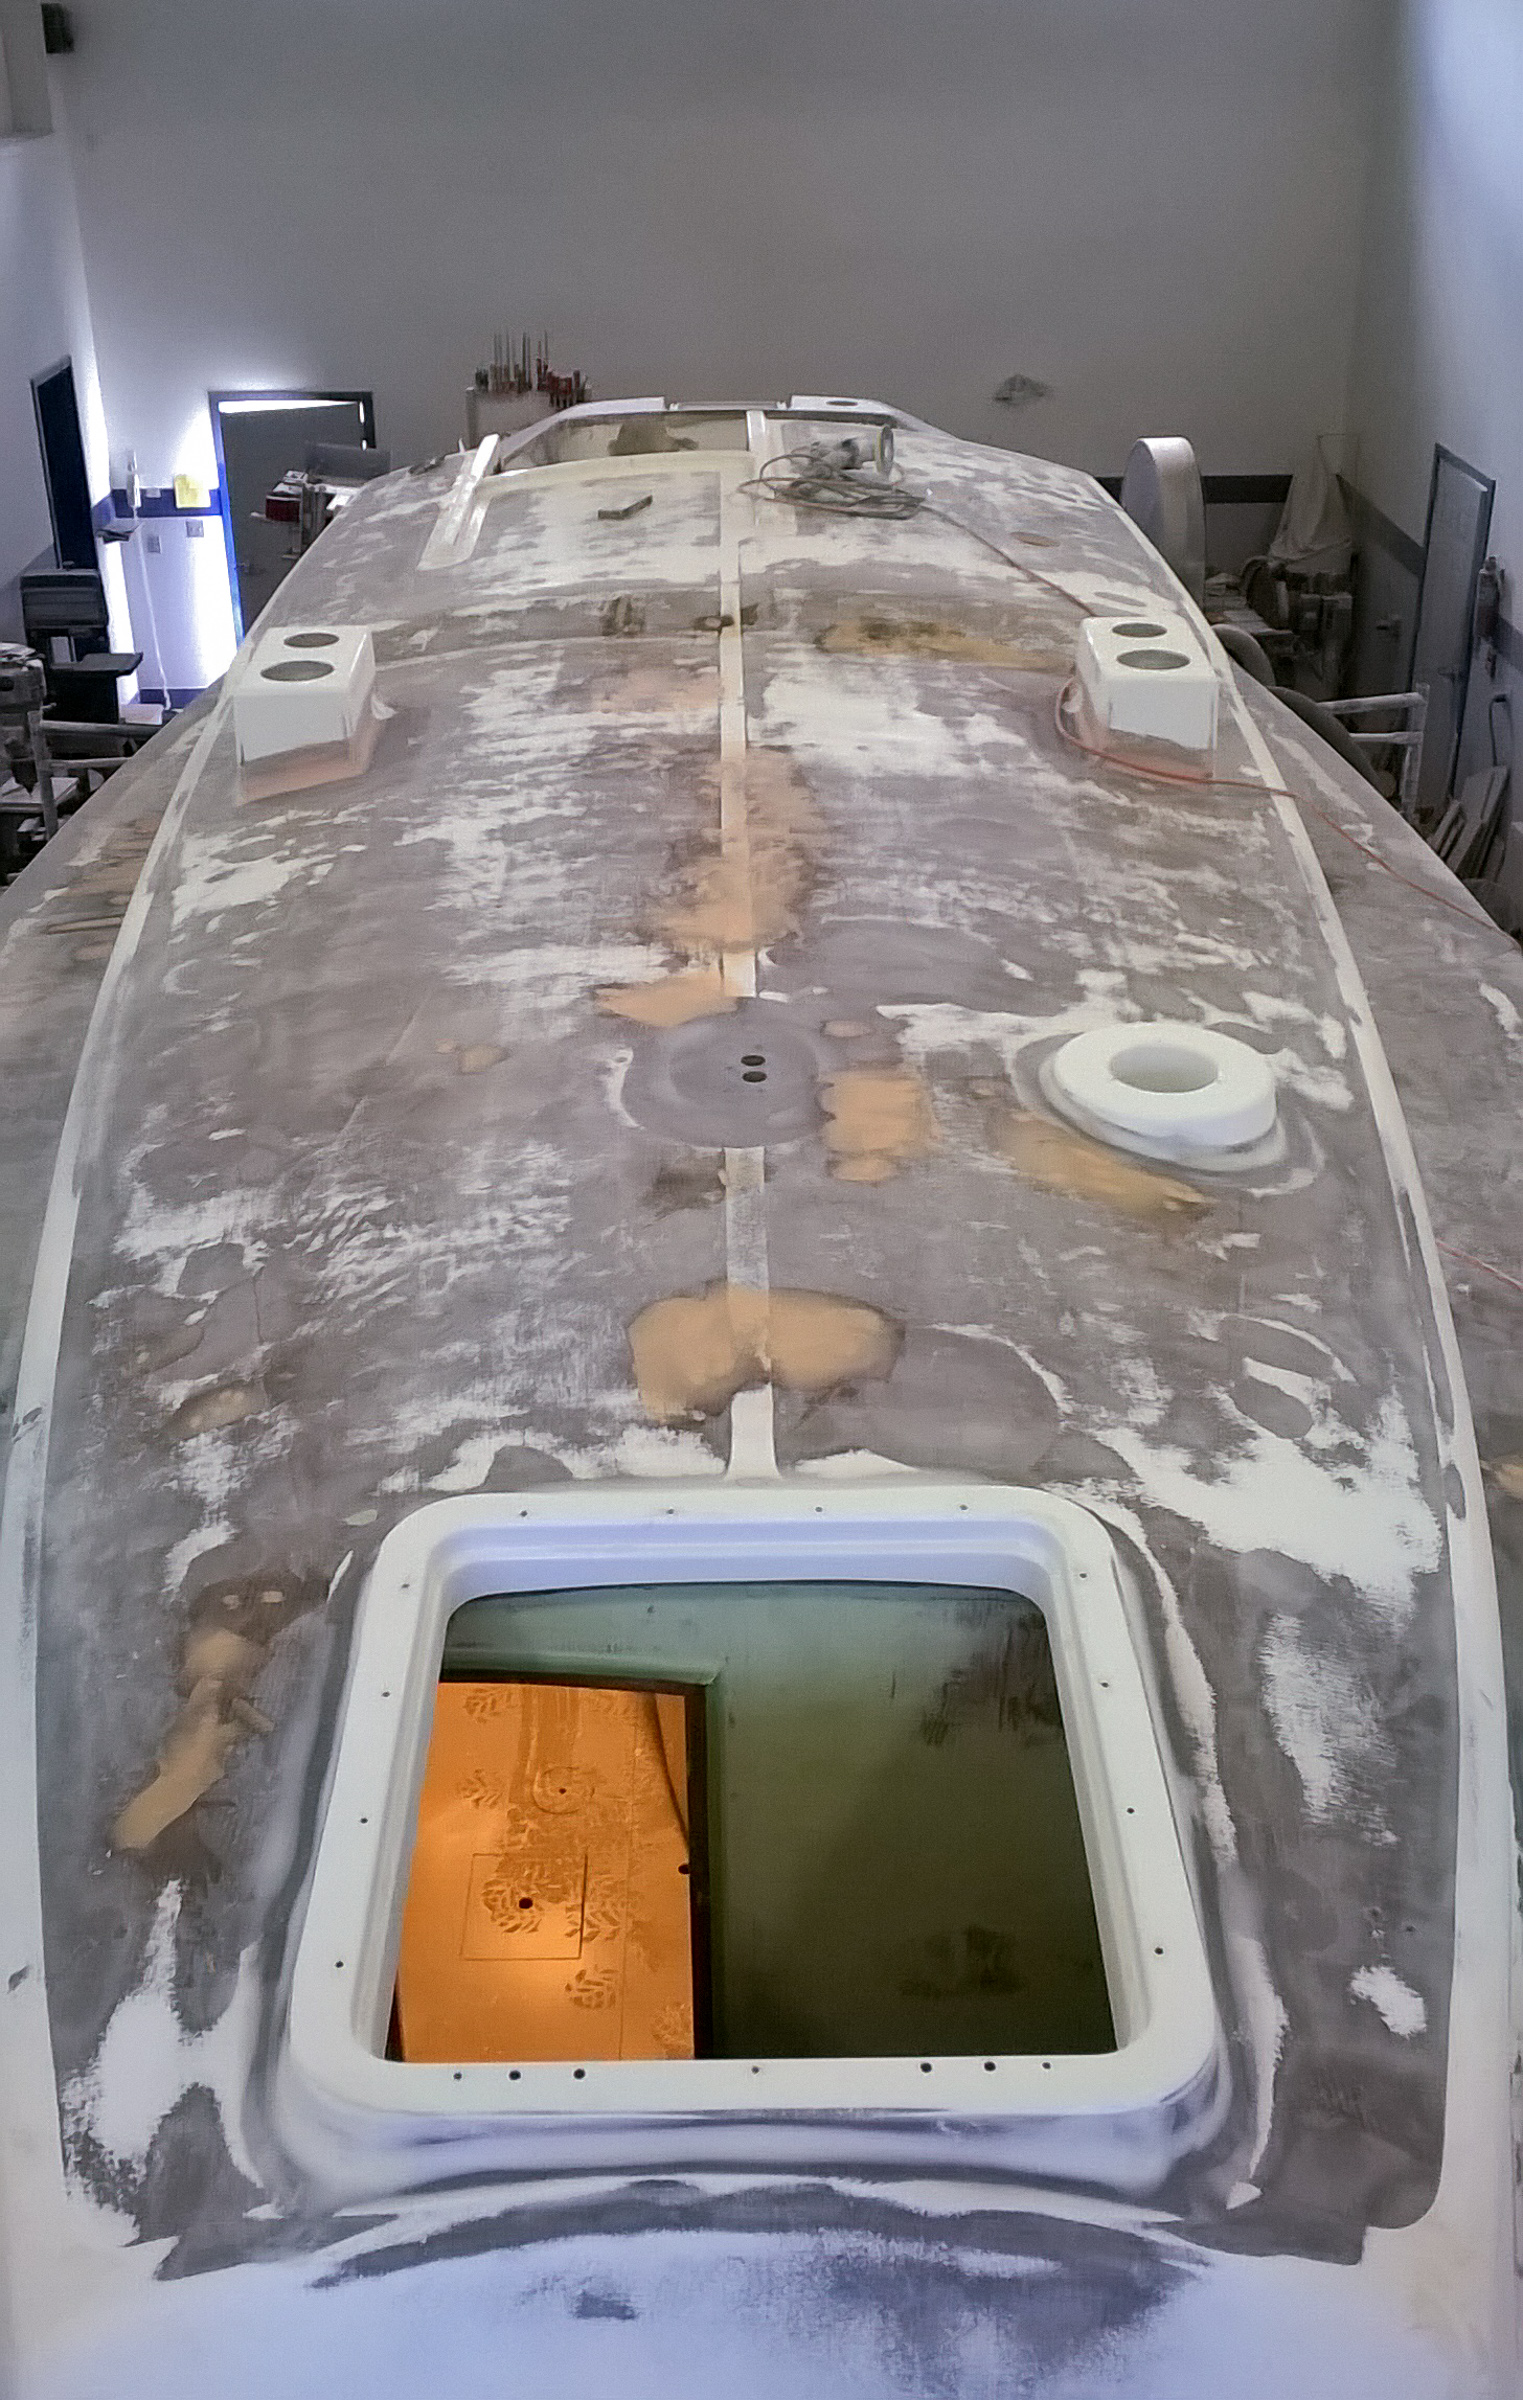
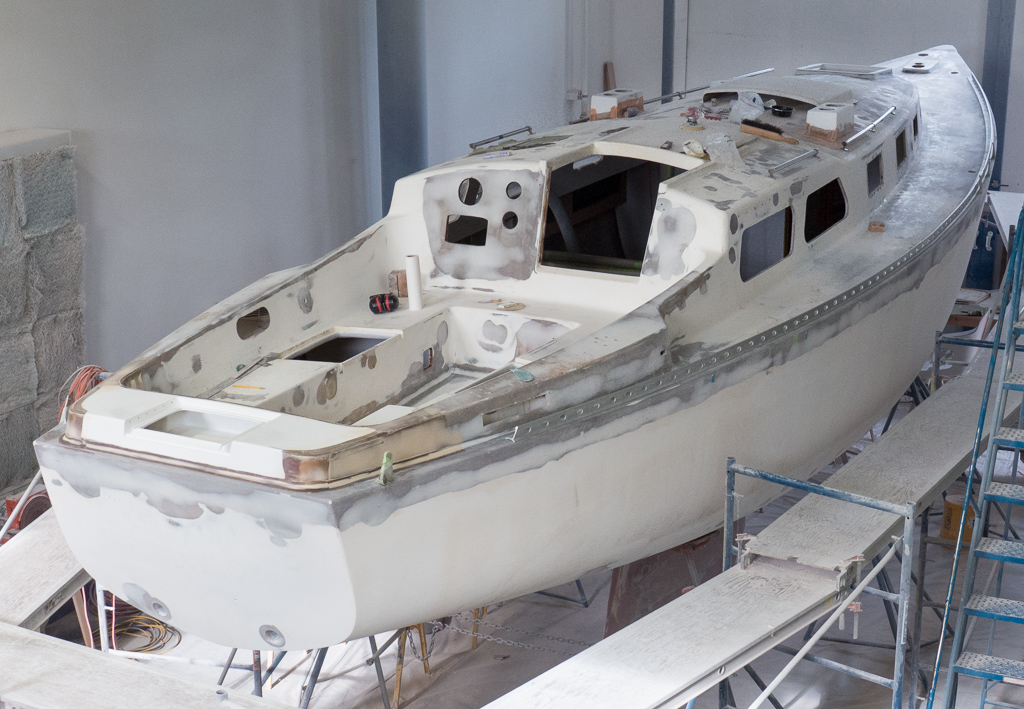
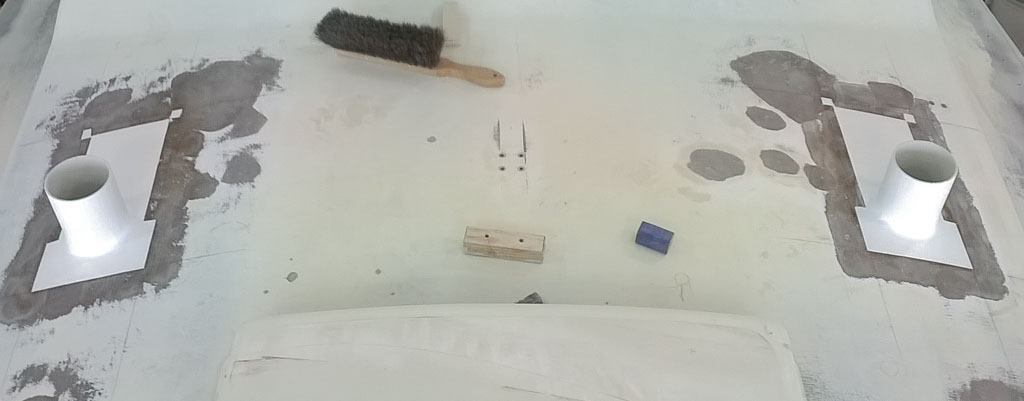
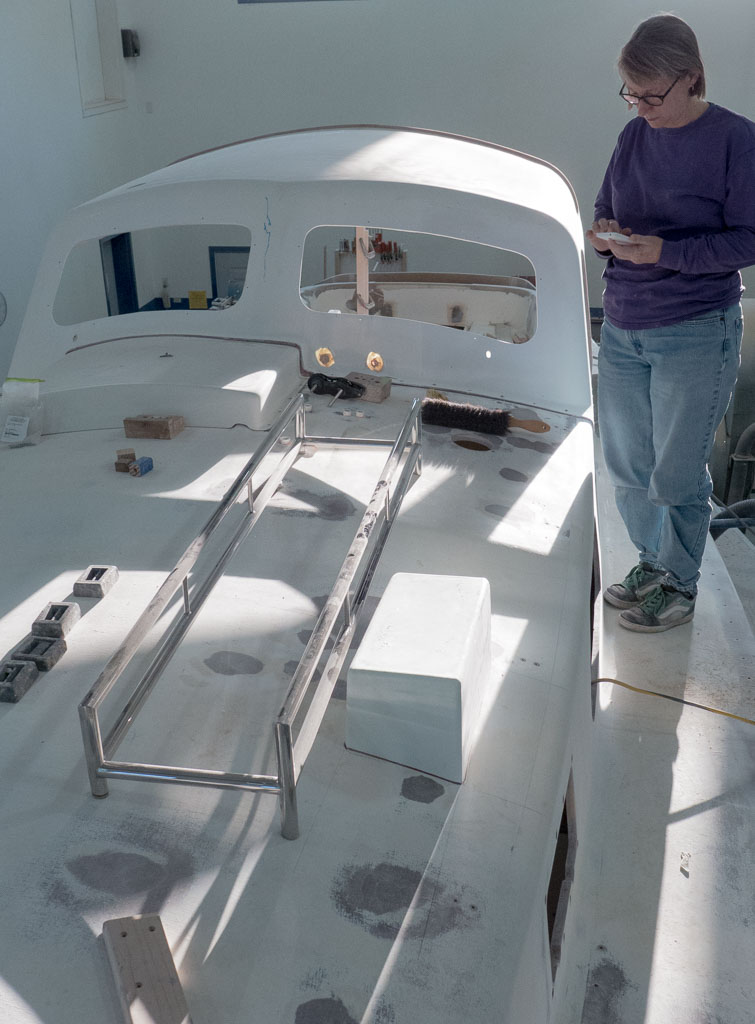
So, life got in the way of posting this week. But, here it is: our weekend’s progress. We arrived on Sunday morning to find a list of things to do and a boat with the non-skid sanded off! And we were greeted with a list of tasks. This was also a good thing, because we weren’t quite sure how much we had left to do. One of Nina’s first tasks was to track down any air bubbles that had been exposed by sanding off the non-skid, grind them down and basically fill them with body putty. This turned into one of those learning curve projects, but after many spots of not quite spot on puttying, she learned how to do it properly. Tom gets to make them smooth.
Non-skid sanded off, oh my! The pinky-beige spots are where the air bubbles have been filled in and are waiting to be sanded smooth.
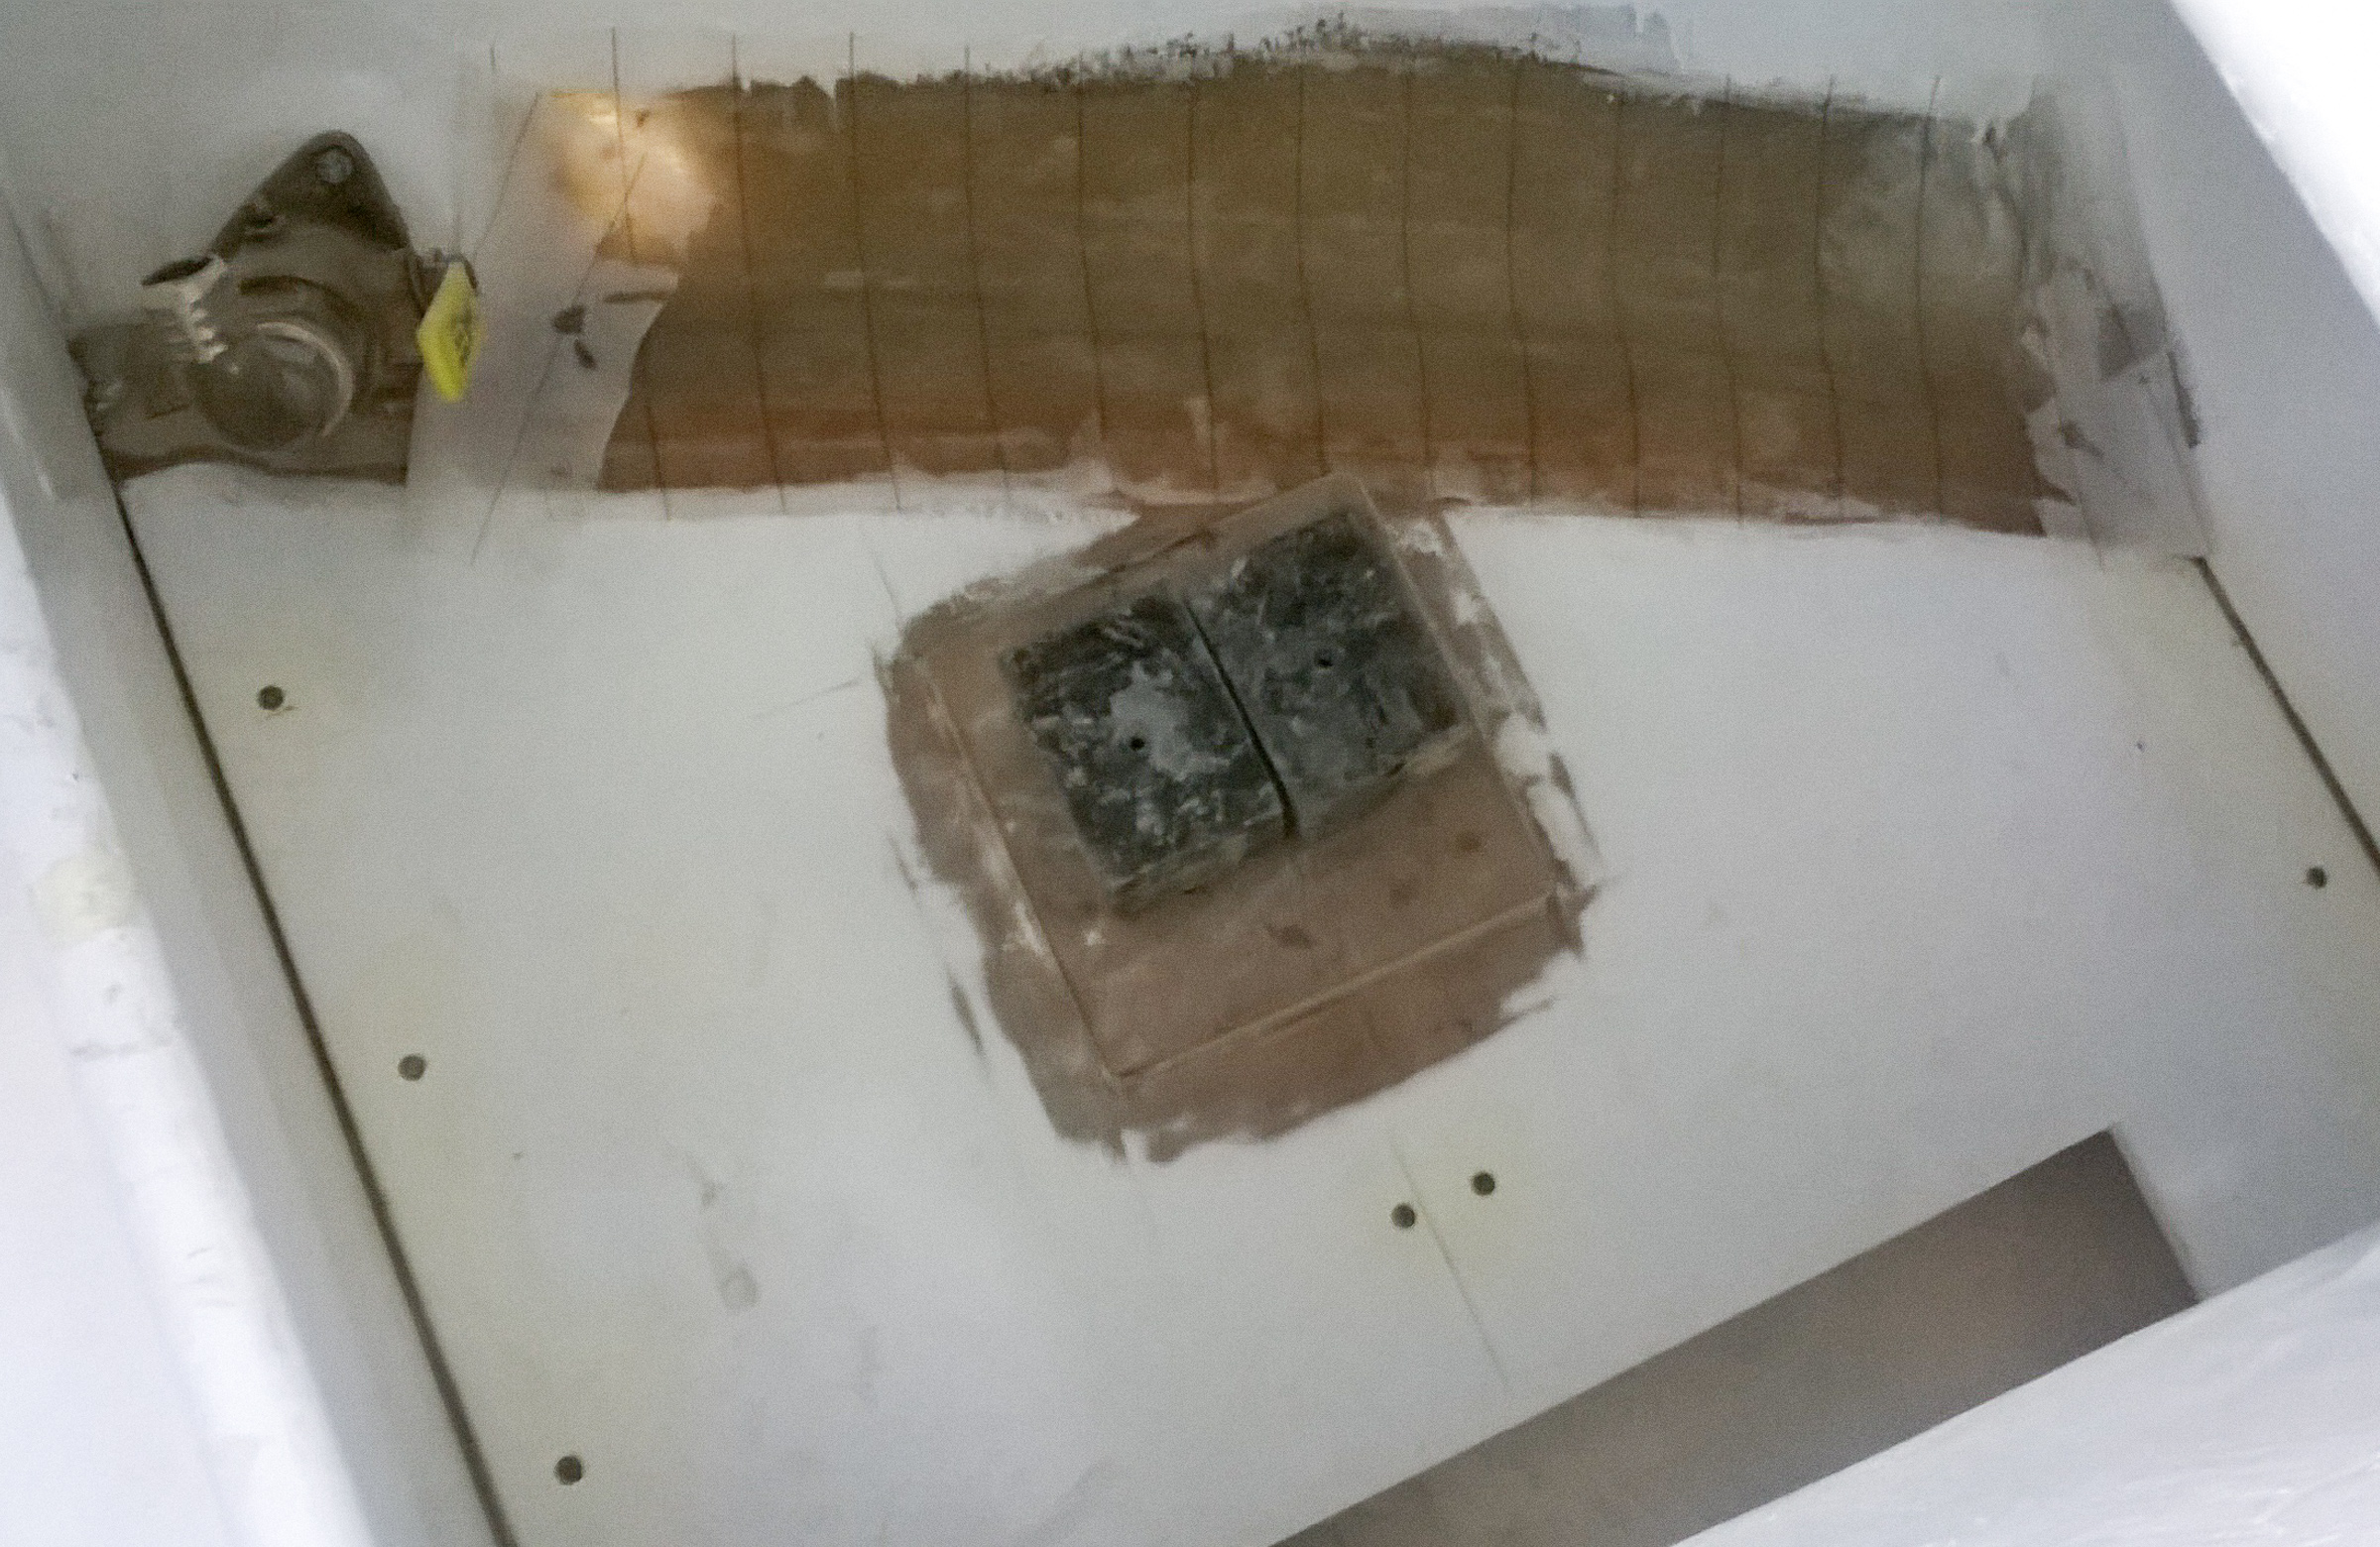
During the week Tom got the mounting plate for the boat anode zinc installed. This is the super zinc that all of the underwater metal parts on the boat will connect to so that if there is any electrical imbalance, the zinc will dissolve before the expensive, important metal bits do. He also cut the rudder tube for the autopilot quadrant (and fixed our attempt at fiberglassing a small copper tube to a larger one).
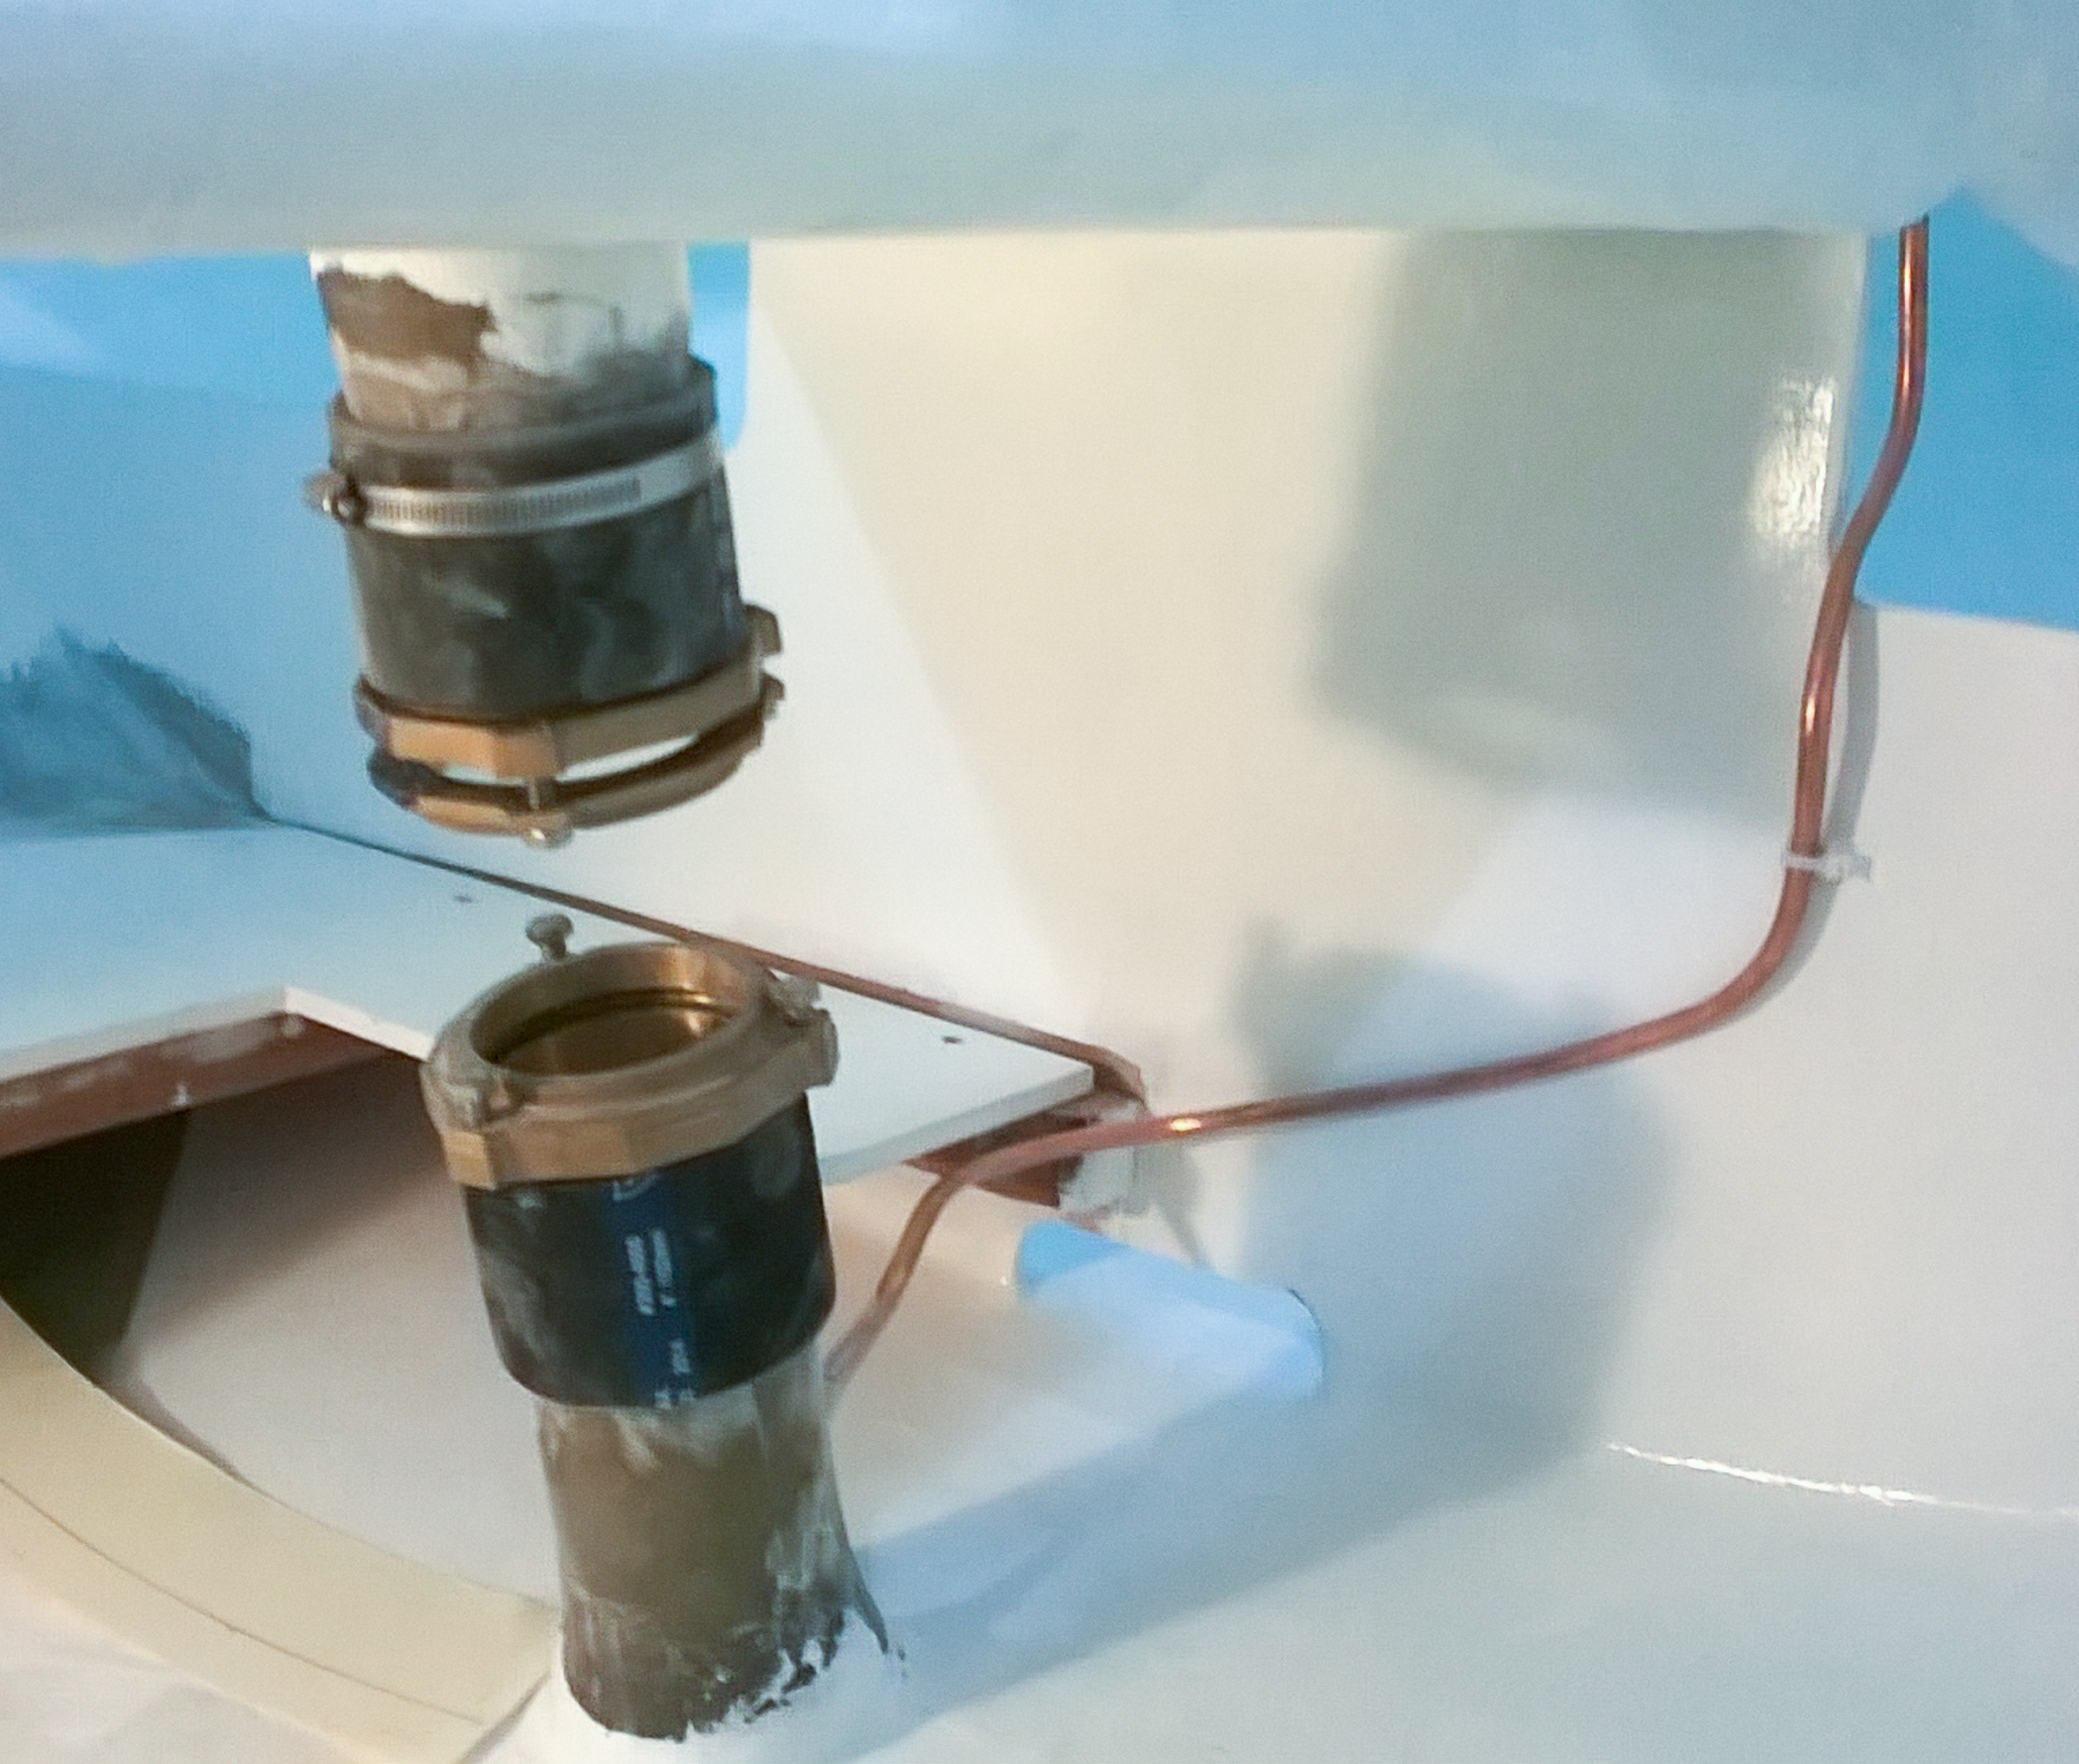
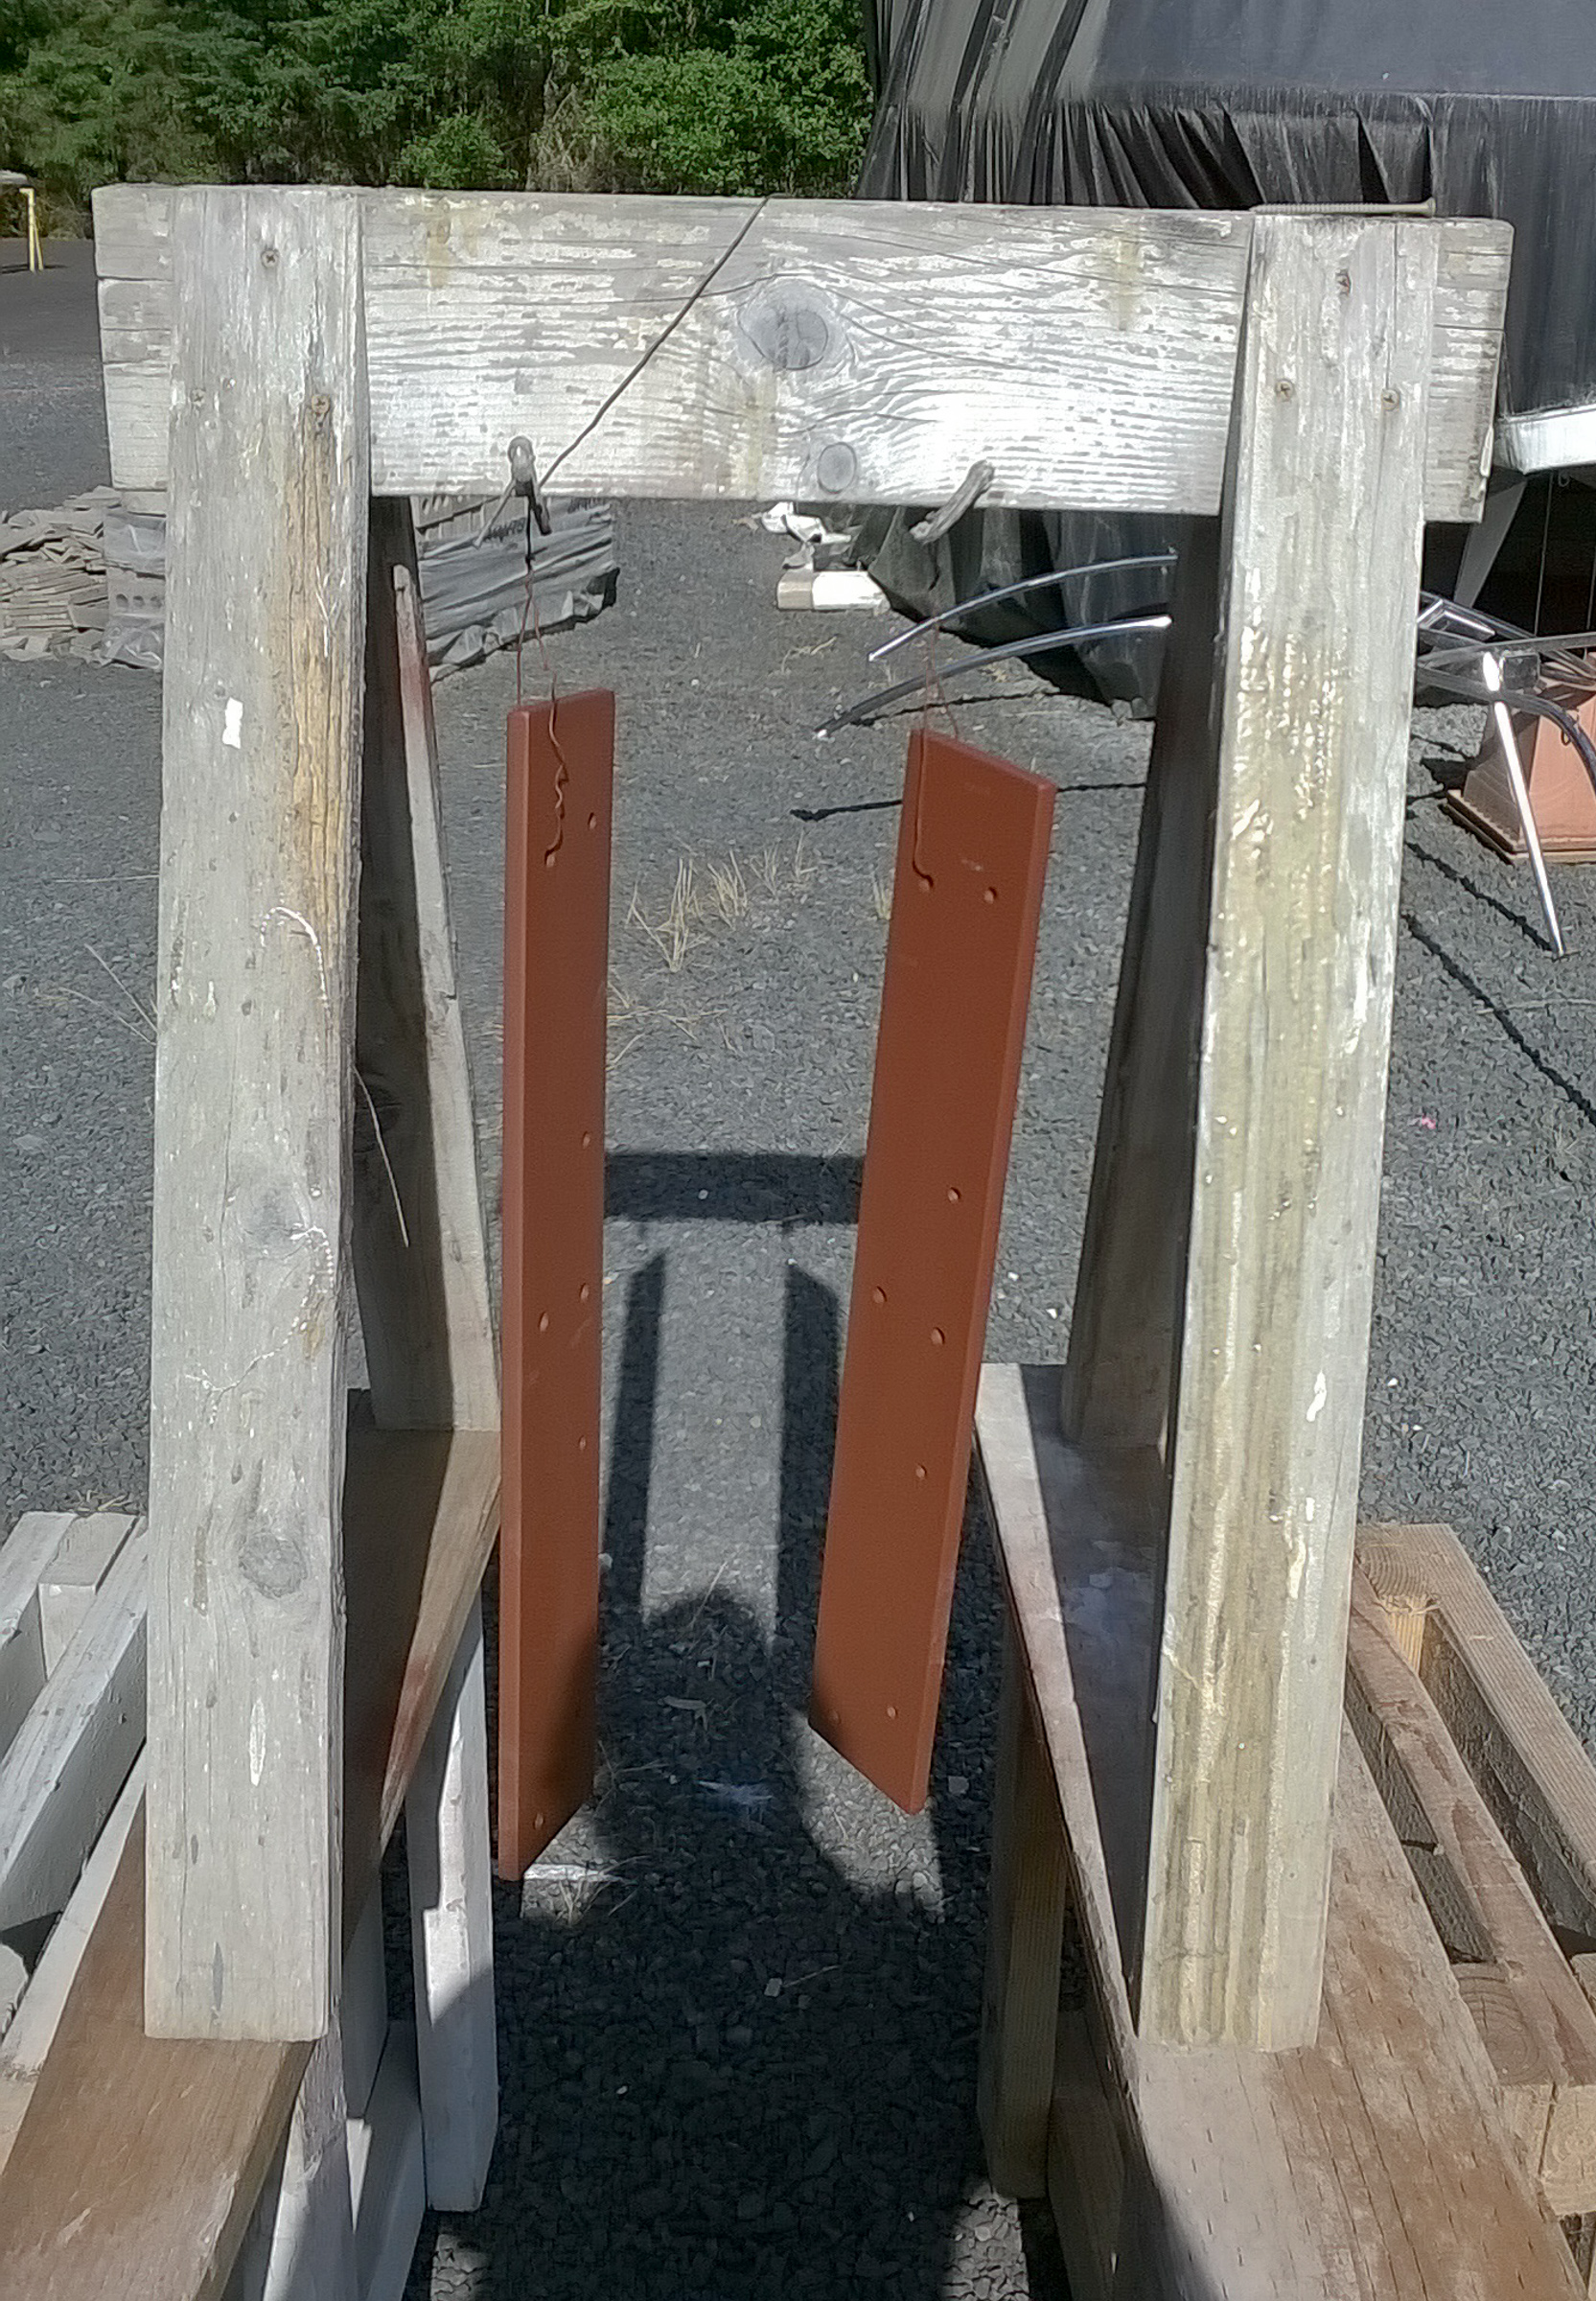
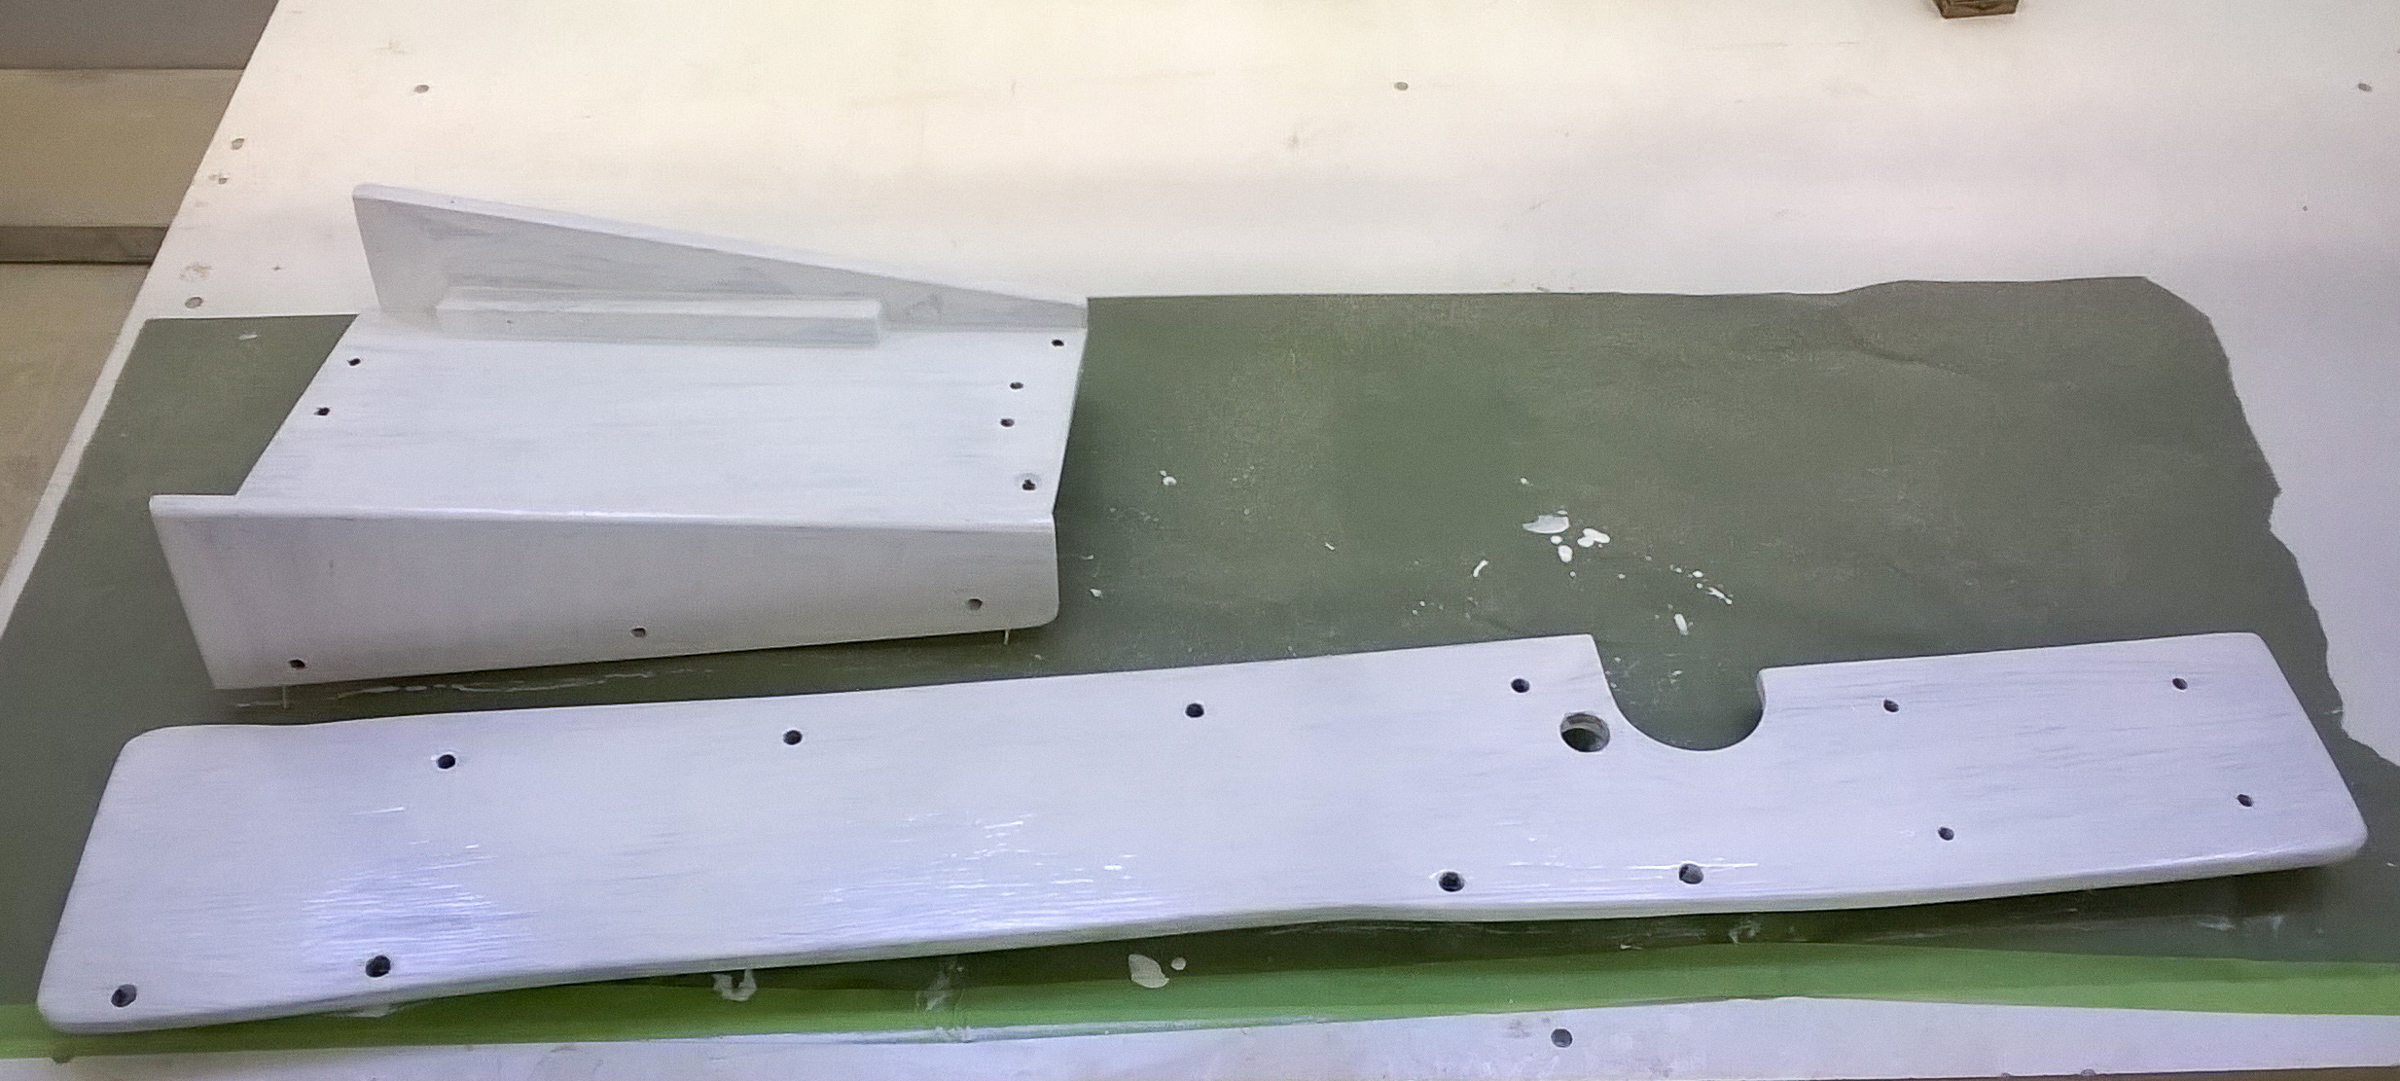
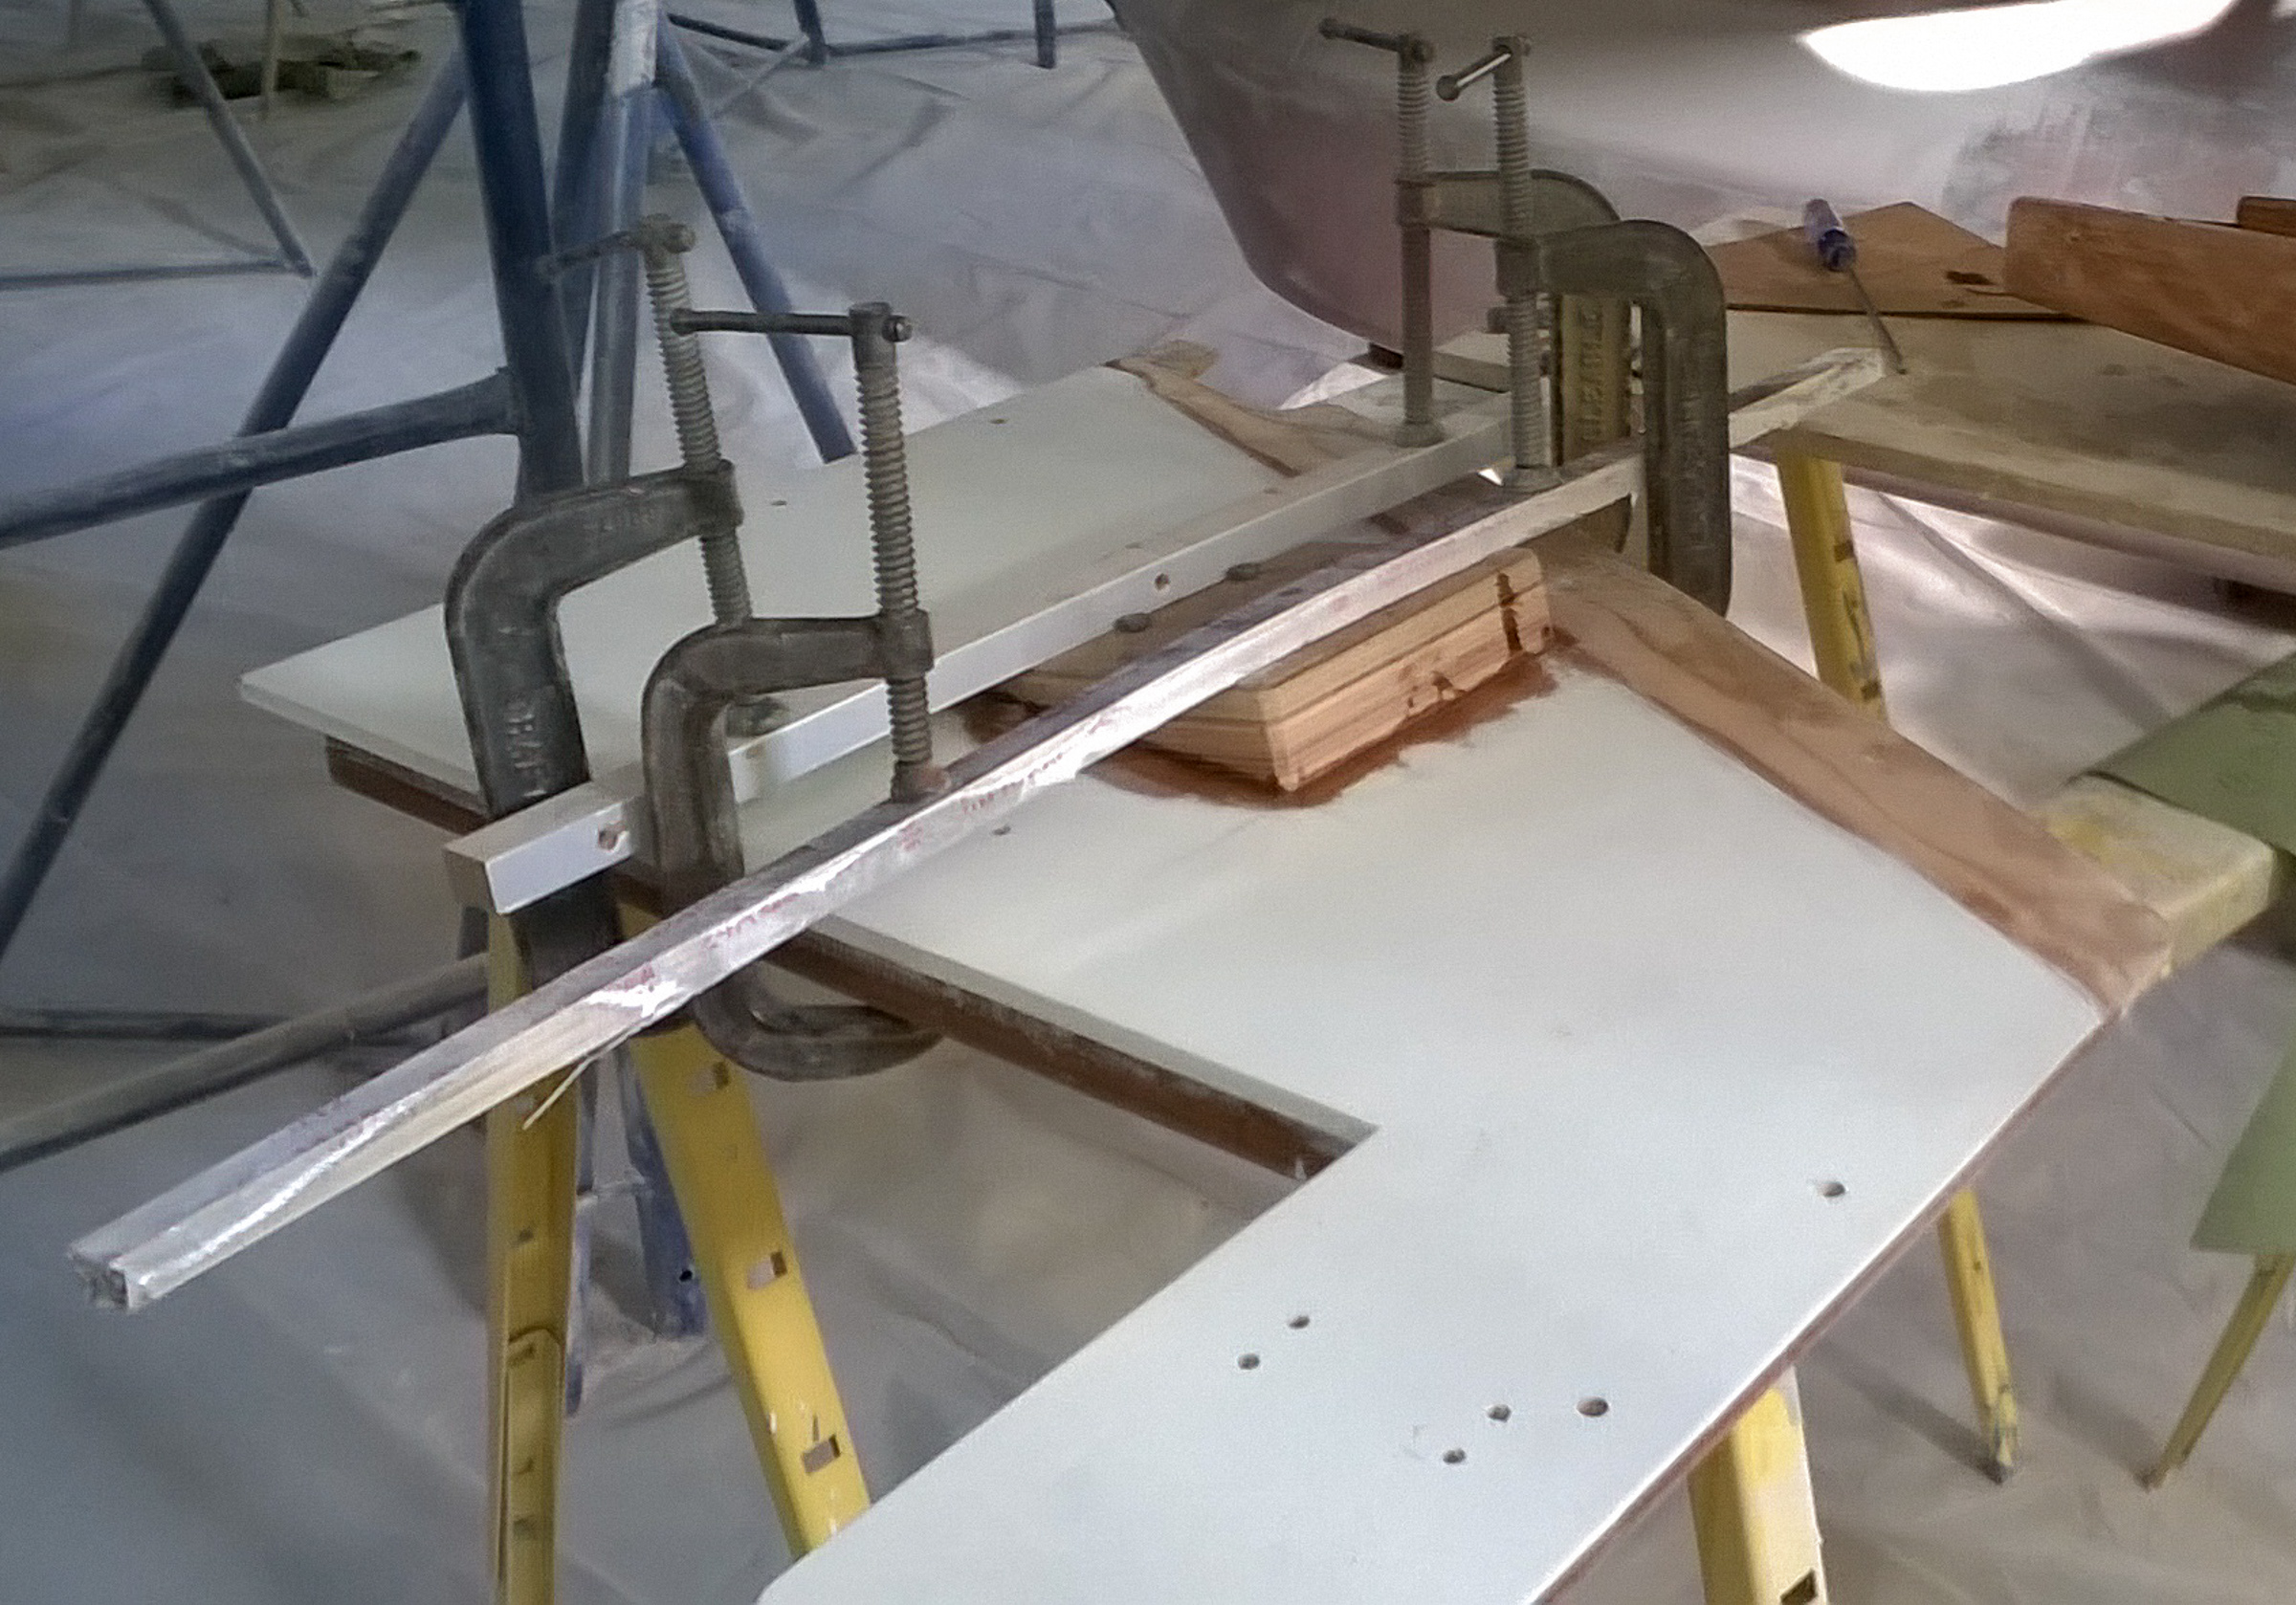
The boat anode mount, we’re not sure what the number refers to…The rudder shaft cut to install the stuffing boxes that keep the water out. The autopilot quadrant will go in between them. Tom used the piece of tag board as a template for the hydraulic arm to locate where the cut needed to go. The packing glands have been dry-fit without their gaskets. The copper tube attaches at the bottom of the rudder tube for the grease fitting, (greasing the rudder tube keeps it turning smoothly), our fiberglassing attempt was reinforced and cleaned up by Tom. The autopilot platform is in the background.The autopilot shelf finally installed. It has been fiberglassed to the hull and epoxied to the cleats on either side and in the middle. The black squarish things in the middle are lead weights to help the epoxy create a strong bond to the support in the middle. It was also screwed down on the outside edges to help make it as solid and wiggle proof as possible, since autopilots in action can create tons of torque, literally.The autopilot quadrant attached to the rudder post.Engine bed log plates primed. Bill made the hanging frame using a sawhorse and coat hangers.Primed and ready for sanding and final paint are the engine muffler platform (top) and the fuel tank brace (bottom).Tom brought up the point that epoxy will take longer to cure when we’re back in the water, so Bill started on installing the cleats for the furniture that we need to rebuild. Here’s the outline for the port settee.
If weeks were years our blog could vote. I bet it would vote to get done and go sailing. The problem is more projects keep arriving. We got to the shop Sunday and we were worried that we would not have much to do and we would have to be creative about projects to keep busy. We got a task sheet that left no time to get bored. Bill got to design a platform for the muffler to sit on and then a path to route the exhaust out of the boat. Nina got to make the mounting block for the auto pilot drive to sit on her platform. This took all day Sunday.
Muffler platform. The muffler itself looks like a sideways heavy-duty plastic milk jug with two spouts. The engine uses a wet exhaust, so water is mixed with the exhaust gas to cool it and it travels down a hose and out of the transom of the boat.
We got in Monday and there was a new list with more projects. Bill got to modify the muffler mount and check the engine water strainer mount. Then he got to plan the exhaust hose route and drill some more big holes in the boat. The good news is a good path was there and only one more big hole was needed. The big new project was to design a greasing tube so the rudder tube can be greased while underway. When we are crossing an ocean the water will wash away the grease at the bottom of the rudder tube. This will give a sloppy feel to the rudder. It is easy to put a grease fitting down at the lower end of the rudder tube. The drawback is you have to climb into the locker to get at it, hence the tube. We got to make a copper tube tube to run from the bottom of the rudder tube up to the top of a cockpit locker hatch opening. This will make it easy to grease the rudder every couple of days when on a passage. Bending the tube went better than expected and we got the tube shaped in about an hour. The tricky part was trying to fiberglass a 3/8″ copper tube to a 4″ diameter fiberglass tube. We ended up with a mess of fiberglass fibers in hardening epoxy that were not cooperating as we had hoped. I think there is some sanding and try number two in our future.
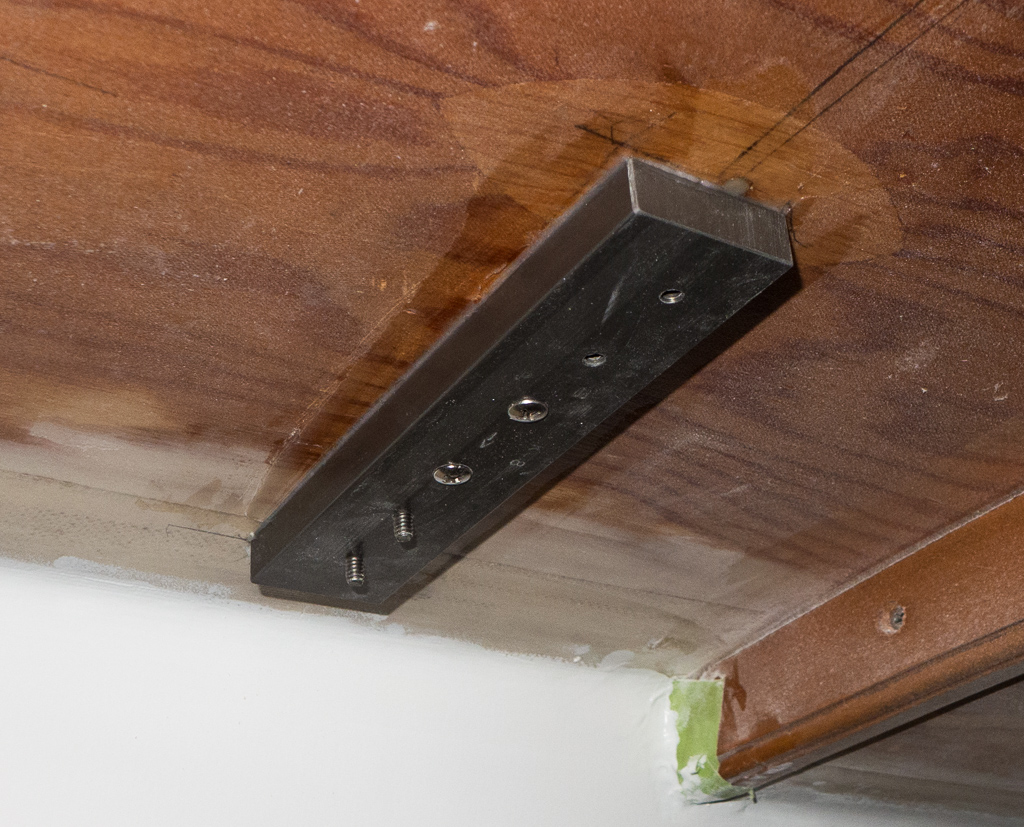
Auto pilot platform with the auto pilot drive mount glued on. The angle is to match the drive with the rudder post.
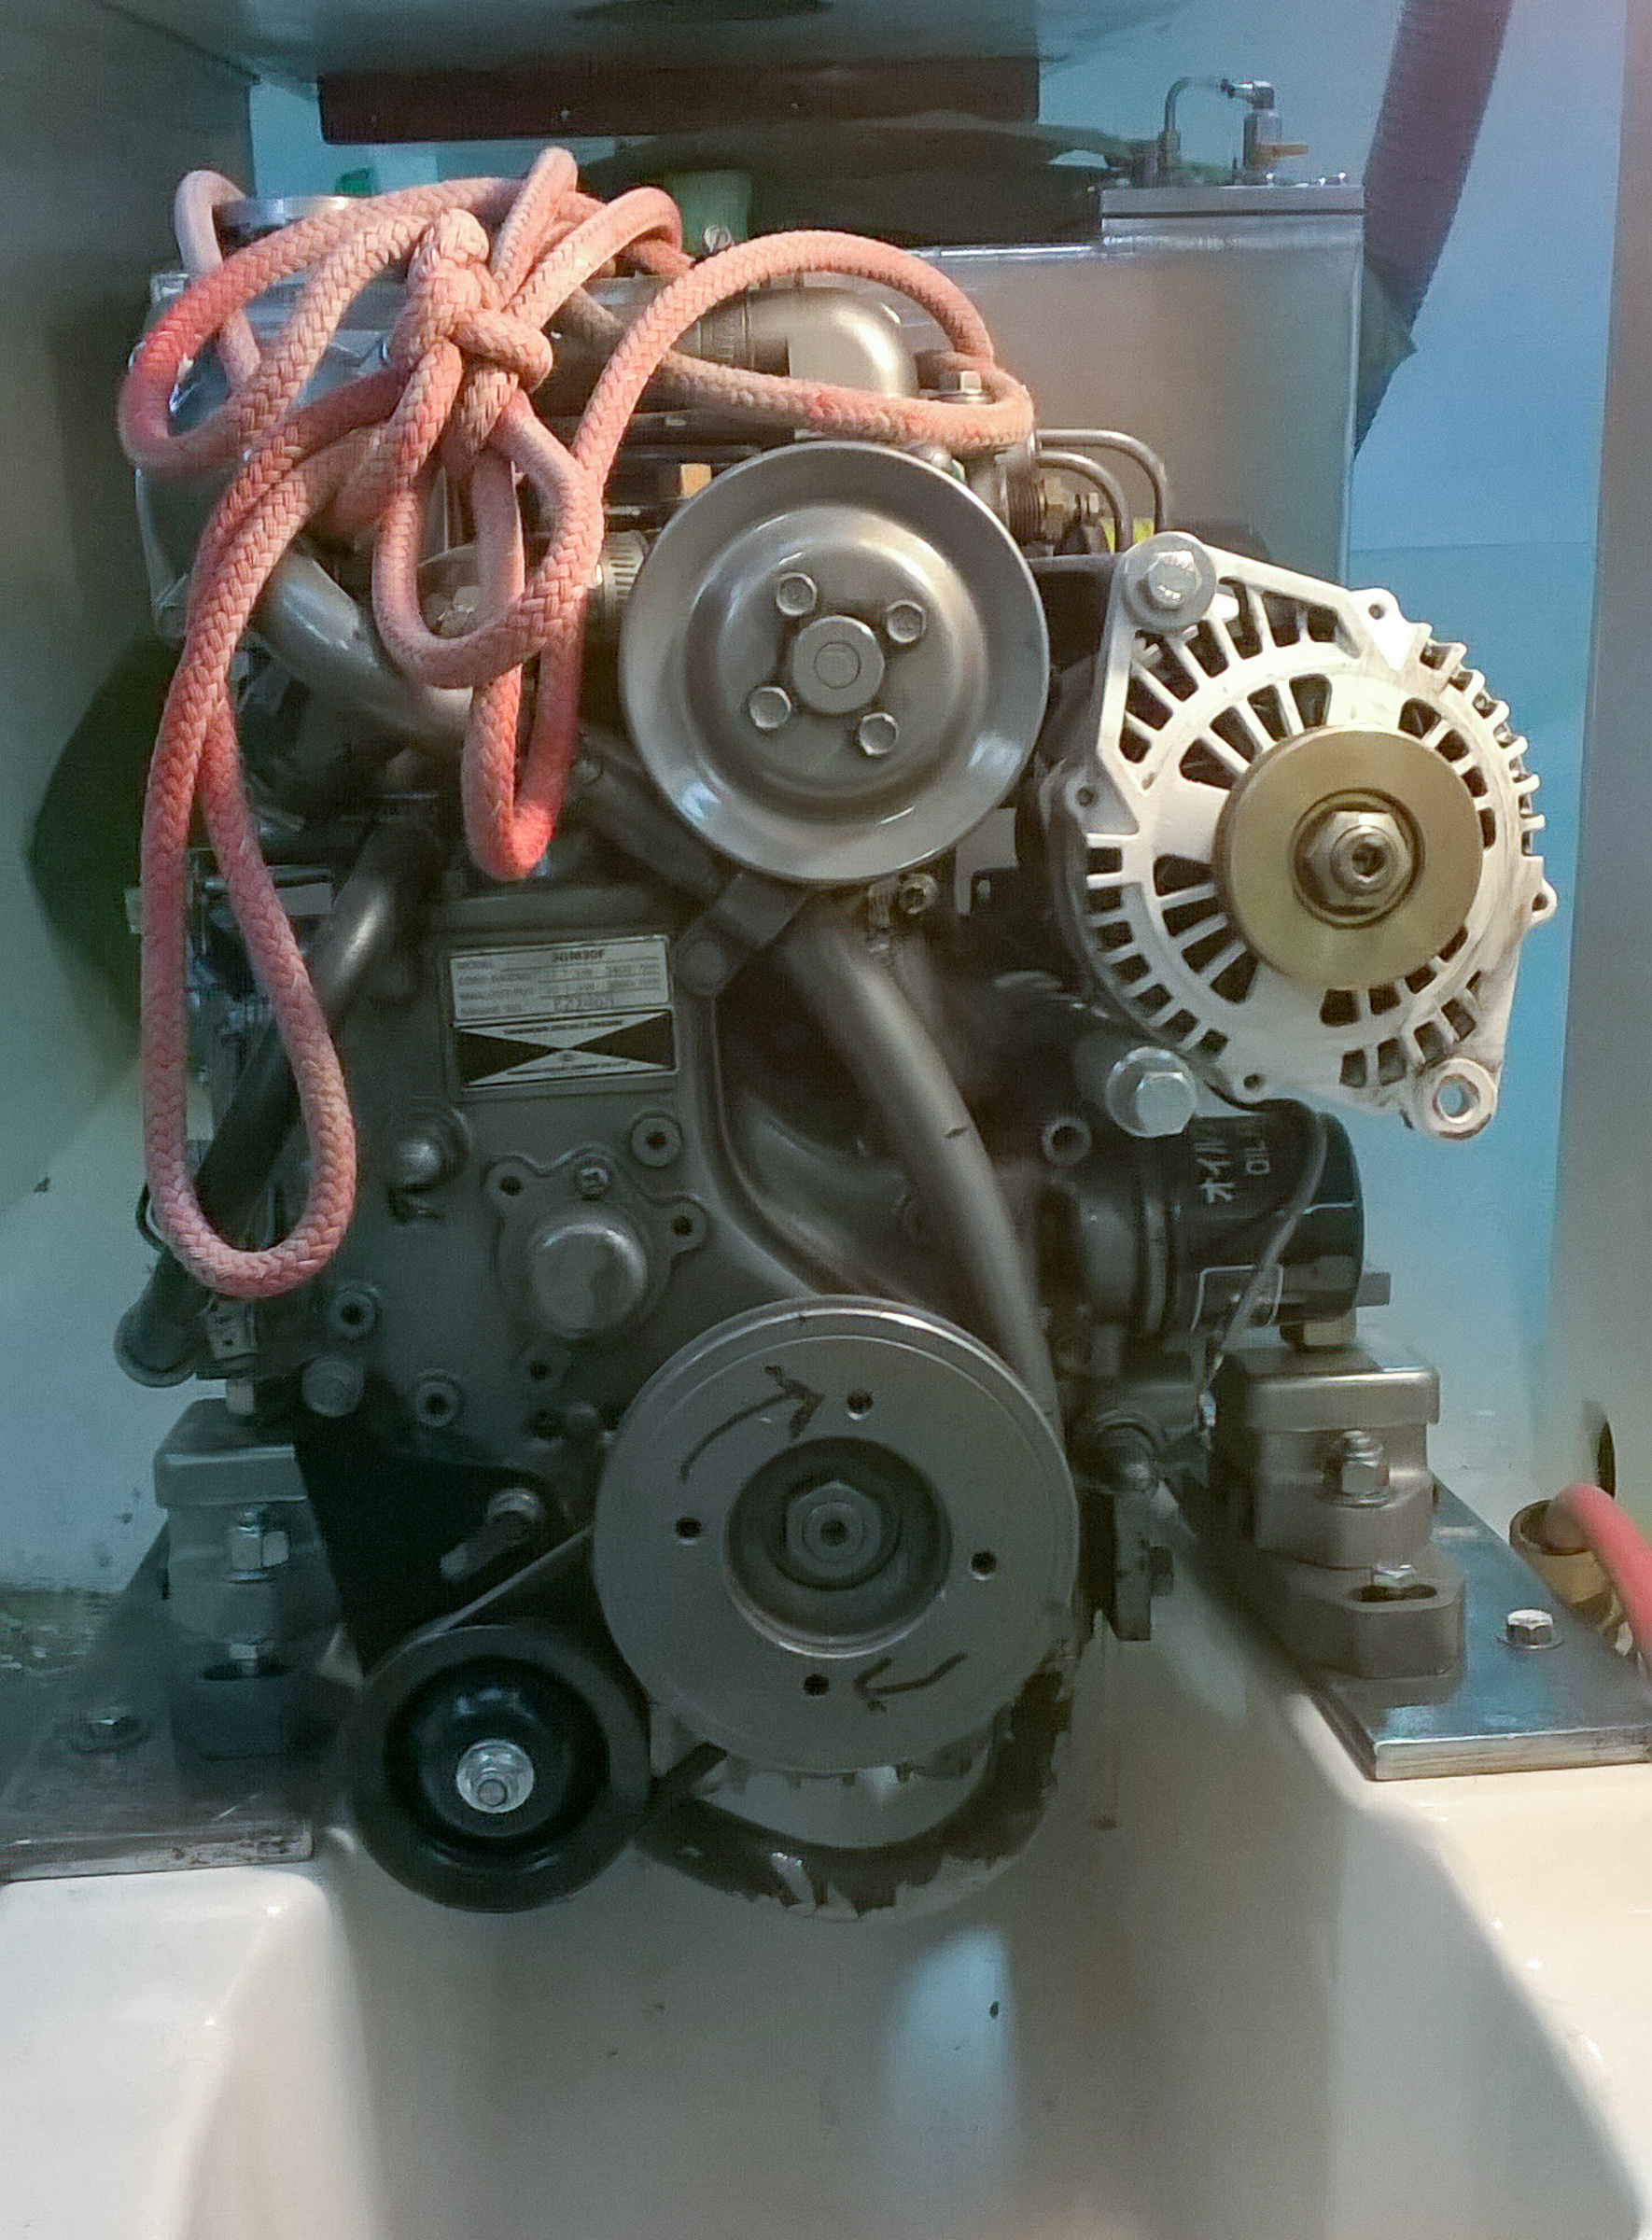
The other news is the engine was fit back into the boat. It fits beautifully on the new bed logs. Along with getting the engine aligned for final installation, we needed the engine in place to fit the exhaust.
Engine in its place. The fuel tank is just peaking out behind it. While it’s good to have it in place, it makes getting in and out of the lockers an exercise in shimmy and twist.
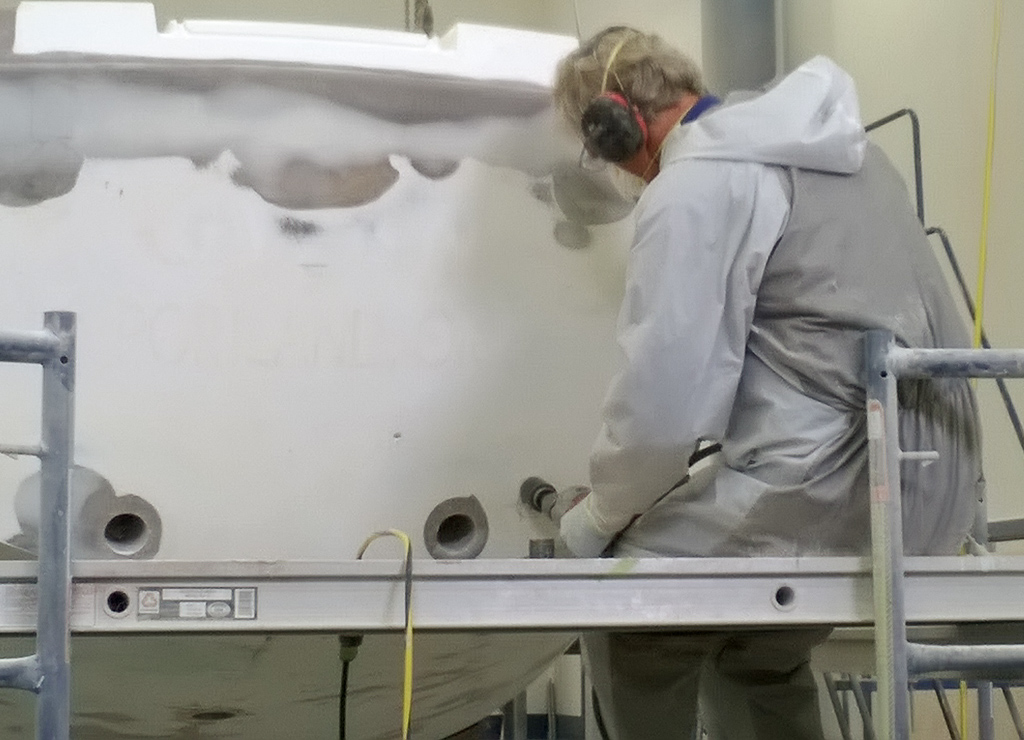
One of the drawbacks of spending all of our spare time working on the boat is when we get done we are tired and taking photos is not a high priority. We do want to make our blog posts scintillating, so we always get at least a couple of shots which we then Photoshop into the exciting images you see while you read about our latest week. One of the exciting things that happened this week was installing the thru-hulls. The thru-hulls are big valves that get put in holes in the hull to let water in or out. You can shut them so if something goes wrong you can stop the water.
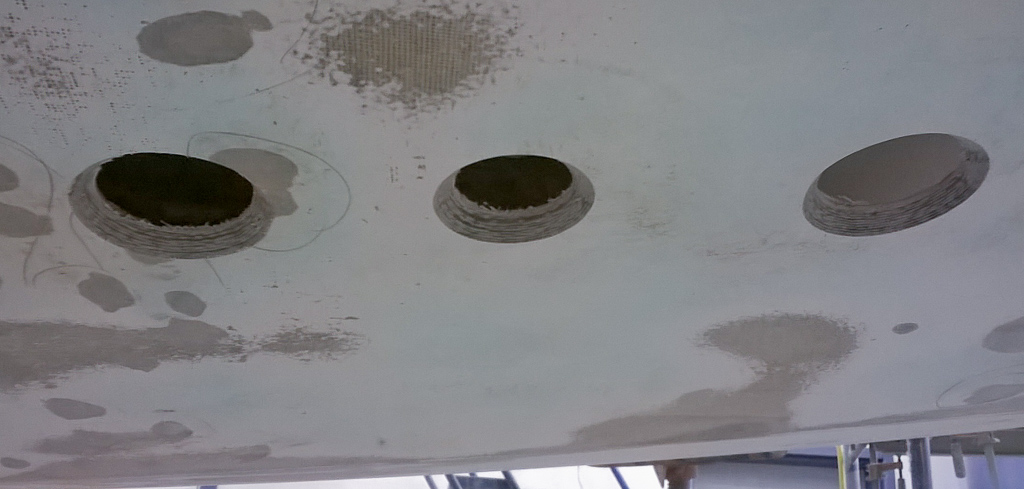
Thru hull installed (looking from the outside of the boat). Tom has since fiberglassed over them in so they would be flush with the hull to reduce drag.The same thru-hulls from inside the boat. From left to right, the galley sink drain, sea water in to the galley for rinsing, sea water for engine cooling.Head sink drain and bilge pump drain.Transducer mount for speed, depth and temperature readings.
We also worked on other stuff over the week end. More holes were drilled and cast with epoxy by Bill. These were for the GPS antenna, the BBQ fuel hose hatch and the fuel tank fill. More of the cabin was sanded by Nina to get it ready for painting. Not quite finished with it yet, but it was a hot weekend (think nylon bunny suit and dust flying every which way. The teak trim for the companion way was drawn out (such a simple sentence, such a complicated thing to make). Tom cut U-shaped pieces in teak and Nina figured out how the ends needed to be cut. The inside lengths and shape are different than the outside bits, so figuring out how that would all work in one piece of wood did actually keep her awake at night. We also painted the rest of the cockpit lockers. One coat of slippery bilge paint on and one to go (and the places we missed because crawling around awkward tight places trying not to get paint in one’s hair does tend to leave missed bits).
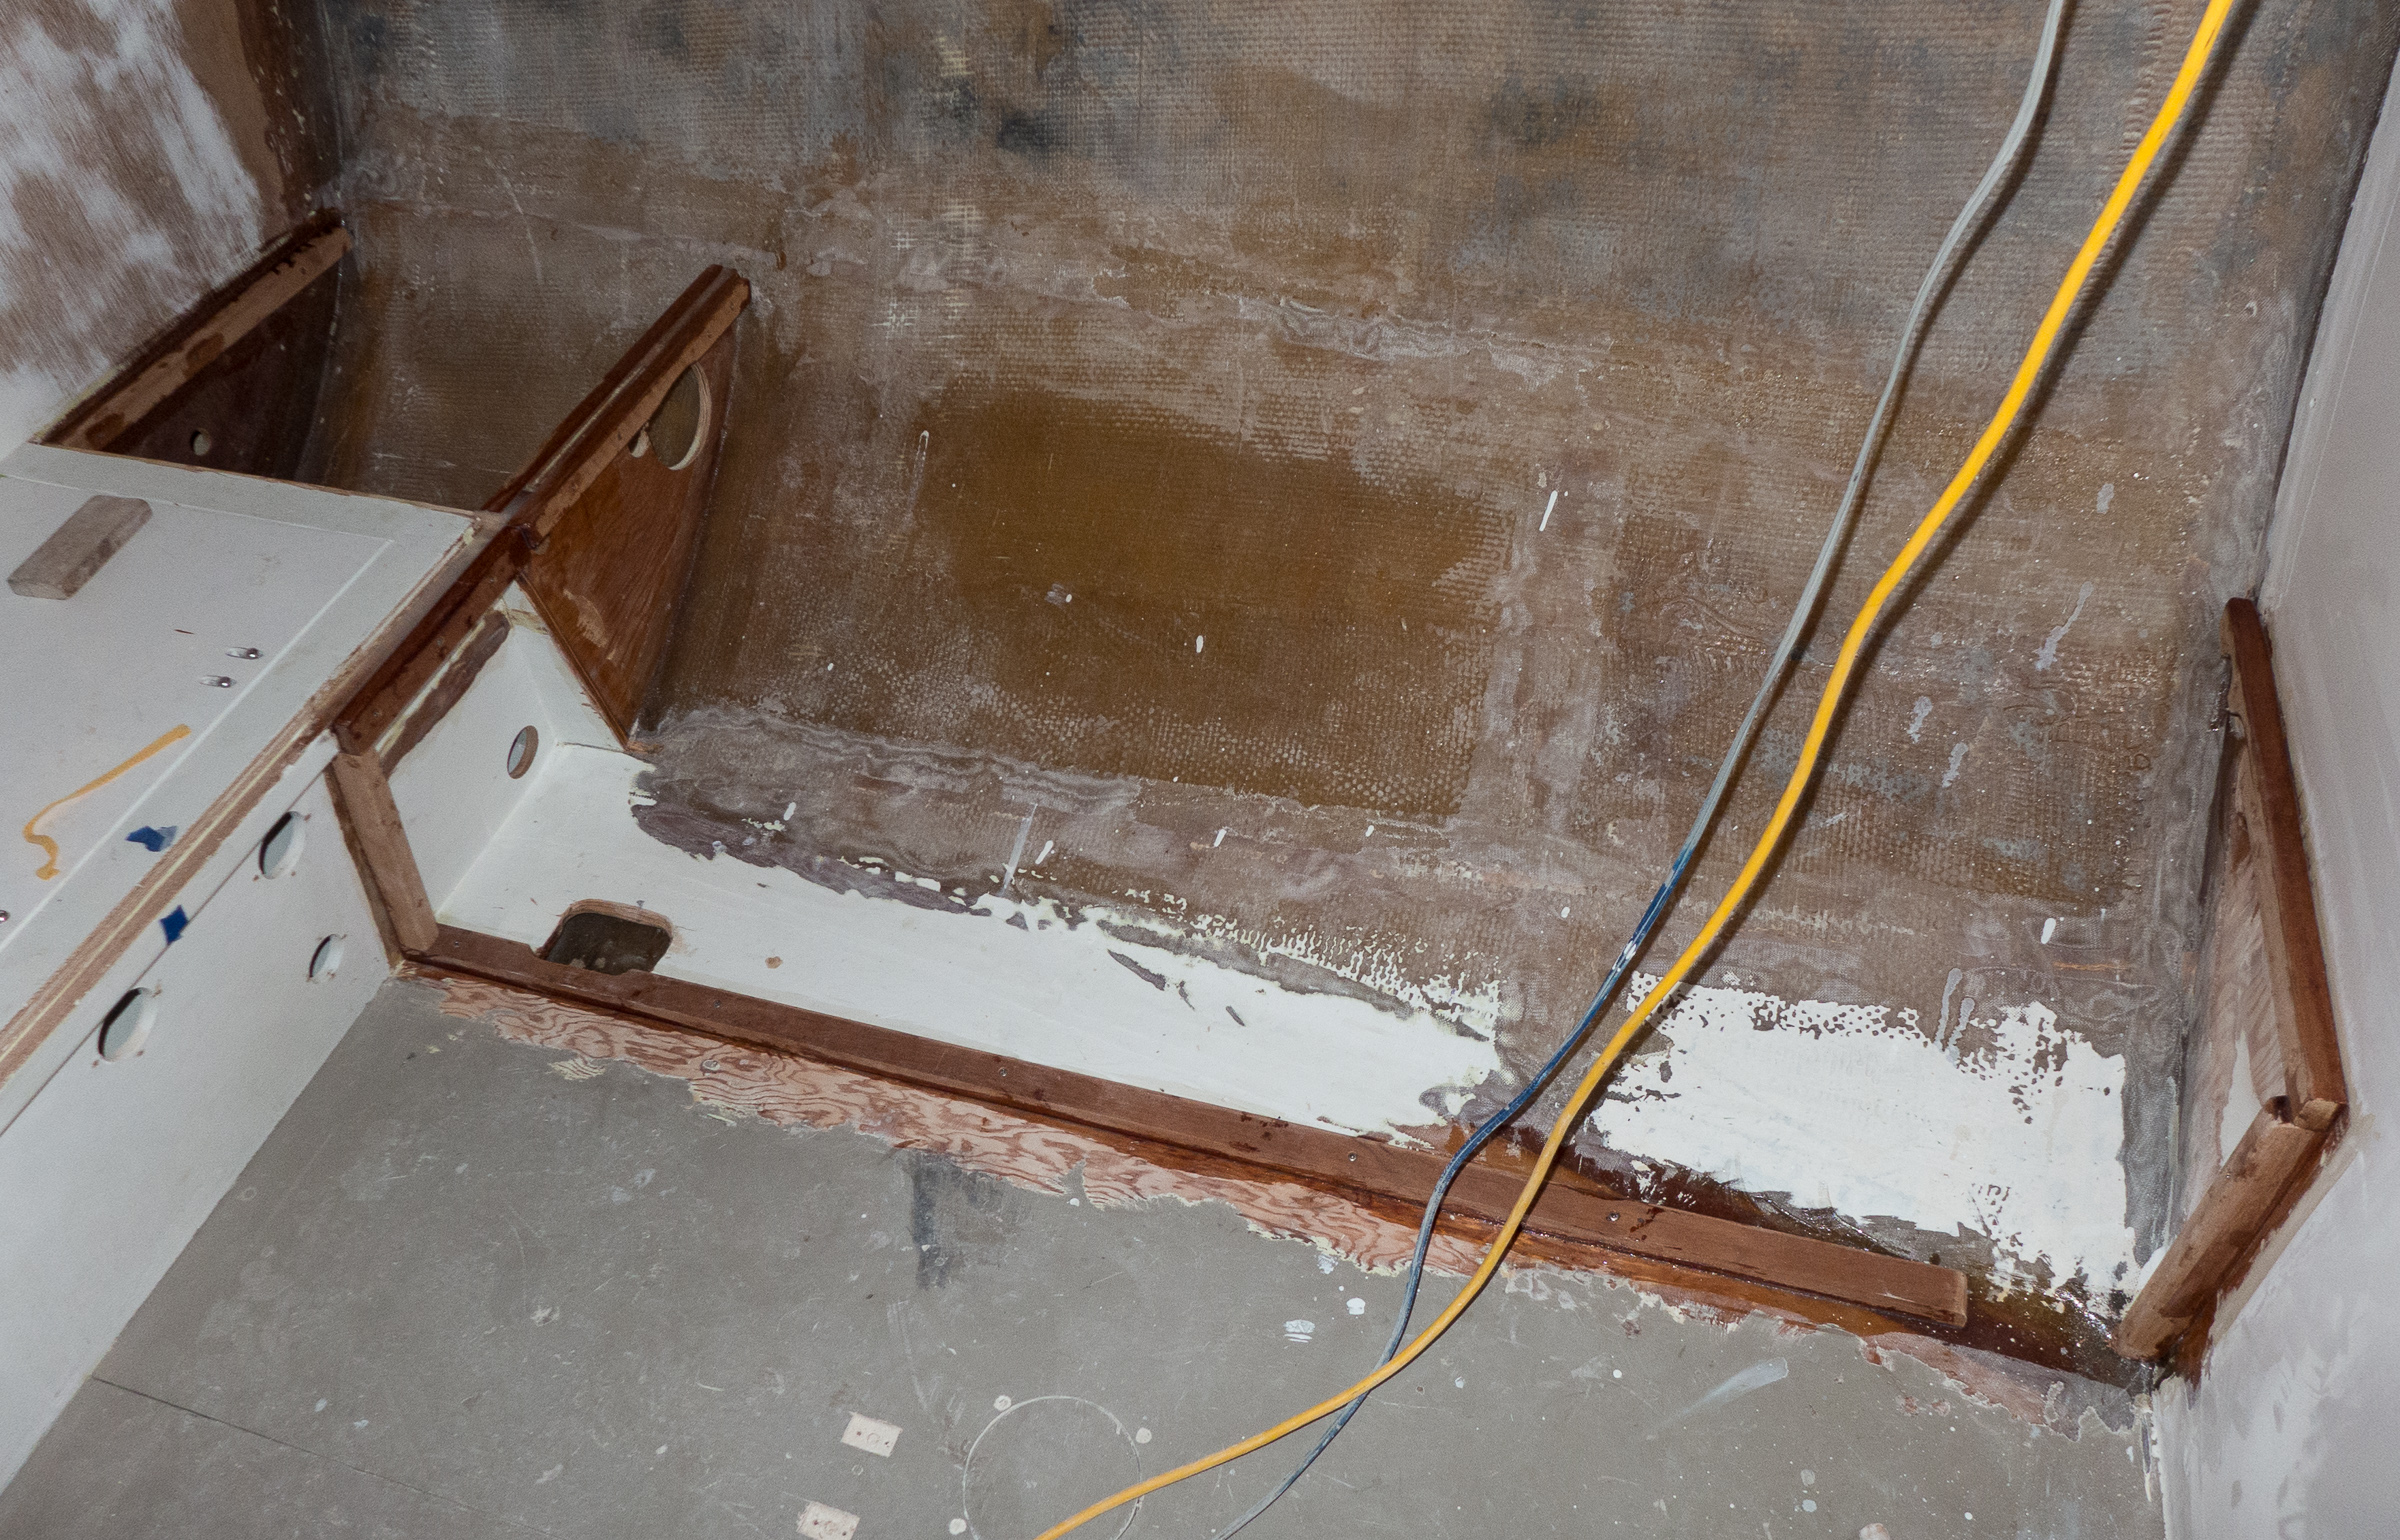
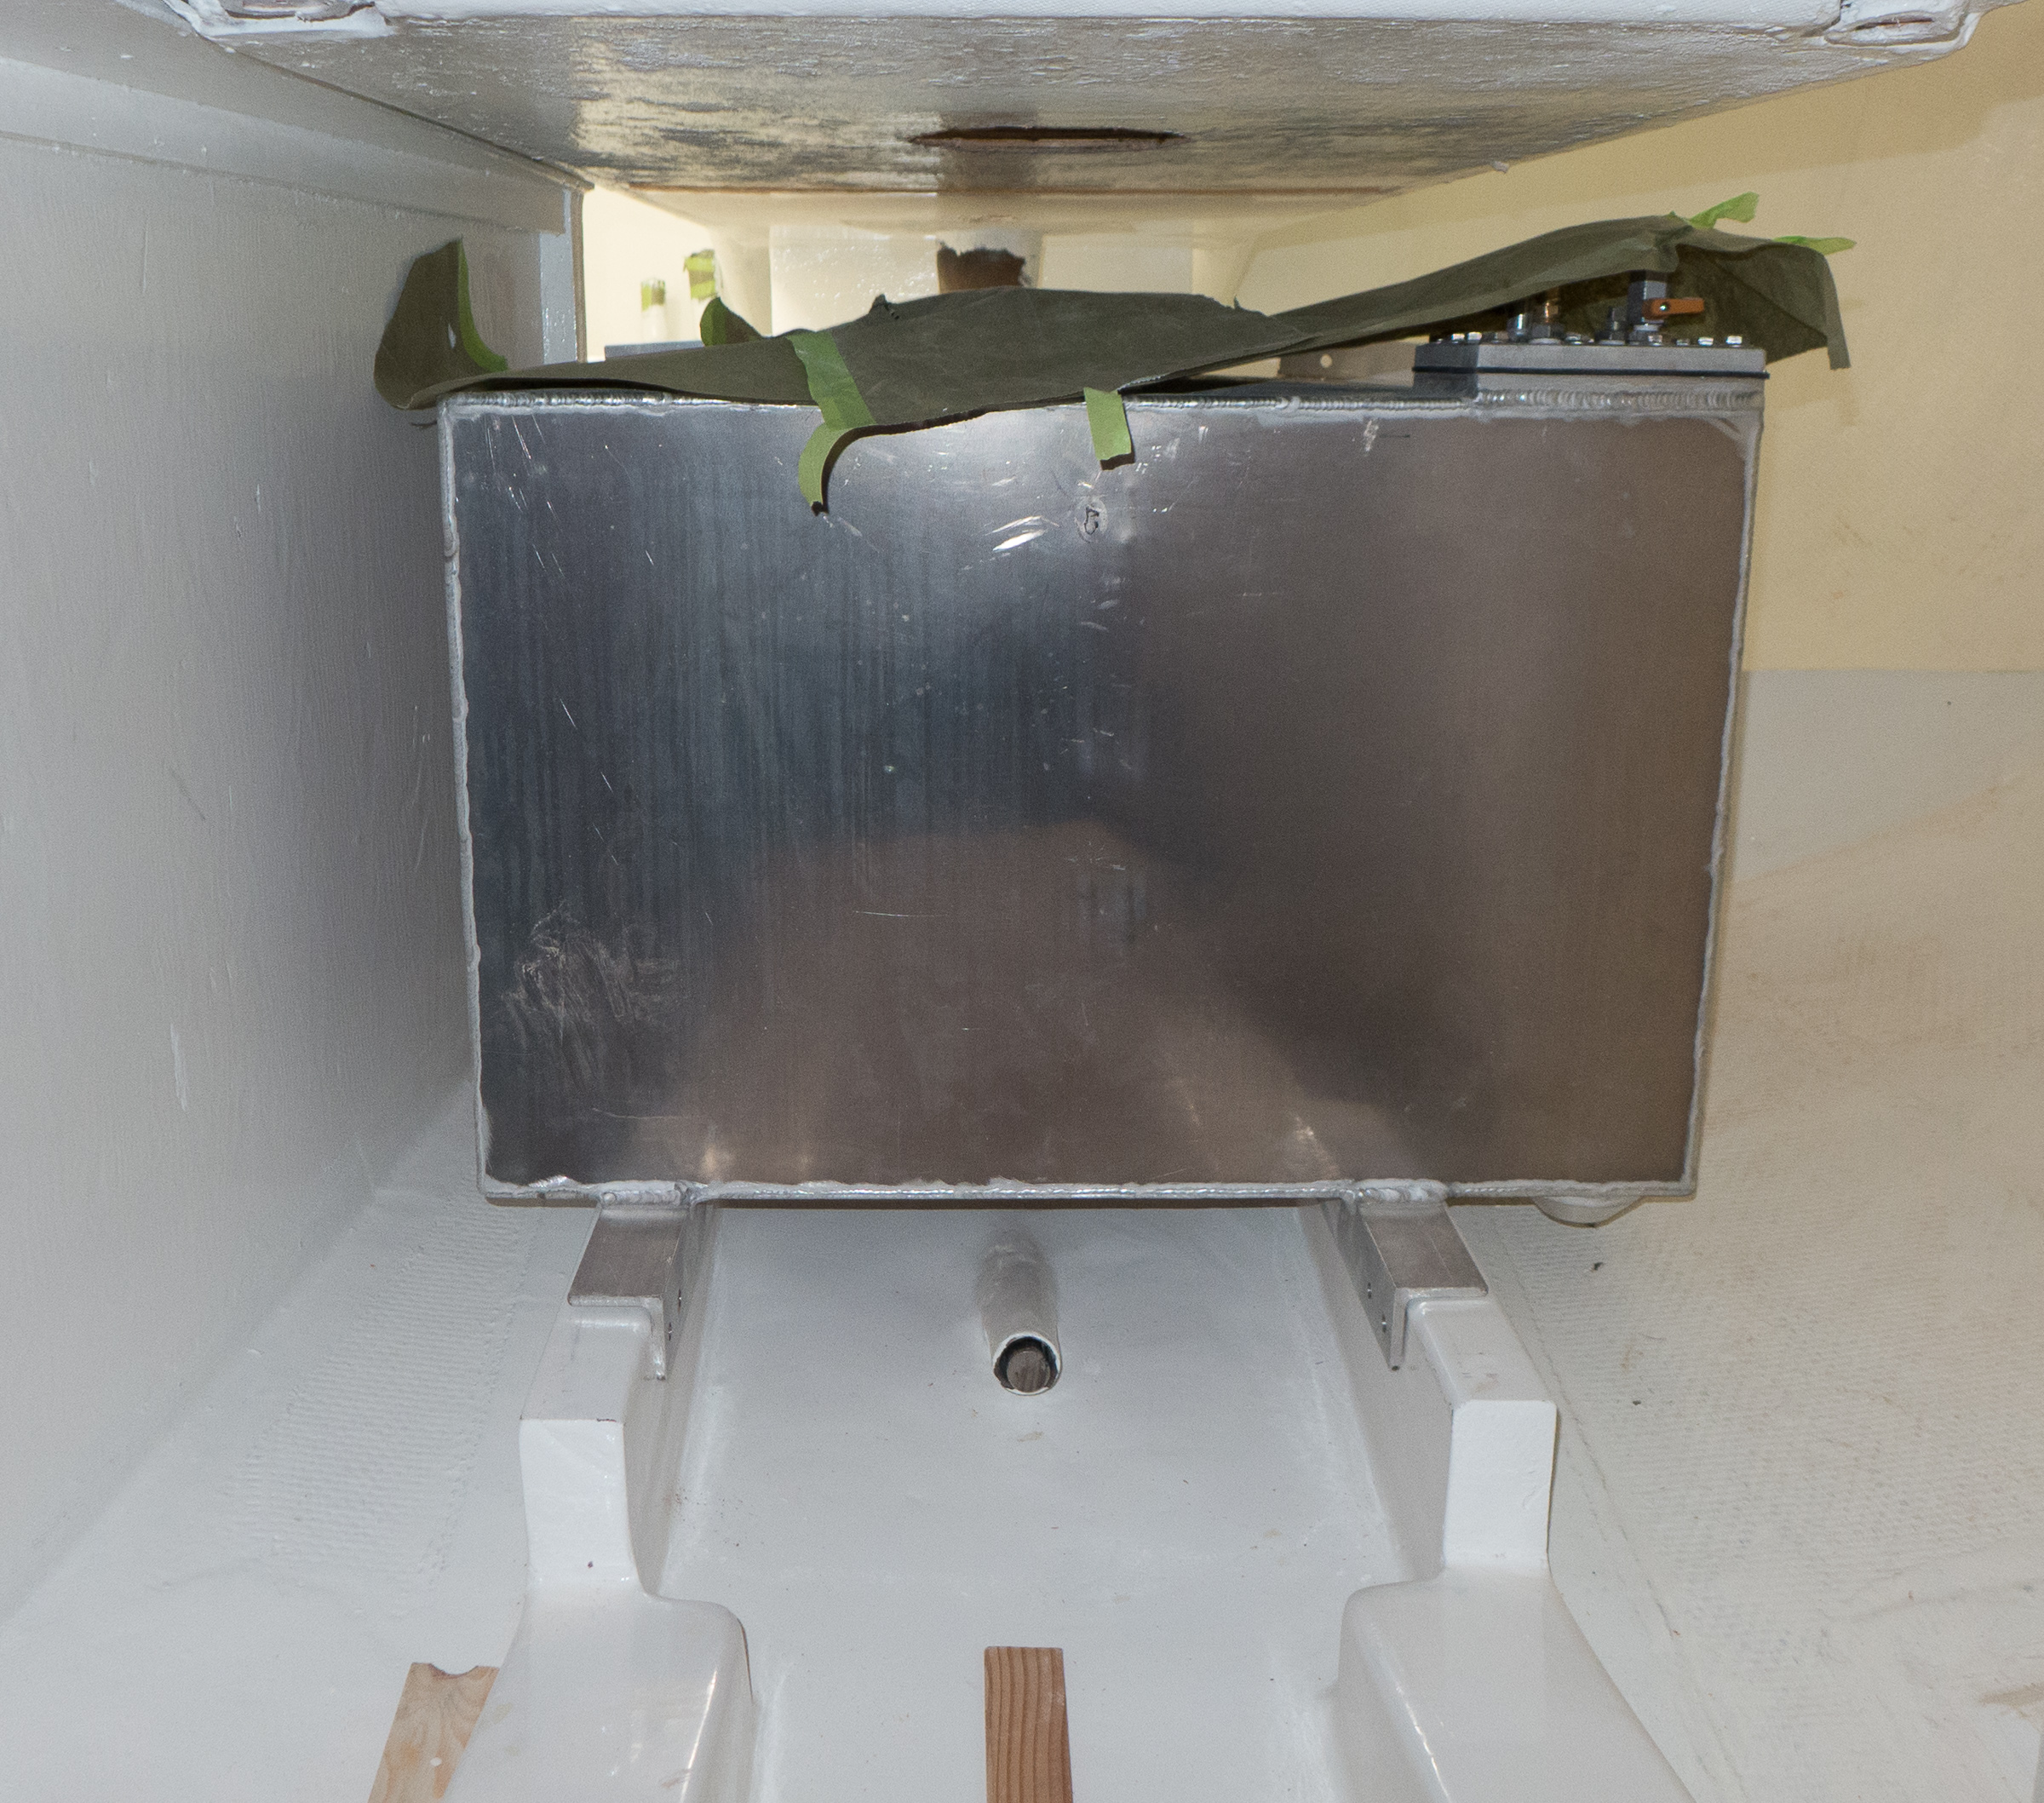
The fuel tank re-installed in a nice white space. We also worked on mounting brackets for the tank. Bill got to design the top board that will be attached to a cleat in the ceiling and to brackets on the top of the tank.
One of the joys of being at Tom’s shop is listening to a classic rock station. In honor (?) of that, Nina thought we should call this week’s post Blinded by the White.
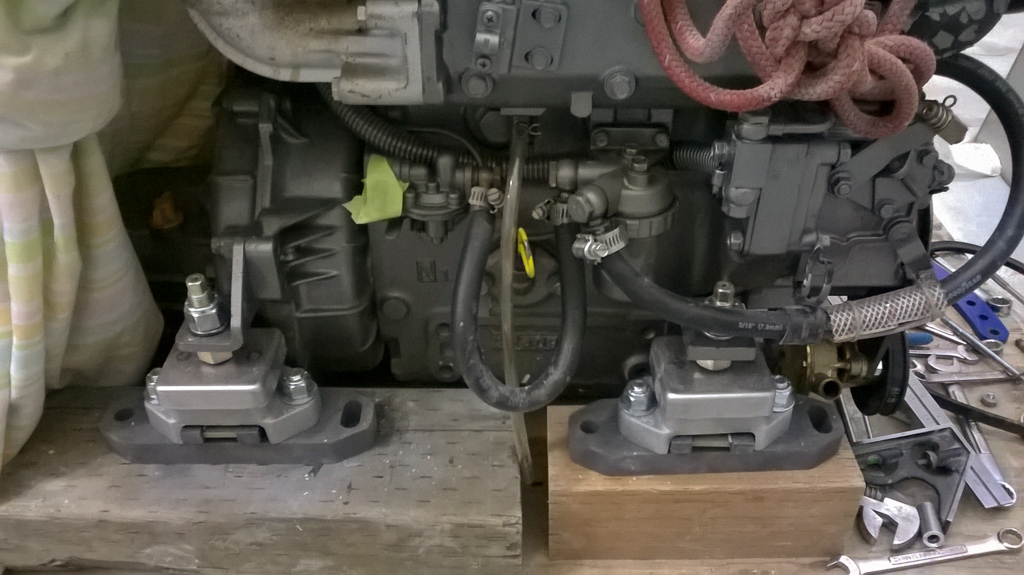
New and improved engine mounts. The old ones were sagging badly.
We hope we are getting close to being ready to paint the boat. We spent this weekend getting stuff checked off our to do list. Most of it is not really photogenic, so what Nina shot on her phone is what you get. Still to do is align the engine so that it runs smoothly. New engine mounts were installed. This involved taking the old mounts off and replacing them with the ones in the photo. The red rope at the top was hooked to the hoist in the shop and lifted so that the mounts could be replaced. It can be quite mesmerizing watching chain go up and down if you’ve never played with a 5 ton hoist before. The old saggy mounts came off (they’d sagged about 1/2 inch) and the new ones were installed.
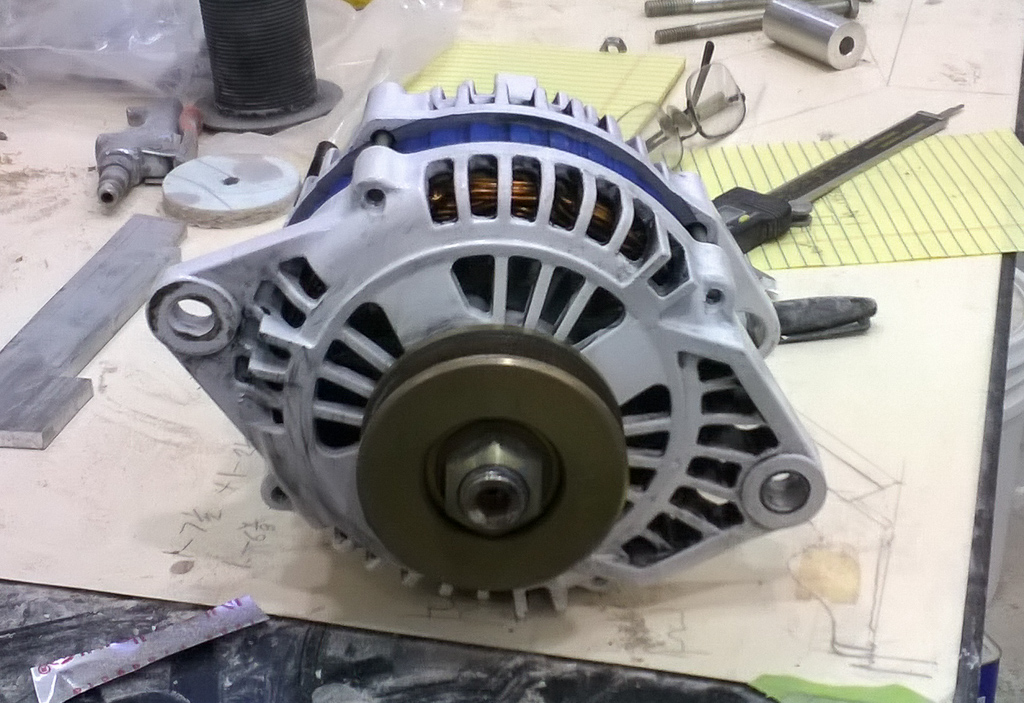
The alternator. It needs some help with its aliment.
Our alternator, which charges the batteries when the engine is running, has had problems delivering its charge. Tom discovered that we didn’t have the correct mounting bracket, and that the way the alternator was installed made it difficult to get it into alignment and keep it in alignment so that the belt to the engine doesn’t wear down and throw black rubber dust all over the engine. This will all get fixed and readjusting the alternator tension should actually be easier from here on out.
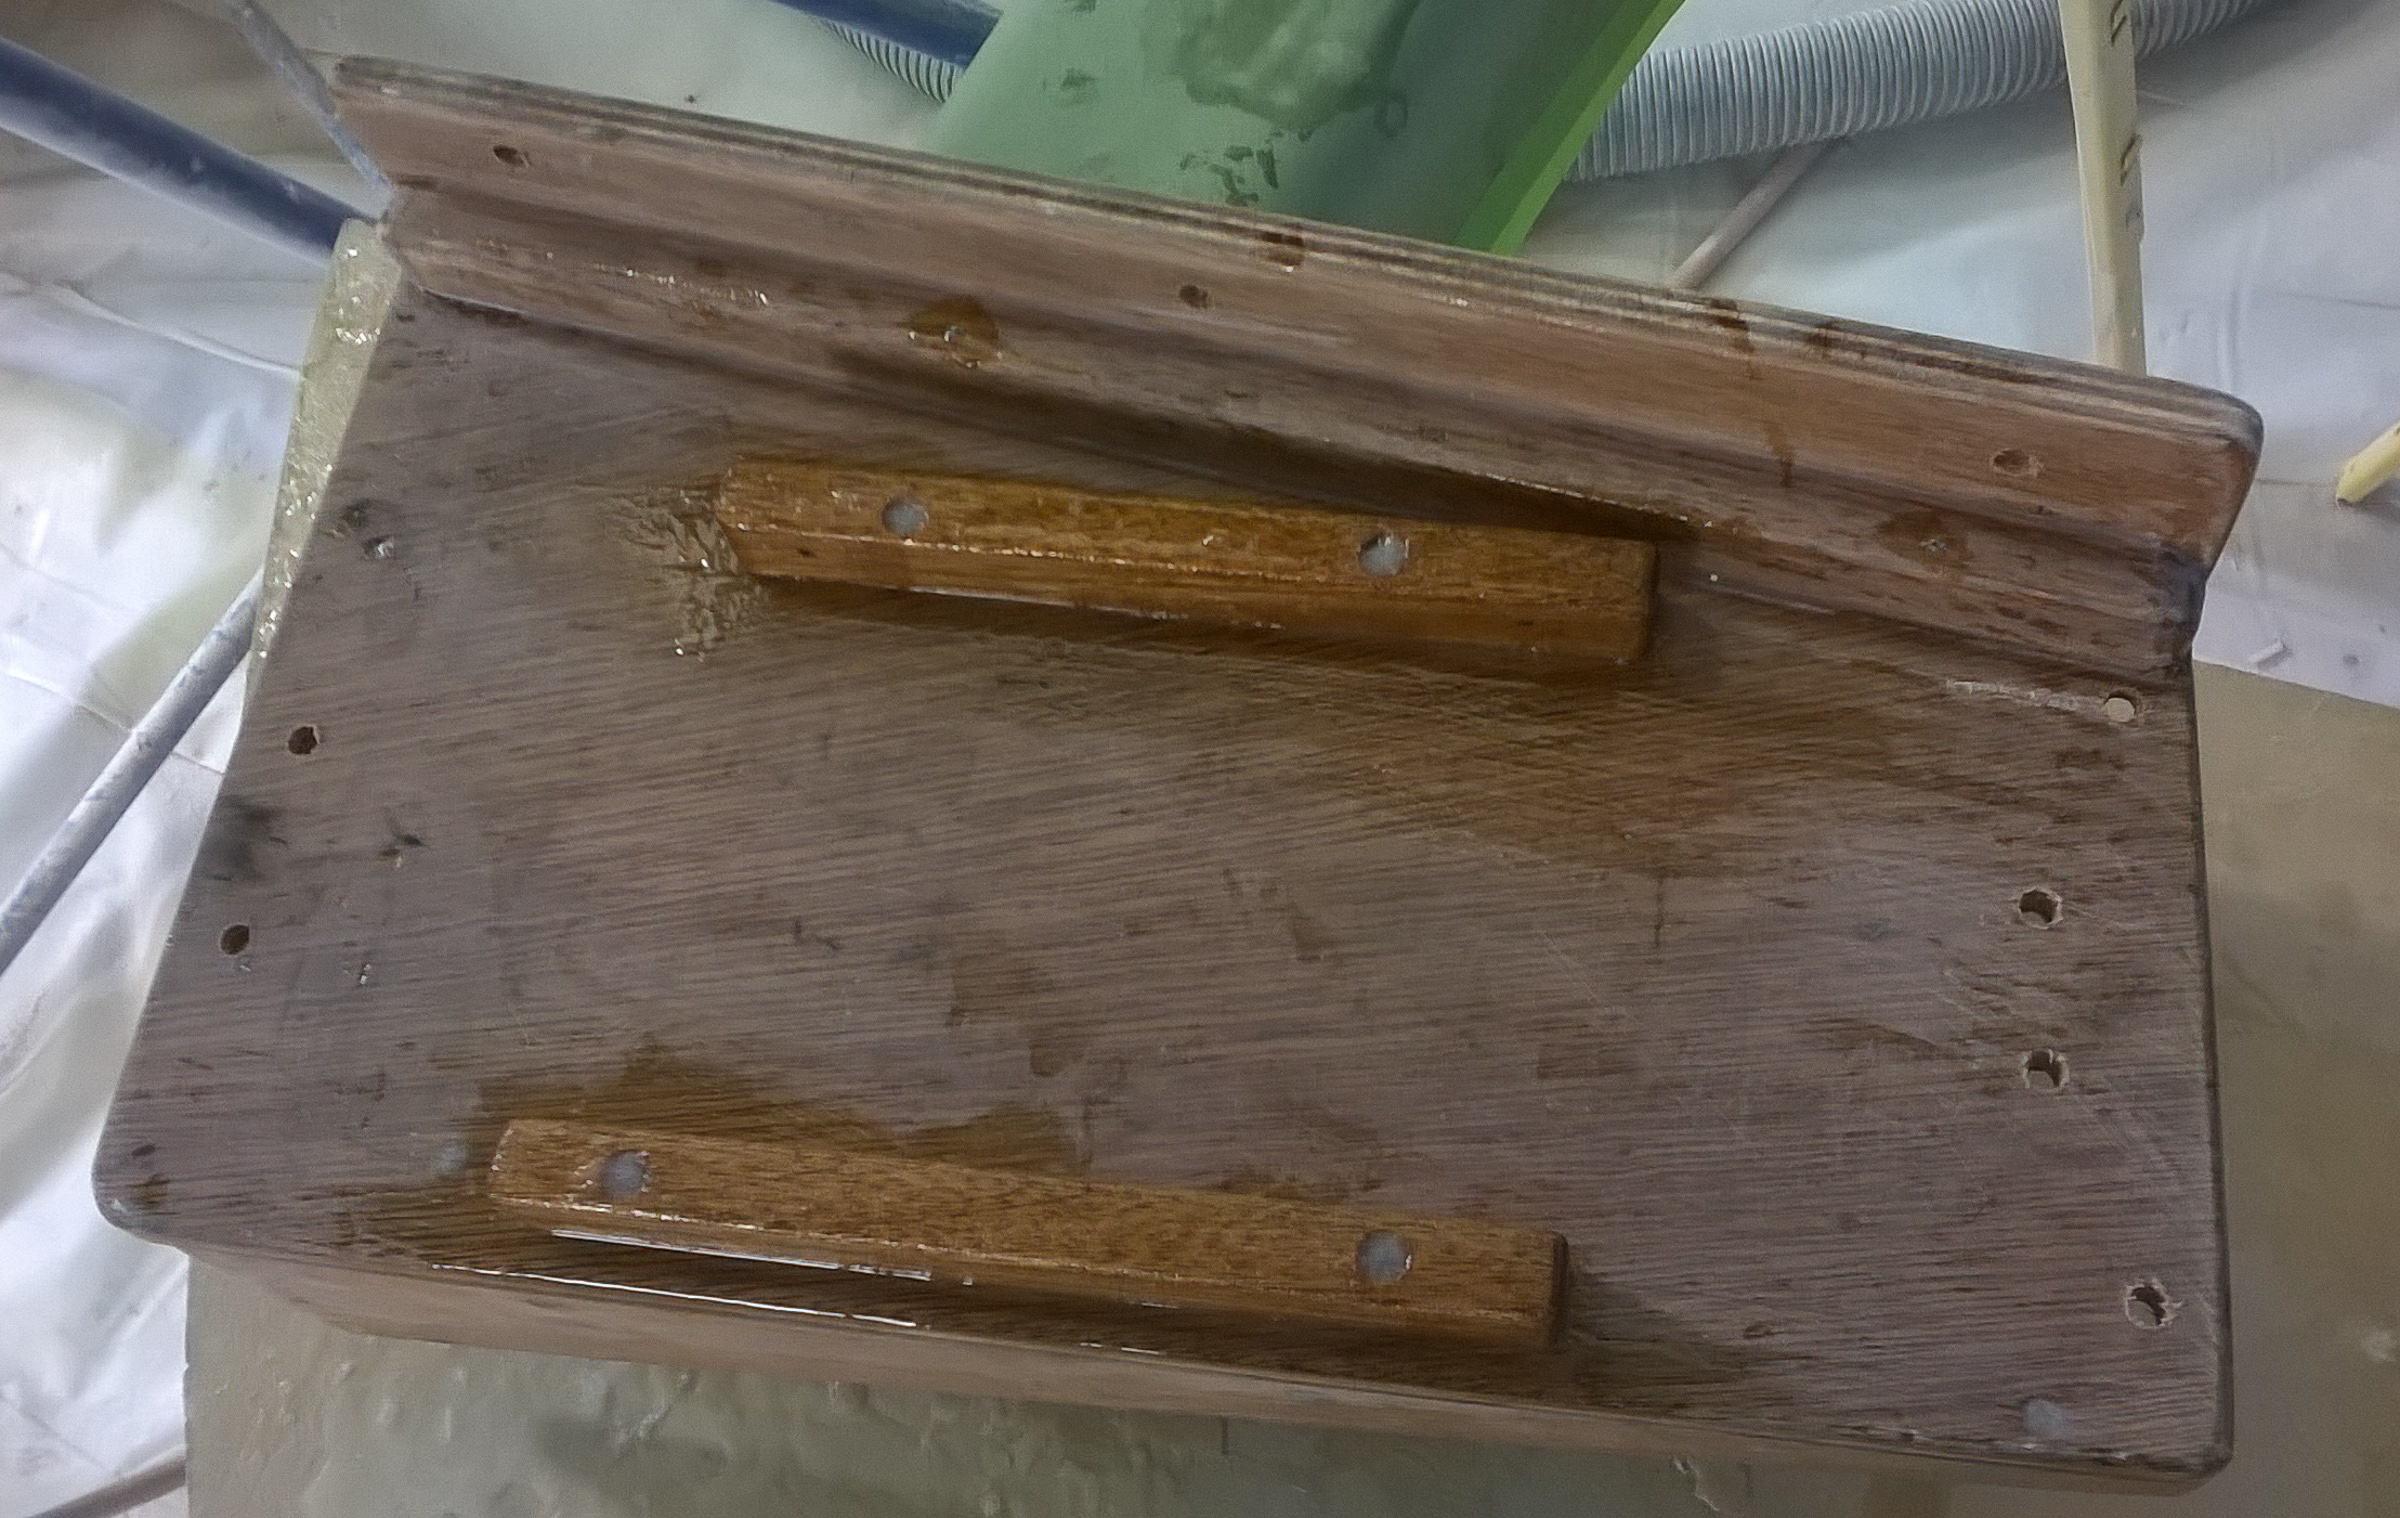
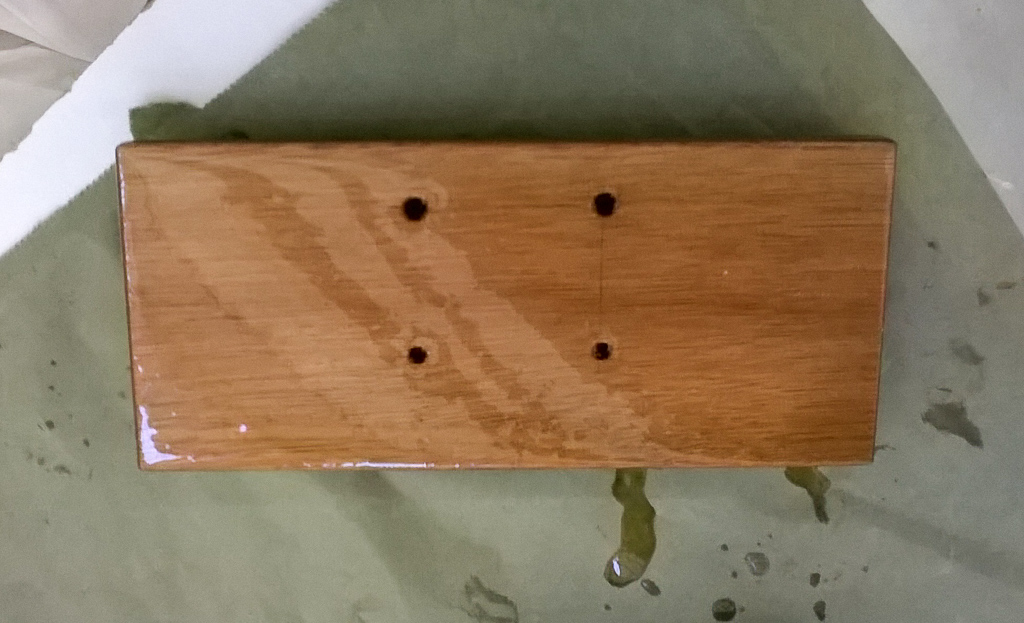
The cabin heater will mount to this board and then to the shear clamp in the cockpit locker.
Ok, so the bit of shiny plywood is not exciting, but it is a stand in for the work that was accomplished over the weekend but did not got photographed. Bill got an extra day in the shop and worked on the windvane alignment. He finally got it all in place, and was so excited to get it fit that he took it down again without taking any pictures of either the windvane in place, or the location of its mounting brackets. Thus photo of a 9″ by 4″ piece of wood. Nina is getting pretty good at designing plywood pieces to install, especially when they are simple shapes. The autopilot platform is waiting to be glassed in place. One of the delays here is that there is now a thru-hull going right through where it will be fiberglassed to the hull and we still have to locate the engine exhaust routing and thru-hull, so that platform is sitting there, making crawling in and out of the locker both easier and more challenging (think shimmy and twist in an awkwardly shaped hole but the floor is now level instead of sloping). Meanwhile, the small plywood piece will help secure the furnace bracket to the shearclamp. Nina’s light reading this week is the installation manual for the furnace. Thankfully, there is a version in English.
Other miscellaneous tasks we completed: the ceiling in the cockpit locker was primed; thru-hull hardware was sanded so that it can be laquered (sealed so that any moisture will show up more easily); and the stern pulpit was fit so that its mounting holes could be cast. Bill aligned blocks to lead the windvane stearing lines forward to the tiller. Tom installed backing blocks for the thru-hulls and added pipe fittings for the engine exhaust and the manual bilge pump on the transom.
It was a short week of boat work for us. We only got a day and a half in, but it was a full scale effort.
On Monday after flying back to town we finished up on the slider rails for the sliding companion way hatch. We had cast the bolts in epoxy to get threaded holes and I had to disassemble them, sand off the excess epoxy and clean the rails. We also filled and sanded the companionway sides to get them ready for the new teak trim that the doors will seat against. The old trim was chewed up and so we are making new ones.
We also epoxied in the cleats to hold the autopilot shelf. The back edge of the cockpit locker openings were fiberglassed to strengthen them and fill the old hinge holes. We also got a second coat of bilge paint on the engine, fuel tank and water tank areas. These three things got started after 5:00 pm and we finished after 9:00. Things just take longer than you think.
Only minor epoxy leaks happened. We are getting better at this.
Tuesday we needed to cast the holes for the stanchion braces. To do this we removed the stanchions and the toe rails. They had been put back on to locate where the braces would go. Then we had to drill out the holes. They go in from the sides of the boat through the shear clamp. To cast them we drilled down from the deck into the holes and then taped off the horizontal holes. This time we had no gushers. Epoxy is sneaky. It waits until you think it’s kicked, and then it leaks. Only a couple of slow oozes, thankfully, but we did have one set of holes that absorbed an amazing amount of epoxy.
The other exciting thing that happened is the holes for the thru-hulls got cut out. thru-hulls are valves in the bottom of the boat that let water in or out. These are at least 1 1/2 inches in diameter, so you make the boat watertight and then cut big holes into it. The thru-hulls will be flush with the hull to reduce drag.
Tom drilling the holes for the engine exhaust and bilge pump outlet.Holes in the hull for engine cooling water in, galley salt water in and galley sink drain out.Two flush thru-hulls on the right and a valve on the left. The valve threads onto the thru-hull.
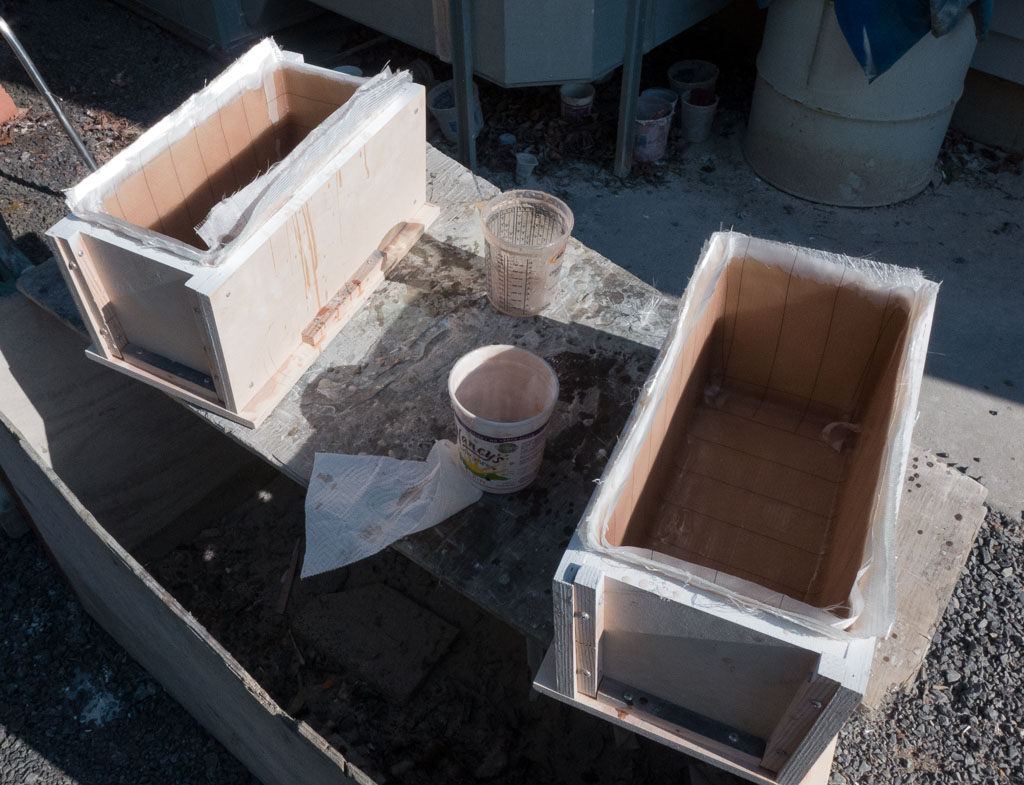
Bear with me on this. Have you ever watched the movie The Great Escape? The one where they have to go down the hole and then tunnel away? And keep on doing this until they reached the other side of the fence? This was Nina’s weekend, sans moving dirt. Her job was to figure out the platform for the autopilot and all the supporting cleats and whatnot that go into that project. This meant innumerable trips up the ladder, across the cockpit, down the locker hatch, crawling on hands and knees under the cockpit to measure things, wrestle them in place only to have to unwrestle them, take them out and recut, redo or re-something them. Multiple, interesting bruises later, exhaustion has clearly set in. Technical and proper names are no longer readily available. And thinking in three dimensions is not something that you normally have to worry about as a knitter. Bill was moaning about having to drill more holes to cast. At least he got to be standing up, and in a position that did not remind one of World War II tunneling movies or multiple trips down the rabbit hole. Marsden got to polish more. He got to be outside, and standing up. No sympathy from the tunneler.
On the right is the upside down platform for the autopilot. The left piece is the front that goes underneath the platform. Not shown is the little bulkhead that goes down the center of the platform to support it.
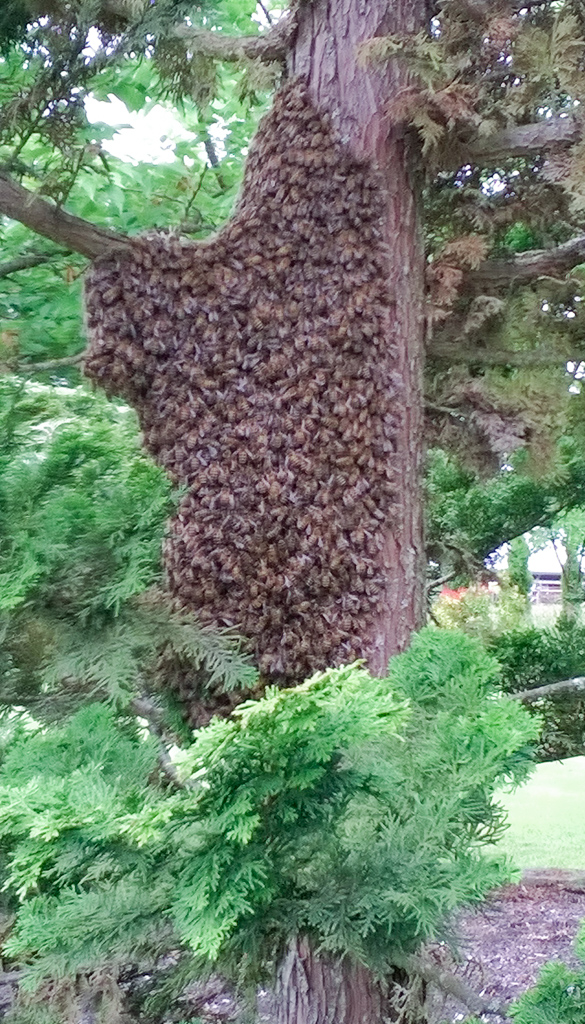
In many ways, we are at the “are we there yet?” stage of the project. The real excitement for the week was bees. Tom had a swarm attach itself to a tree in his yard. Being city folk, we’d never seen anything like it. Even more exciting was watching another swarm of bees swarming.
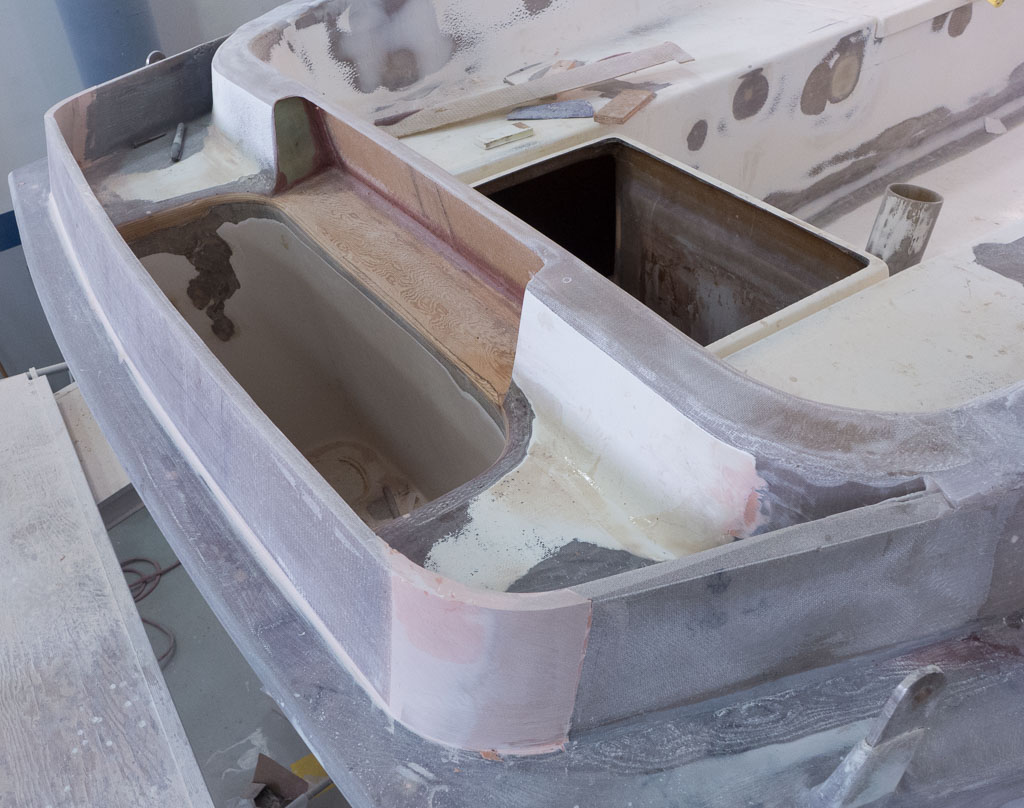
When we got to the shop on Friday the cockpit combings and propane locker opening were installed. We can now see what the finished boat will look like.
Coming together – combings to propane locker to aft seat.
Close up of the new locker.
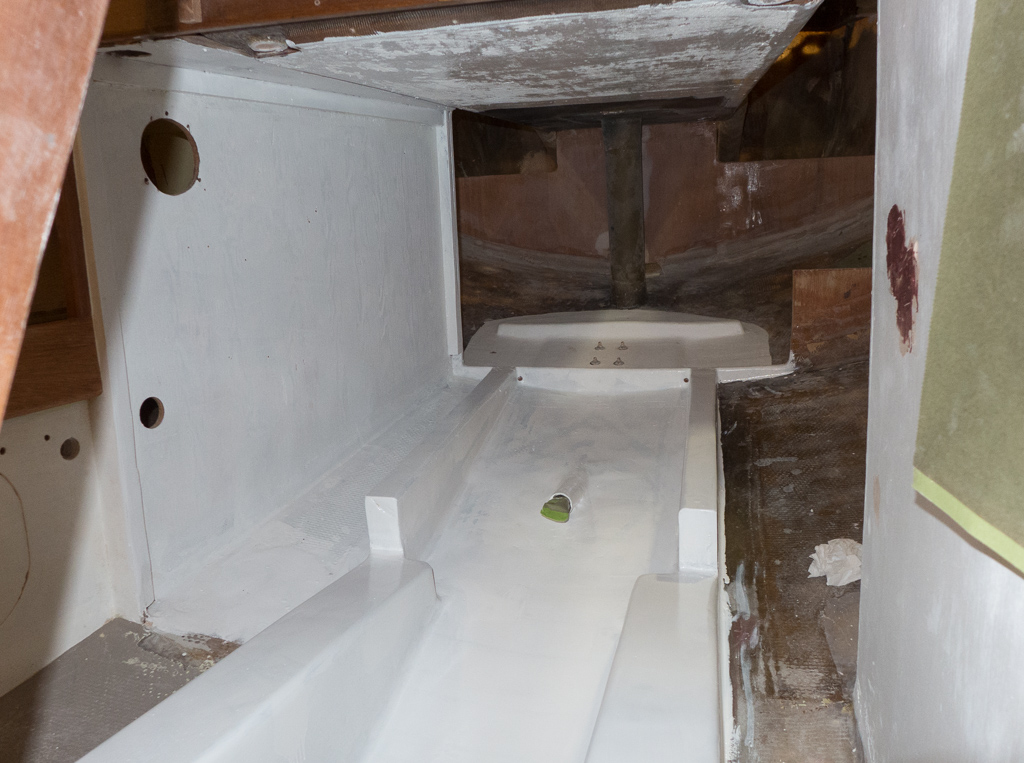
It was a weekend of continuation for us. We put the toe rails back on so the stanchion mountings can be finalized. We continued to work on the painting. We now have shiny engine beds and the locker is ready for the new water tank.
Easier to paint before the tank goes in.
Other stuff happened this week end: the bolt holes to mount the forward hatch were drilled and tapped. On the cockpit end of things, the angled backing plates were finished and more work was done on the cockpit locker lids. Inside the cabin, we now have the grab rail backing plates epoxied to the cabin top.
The backing blocks are 1/2:” thick aluminum. They allow us to stagger the grab rails so the outside rails are closer to the side decks and the inside rails are in reach from the center line. Someday we’ll be installing 1/2″ of insulation and finish panels to make the ceiling all one level.
On Monday two big projects were started. Nina got to work on the mounting platform for the autopilot drive and motor and Bill started aligning and working on the Monitor windvane mounting. Both of these project are going to take awhile to finish.
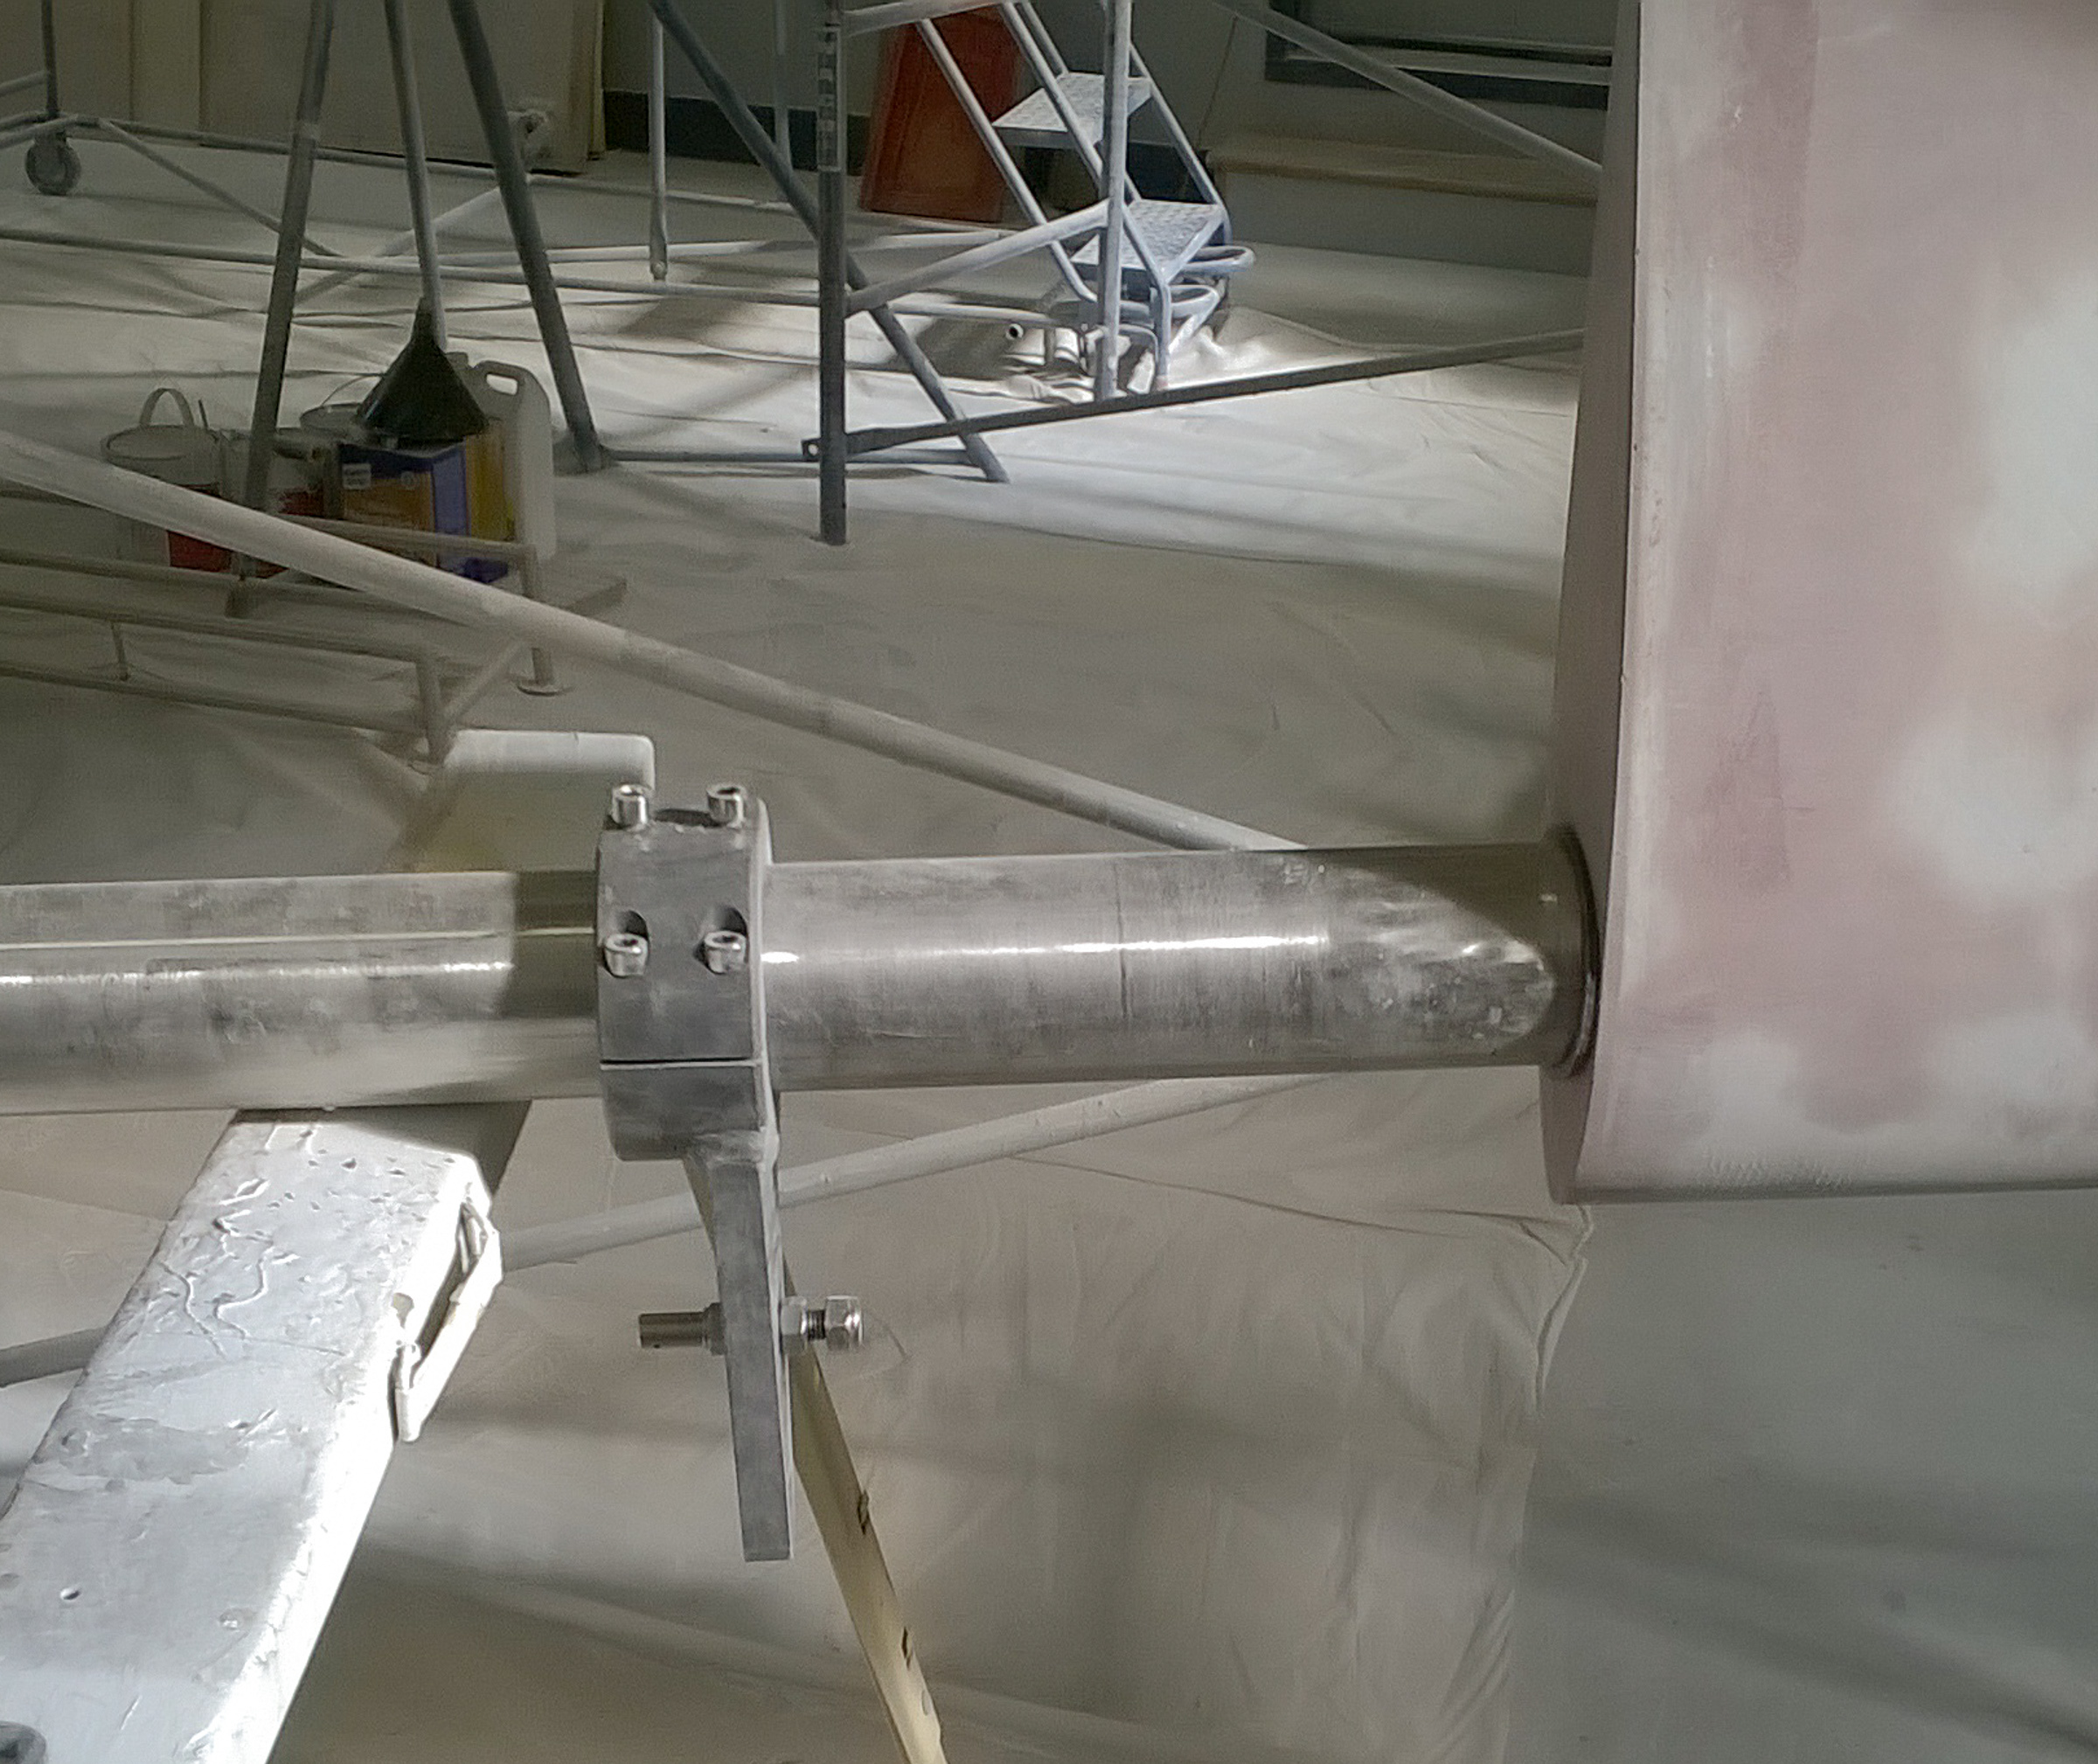
It may look like a maze of tubes, but the windvane will steer Gypsy without using any power other than the wind.
We bought the windvane third hand (at least two previous owners, the last of whom has a sugar scoop on the end of their boot) so the mounting tubes need to be modified to fit Gypsy’s traditional stern. Tom rigged up a crane out of an old boom to hang the windvane for fitting. It was adjusted so that it we have the vane hanging in place so we can take measurements and get new tubes made. Tom had the smaller 1 1/4 inch diameter 316 stainless pipe so the only pipes we’ll have to order from Monitor (Scanmar) are the 2″ stainless pipes to connect the Monitor to the top of the stern.
The hanging arrangements.
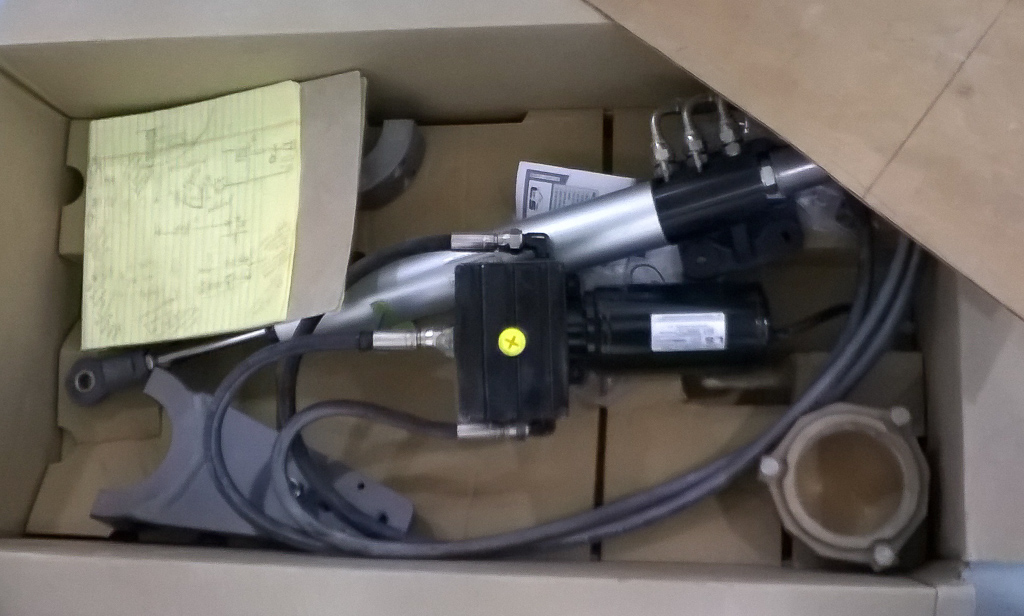
Nina got to spend most of the day in the cockpit locker measuring for the platform to mount the auto pilot on. This is what happens when you ask a question that you hope will get you out of sanding. The autopilot allows for more precise steering and it works when the wind is not blowing. While that sounds exciting, what it meant was that she got to spend the day measuring and dry fitting equipment in a space not much bigger than the box below, and with much less headroom. More measurements and more cardboard templates.
This is the kit she need to build a mount for. The drive unit can exert about 1000 lbs of force so the mounts need to be sturdy and reinforced (redundancy is very good).
Marsden got a reprieve from polishing, sort of. The cleats that will be mounted on the combings (remember the alligators?) needed backing blocks on the hull sides. He got to fit fiberglass blocks and then bondo them on place. Keeping with recent family tradition, it took more than one try to get it pink enough to kick. (The hardener catalyst is red so if you use enough the bondo is bright pink, if it is light pink that is not peachy as it won’t harden.) They are now in place and ready to do their job.
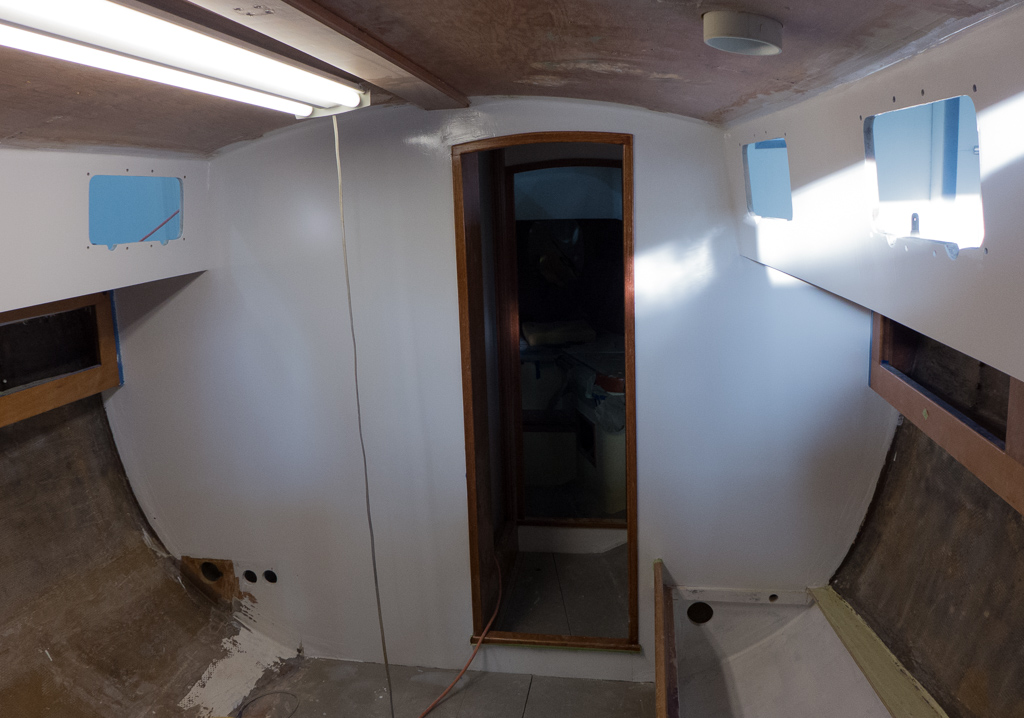
We have gotten into painting mode. It is imperative that we paint the cabin where stuff is going to be mounted when we put Gypsy back together. This has meant a flurry of filling and sanding so surfaces are ready for paint. What we do is paint a coat of primer and then after it has dried, sand it. If there are defects in the surface, more filler and sanding. Then a second coat of primer followed by at least two top coats of enamel.
We are using oil based paint because it is tough and holds up better in a marine environment. Oil based paint stinks so we have to wear respirators while we paint and it takes at least a day to dry. After painting now for two weeks the results are looking good. We got our first coats of the semi gloss white enamel on the shear clamp and cabin sides. This is the best the cabin has looked in years. We’ve been adding fiberglass reinforcements, new ports and other projects as we could, but it’s meant that the cabin still looked like a project, in spite of cheerful curtains. It’s finally beginning to look finished. Wow!
The main bulk head and cabin sides are looking good.Above the galley.This is where the engine and fuel tank are going. The paint really lightens up the space.
We also cut big holes in the bulkheads for the 4 ” furnace ducts. Being warm has to make up for the lost storage space because we’re suddenly realizing how much small locker space is being taken over by ductwork. Plumbing hoses and electrical wires also needed bigger holes and some of those holes have run into the new shear clamp. We mend and forge on.
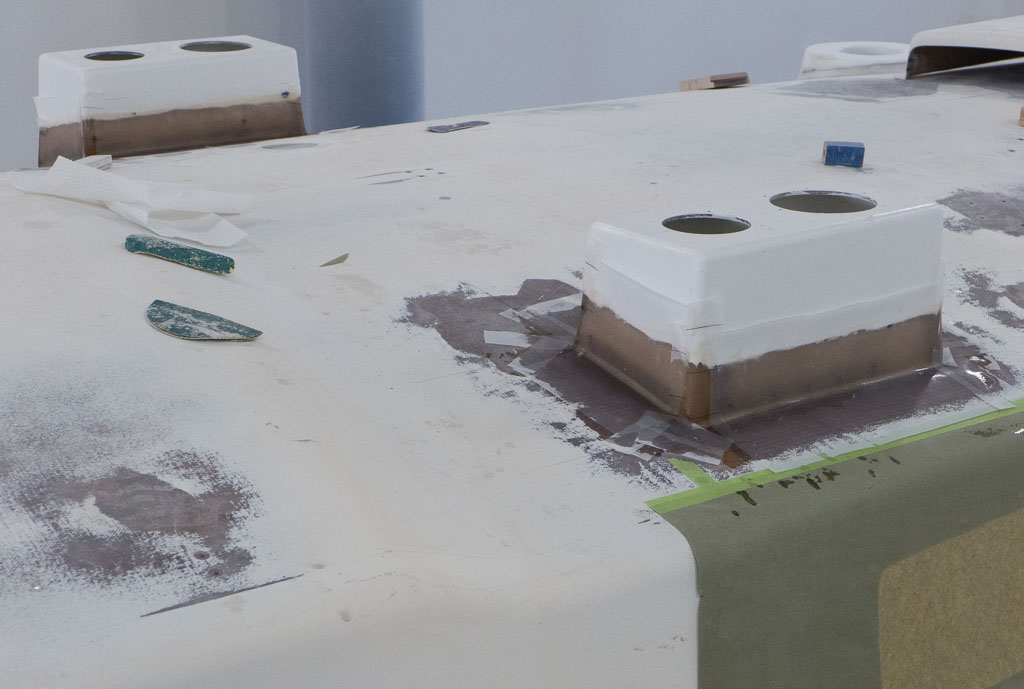
The dorade boxes are coming along. They got a starter round of sanding to fair them into the cabin top. Imagine them painted with cowls on top, and they’re gorgeous.
\
The other project was the cockpit locker lids. They had been installed wrong ever since the boat was new, with not enough lip to properly screw in hinges. We added fiberglass to the back edge where the hinge attaches and added a foam core to stiffen the lids. They will also sit level with the rest of the cockpit seating now.
The lids have had the foam core added and have been fiber glassed over to make them stronger and to repair the back lip.More fiber glass has been added to the hatch lids. You also see the sliding companionway hatch with its new wood front edge glued in. The round circles are fiber glass wedge backing plates for the winches on the cockpit combings. This will make sure that the nuts and washers on the winch bolts land flat and not just on one side.
It’s exciting to see how the interior of the boat is coming together. The exterior doesn’t have much left to do, and that should be well on it’s way during this next week.
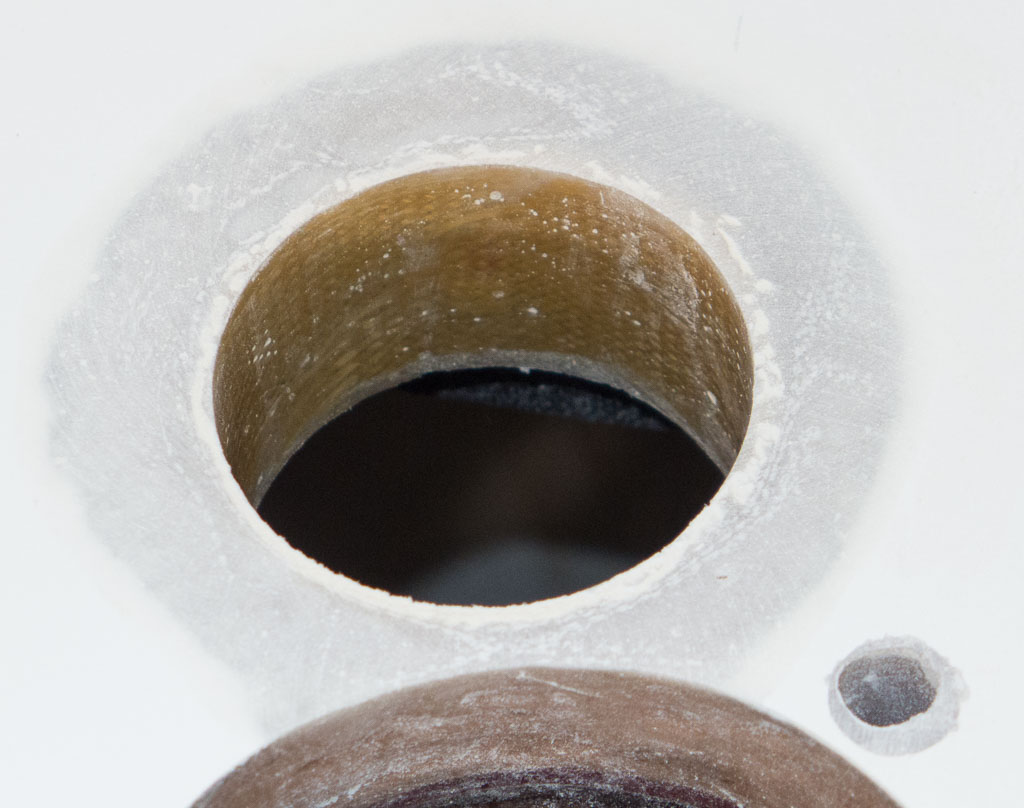
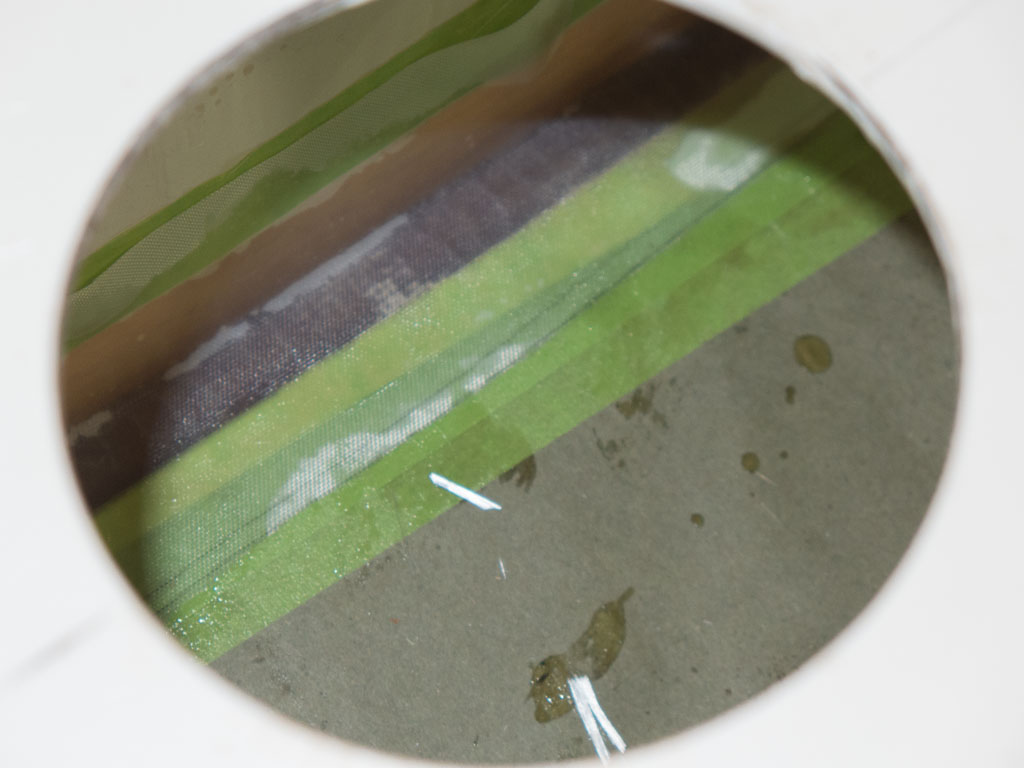
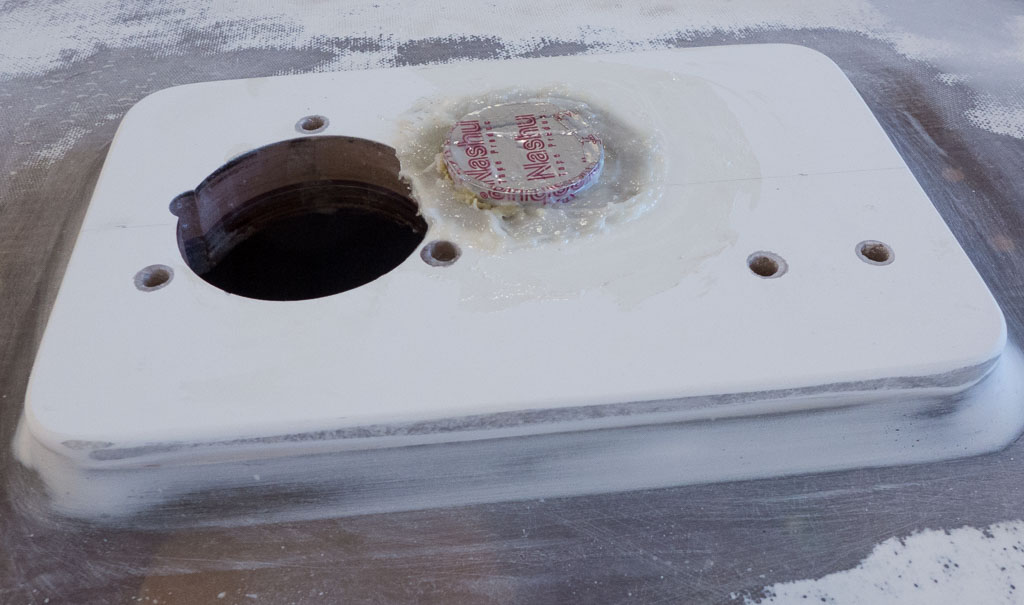
We left you on a cliff hanger last week. We showed how we were molding the Kevlar lining for the anchor hawse pipe. Now you get to see the Kevlar, it is bright yellow (well, it is in a bright light. Otherwise it’s just a variant on fiberglass brown).
The Kevlar will keep the anchor chain from damaging the sides of the hole. The hawse pipe is where the anchor rode (chain and rope) falls through into the anchor locker after the windlass pulls it up.
Bill’s big project was the dorade boxes. The air tubes have been installed, the boxes gelcoated and the boxes have been fiberglassed to the cabin top.
The air tubes are installed and a fillet is holding them in place. They have been fiber-glassed to the deck with resin and cloth.The dorade boxes and the deck where they go have been coated with gel coat, a pigmented paint like resin.
Here they are installed on the deck.
Dorades fiberglassed in place.
This doesn’t show all the fiddly bits inside. Part of the dorade glassing was that the interior of the box needed to be glassed to the deck as well, but this had to be done through two three to four inch holes.
Inside of the dorades was a very narrow strip, about one inch wide, to glass it onto the deck).
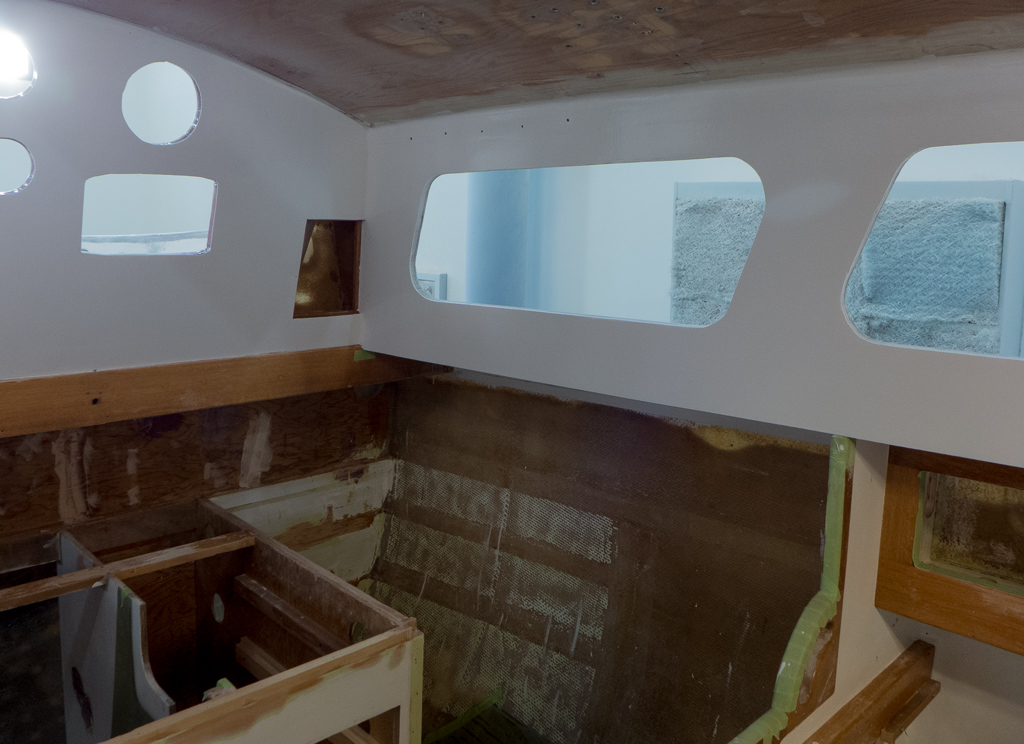
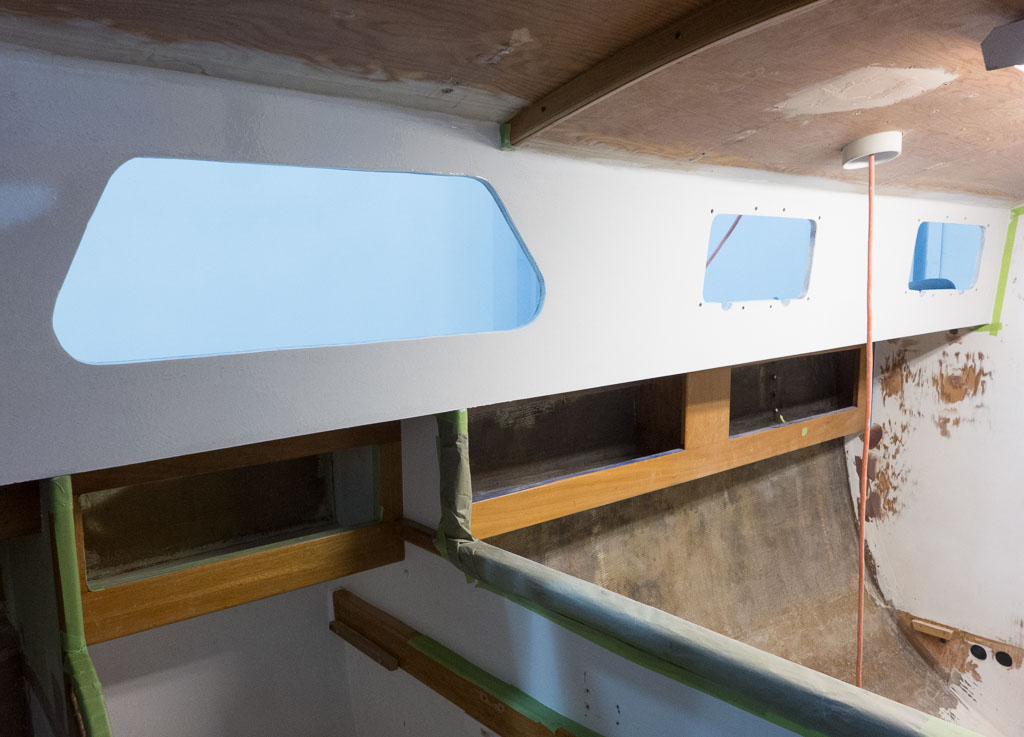
Meanwhile, the interior of the boat was progressing. Nina spent more time sanding than she cares to think about, but we got the cabin sides primed where the ports (windows) will be installed.
Cabin sides primed. They were sanded, will get another coat of primer and then two more coats of enamel to make sure they are smooth and finished well.Instrument holes were cut and epoxied. Upper left will be the compass, below it is the chartplotter. The two holes on the right are for the wind/depth and speed instruments. The hole at the bottom in the cockpit is for the emergency bilge bump. At the very left of the cockpit, and hard to see in the picture, is the throttle control hole.Seat lids. Marsden added a layer of 3/8 inch foam to stiffen them up. The weights help glue everything together. They will get a couple of layers of fiberglass covering the foam to level them out with the cockpit. Earlier in the weekend, Nina added fillets to the seat locker lips to stiffen them up and to create a smooth surface for pulling things out of the lockers. This was one of those practice makes better exercises – the second time took (iso resin takes a lot of stirring to get it to kick properly!@!) .
We’re definitely on the home stretch. Tom will be connecting the new platform on the stern for the propane locker. At that point, we’re pretty much ready to start prepping the outside of the boat for paint (this means yet more sanding).
It has been a week filled with dust and shavings. Friday we re-drilled all of the toe rail holes after they had been cast with epoxy. That’s one more job off the list. The cabin, cockpit locker and dodger have been sanded some more. We want to be able to paint the insides of the cabin where the ports will go and where the engine, fuel and water tanks will be.
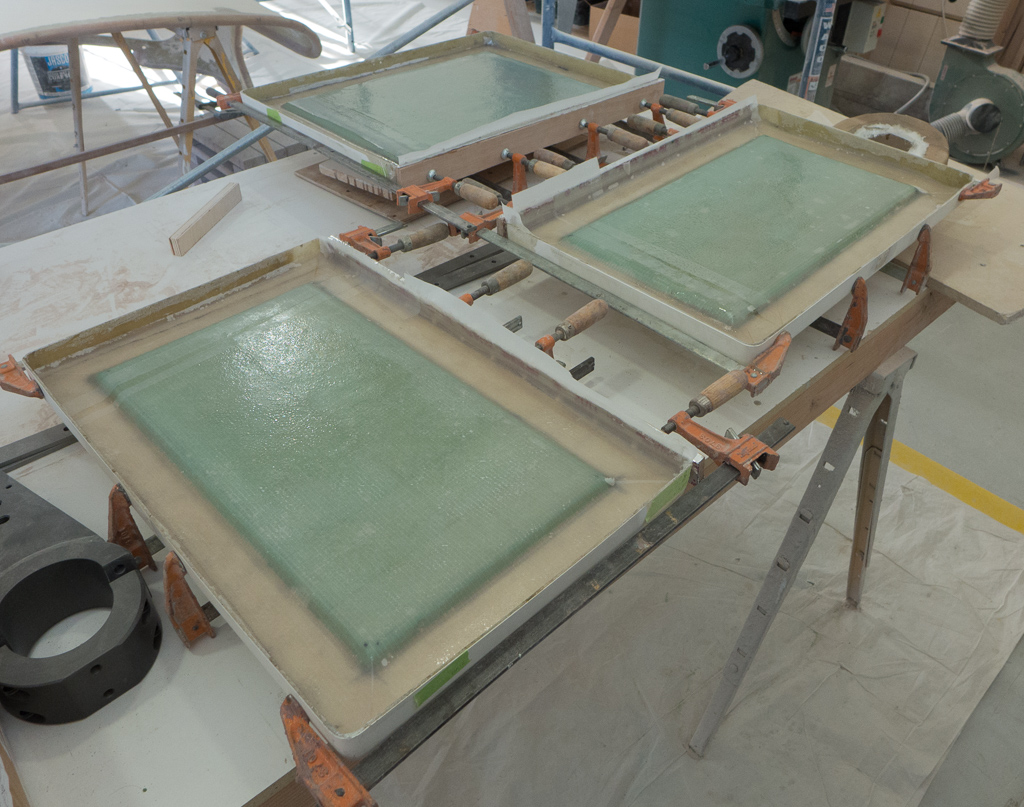
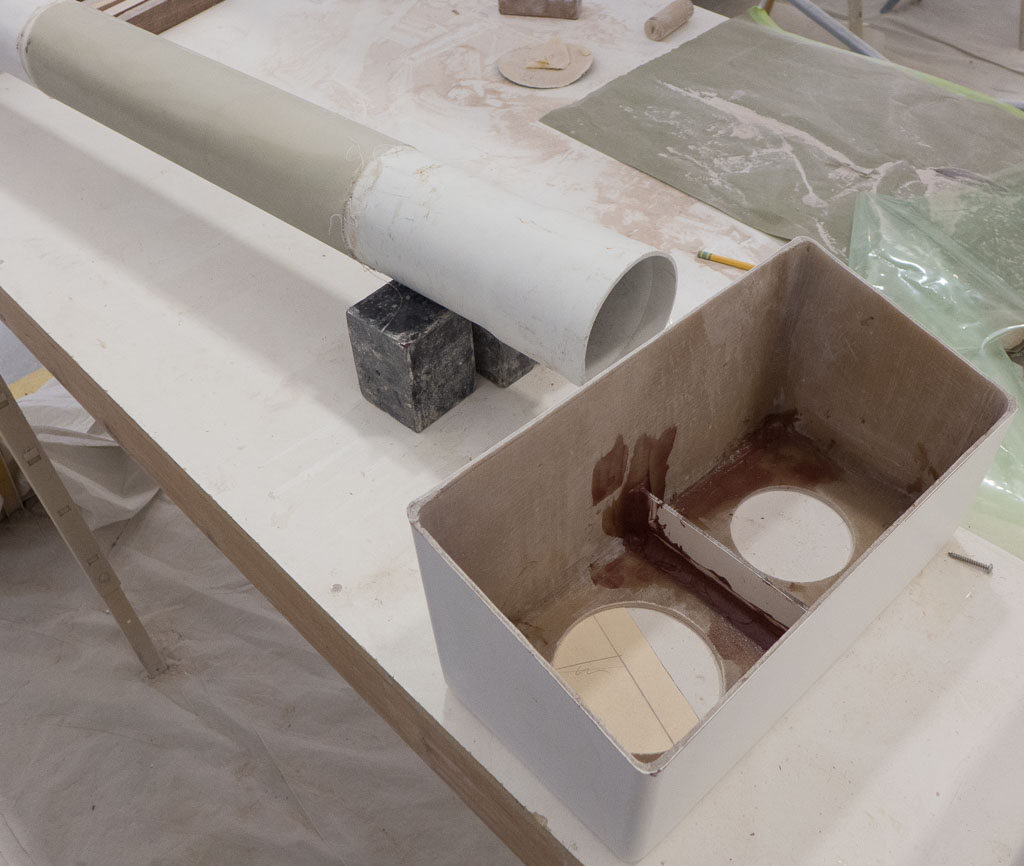
We made our dorade boxes. The molds were ready to go with a coat of wax and gel coat. We added two layers of fiberglass mat followed by three layers of biax cloth on the sides and 5 layers of biax on the tops. These are going to be stout boxes. (Dorades are water trap vents, they have a cowl vent on top, drains on the bottom and a air tube that lets air into, but keeps water out of the cabin.)
It took a half gallon of resin to laminate the layers of cloth.
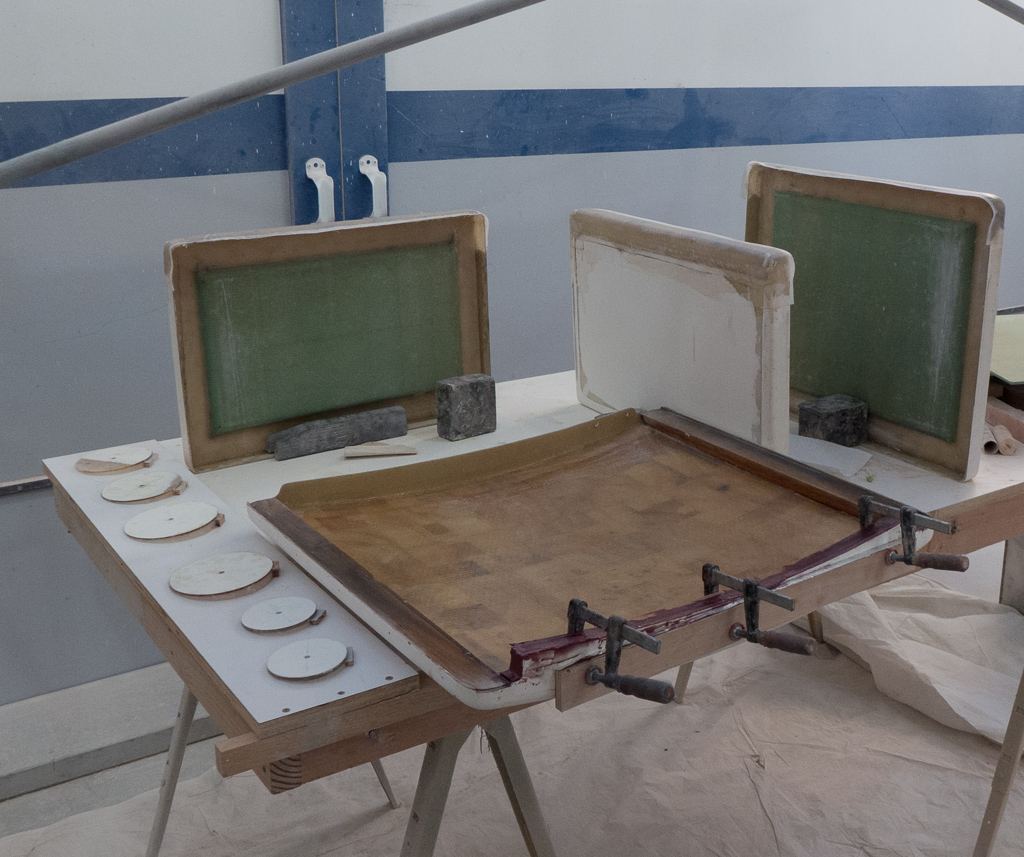
Sunday we popped the dorades out of the molds and trimmed off the excess cloth. Monday they got fit to the cabin top. The location of the dorades was dependent on the location of the oar rack. The oar rack had to avoid lines for the main sheet and vang. The dodger got installed to help decide on how the lines would run. In the end we found a place where everything will work, but it took a little fiddling with where thing would go.Tuesday the holes for the cowl vent and inspection plate were cut out on the dorades and a baffle was glued in to keep spray coming down the cowls from going into the air tubes.
You can see the baffle epoxied in place. The 4″ PVC pipe has been covered in fiberglass and is ready to be cut into about 6″ lengths to become the air tubes.
The cockpit is ready for us to layout where the hardware goes.
Getting winches and cleats where we want them. Nina jokingly referred to this as getting the alligators in a row.
This was followed by drilling holes and casting them with epoxy. Next week we will re-drill them.
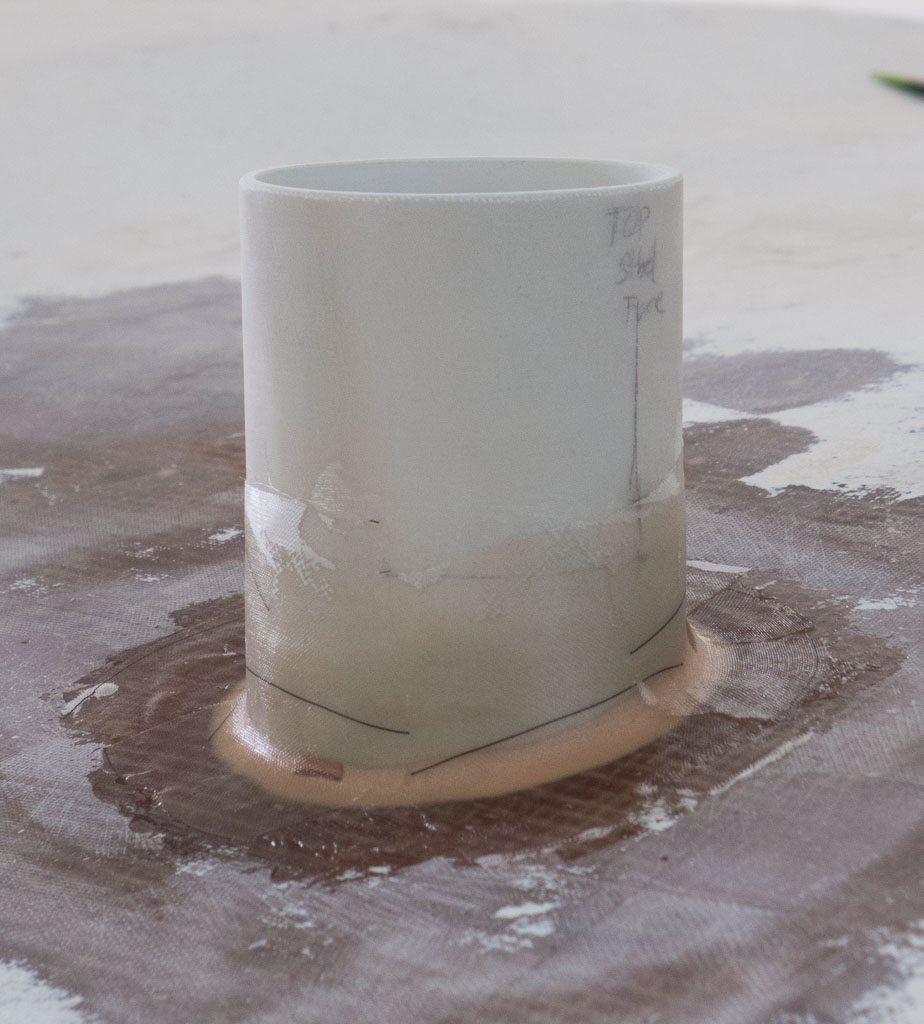
The new engine instrument panel was installed. The old location was around the corner to the left. The new one will be sealed and watertight.The hawse pipe for the anchor windlass was lined with Kevlar. The plug will give us a nice round hole for the anchor chain and rope (rode) to drop down.
The bulkhead to support the cockpit was fiberglassed, but it had not been sanded properly first. The fiberglass popped off, it was a sad day. Here is try two. This one did actually stick.
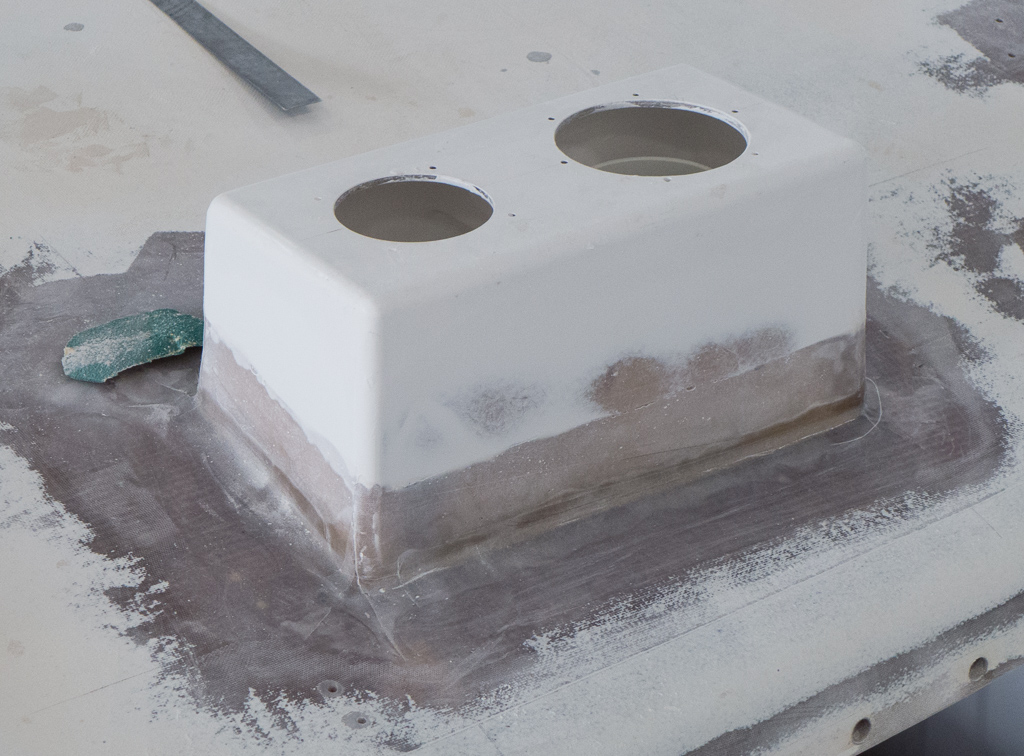
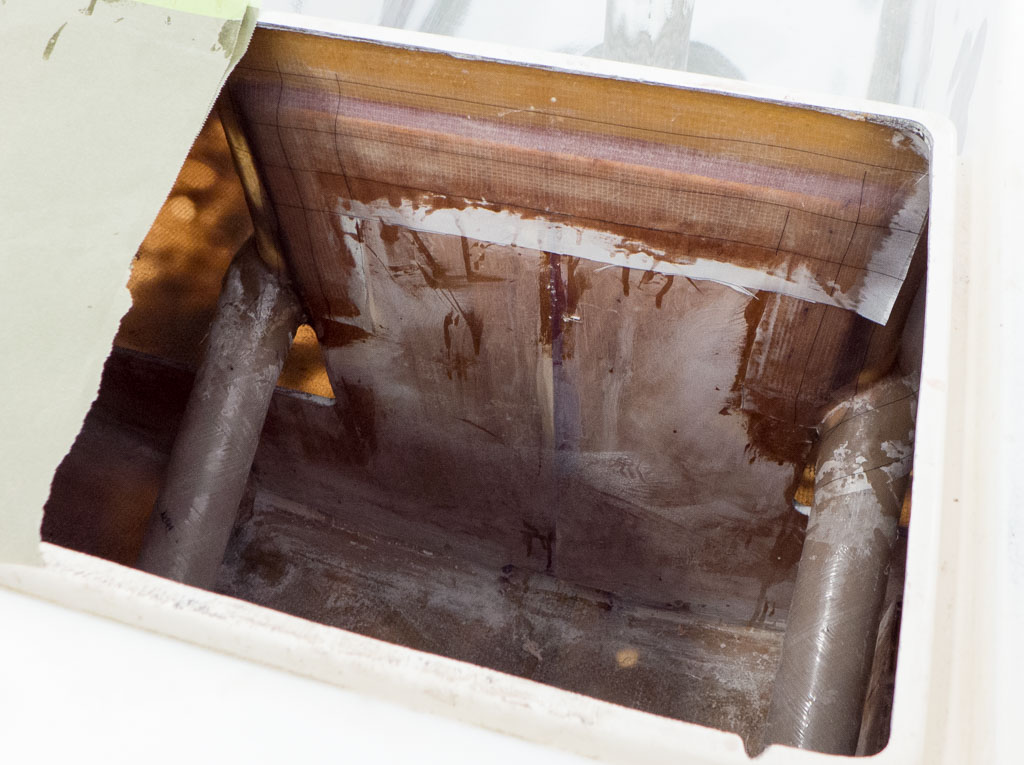
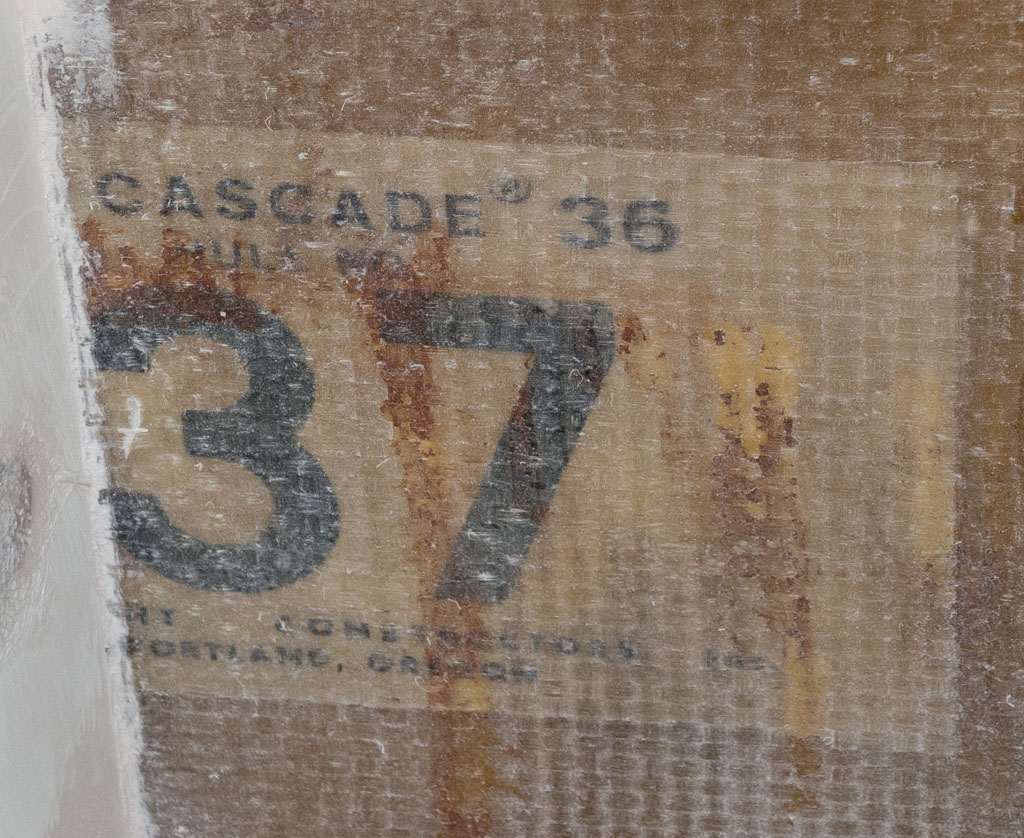
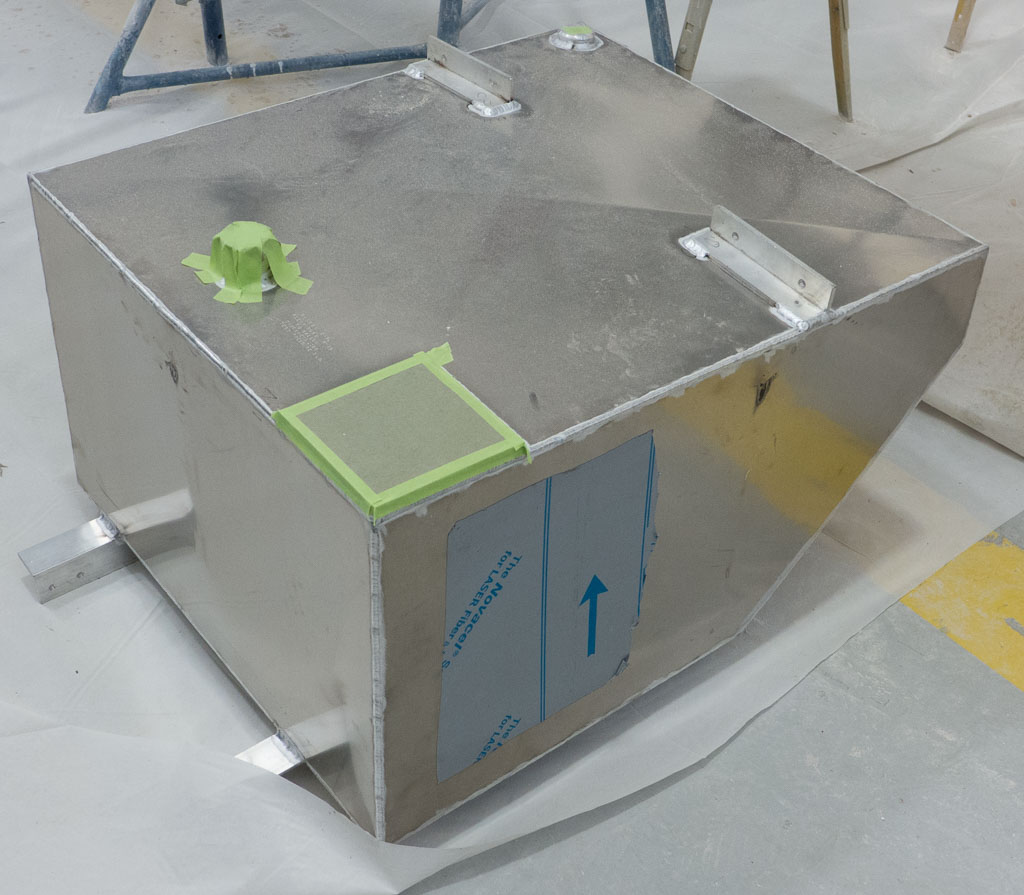
One of our goals has been improved access to the propane locker. This is the new top for the locker and cockpit combings. It is sitting on top of its mold.This is where the lid will go. This will also create a wider seat to sit on.Inside the propane locker we found the original hull number plate.Our new 60 gallon fuel tank came back from being welded. It is almost ready to install. All the openings are taped off to keep the incredible amount of dust we generate out of the tank.