This past couple of weeks led up to an attempt to leave the dock. Ready or not, here we go.
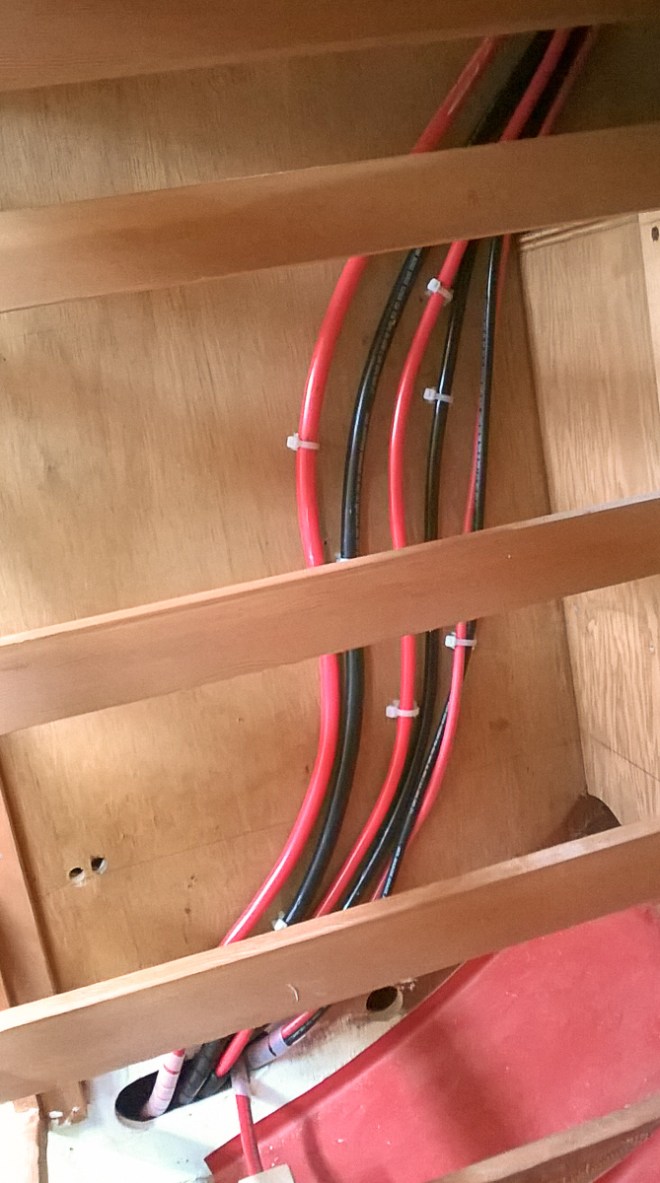
We got the wiring in place for lighting. Nina learned how to do the ends on wires. Does she understand wiring? Someday, perhaps. The dangly wires connect to terminal strips. The LED lights, which should arrive in September, we hope, will be screwed into the panels and connected to the strips.
Dangling wires, but in place ready for lights and panels to be installed.
On the outside of the boat, the rigging was checked and static tuned, ready for dynamic tuning under sail. We replaced the backstay adjuster with a new lengths of Amsteel, MLX and a new 8:1 block system. The old 3 to 1 setup meant that Bill usually had to do any backstay adjusting because Nina just didn’t have the umph to pull anything in. Now even wimpy Nina can pull it in.
The new backstay adjuster.
The next step was getting the sails back on the boat. The sail cover got a once over and was sewn back together where the elements had played hob with the thread (it’s now sewn up with UV resistant thread so should hopefully last more than a year: hooray Sailrite sewing machine). We found one jib sheet in the garage (the rope that connects to the sail) but had to hunt for the second. It was mis-labeled so locating it was a bit challenging. Tracked it down, got it on and we’re ready to go.
Sailcover, left, and genoa, right, in place. Gypsy ‘s looking like a working sailboat again.Sail hoisted while at the dock. Interesting shape.
We got things reasonably stowed down below. Everything was still in project mode so it needed to be put away so that when we heeled, nothing would go sliding all over the cabin. We put on our PFDs, began to untie the boat from the dock, and started the engine. Except it didn’t. It made lovely clicking sounds. We unconnected, wire-brushed the connectors and reconnected the starter. Still nothing. Repeated the process with the same results. Heat and frustration ensued. Other attempts were made to clean any wire ends involved in the batteries, starter and engine. Nada. Finally we called it a day. After our Labor Day vacation we will investigate the Yanmar wiring harness as the internet says this is the problem.
Stay tuned for varoom, varoom it starts or F***S**** it doesn’t. Oy.
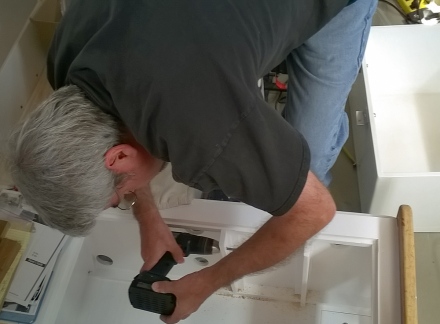
When we left you last the engine would not start.Everything was ready, but nothing was starting. This is when you need friends who know what they are doing. They are much more help than a book. After not solving the starter problem on his own, Bill called Norm who is very knowledgeable about Diesel engines. Norm gave him some things to check. The checks led him to think the starter may be bad so he removed it and took it back to the shop that had rebuilt it last January. The starter worked great for them. They also had some good advice. When checking a circuit, don’t use the battery as the ground, use the part. That way if the engine has a bad ground it will show up. Bill went back to Gypsy and cleaned all of the connections and reinstalled the starter. This is where not having a galley counter over the engine is a big help. We tried once more and the starter spun. The engine started right up and ran great.
The engine is loud and so we also have been working on the engine enclosure box. The box sides got sound foam installed. The foam is about 1 1/4 inches thick and has several different densities of foam to better absorb the noise. You cut the foam to fit and cover the edges with mylar tape. Then you glue it to the box with contact cement.
The foam is heavy so we added screws and large washers to help hold the foam and keep it in place.
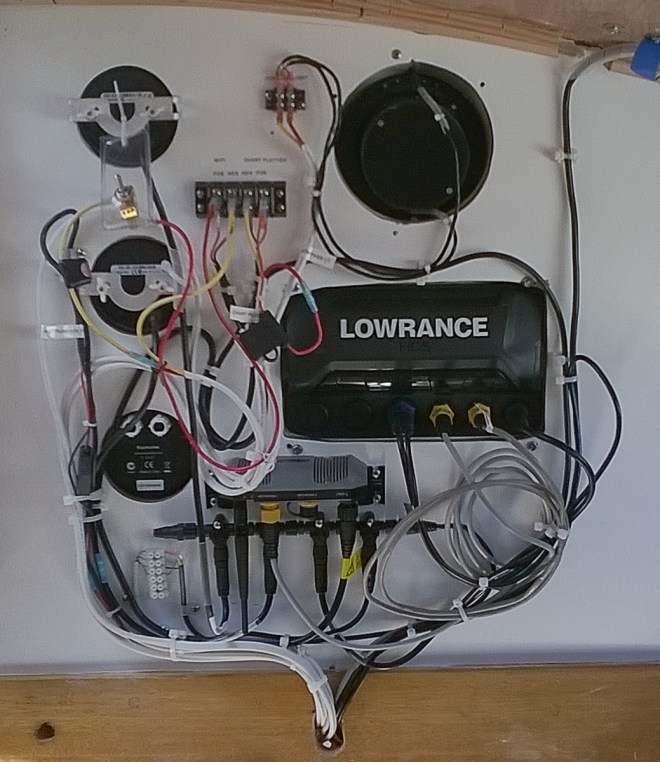
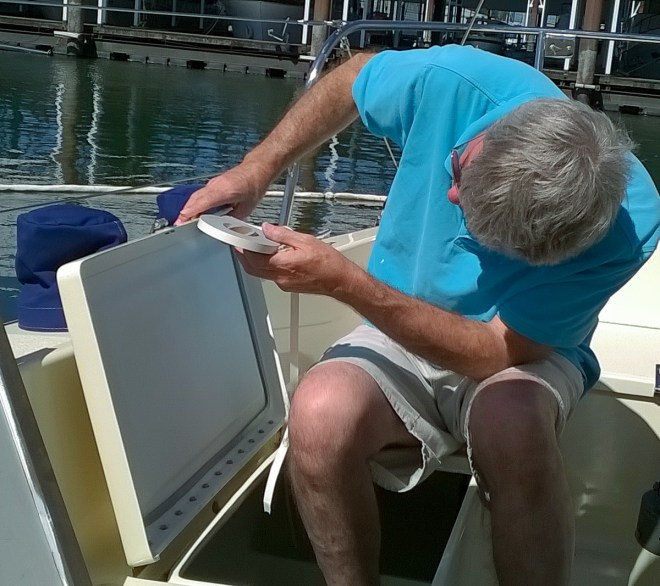
We also have been working on our instruments. The chart plotter was not sealed well to the cabin side and was leaking water into the boat so it got mounted on a fiberglass trim ring and resealed. The auto pilot controller, bottom right, also got installed. The instruments are a compass, top left. The chart plotter, below the compass, shows the charts and the radar image. The two B&G instruments on the right show wind, depth, speed. The auto pilot controller is below them and it still needs to get hooked up.
The instruments are all connected to a data back bone that shares the information: wind, depth, speed, GPS, AIS, radar between the units. There is also a wifi module so we can use our ipads as repeaters for the chart plotter. On top of all of that there are power wires to give the instruments 12 volts DC to run. Trying to keep it all neat is a challenge. This will get a cover to hide the wires from view.
While Bill has been wiring away for the last couple of weekends Nina has been working her way across the overhead, (the cabin ceiling). She has been installing cleats to hold the overhead panels and lights. She also has been installing insulation foam. The foam has custom removable bits where the hardware is so we have service access.
The long strips are the battens to support the cover panels. The panels will be thin 3/16″ plywood covered in white vinyl. They will be held in place by varnished hardwood strips screwed into the battens. The little blocks are for the light fixtures and vent trim rings to screw into.
Summer vacation is usually a time to head downriver, spend a lazy week or two on the Columbia River. Not a usual summer, so ours was sort of a busman’s holiday. We spent ten days working on the boat and actually got quite a lot accomplished.
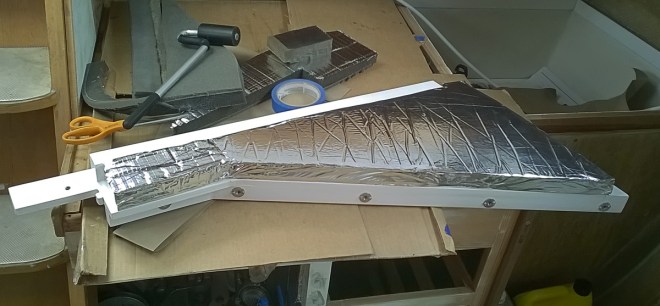
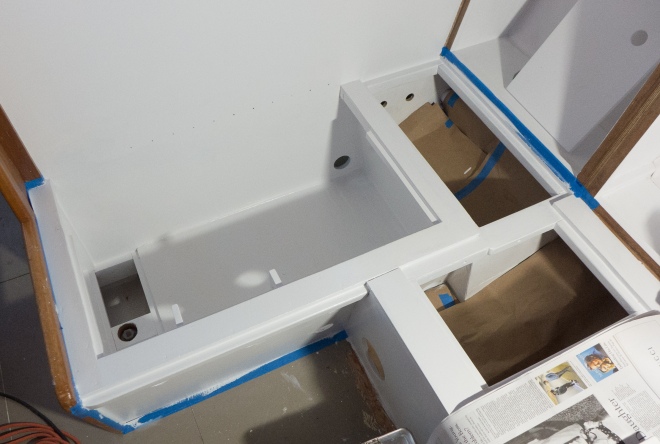
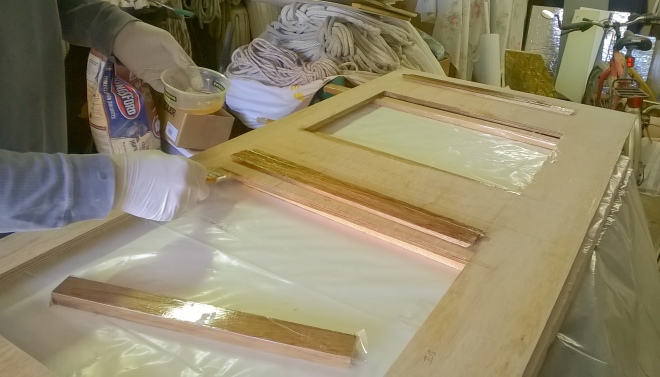
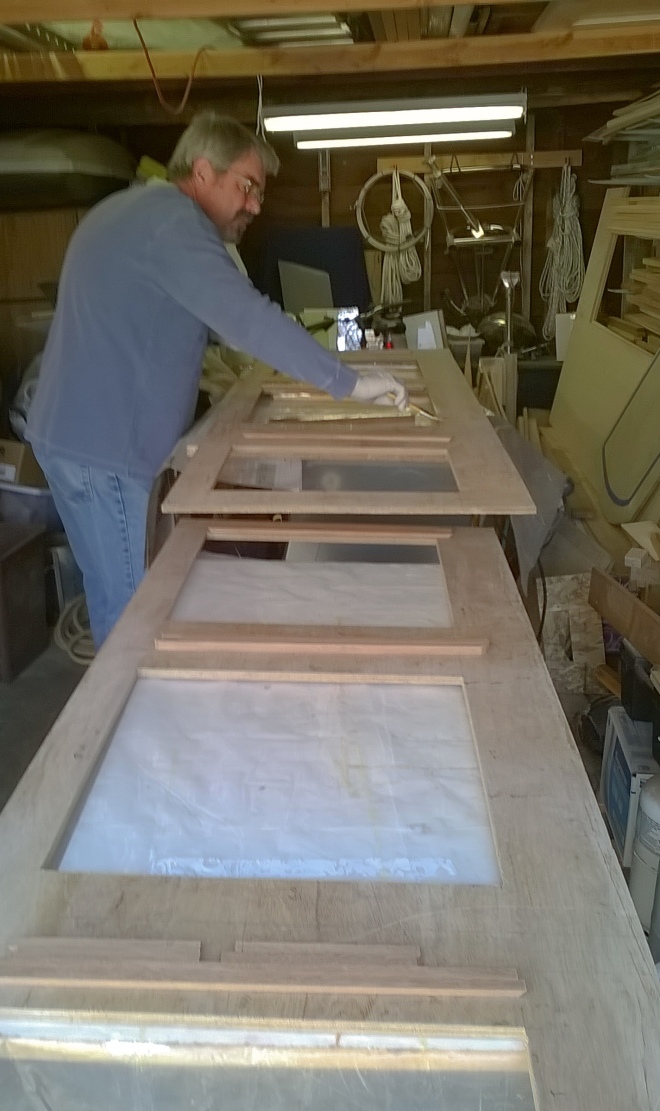
One of the projects was the engine cover. The old one involved carpet covered plywood panels that were sort of held in place by the ladder, which was also part of the whole contraption. We now have a new and improved, standalone Rube Goldberg construction that fits together nicely. And no carpet at all.
Bill fitting the template for the side of the new cover. There is half of a split shelf on the top right that has cutaways for hoses and wiring to pass through. The piece of plywood on the right blocks off the galley and has a cleat for the front cover.Cardboard pattern being fit.The new plywood panels being dry fit.Painting all the parts back home in the garage, a multi-day process. They are now finished on one side.
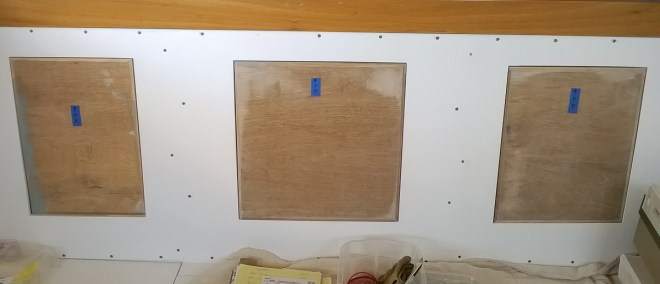
Another big project: we now have have an instrument panel! With instruments! Um, well most of them. Our old setup was three separate panels for three separate small compartments. The new configuration has no dividers and is a single panel that swings down nicely with easy access to the wiring. It also allowed us to get the AC and the DC switches to be in the same general part of the boat. The AC panel used to be across from the head, next to where the shore power plug is.
Bill is starting to wire the panels here. It’s early in the process, but the AC on the left is live, thus the temporary cover over it. He’s also labeling all those wires as he goes so it will be easier down the road to figure out what is what if things need work.This is the instrument panel with almost everything installed. The holes on the right are for the VHF and SSB radios. Originally we had talked about putting the SSB on the top since it doesn’t protrude too far into the space behind, so the panel would be able to swing open and closed. Somewhere in the time between the conversation and the cutting of the holes, this was forgotten. The VHF is getting a lovely, varnished additional face plate to help facilitate the opening and closing of the panel. The SSB will someday be a reality.
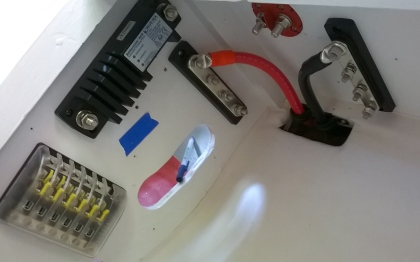
All the big cables have been run, cut to length and had ends banged on and finished off with heat shrink tubing. The batteries and engine are now wired, but for some reason it won’t start. Just click and nothing more. We have a call in to Norm who will help us sort it out. So leaving the dock is in sight!
Meanwhile, Nina had a couple of projects.
This is the finished project. Both settees’ backs storage compartments now have doors, complete with piano hinges and barrel bolts and lots of screws holding it all together.
The other project was to get battens installed in the ceiling so that we can insulate it. It began with cutting all the long bolts in the ceiling back to their nuts.
Newly shortened bolts. We masked everything off nearby and used a die grinder for all the ceiling bolts and a dremel for the bolts at the top of the cabin sides. It was a messy job.Sometimes you just have to use the tools available to you. We cut battens at home on the table saw and they then got cut to length and kerfed on the boat using Nina’s step stool mitre box. This helped them match the arc of the ceiling. They were glued up with a poly adhesive and one inch screws.
Battens in place with the first piece of foam glued in. The ceiling foam is half inch Armaflex (neoprene) and is the same material we’ve used in the rest of the boat. A miscellaneous project – the rest of the rub strips were installed. Our neighbors were off cruising, so we moved the boat over to their slip and picked the hottest afternoon to finish off the job. Fortunately, with both of us working on it, we got it done pretty quickly.And this is how we left Gypsy at the end of the day. Instrument cables are starting to be run. They only come in odd, expensive lengths, so Bill is getting them roughed in with blue tape. It’s back to work for both of us tomorrow so they will have to wait to be finished up properly.
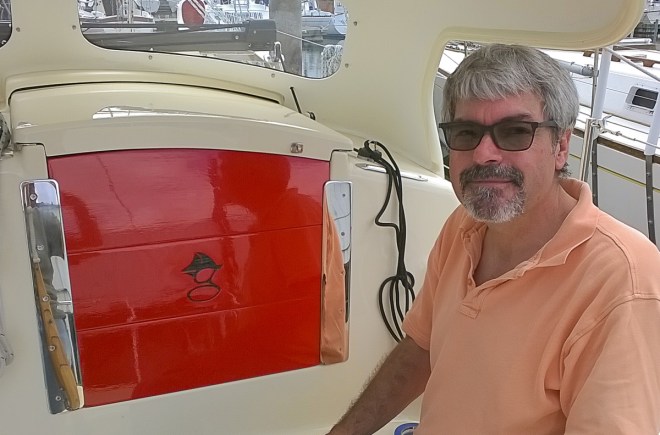
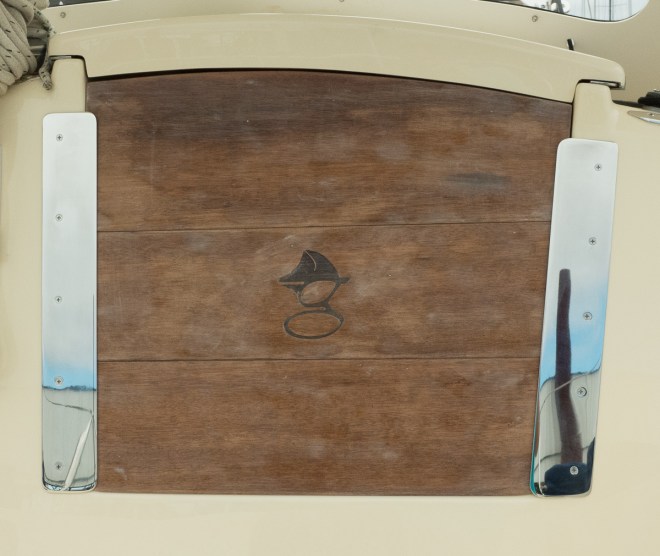
Bill and Gypsy’s new hatch boards. Everything is so shiny.
We have always tried to live up to Gypsy’s name. This has meant plenty of color and red doors were one of the first color additions we gave Gypsy. We plan on doing plenty of ocean sailing so the doors have given way to hatch boards. Hatch boards are simple and strong. They also don’t have to be varnished so after getting the Gypsy G etched into the wood we painted them red. The red paint took four coats, but it is very shiny. As with many projects this one has been in the works for quite a while, getting started in October and finally being complete.
Inside view
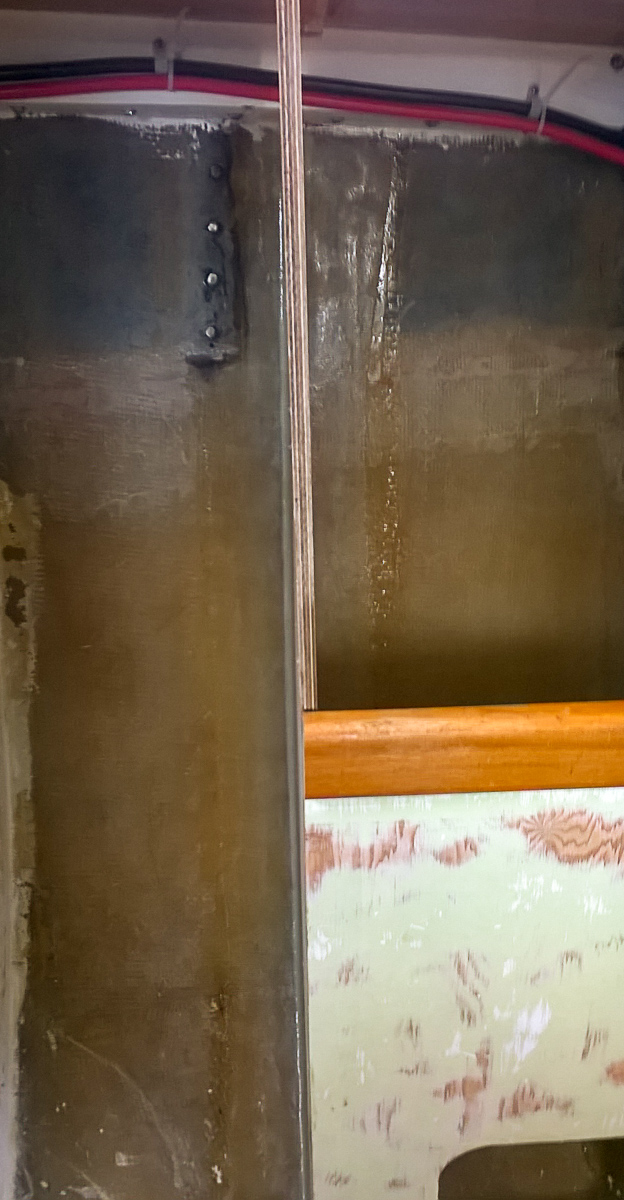
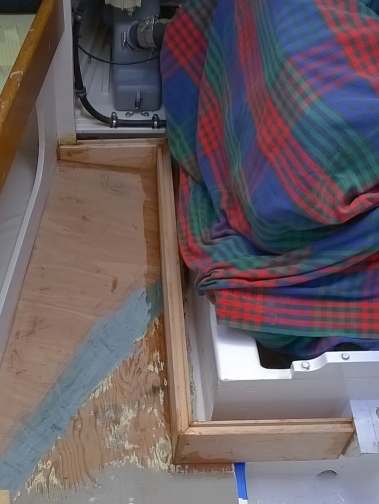
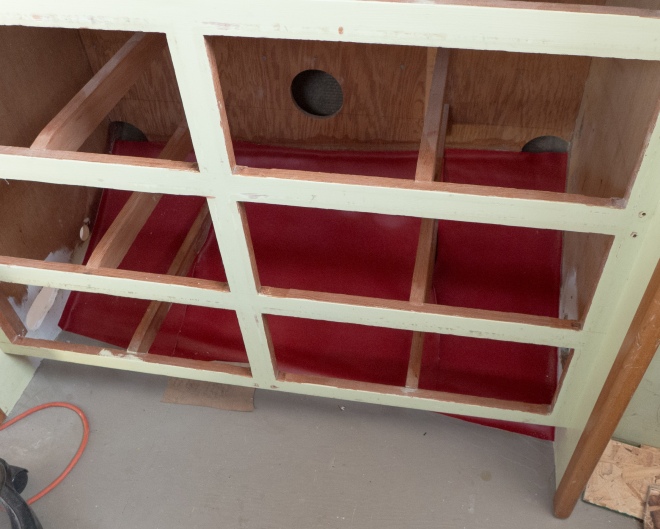
We have also been working on the wet locker and shelf unit across from the head. We got the bulkhead installed and tabbed to the hull.
We are going to put in slide out bins for clothes and so we needed to keep the bulkhead parallel to the other bulkhead. The front edge is held in place by a cleat along the plywood. The spacers keep the back of the bulkhead in alignment.Nina tabbed the bulkhead in to the hull and did a great job. The wires at the top go to the anchor windlass in the bow.We continue to install the wiring back into Gypsy. We are about done running the big battery cables. This is a picture of the underside of the chart table and you have 1/0 gauge for the windlass, (which is about 5/8 inch in diameter. 2 gauge for the inverter, which will make AC from the DC batteries and 6 gauge for the battery charger. Nina makes sure that the cable runs are neatly organized.The quarter berth, back aft of the chart table and next to the engine got more insulation. This is for heat and noise control. The seams are Velcro tabs so the bolts that hold on engine parts, like the fuel filters can be accessed.One more view of the hatch boards. You also can see our fenders. Nina washed and is modifying the covers so that they are the correct length for the fenders. Now that we have more rub strips the fenders can be tied to the toe rail. So the fenders are moving to the toe rail as they get fixed. Tying the fenders to the life lines stresses them and is not a good long term solution.
Progress is being made on Gypsy. It is the sort of progress that just slowly moves forward. No great leaps and not too many steps backward. We have many intersecting projects that all need something else to happen first. Nina calls these the chicken and egg projects. Yes, try to figure out what is an egg and what is a chicken.
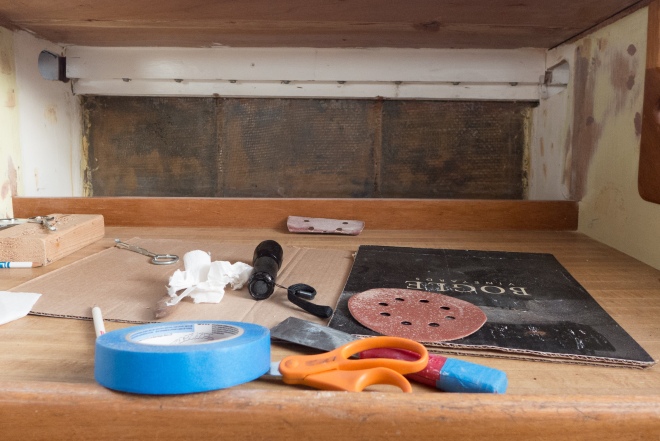
One of the eggs was getting the sound deadening foam in the engine compartment. This foam has a regular foam side and a layer of lead filled foam to decouple vibration. We had this type of foam around the engine on our previous boat and it does cut back on the engine noise. We needed to get the foam on the engine room walls before we ran plumbing and electrical wires. We had to decide how the galley sink was going to be installed so we would know where the foam could go. The sink is new so we had to decide how it was going to fit. once that was decided the foam could go on.
Paper template for the sound insulation for the engine. The boxes that stick through are where gear will be mounted.Cutting the foam to match the template. We use an electric carving knife to cut the foam. Don’t worry, we do not use this on a real turkey.The foam is installed.
We have been installing the large battery cables into the boat. This is the first step to getting everything wired.
We got the port side doors for the settee back fit. They are now getting painted before they get installed.
We also had several projects that had been waiting for better weather.
The companionway hatch slides have been installed. The hatch boards are also getting a test fit. The Gypsy G has been cut into the hatch board and it looks great. The G is from the previous owner of Gypsy, George Kent. When we bought Gypsy, the G was on a wooden plaque on the door. It’s a fun graphic and a nice way to honor some of the history of the boat. The boards are now getting painted. We wanted to keep our red doors. The hatch boards will be much better suited to ocean sailing than the doors were.
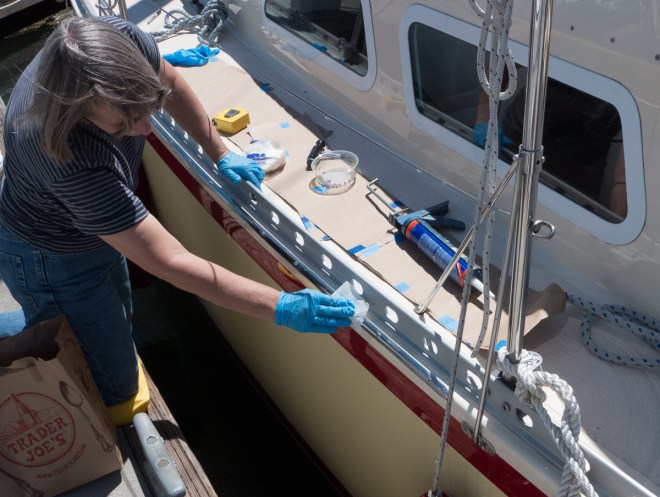
Another project is that has been waiting was adding more rub strips on the boat.
New rub strip installed. They will help keep lines from damaging the paint.Cleaning up all of the extra caulk after the install.The cockpit locker lids have needed a gasket to keep water out. We traced the opening and Bill is putting the foam tape on the hatch.We also got latches installed so we can lock up the boat.
The engine cover is another project. the cover is needed for noise suppression and to hide the engine. We are redesigning it because we did not like how the original cover worked.
Well, you may ask, what’s been happening? They get out on the water and the blog falls by the wayside. Not so! We’ve actually been plugging away.
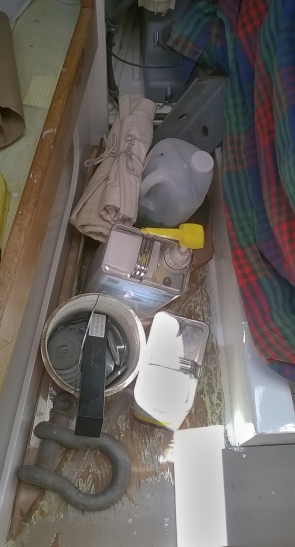
Stuff everywhere. The big white box is the house bank battery box.
It all starts with a jumble: parts and tools everywhere. Still cutting away parts, we got the sink cutaway finished. Using a combination of coping saw and saber saw, the sink will now fit (once in we finally get to the countertop in the galley).
The edge was too close for the saber saw, so Nina got out the coping saw.The left side got cut using the saber saw.
Working on the surround for the engine, we decided to smooth out where the hull rises up from the floor. This part of the boat was roving and pretty uneven. We decided to flatten it out with a piece of plywood. A pattern was made, plywood was cut and epoxied in place and we weighted it down with whatever we could find – tool rolls, jugs and cans of various fluids, a bucket of large washers, a ship sized shackle and a circular weight we had in our backyard. To smooth out the transition, bondo was applied and sanded and applied and sanded. This will make the engine cover base easier to shape and will create a flat surface to glue flooring to down the road.
Weighing the plywood down after epoxying.Bondo and elbow grease.
Meanwhile, while Nina was messing around with bondo, Bill tackled the bin opposite the head. This has always been a space that has been a bit frustrating. We stored wet gear in it but there was no real drainage and the bottom was impossible to reach if you do not have extremely long arms. Cleaning it? Ha! In a last fit of cutting things out and apart, Bill cut a reach through and then sliced about a third of it off. This part will have slide out bins. The other side will house wet gear. A bulkhead template was made and much discussion occurred about how to configure the bins. The bulkhead was dry fit and will be tabbed to the hull. More on all that later.
Bin across from the head before getting attacked by the saber saw.Reach through cut out. We can put sea boots in here.Bill cutting the bin.Bin with the forward end cut off.
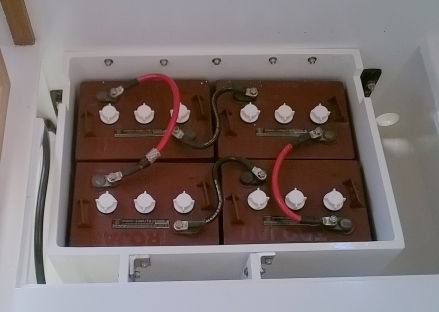
Other projects we’ve been working on: getting the house battery box installed. The box was fitted. We moved it slightly to provide access to a couple of bus bars on either side of it. A new bracket was made out of aluminum angle stock to beef up the current one. Bus bars were installed and really big wire was run from the box locker to the locker where it will connect with all the other equipment that runs off the battery. This is a fanfare moment. Getting the batteries connected means that we will be able to leave the slip this summer! Well, once we get them actually connected to the engine, that is. The batteries, both starter and house set, are now residing in their respective boxes. We are officially installing gear now.
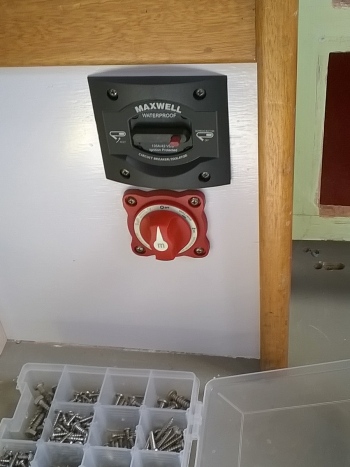
Bill drilling new bracket holes for the battery box.House batteries back in their box with wires attached.Switches installed! These were the first switches we installed.Black and red wires from the house batteries. They run through the bilge and pop up on the other side of the boat.
One of the big installation hurdles is the question of how to block off the engine. Boat diesels are noisy creatures and hard wood surfaces really amplify the noise. Our original engine compartment was a Rube Goldberg, uninsulated affair. It was not effective in noise reduction and it was comprised of awkwardly sized and shaped pieces of carpet backed plywood. Part of the reason for smoothing out the hull rise was to make the installation of a drop board track much easier to install. Shaped and dry fit, we glued it down on one of the hottest days we’ve had yet. Early June, and the temp was close to 100 Fahrenheit. Epoxy smokes when it gets to hot and is too hard to use. Get it out of the sun and work fast and things go much more smoothly. It’s now sanded and waiting for the side templates to be made.
Frame for the bottom of the engine box epoxied in place. it’s all nicely sanded now and waiting for primer. The engine is wrapped in an old sheet in an attempt to keep sawdust out of it.
Other things in the process of being made: upholstery and drop boards. We picked out fabric for the cushions and ordered it from Sailrite. It’s arrived and Nina has started making piping for new salon cushions. Waking, another Cascade 36 at Rose City, let us borrow their bottom drop board to see if it would fit. It did, and made the process of creating new drop boards for Gypsy much, much simpler.
Yards and yards of upholstery fabric waiting to be cut into strips for piping.Bill showing off the new drop boards. They will be held in place with stainless sliders. And yes, they will be red! If you were wondering the doors are going away. Solid and secure beats easy opening.
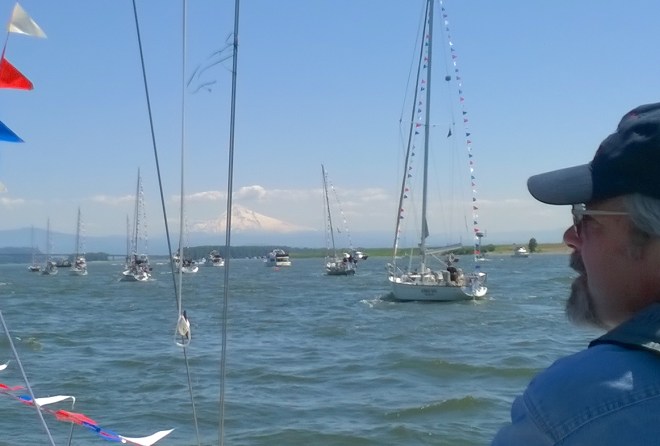
Saturday was Opening Day. The yachting season has officially started. We joined the fun aboard a friend’s boat and got out on the river.
A view of the other club boats in the parade. Mt. Hood in the background.The Sea Scouts ship City of Roses was part of the parade.There also were several fire boats.
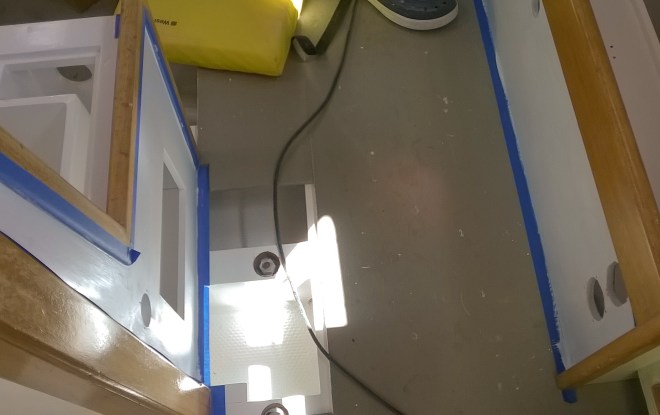
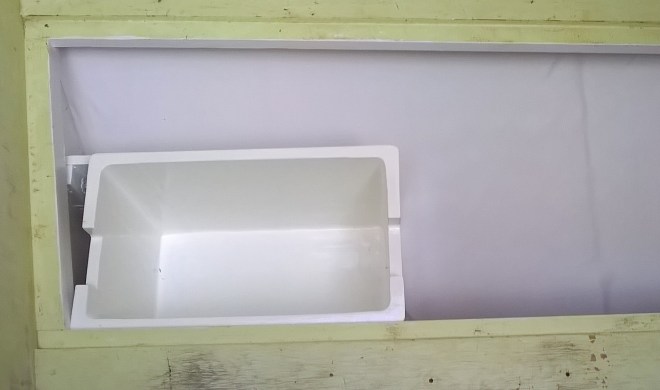
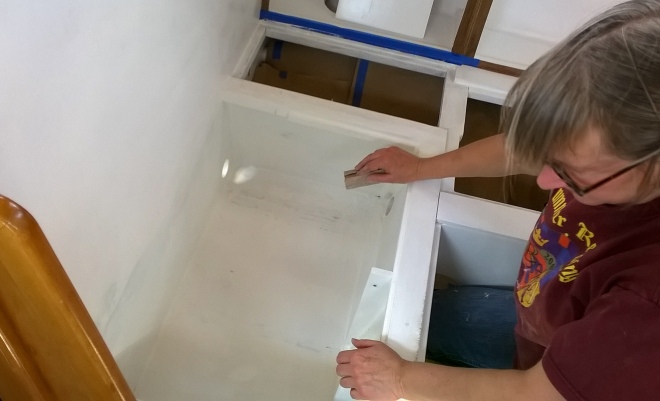
Once the fun was over we got to work on Gypsy. This weekend was mostly paint prep, which is mostly sanding. We also made some small cleats to glue in to fasten the tops of some bulkheads to the underside of the deck. A piece of plywood was cut out for the front of the icebox area and we made mounting cleats for that. This is one of the few places on the boat that is square. The plywood will get installed next week. The exciting part will be checking to see if we can actually get the refrigerator box in the space with the front panel on. If not, we change how we put it together.
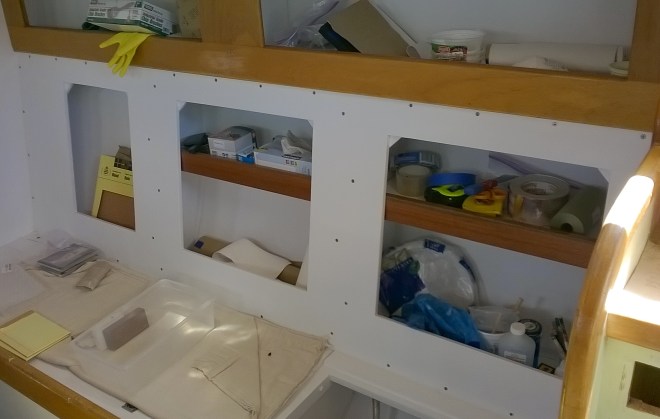
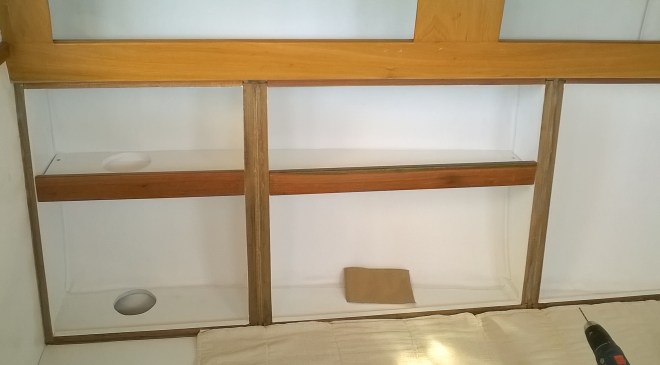
Sanded and ready to paint with vinyl installed over the foam.Painted. The more of the old lime yellow we get rid of the better I feel.More paintingThe anchor locker is so happy to be painted that it glowsThe box for the engine starter battery is inRemember the shelves we installed last time? If you build them they will get used.
We finally get to sit down on the job. The last couple of weeks were spent getting the shelves and seat backs painted and now they are finally installed.
Port settee insulated and covered with vinyl. The locker above has vinyl glued in, with an access flap for the chainplates.And with shelves in. The forward compartments get so narrow on both sides that we decided to not put shelves in them.Bill sitting on the starboard settee after the seat back was screwed in place. It is pretty comfortable. Both sides are installed! We still need to make the doors and cushions, but it feels like we have most of a project completed. Having the salon look more finished is a real morale booster, even thought the reality is that we still have a long way to go before it is truly finished.Insulation in the quarterberth. The foam gives it a lovely cavelike feel. The vinyl has been cut out and needs to be installed. We just need to paint over the old paint.The pantry bulkhead waiting to be fiberglassed to the hull. The panty now has fiddles on its shelf and is ready for final touch up paint.This is the mystery picture. Actually, it’s a mounting brackets for the starter battery box. The battery boxes, for both the house bank and the starter batteries, are just about finished being painted. This space is now insulated but we didn’t get a picture. That photo would be show a finished space but Nina had an adventure with vinyl when she cut the piece for this and the piece for the quarterberth with the wrong side of the pattern face down. They’ve been fixed and are waiting to be glued in.
That is all for this week. don’t worry there is more to come.
This weekend had elements of the Great Leap Forward, progress was made and then we would remember what we should have done. We got stuff done by less than linear routes, but I still feel like a rocket scientist compared to many of the figures in the news. The other bright side has been drop dead gorgeous weather. If you are sniffing glue and paint fumes it might as well be spring.
Sanding the primer leads to a shiny first coat in the house battery box space. And sander’s hair: it’s the new beauty regime.
Nina noticed that she missed a spot on the bottom. Still primer, but there will be another coat and the battery box will be on top of it.
So much for paint fumes how about some glue? Nina had insulated the hull below the chart table. This will be out of sight and we had old red vinyl that was supposed to recover the dinning room chairs when the boys were young…
When you have a boat like Gypsy you just have to let her have a bit of color.
So so far Nina has been doing all the work and you may be wondering what Bill was doing? Well he found some more destruction that needed to happen. Bill had decided that one big electrical panel would be better than three small ones. Also, with Gypsy looking so good the old panels were a bit clunky so a redo was in the works. The area behind the chart table had been divided in three, hence three panels. Well, a bit of destruction showed that the dividers were not tabbed to the hull. So more unlinear progress happened.
We will frame in the sides and top to support a hinged panel that will allow easy access to the wiring.
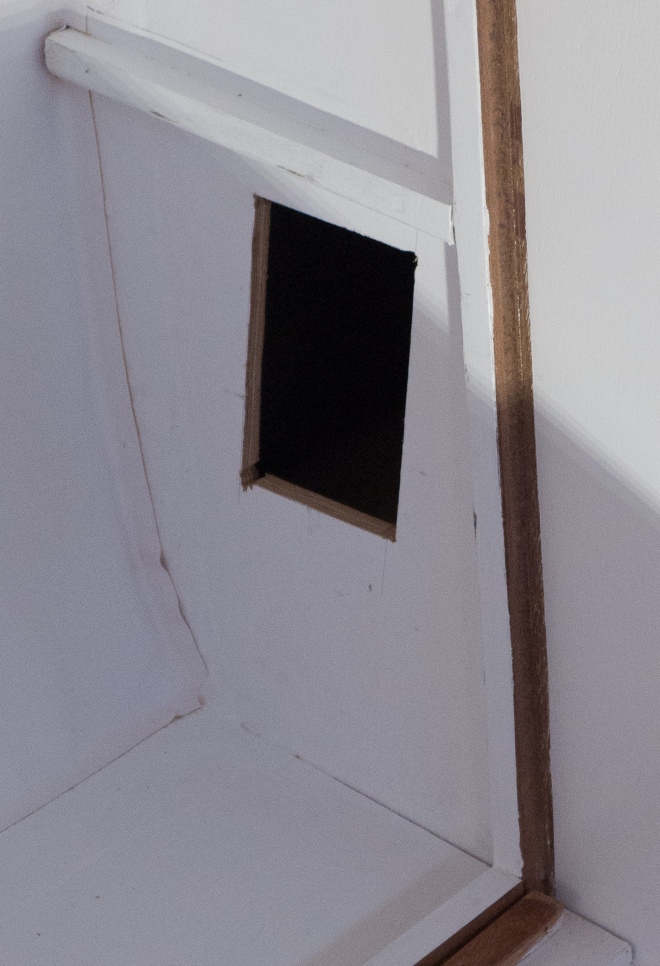
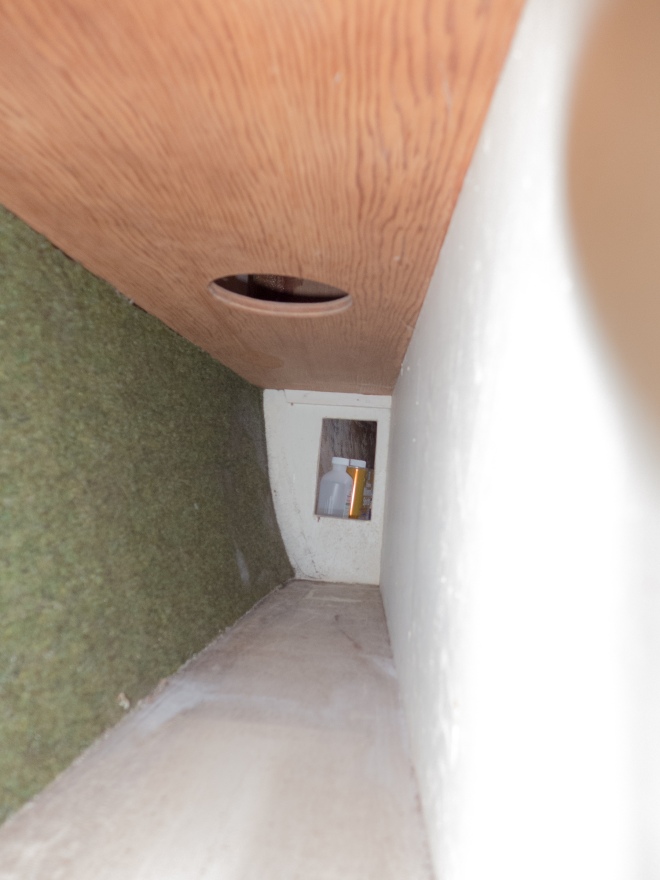
Gypsy has a secret compartment behind the chart table. Bill also remembered that we wanted to add a second door to make the space more usable. It would have been better to have remembered this before we had painted, so it goes.
The original access hole in the quarter berth to the secret compartment behind the chart table. When we bought Gypsy we found a couple of fishing lures in here. We never figured out a use for the space, not being fishermen.The new hole in the starboard seatback storage space.This is what the space looks like. Yes that is original carpet glued to the hull. It will be the heritage piece that will remind us of all of the rest. Cool little space, now we just need to find a use for it.
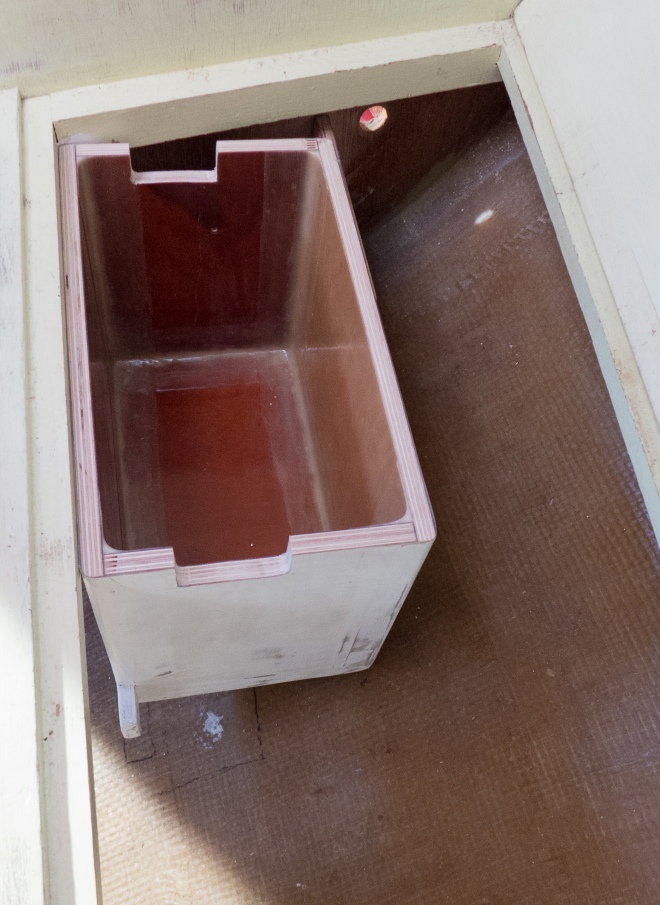
Another project that has been on Nina’s project list is to find a new home for the starter battery. Bill tried and he had found a place that was close to the engine, but it was outside of the quarter berth and it was in the way. Bill has found a new spot for the battery. It is not perfect since it sort of bisects the space under the quarter berth. This has become less of an issue since we have decided that under the quarter berth is where the water maker will go. The water maker will fit around the battery and so the space will have a function. It just will not be a storage space.
The box fits in the forward corner of the opening for the quarter berth.The quarter berth has a big opening cut into it so we will need to make a door. The wasted space is usable because of the opening.The aft end of the box will be supported by a piece glassed to the hull. This will allow the battery box to be removable if future changes occur.
To wrap up this week’s report I know you are all wondering what is happening with the backrests. I mean we have only been working on them for months. Well they have started getting painted.
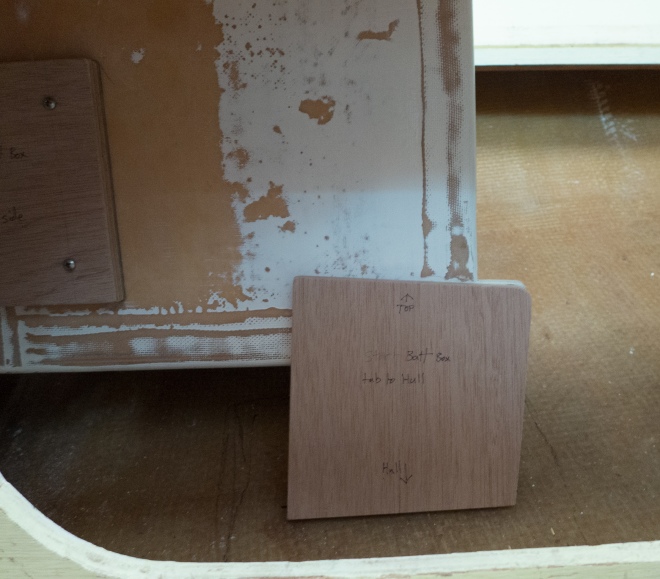
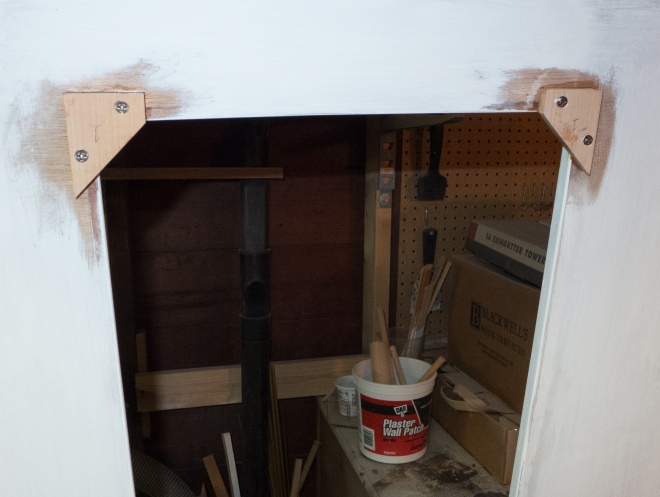
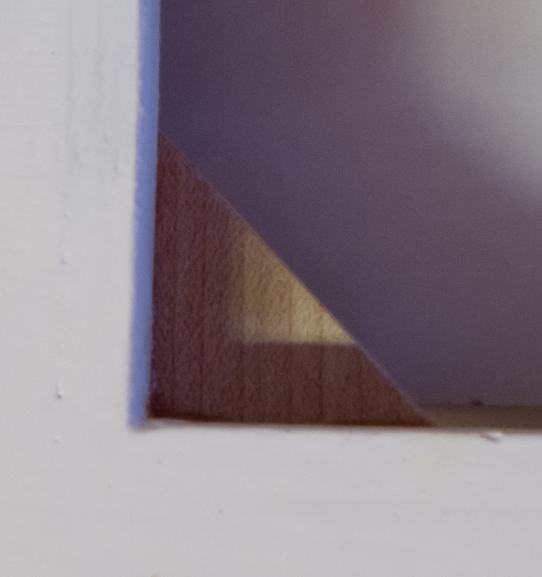
Don’t they look nice and white? Well we forgot one detail. The corner stops for the doors.No problem, a couple hours making the triangles, they are beautiful hard maple. Then sand away the paint and epoxy them on. Even though this is the back side Nina lined up all of the screw heads so they align.The view from the front.
So with some luck we will get a coat or two of paint on after work this week. We just have to remember paint first – then the martinis.
The seat back storage areas are now insulated and covered in vinyl.
The Easter Bunny brought Nina a can of 3M Super 77 spray adhesive and she went to town gluing up vinyl. While Bill washed all the green gunk off of Gypsy. Nina beautified the cabin. In the end we had a cleaner boat and a spiffier cabin.
Gypsy lives under a airport flight path so she gets really dirty over the winter. She is clean again.
Meanwhile the seatback fronts and the shelves are getting worked on. The plywood seatbacks have the door openings cut out and they are getting hardwood trim glued to the opening. The shelves got their front fiddles glued on so the stuff on the shelf won’t slide out when the door gets opened.
Coating the edges with epoxy. Thickened epoxy is then gooped on to glue the edge strips to the plywood. The edge strips get nailed into place with stainless steel finishing nails, and yes, Nina gets to use her nail gun for that.Production line in the cozy shop. It’s a warmer day. No jacket required.
The weather has warmed up so we no longer have to use a space heater to get the epoxy to set. We also have more hours of light to work by. The next step is to get everything painted and installed. So it’s paint a coat, wait a day for it to dry and then paint the next coat. One coat of primer and a couple of coats of finish paint means that it takes three or four days before one side is done. Flip it over and start again. If we time it right and the weather cooperates, we could install it this coming weekend! We still have some sanding to do so maybe it will be the weekend after. Honestly, it’s not like we have a shortage of things to do on the boat. And life does, occasionally, get in the way.