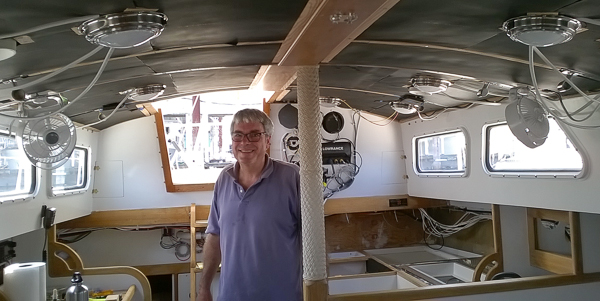
We last left you in heavy project mode. We wanted to get Gypsy into usable shape so we could do more than work on her, like actually get her out sailing. Our first goal was to get the cabin looking finished. We had unvarnished trim and lemon yellow paint still showing. The varnishing needed to get done first, so May was varnish month. We varnished and we worked on enclosing the engine space in the cockpit lockers. We got the varnishing done in time to clean the cabin and get Gypsy ready for the Memorial Day cruise. We had a fun weekend not working on the boat. The engine enclosure is still in process. Since the engine was not enclosed we get to invent the whole system. This means you do one bit and then you design the next bit… It may be done before we sail to Mexico.
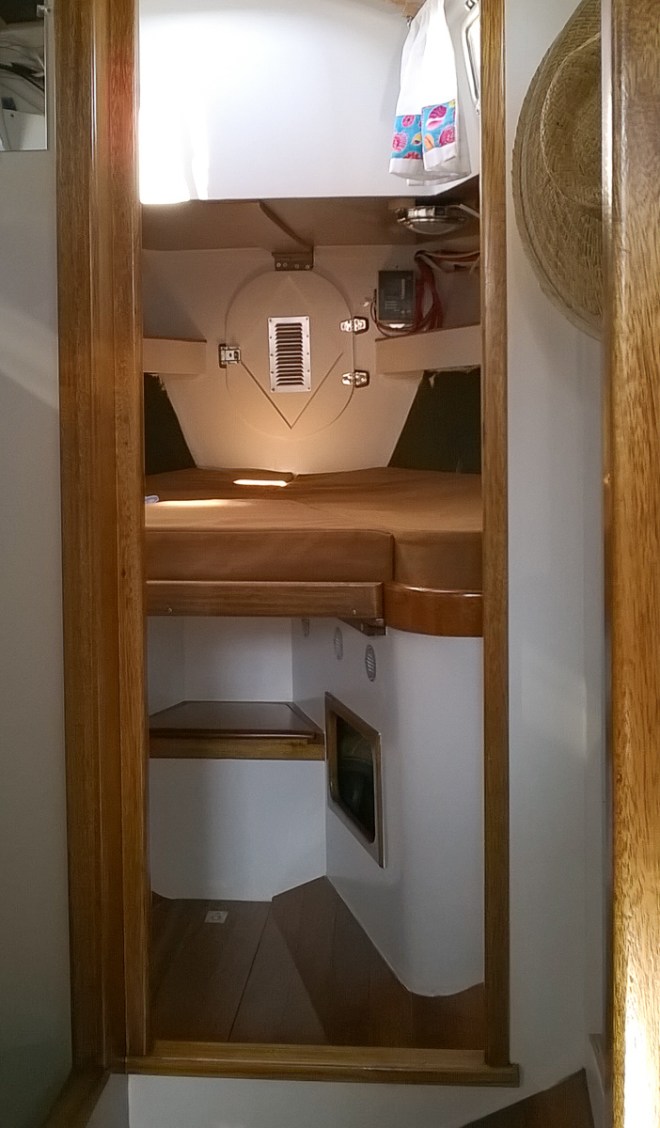
The cabin looks pretty good. The vee berth still has the lemon yellow paint.The ladder is varnished and we have our new Treadmaster steps. You can see that the quarter berth still needs varnish. The ladder has come a long way from its plywood back and solid sides. It now weighs less, too.
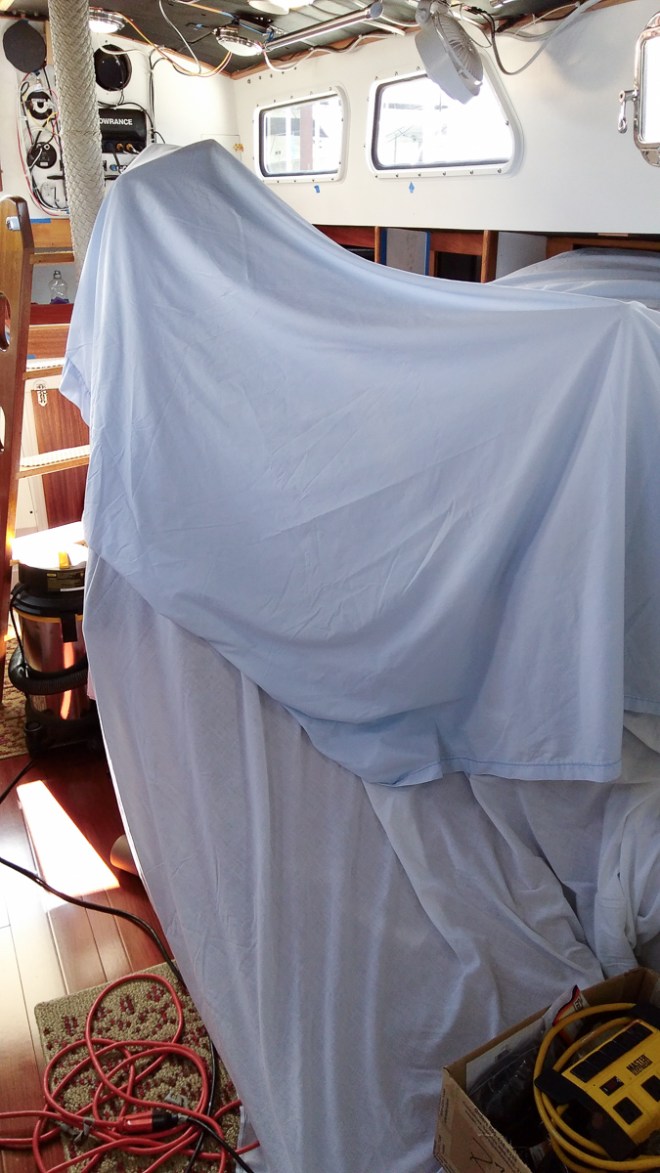
The painting came next. We piled all the cushions up in the main cabin and painted the vee berth and quarter berth.
No ghost, just cushions.
Nina painting.The green is gone!!!
Bill made new plexiglass sliders for the head and galley cabinets. He almost fainted when he got the bill for the plexi. They do look good!
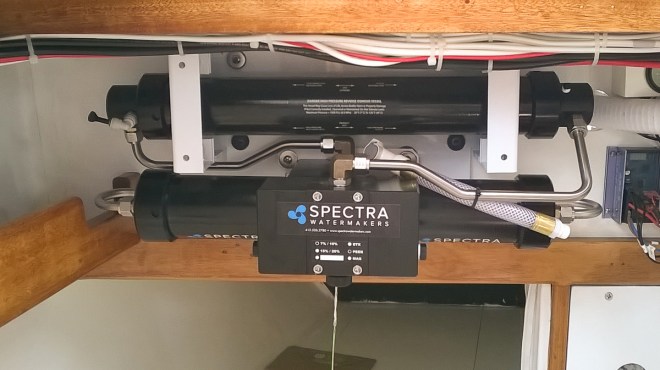
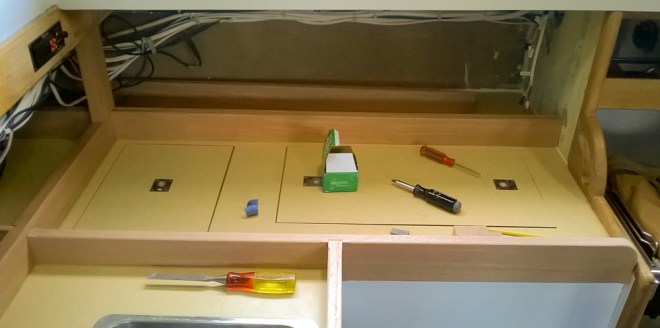
We also got plexi mirrors. They will be great.While we were doing the painting, our dining room table became Monitor central. We rebuilt our wind vane. We replaced all of the plastic bearings and the blocks. While doing this, we discovered that 316 stainless is not that rust resistant. There were some every iffy bolts that have now been pounded out and also replaced. Anyways, the wind vane is ready to mount on Gypsy. The 3M stainless polish works very well at removing rust.We also started installing our watermaker. This is the main pump and reverse osmosis membrane unit. It is mounted above the quarter berth. We wanted a location that had good access and this was about the only choice. We chose this unit because it had a bigger output and a lower amp draw per gallon than the small Katadyn watermakers. We will be able to make 6 gallons per hour for an 8 amp draw.The rest of the gear for the watermaker will mount on the board that will hang below the shelf. Getting the layout settled was a big step. Now Bill just needs to mount everything and run the plumbing.
The other project we finally got to was to have Rogers Marine come and troubleshoot our instruments. We were having problems with our radar and GPS. The problem turned out to be a defective Lowrance GPS. If we had been able to deal with this sooner we may have been able to get warranty coverage. Lesson learned is deal with problems sooner rather than later.
So that is what we have been doing. We are working to get Gypsy ready for her summer cruise to Vancouver Island. We have a month to get her ready.
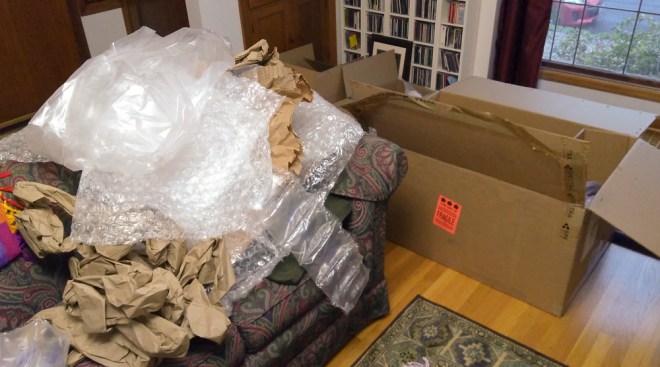
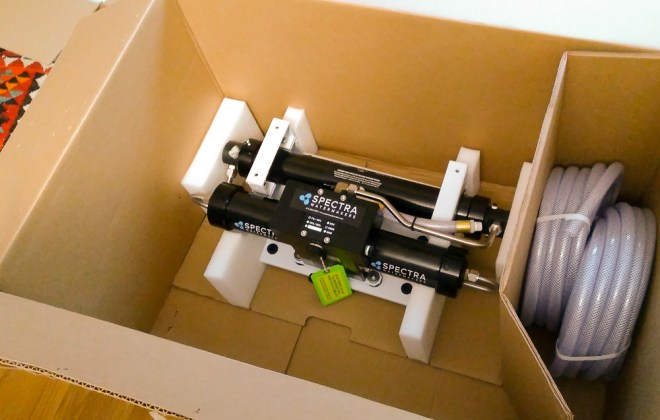
We went to the Seattle Boat show at the end of January and we made a decision on a watermaker. We decided to get it this year so we could try it out, in salt water, on our summer trip to Vancouver Island. We ordered it and it arrived. It was in a huge box.
It is huge! Where will it fit?I don’t think it is returnable, we will figure it out.It is all packing!Our baby. Six gallons per hour of fresh water.The bulkhead on the right is where the watermaker will go above the quarter berth. We had to modify the shelf so it would fit. From now on the quarter berth is going to be a cozy corner where special guests get to sleep.
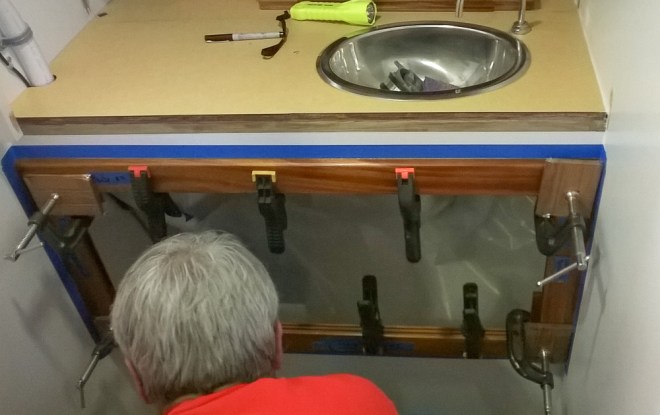
The watermaker was a fun diversion to the real project of putting the galley and head trim in. Being slightly crazy we decided to epoxy the wood to wood joints and use 3M 4000 on the wood to formica joints. This meant we had two different glues and clean ups going at once.
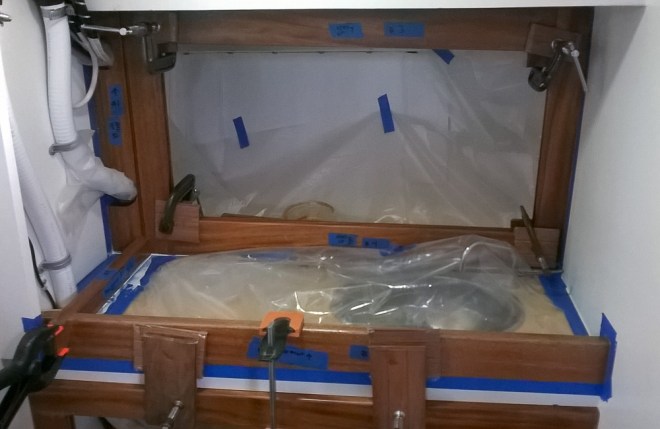
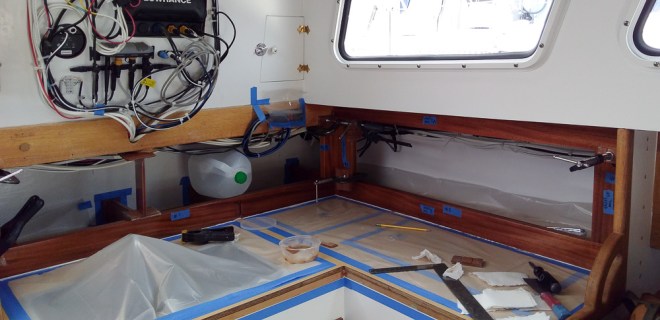
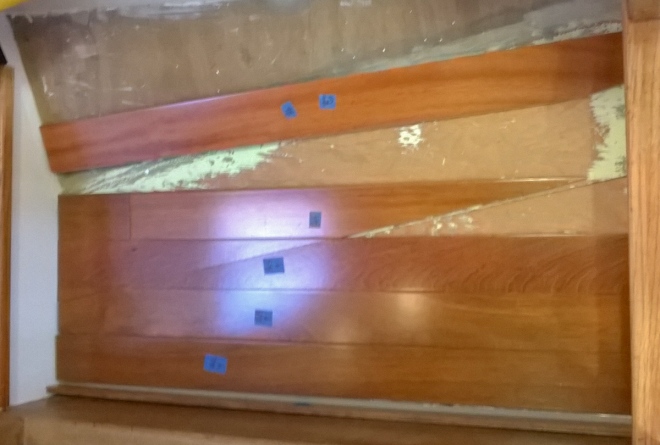
Lower head trim.Upper head trim. Not only did we have two glues, but we had these tight fitting tenon joints that would have pleased Roy Underhill. It was messy and we tried to protect the paint and formica. We had pre-varnished the wood with three to four coats of varnish so the epoxy and caulk mess would not soak into the grain. The gluing surfaces were taped off so they were not varnished.Again in the galley, improvised clamps and everything is taped off. All the pieces were numbered so we would not forget the sequence of the installation.From a distance it does not look bad. In reality we need to sand all of the joints and re varnish. And caulk all the surface joints so they have a consistent bead all around. At 2.5 inches high the fiddles should prove adequate. They are about triple the height of fiddles in production boats and they do give the galley a serious, no nonsense look. We’ll see how that all works out this summer. All that dangling wire got neatened up before the furnace ducting went in.We can finally get our ducts for the forced air furnace in. They will take up a lot of space even once they are tied up in place.
We have also been completing the cabin sole. We got the flooring installed in the head, passageway and vee berth. The trick is getting everything to line up once it is covered in glue and to keep it in place.
Milk jugs are your friend.Finished vee berth sole. The piss green (Bill’s name for the original yellowish color), will get painted white and the wood trim will get sanded and varnished. Edges and transition joints have been caulked and the floor board fits.Complete sole.Cockpit locker floors have also been moving forward. They have been coated in epoxy. We also just added wood cleats to locate the bottom of the sides. The next step is to make the sides and enclose the engine with insulated panels.
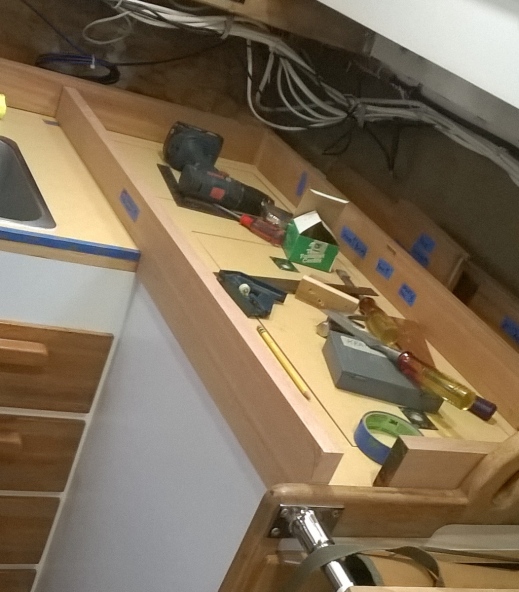
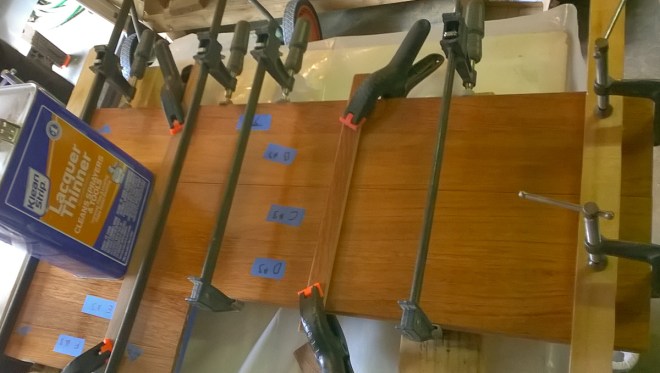
The weather has gone both sides of freezing. We have had rain, snow and a glimpse of sun. While this has happened we have been working on the galley, cabin sole and the cockpit locker floor. The wood trim and fiddles for the galley are ready to varnish. We just need to find some space at home to spread the wood out in order to get it all done.
Final fit on the galley wood.
We painted the space behind the galley and in the head to get ready for the installation of the wood.
Nina fitting a floor board. She is getting lots of practice on cutting odd angles. She’s using a short construction saw – oh when the shark bites… (The saw is called a shark saw and the wood has been dulling it, so it is almost a toothless shark.) Please send your three pennies to Nina for the Kickstarted sharp saw fund.
Head.Passageway and vee berth
All of the floor pieces are still loose. We are waiting until the water warms up so the glue will cure.
The other project we are working on is making floors for the cockpit locker. If you remember the lockers were originally lined in yellow shag carpet. While this did pose an aesthetic challenge, the carpet did help keep you from sliding round. Our nice, carpet- free lockers are now very slippery. The floors will give us a flat surface to store things on. They are also the base for enclosing the engine and its noise. The floors require repeated crawling into the lockers with tape measures and scraps of cardboard. The cardboard pattern gets transferred to plywood and the plywood then gets fitted. The result is a floor.
Forward port floor getting made in the galley.Forward floor is ready for epoxy coating and paint.
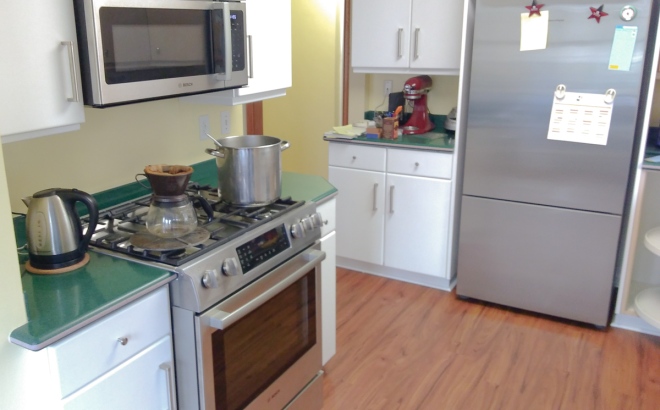
It has been two months since our last post. We have been busy working on our kitchen. We are still land based and live in a house and that house has been patient, but it did demand some attention right after Thanksgiving. The attention grabber was when the microwave died. I think it was feeling left out and it wanted some TLC. The kitchen got a makeover and it is happier.
New floor, range, fridge, microwave and paint. Domestic harmony is restored.
We started 2018 off right, we went out on Gypsy. It was a calm day so we motored. No rain and not too cold.
The kitchen under control we are back working on Gypsy.
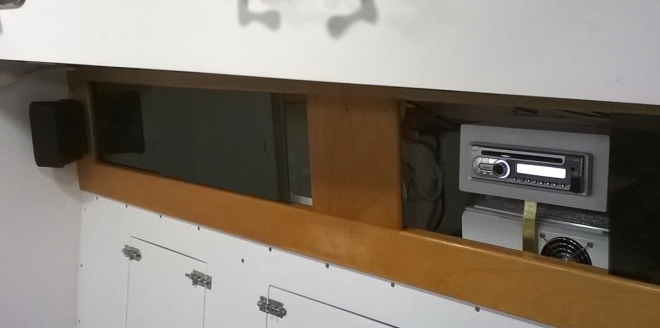
One of our first tasks was to get the stereo reinstalled. It is in the box above the inverter. We had been using speakers that used to be in Bill’s painting studio. They were head coshers, so we got some cute little speakers. The bigger speakers may get worked into the bookshelf when it gets built.
The two projects we are working on are fitting the floor boards in the head, passageway and vee berth, and the face frames and fiddles for the cupboards in the head and galley. Both are fiddly, as each piece has to be trimmed to fit .
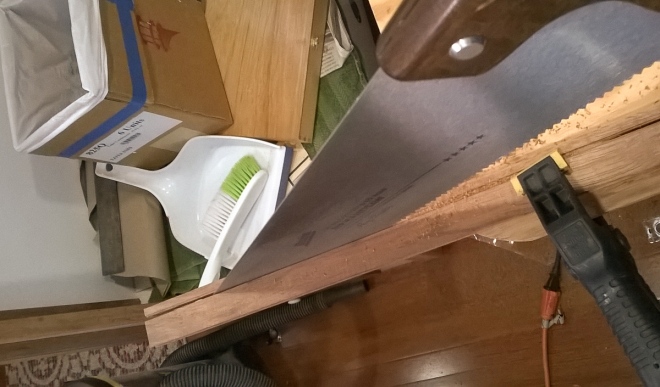
Head solePassagewayTrimming. Sometimes all a girl needs is a good rip saw. Brazilian cherry is really hard and it may have done in our ancient saber saw. Thus the hand tool approach.Face frame fitting. One thing we discovered – tenons work best when going into open spaces, not spaces they have to be jimmied into. Part of the fitting process involved converting some of the tenons into half lap joints. Otherwise installation with epoxy is just not going to happen neatly (or at all).Fiddle fitting. After all the rest of the framing fitting, the fiddles are pretty straightforward.
We did take a break to go to the Seattle Boat Show. It gave us a chance to see friends and to do research on boat stuff. We did get to spend some time sightseeing with our friends.
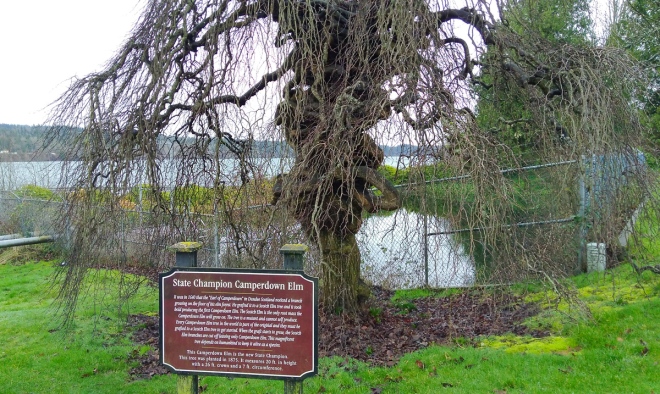
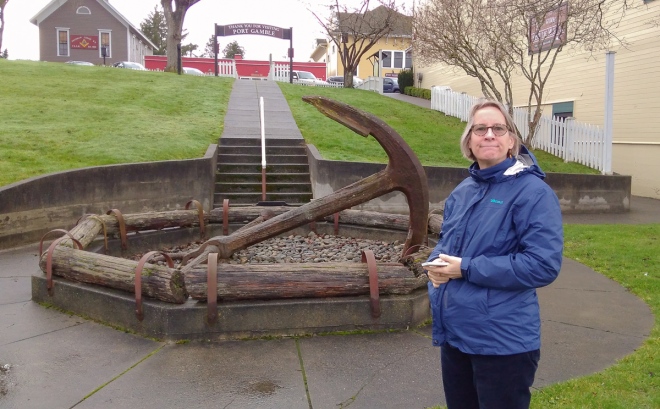
A neat tree in Port Gamble.Nina in Port Gamble. Port Gamble was a lumber mill town. It was owned by Pope and Talbot. Yep, that is a silly face.
Over the last two months we have been working on our sole. No, we haven’t gotten religion, that’s soul. I mean the cabin floor.
Our last post had Bill’s fingers in bandages and we had just started on the sole. Bill’s fingers have healed and we are once again charging ahead. Our goal was to get the rest of the main cabin sole done before it got too cold. We had made bundles of floor boards with matching color and grain. This was very helpful as we laid out the sole. We still had to make some substitutions, but the process went pretty smoothly.
Fitting the boards means cutting them to length so they fill the space. The last board gets ripped to width once the rest have been fitted. Nothing is glued down yet. Once the fit is good then we glue. We’re using Gorilla Glue’s construction adhesive which is 100% waterproof.
The excess glue gets wiped up and then we put weights on to hold the planks down. The wood is pretty straight and true, but it does have minor warps and bows. We are using pre-finished 3/8″ thick jotoba, Brazilian Cherry, planks that are 3″ wide. The original plan was to use our thickness planer to remove the glossy finish, but after destroying the blades after a couple of boards we decided that glossy was fine.
We were cutting the planks on the dock, which kept the saw dust out of the cabin. This worked until a neighbor complained that we were getting their boat dusty. The rest of the planks were cut with the saw propped up in the galley and the dust was contained by Gypsy.
The galley sole added a complication. If you look under the drawers the sole angles up to match the curvature of the hull. We had compound angles to cut and also to fit the last plank.
As long as you stay a foot away it looks great.
Repeat on the starboard side. Bill is wiping up glue. The bar clamps are pulling a bow into line.
Looks great, again we had a big angled section at the aft end.
Center boards now have their pull rings and they are in place. The results look pretty darn good.
Final shot with Ikea-stan rugs in place. The forward floors and the head will have to wait for warmer weather.
The ladder has also been waiting for attention. It was a heavy sold thing and we decided that the basic construction was good, we just wanted it to be lighter. We removed the back and cut holes in it. We also removed the old tread pieces. It has mahogany sides and oak treads. It needs more sanding, but we have gotten the weight down to an acceptable level.
We also made new teak blocks to locate the bottom. The ladder was pinned into place with a large barrel bolt. We had old ladder hardware from a former boat which I used to hold the top. This allowed the top to move away from the galley cabinetry so the varnish and paint won’t get scuffed up. The test fit was a success now the ladder just needs to get refinished.
Other stuff we have been working on: the trim wood for the galley and head cabinets.
Nina made a storage bag for the dinghy’s rudder and daggerboard. She used the old cushion upholstery material. It was in good condition. Who cares if it is a dated color.
Nina has also been making very useful lanyards for the shackle keys and boat knives. The weather is getting cold and we have been forced by events to work on our kitchen. Since this is a boat blog we will spare you the kitchen remodel woes, but as soon as we can we will bring you the galley and head cabinetry. Have a lovely holidays and remember to get your boat a nice gift from Santa.
Well, we had finished our summer cruising and we were getting ready for more projects. The first project was to install the flooring on the cabin sole. The floor boards for the sole needed to get glued in and since the floor is under the waterline we wanted to do that while the river water was warm. This would make the glue much happier. Our first step, which you saw in the last post was to sort the floor boards. We then started cutting them to fit. Two weeks ago Bill was setting up the table saw so we could rip the edge boards to width for the removable floor boards. The waste from a test piece was kicked back by the saw blade and it hit Bill’s fingers on his left hand, cutting up the tips of three fingers. Bill and Nina spent the rest of the morning at the hospital getting Bill stitched up. Luckily for both of us, Nina did not have to do the stitching.
This is going to slow things down.
Wisely we gave the fingers a couple of weeks to heal. The next weekend Nina ran the saw and Bill assisted. The boards were ripped and they got glued to the floor boards. We started on the removable sections that cover the bilge. We figured that was a good beginners project.
Here are all the floor boards marked and laid out for installation.Bill spreading glue. You can work one handed. It also saves on gloves.Glued and clamped. We have a lot of clamps, but we could have used more.
We glued the floor boards down with Gorilla Glue’s construction adhesive. It is waterproof and gap filling so we thought we would give it a try. It is also bright white so we had to be careful to clean up the squeeze out. It is easier to control than epoxy. In the end the cost will be similar to using epoxy.
This last weekend we cleaned up the edges with the router so the boards would be flush with the plywood bottoms. We also routed out for the pull rings. The template we made for the countertop got reused since we’re using the same size of pull rings for the floor.
Test fit of the floor boards. They look good. We can’t wait until the whole cabin sole is done.
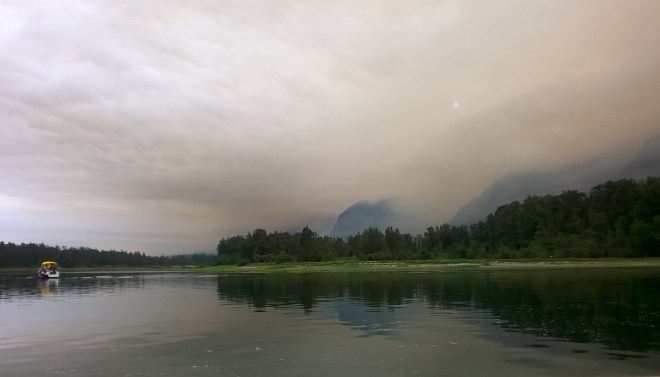
Labor Day Weekend. It’s traditionally a club cruise and this year Rose City went to Beacon Rock. It was going to be hot in Portland (around 100 degrees F) and it was going to be equally hot up the gorge. As a result, fewer boats made the trip up, but we still had an OK turnout for the potluck Sunday night. We started the cruise on Friday after work and made it as far as Schwitter’s Landing on Government Island.
We started out the cruise with a full compliment of cushions. They are jammed into place. We still need to figure out how to keep them there in the long run.
Saturday we motored and sailed the rest of the way to Beacon Rock. We arrived around 3:00.
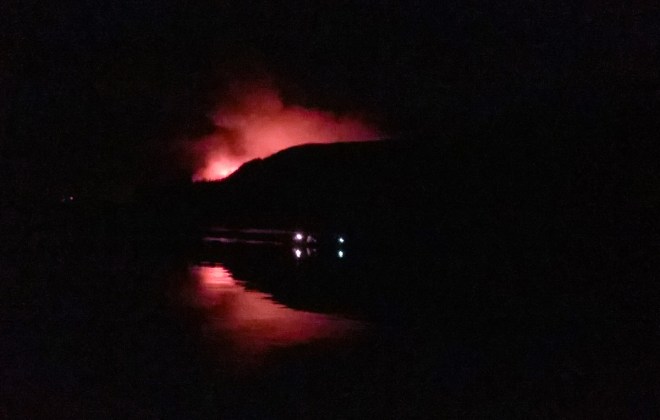
About 4:00 this is what we saw.Definitely a fire, and not too far away. 4:30 pm.
Everyone scrambled for phones to find out more info. As the afternoon and evening progressed, so did the fire. It just kept getting bigger. Eagle Creek, just down river from Cascade Locks, was burning away. It really took off during the night.
Around dusk, this is what the fire was looking like.The fire after dark.
This is what we woke up to on Sunday morning. Do we leave or do we hike the rock? The rock won, mainly because there is now a trail that leads from the marina to Beacon Rock. No more walking along the highway hoping you don’t get hit.
New bridge to the trail.
The new trail. No cars whizzing by.
An interesting downed tree.
One set of trail switchbacks up the rock. There weren’t many people hiking it this year. The heat and the fire probably contributed to that.
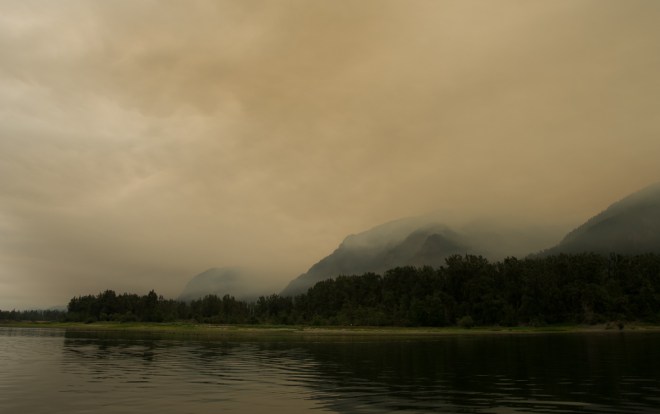
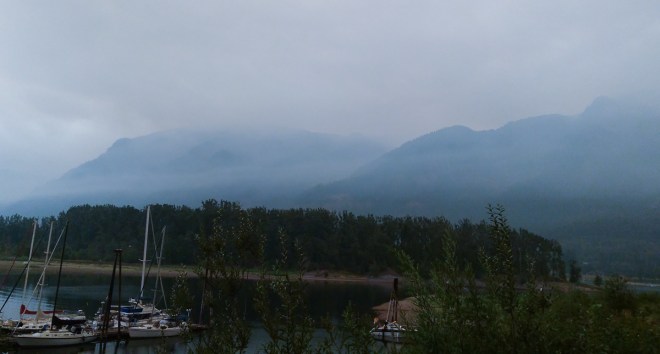
The view from Beacon Rock. Other than a couple of large motor boats, the dock is all Rose City boats. Smoke was everywhere, but it you could still see the layers.
Sunday afternoon we took a sail in the dinghy. A nice west wind blew most of the smoke away. This is looking back at Beacon Rock from the Columbia River.
During the dinghy sail, we noticed another fire. The one on the left is the Eagle Creek fire, moving down the ravine. The cloud of smoke on the right is from the Indian Creek fire, burning since July 4. They are about to merge. And the wind is about to shift back to an east wind.Beacon Rock on Monday morning. Socked in by smoke.Looking toward Eagle Creek from the top of the marina ramp.Sailing home Monday morning. Enough east wind for a spinnaker, but not much else. We hit Cape Horn and the wind shifted to the west before dying completely.Passing Multnomah Falls. This was before the fire reached here. Lots of smoke. The water had orange reflections from the sun. Everything is browny gray.Tuesday morning back at Rose City, ash on the boat. On the way back from Beacon Rock, there was some soot and the occasional charred pine needle on Gypsy. The Tuesday forecast was for up to an inch of ash to fall on Portland. We decided not to wash the boat. Wet boat and ash. Ugh!More ash. Much worse than our usual airport grime.
In spite of the smoke, we had a good cruise – time to catch up with folks and get some sailing in. Now it’s back to project mode.
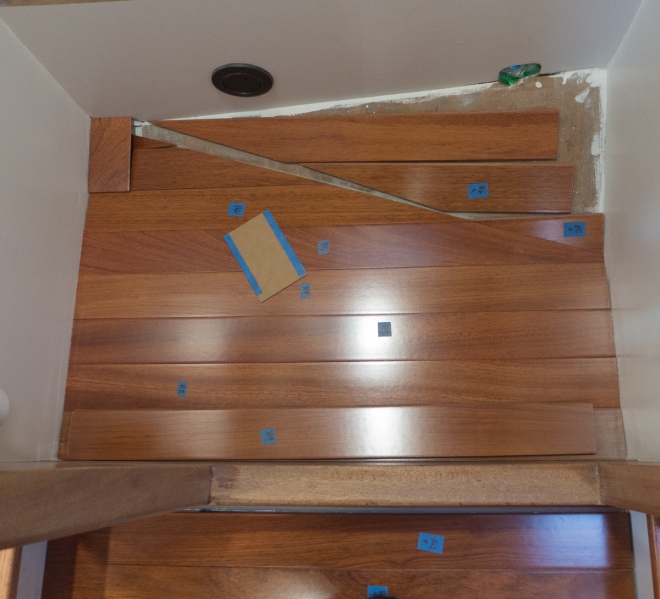
Figuring out floor board layout. The flooring is cherry and this section will end up in the galley once it leaves our living room. We labeled every board with blue tape and made a map of how they all fit together.
Our heroic efforts paid off. Gypsy did leave the dock. We had the sink installed, the refrigerator turned on and the auto pilot had been tested. We filled the water tanks and it was time to go. Now to load the boat.
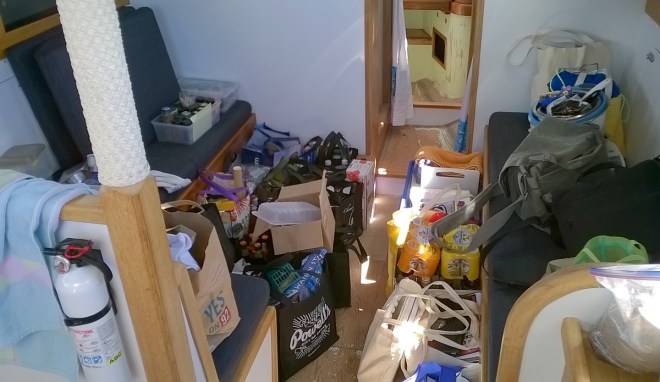
Three carloads latter, food, cushions, clothes, guitars and books were loaded.
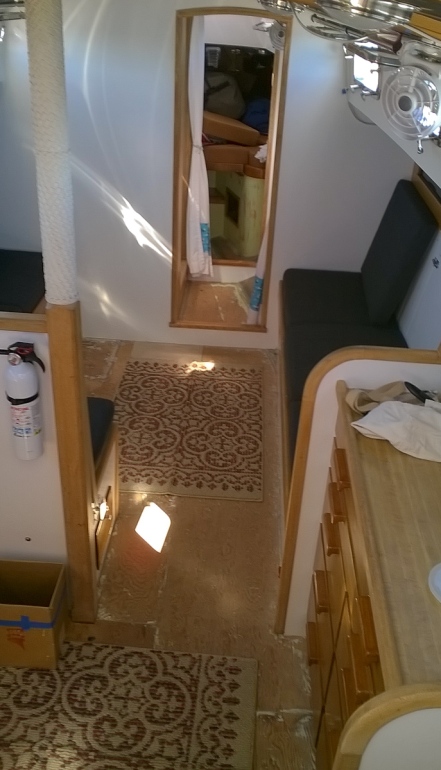
Food and books waiting to get stowed. Wine bags are very handy for loading and carrying food.One hour later it is all gone and two beautiful Costco-stan rugs have appeared.
4:00 pm on Wednesday 7/26, its time to start the engine and cast off. We leave the dock and head out into the Columbia River. The first thing we do is steer the boat in three and a half circles so the auto pilot can calibrate itself. Then it is down river to St. Helens. Our destination for tonight.
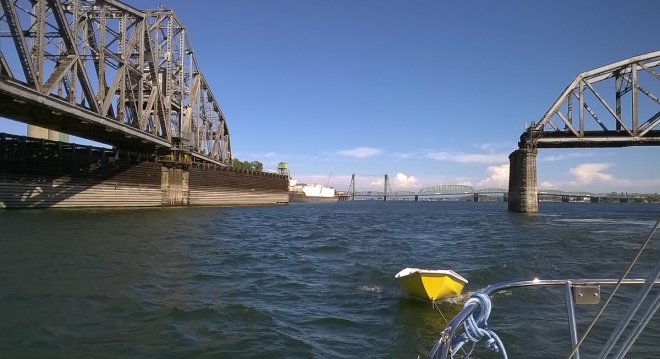
The first obstacle in our way is the Vancouver Washington Railroad Bridge. It is just down river from the I-5 bridge and it is too low for us to clear. We need to have them open the bridge.
We were in luck and the bridge was able to swing open for us after just a few minutes wait.
We now were west of the bridge and there were no more obstacles between us and the Pacific Ocean. So what do we do? The answer is we keep watch. There is a fair amount of freighter and barge traffic on the lower Columbia River and we want to stay clear of them. There are several ways to do this. The channel is the part of the river that big ships use. It is at least 43 feet deep. We can stay out of the channel in shallower water and that will keep us clear of most shipping. We also keep watch, noting when a barge or freighter is approaching. If there is any doubt we can call the ship on the VHF radio and ask where they are going.
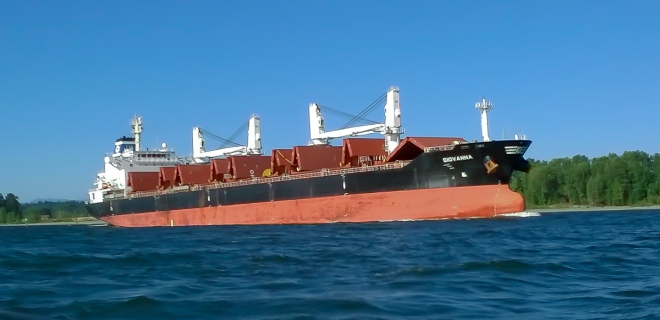
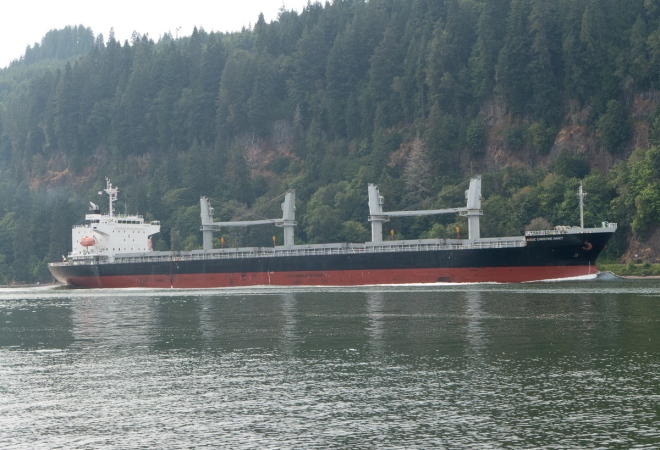
This is a freighter coming up river. You can see by the big red stripe of bottom paint that is is empty and is going to pick up a cargo. You also can see the open hatches on deck, ready for cargo. You can tell it is moving by the wake: the white water at the bow and stern.
We got to St. Helens, Oregon and tied up for the night at the docks on Sand Island. We were the only boat at the dock Wednesday night. Thursday morning we were up early since we had a long day heading down river. We wanted to get to Cathlamet, Washington where Rose City Yacht Club was having a potluck in the evening.
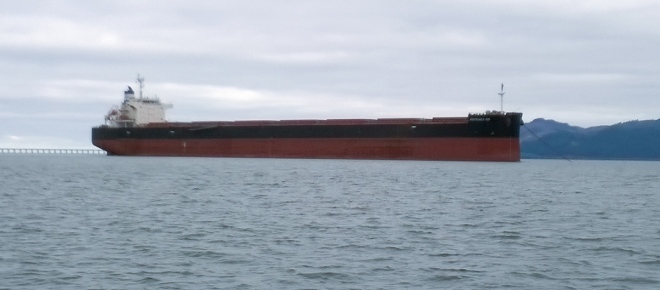
We were passed by this ship as we went through Longview Washington. You can see that this ship is deep in the water, fully laden. Heading down river to the bar and out into the Pacific Ocean.
We made it to Cathlamet by early afternoon. We had time for showers and a trip to the grocery store before the potluck. We had a nice turnout of twenty some boats at the potluck. Friday morning we again were up early to catch the tide to Astoria.
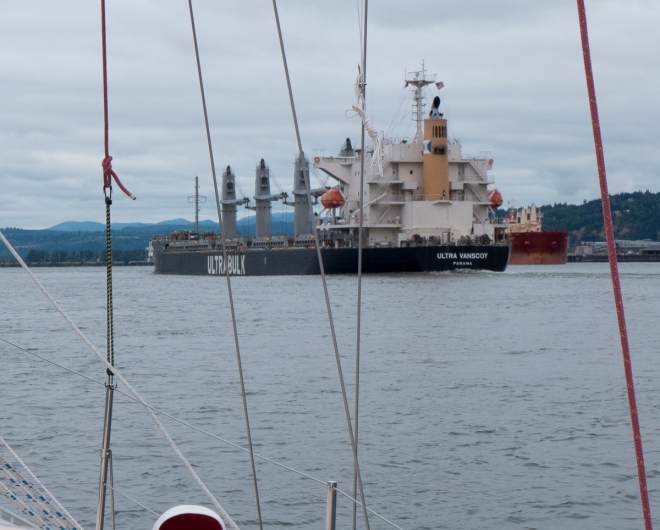
This is the view as we headed around the bend from Cathlamet to Skamokawa, Washington. Skamokawa means smokey waters and the fog this morning was keeping the name alive. The boat ahead of us is Sierra, a Cascade 27.You will also see freighters like this, at anchor with the Astoria-Megler Bridge in the back.West Basin Astoria. Here you are 13 miles from the Columbia River bar.
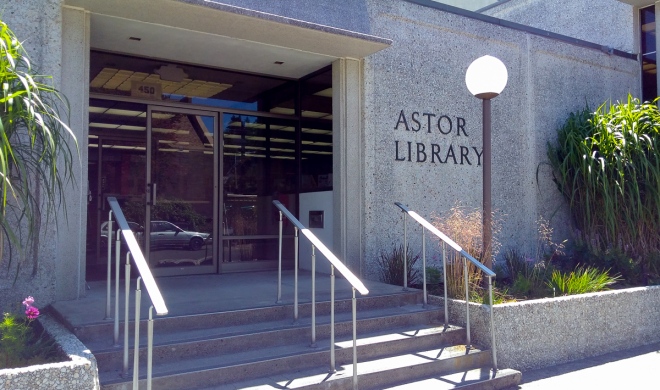
We spent Friday and Saturday in Astoria. Saturday was the Astoria Open Studios, so we toured several artist’s studios. Astoria has an active arts scene. We also visited the Maritime Museum and the library. The library gave us a internet pass so we could check on weather and tides.
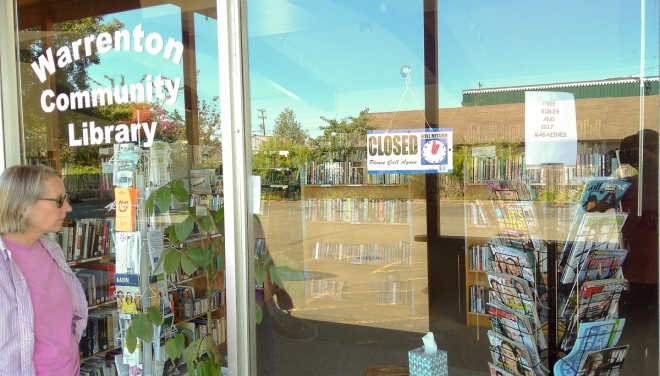
Sunday we left for Warrenton, since we had not been there before. The marina at Warrenton is set up for small fishing boats. Gypsy was way too long for her slip. They only let us stay for Sunday because the Buoy 10 fishing season was starting Tuesday and they were sold out.
We walked into town for groceries. We stopped by the library, but they were closed on Sunday, so we were not able to get a free bible or internet.
Monday saw us underway again. We had wanted to go to Ilwaco, Washington. After our Warrenton experience we phoned ahead to Ilwaco to reserve a slip for Gypsy. They told us we had gotten the last slip they had. Needless to say, we spent two days in Ilwaco and the place was empty. That is too bad because it is a fun place to visit.
It was a very calm motor over to Ilwaco.Gypsy at the dock in Ilwaco. The dock is an improvement over the Warrenton docks. By most other standards it is a dump. Just behind us is Joysea from Rose City. We like to visit Ilwaco, but the docks are not why we come. As non-fishers, Jessie’s Fish Market is the real reason. There’s also a nice book store on the waterfront.Hiking the Discovery Trail to the ocean. It goes from Ilwaco to Long Beach.
One of the benefits of going cruising is you have a hard time staying connected to the internet. Not knowing everything that is happening is not so bad. We were quite happy to not be following Donny Johnny’s every twitter. We were also not following the weather news too carefully. So Tuesday morning the weather radio keep mentioning smoke. We realized that all the haze we were seeing was smoke from forest fires.
Freighter and fishing boat in the haze by Tongue Point.
We anchored behind Tongue Point to spend a couple more days at the relatively cool coast. 90 instead of 100 plus degrees. Not much wind but humid.
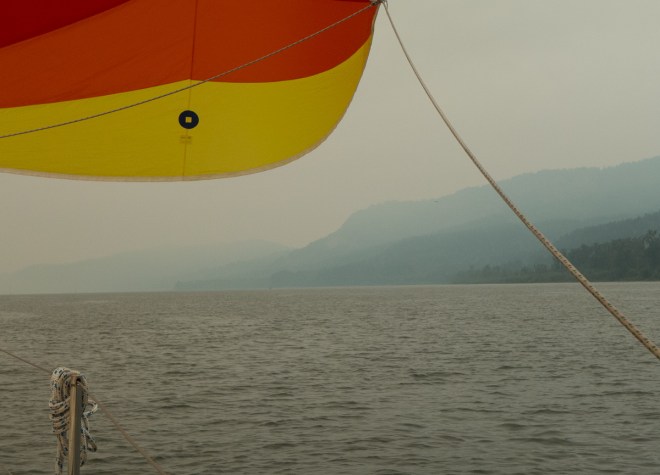
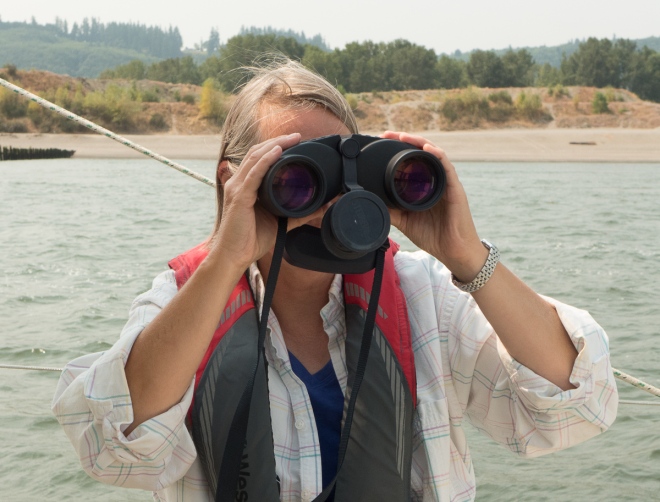
Rowing around.Old railroad bridge at the mouth of the John Day River.Gypsy at anchor. The electric windlass worked great. Nina no longer has to hand crank the anchor down and up.Friday morning heading up river again. Osprey nest on top of a buoy.Sailing to Cathlamet. Up to now the wind has been on our nose or calm. Now it is behind us and we start using the spinnaker. The autopilot is steering. This is the way to sail.Nina is keeping watch.
We pulled into Cathlamet Friday afternoon. As we were docking Gypsy a guy on the dock was asking us if we here for the boat show? Bill just thought he was a smart alec commenting on our paint job. Once Gypsy was tied up we found out that there was a boat show and Gypsy could be in it. It was the Wooden and Classic boat show. We decided it would be fun and we said yes (plus a deal on moorage for the weekend).
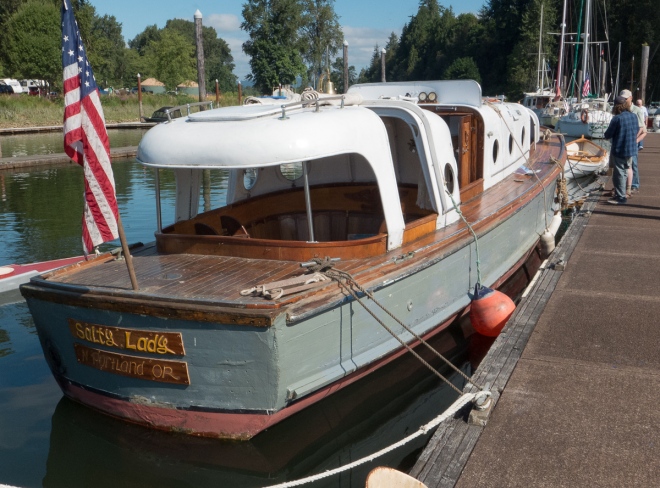
Salty Lady is a Captain’s gig circa 1940s. She would have carried the captain and officers from a navy ship to the shore or other ships.Salty Lady won best motor boat.Nina’s favorite boat, a San Francisco Pelican.This is a bow pudding, a fancy rope work fender. It is on a restored Coast Guard surf boat, MLB 36391, Point Adams.Gypsy in the show. The most common comment was, she does not look 45 years old.Nina rowing in our wooden boat, a chameleon nesting dinghy designed by Danny Greene.Sunday afternoon. The show is over and we are heading up Cathlamet Channel. We are sailing with our genoa, and keeping up with a Willard 30.Another freighter. You can see she is empty and moving.
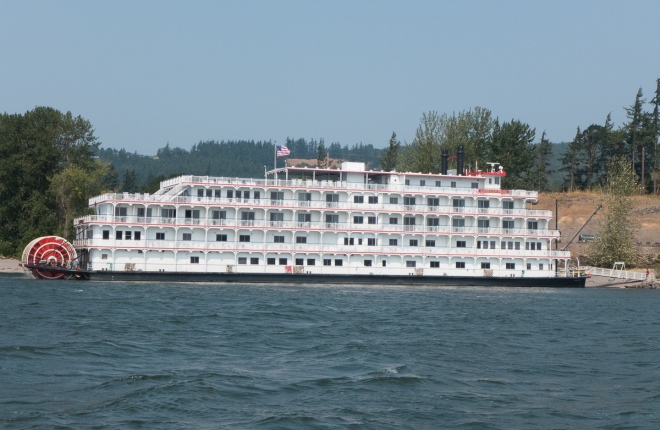
Sunday night we spent at Walker Island which is near Longview, Washington. Monday we sailed to Martin Slough. Just up river from Kelso we saw the river boat American Pride. They were waiting for their passengers to return form their excursions. Just like riverboats of yore, nosed up to the bank with the gang plank down.
We spent Monday and Tuesday in Martin Slough. Very peaceful except for some traffic noise from I-5.
Wednesday we continued our homeward sail. We decided to go down Multnomah Channel.
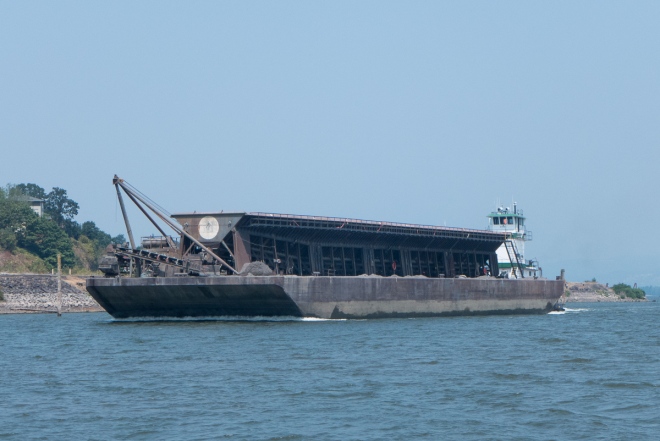
This gravel barge followed us at St Helens.
We tided up at Coon Island. We noticed that there were gates at the top to the ramp to the island. We discovered goats. They were quit tame and friendly.
Thursday we headed back to Portland.
This is not what you want to see on the railroad bridge. We had to wait for four freight trains and an Amtrak train. It took about an hour to get through the bridge.
We stopped at home Thursday night and headed back up river Friday to a club cruise at Government Island. We found lots of ripe blackberries and made a cobbler.
So, it’s been about six weeks since we last posted. They have been busy weeks, filled with projects that have many hurry up and wait steps. And then we went sailing, but more about that in a later post.
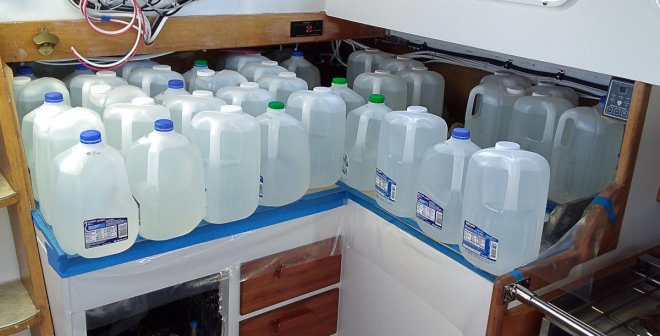
The fridge getting foamed. We used two part foam again and filled in all the voids after the lid flange got installed. All of the excess foam will have to be removed before the counter top can get installed.More pour foam, this time in the lid to the fridge.Cutting the openings in the counter for the fridge and the pantry. We did this on the dock.Dry fitting the counter top. To get the counter in the boat, we had to make it in two pieces.Both pieces of the counter top epoxied in place. The plywood top to the fridge lid has been dry fit and glued temporarily in place with hot glue. The lid to the pantry (center hole) was cut out of another piece of plywood. We epoxied in corner triangles to support the lid.Formica epoxied in place, waiting to be weighted down. We were able to do this in one piece. We covered the Formica in plastic to keep it from getting epoxy on it.The weighting down of the Formica. Just how many water-filled milk jugs does it take? Answer about 50. The kid who has not moved out yet was able to contribute to the project.
Cutting out the sink hole using our trusty 1950s saber saw.
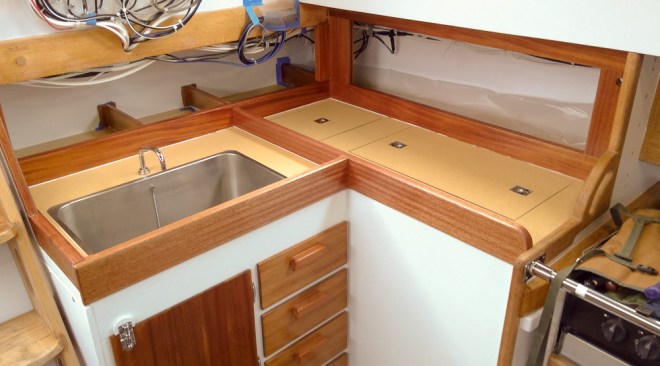
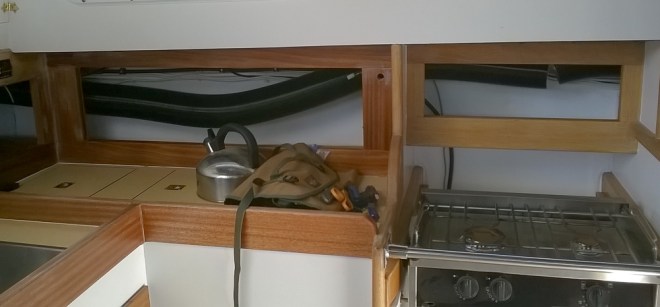
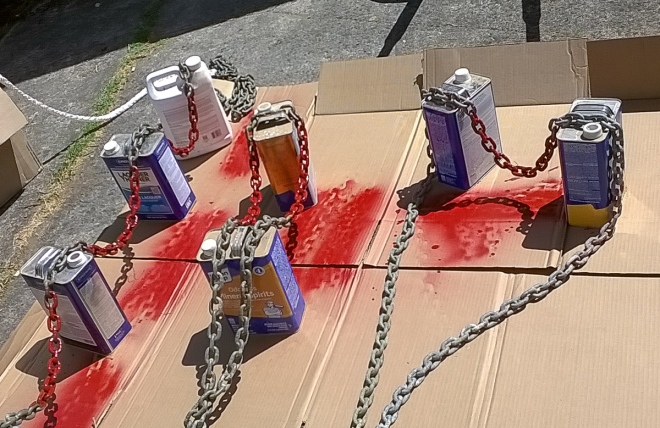
Test fitting the sink. We decided to go with a big sink rather than a double. The sink was glued in with 3M 4000.Formica has been glued on and Bill is using a template to cut out the spaces for the pull rings.Using a template to route out the pull rings. The blue tape is there to fine tune the cut out. We do not want to have to remake any of this.Towel bar in the head. Another of Nina’s projects (she gets all the easy ones). it looks like it was designed for the space.The backyard varnishing station. Nina varnished the oars and the tiller (on the left).Chart table drawers all varnished and installed.Cubby door under the stove varnished and installed. This is a good place for stowing baking tins and food.Engine door and galley drawers. Getting this filled in has greatly reduced the engine noise.Nina spliced the new 8 plait Brait rope onto the anchor chain. We reused our chain since it will fit in the new windlass. The depth markings were getting faint so we re-marked the anchor rode with spray-painted every 25 feet. We used a fat sharpie to mark off the rope part. This probably won’t last very long, but it got the job done.Auto-pilot compass installed. It had to be away from iron in the engine and the keel, radio antennas and wiring, and sort of in the middle of the boat. After awhile we won’t even notice it.Meanwhile, Nina was making cushions. We chose a smoky blue tweedy upholstery fabric, with a light gray underlining on the bottom side. The seat cushions are made with 4 inch foam wrapped in polyester batting. They are sitting on Hypervent to help prevent any moisture from building up. The backs are in process and they are being made of two inch foam.
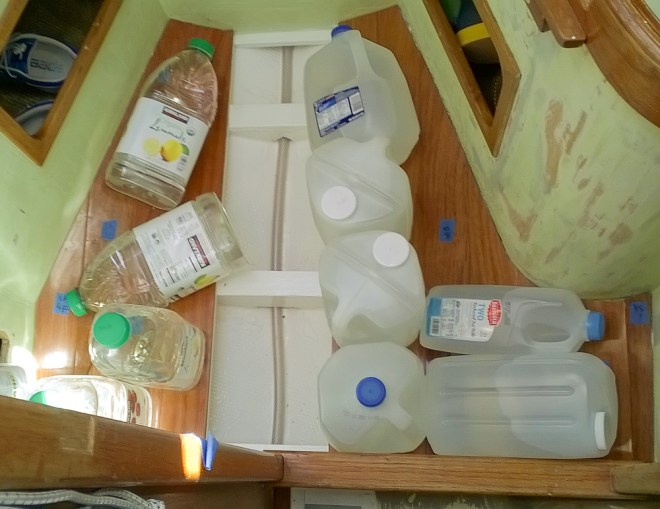
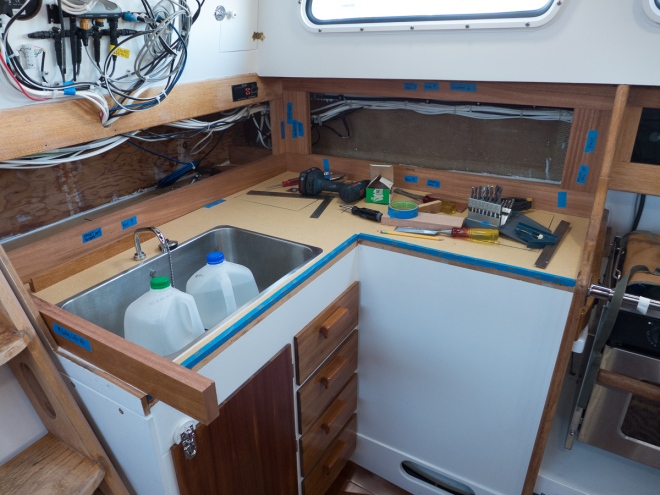
The sink got plumbed after only one extra trip to Pacific Rubber for another hose. It’s always good to measure twice and cut once, but you do need to remember which side of the tape you need to cut on. Hey, it was only one inch too short. The faucet was installed and our cold water system was ready to use. With tea kettle assistance we also have hot water. The boat got cleaned up and project supplies went home. Car loads of provisions were loaded and we took off. Coming next: the great 19 day voyage that all of this made possible.
Temperatures this weekend got up to about 100 degrees F. Luckily, cabin fans got installed and we discovered that all that insulation we installed does actually help buffer the heat.
Bill centered between the new fans. We installed one more in the passageway to the v-berth to help with air circulation up forward.
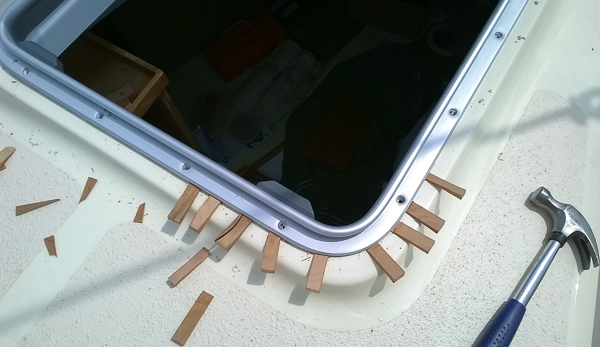
Another project, since it finally stopped raining, was to rebed the forward hatch. The tarp came off, wedges were made out of wood from the cherry tree from our old house, and Nina got to work coaxing it up. We originally bedded the hatch with Sikaflex and for some reason, did not get enough to get a solid seal. Probably trying to be neat. Don’t skimp on hatch caulk!
Cherry wedges to slowly loosen the hatch. Because it was hot out and the caulk was still pretty soft, this only took a couple of hours get it all unstuck.
Once the hatch was loose, it took another hour or so to clean off all the residual caulk on the hatch and the hatch base. We rebedded the hatch with white butyl rubber and screwed it down. Over the next couple of hours and the next evening, we gradually tightened the screws and cleaned up the goosh out. It’s a slower process than working with Sikaflex, but the clean up is much easier. And we think there’s finally enough material in there now that the hatch will no longer leak when it rains or gets wet.
Meanwhile, Bill worked away on the fridge. He tested the fridge to see if it would get cold. He put a piece of left over foam on top and cranked down the temperature. It works! The flange finally had enough two-part white paint on it and was ready to install.
The fridge flange has been glued in place with 5200 with boards across the top to help clamp it in place. The cavities around the flange will be filled with pour foam before the countertop is installed.
Bill also worked on running yet more wire and water hose. All the water hose is in place and just waiting for the galley countertop and sink to be installed.
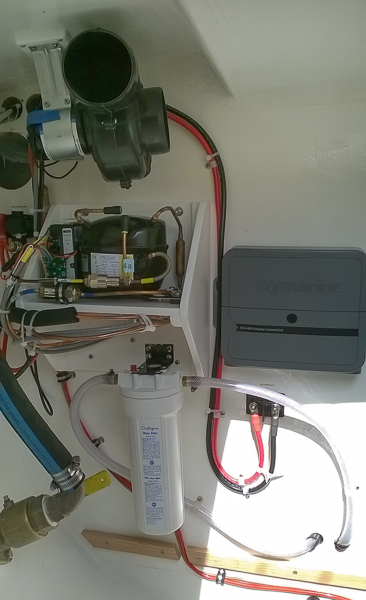
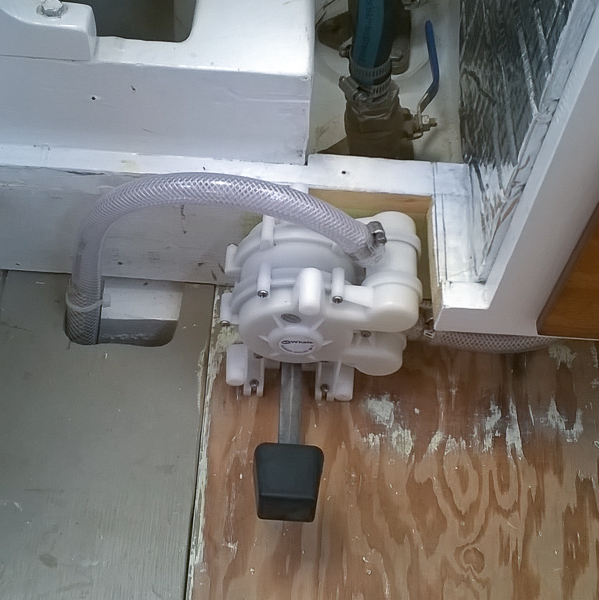
Bulkhead with water filter on the bottom, refrigerator compressor on the shelf. On the top is the blower for the engine. The gray box on the right is the autopilot brains.Galley sink foot pump. No pressure water, no hot water, but that’s ok. One of Bill’s evening projects was to rebuild the pump.