Week 5, A dam fine time

This week we will touch on dams: tape dams to be precise. They are the teaser so you will have read through the rest of the blog to find out about them.

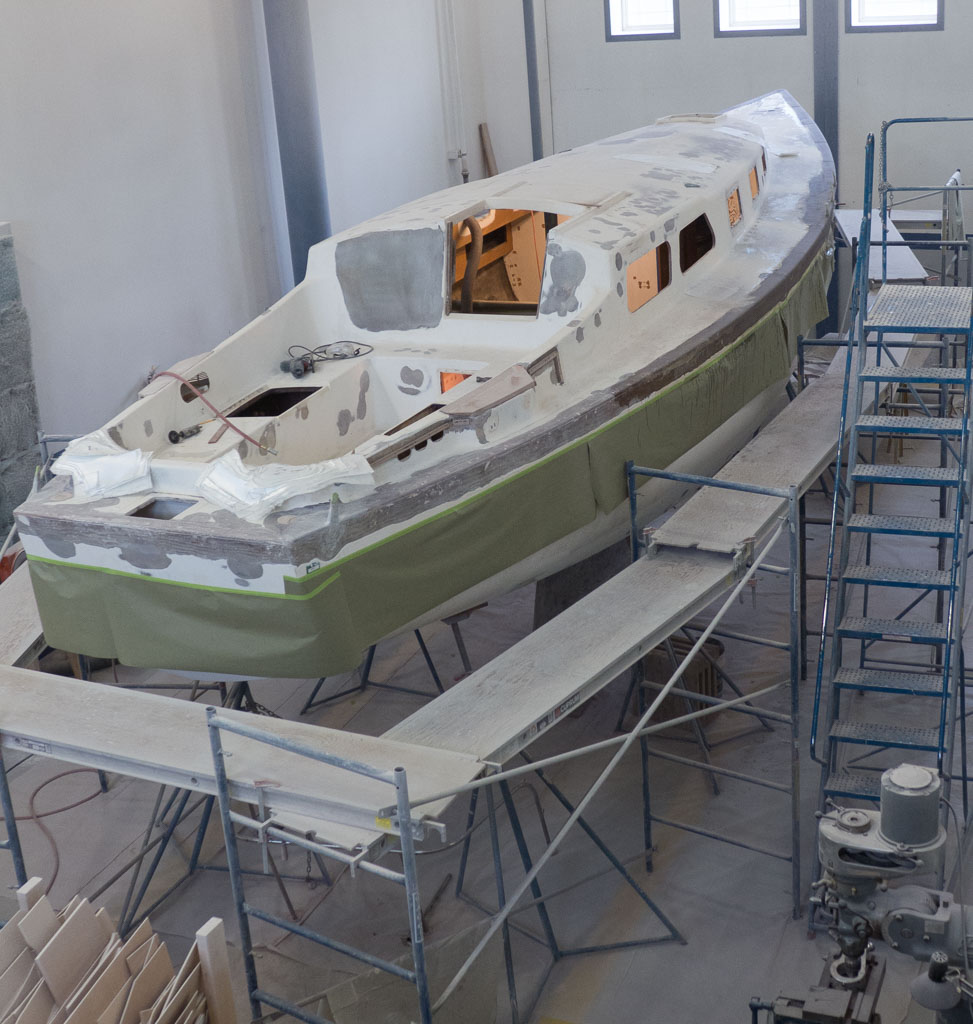
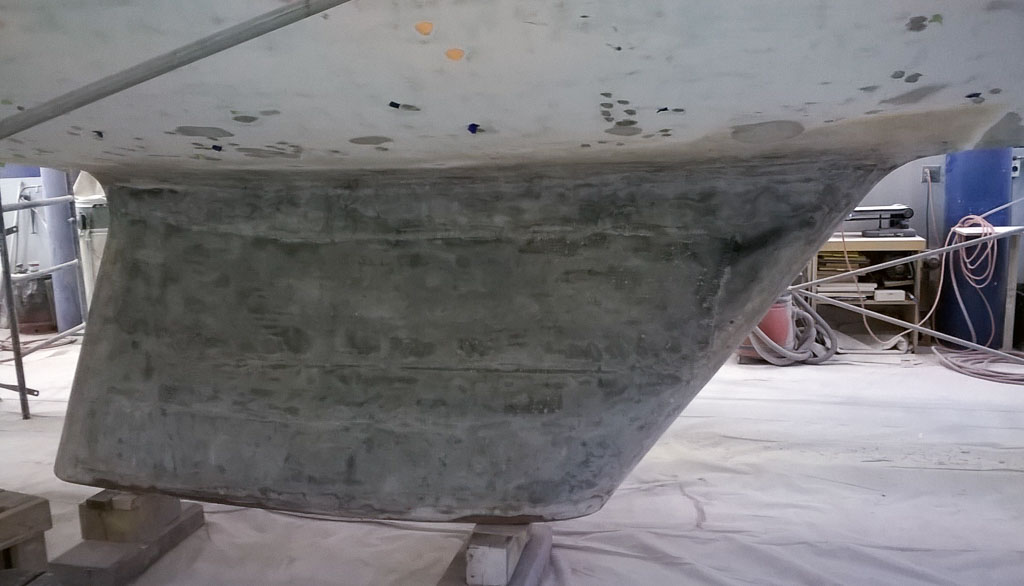
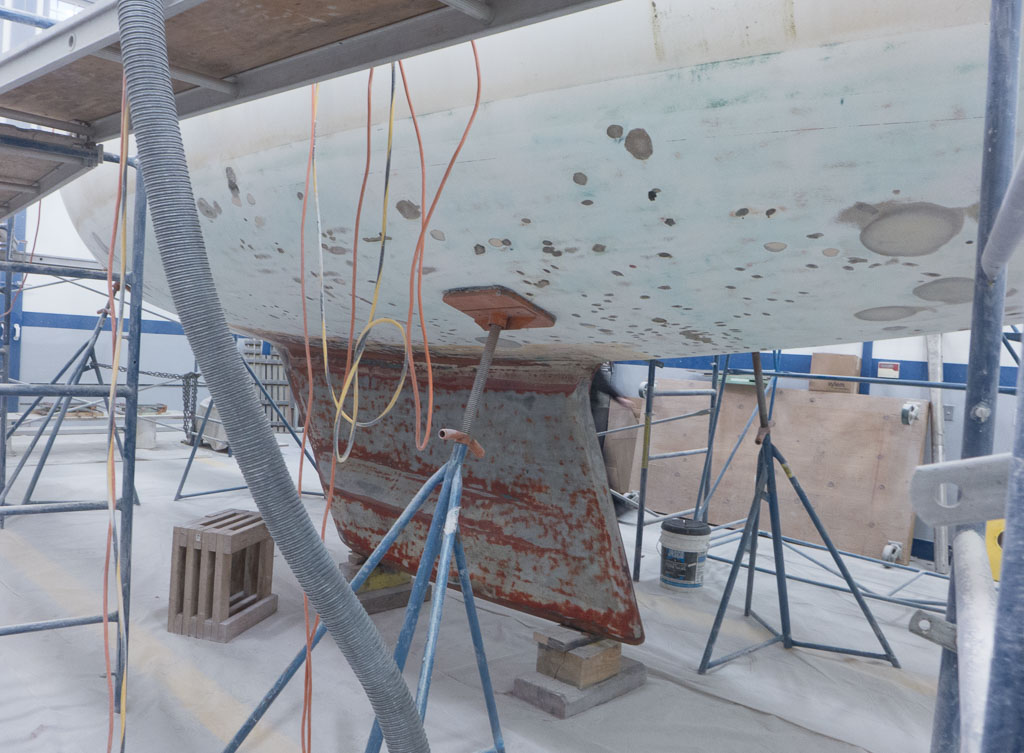
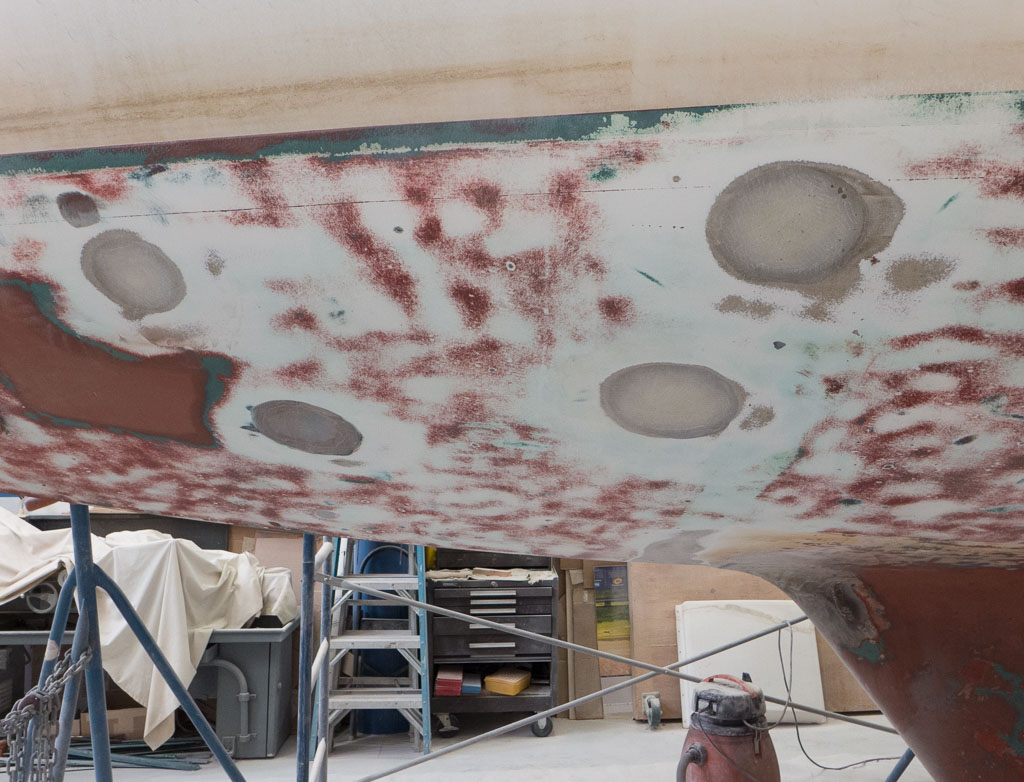
Our week started on Friday. Bill was busy sanding off the epoxy filler that is now filling the blisters on the bottom. You won’t believe how quickly an 8′ 40 grit grinder pad gets dull. He’s probably a wimp, but new sand paper makes the job go easier. He also ground the blisters on Saturday and Sunday. Thirty-six feet by about ten feet wide, and only 15 blisters per square foot. No wonder it took forever.

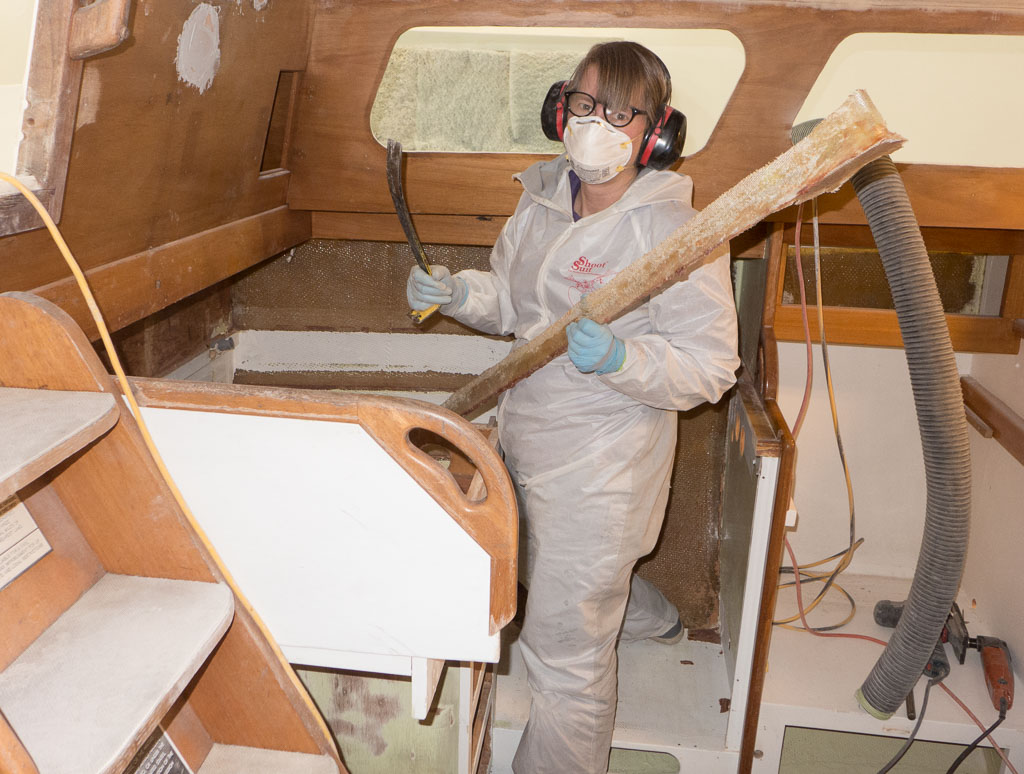
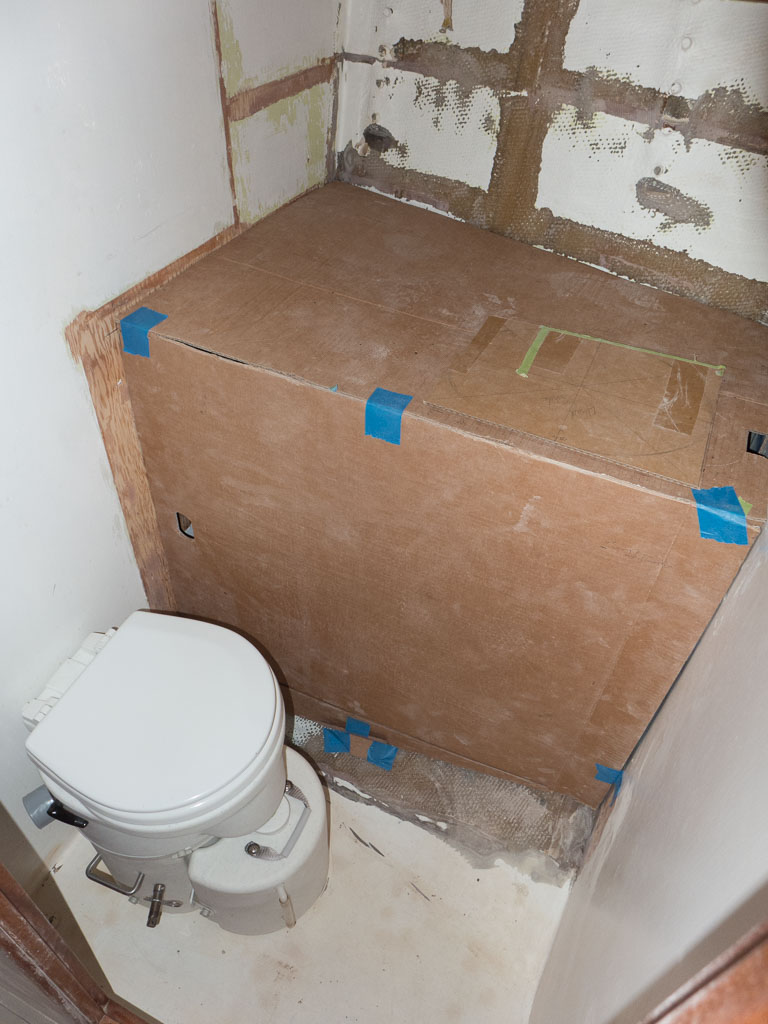
Nina removed old gasket material from the top of our propane locker. The sides of the locker were glassed to the hull and were gas tight, but the top edge had failing caulk.  She removed the old caulk and on Sunday she got to glass the joint. This was Nina’s third experience with fiberglass taping. It was her first in a tight space glassing over head. She did manage to pour a good deal of her resin on her arm (not enough arms to hold the tape, the brush and the resin), but she got the job done and did not glue herself to the boat.

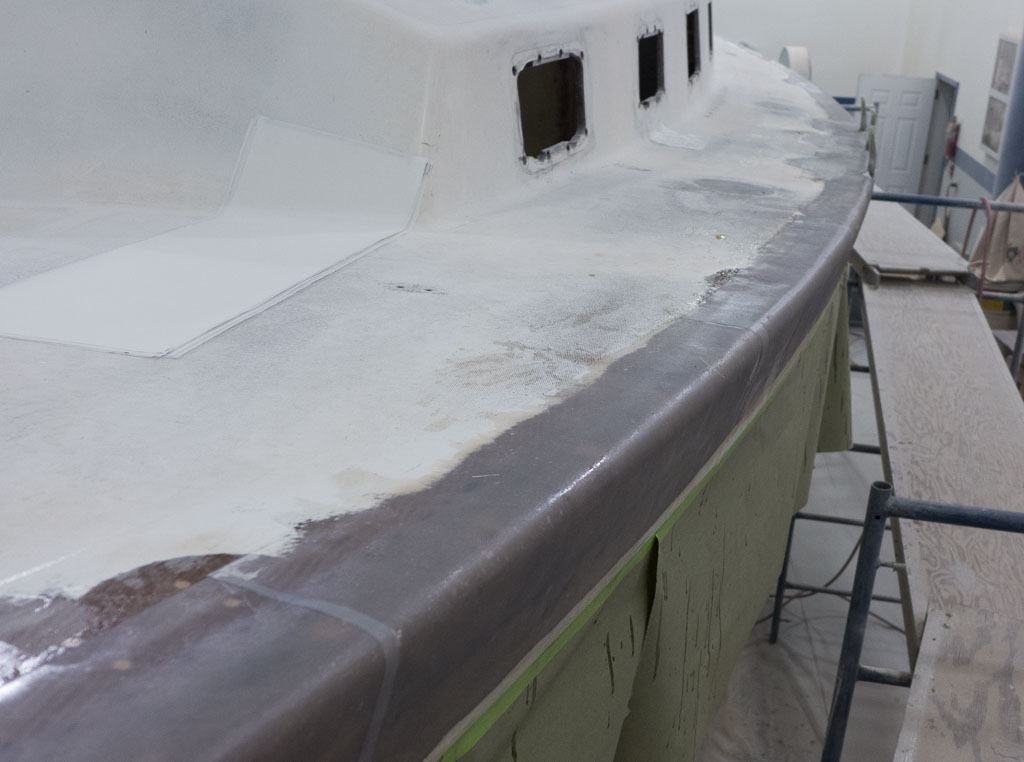
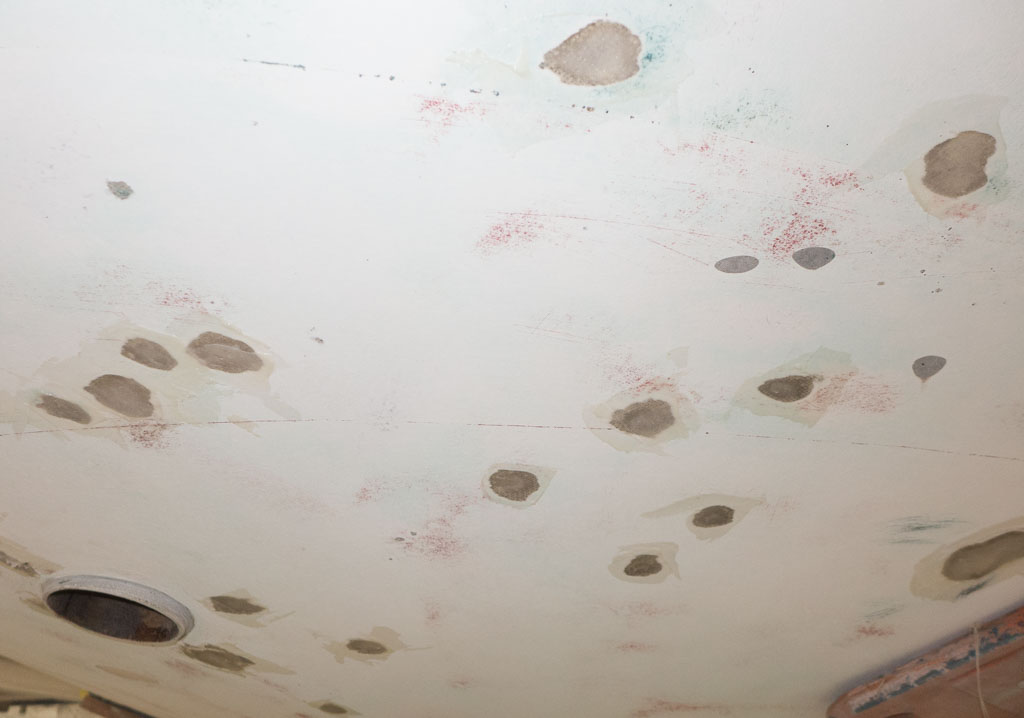
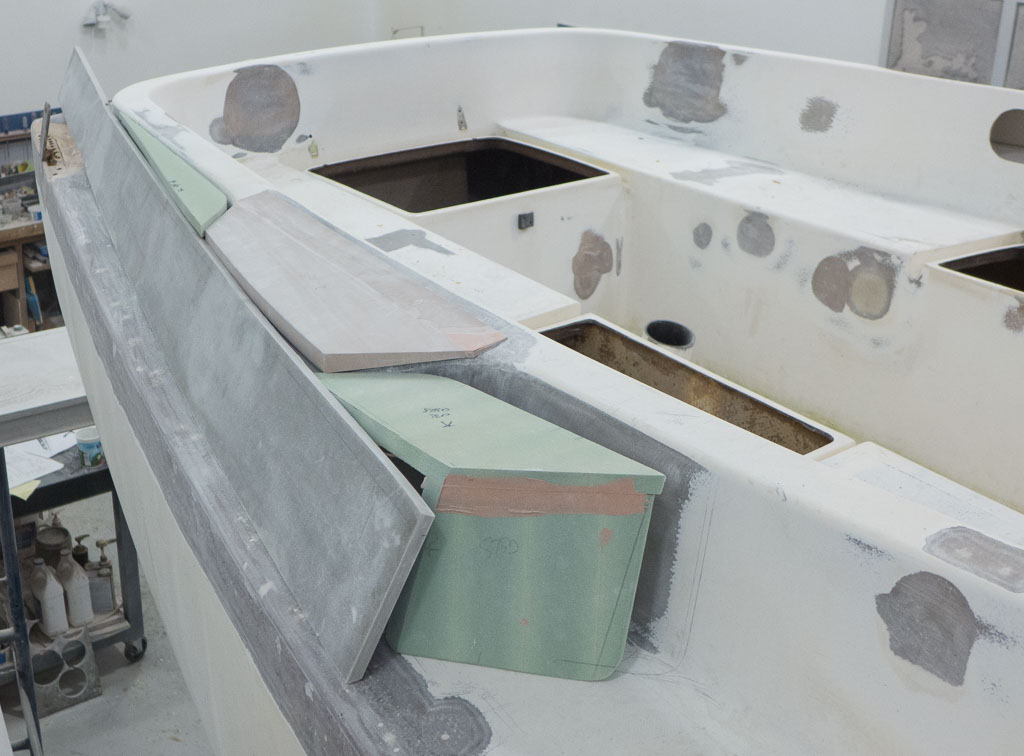
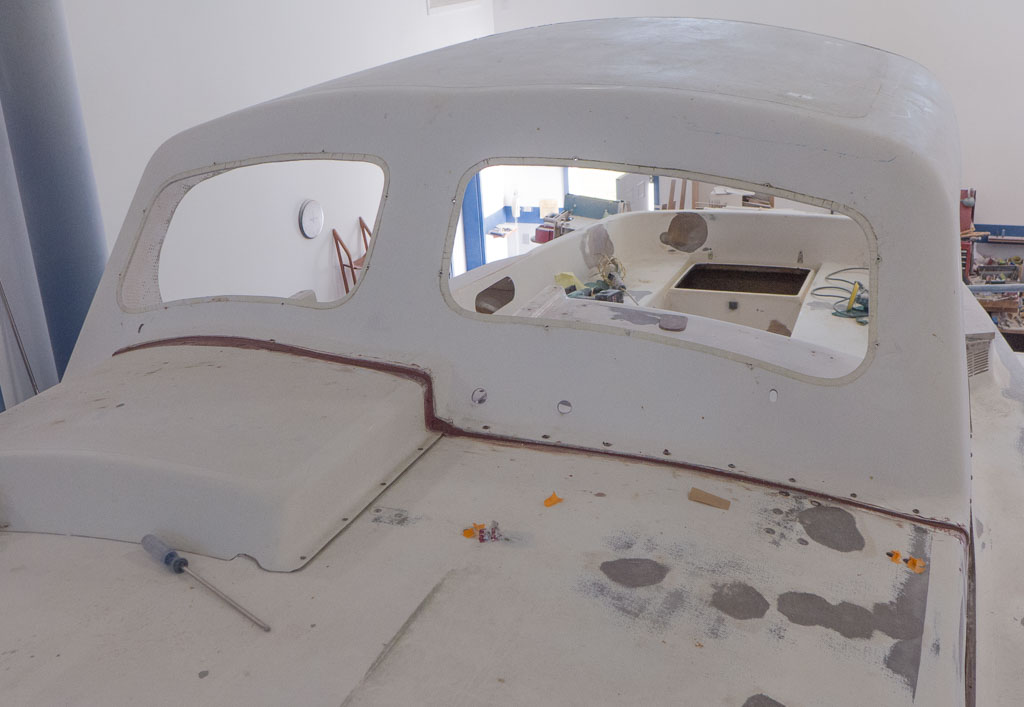
Gypsy has a fiberglass dodger that provides protection from sun and spray in the cockpit. Marsden ground the edges of the dodger to prep it for fitting to the cabin top. We had had a rather large gap between the dodger and the cabin top that had been filled with caulk. The gap also filled with gunk – dirt and mildew. To fix that, we covered the cabin top where the dodger fits with aluminum tape. Then we waxed the tape so the fiberglass would not stick to the tape and boat. Two layers of glass were laminated on top of the tape. On Monday we sanded the tape and covered it with almost a gallon of epoxy putty, which looked just like chocolate frosting. Then we set the dodger down on the putty and screwed it into place. We now have a perfect mold of the cabin top and the dodger will fit tight. There is still a fair amount of work to do on it, but we are off to a good start.

The fillet is the chocolate colored line.
Another view of the fillet. The opening at the back of the cockpit that you can see in the dodger window is where Nina had to glass the propane locker.
Another view of the fillet. The black rectangle  at the back of the cockpit that you can see through the dodger window is where Nina had to climb down in to glass the propane locker.

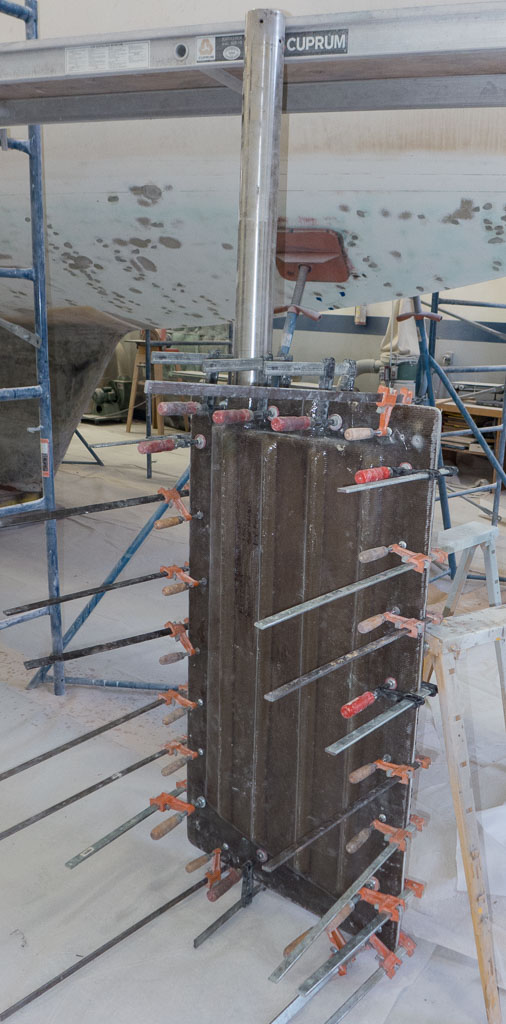
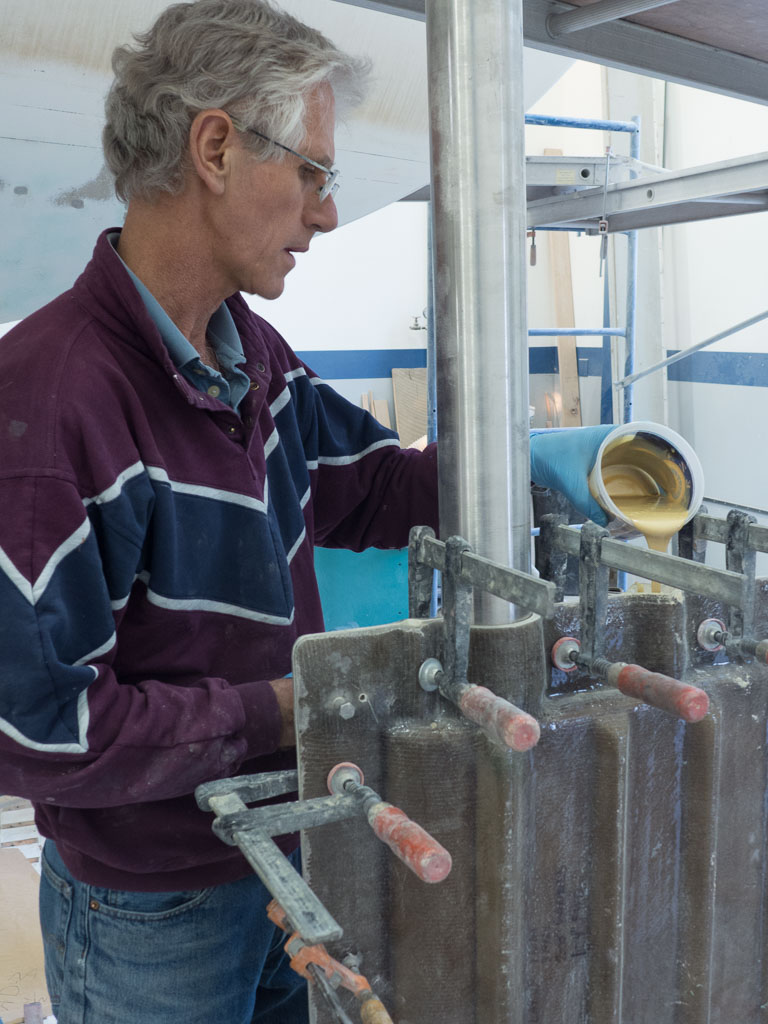
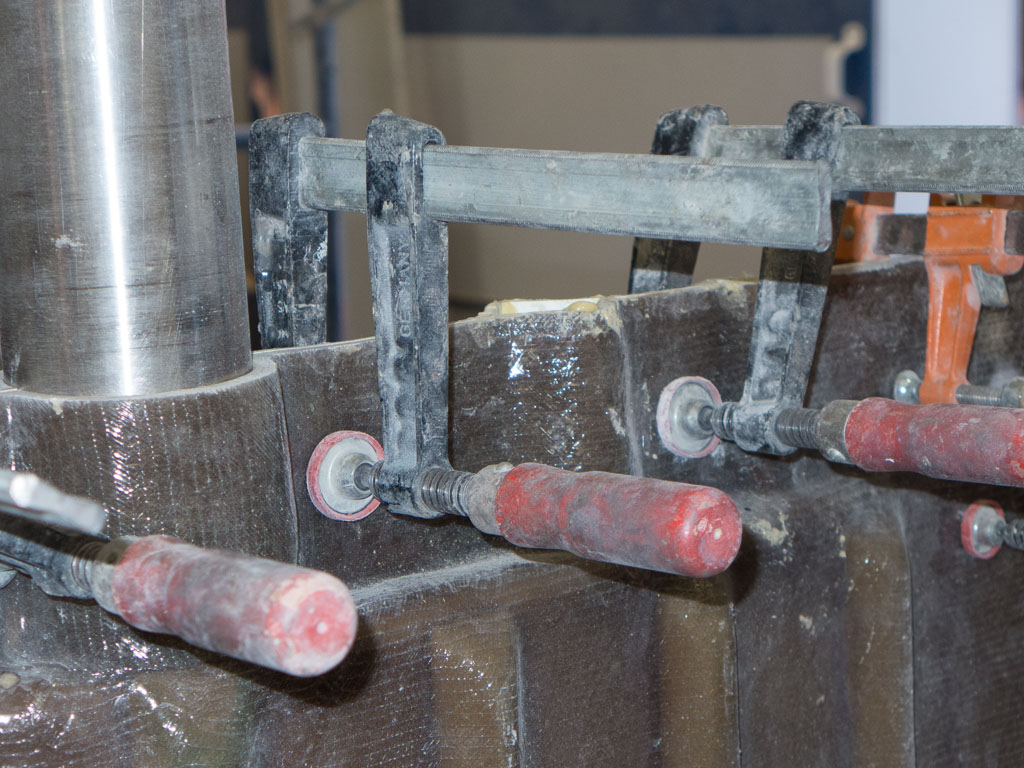
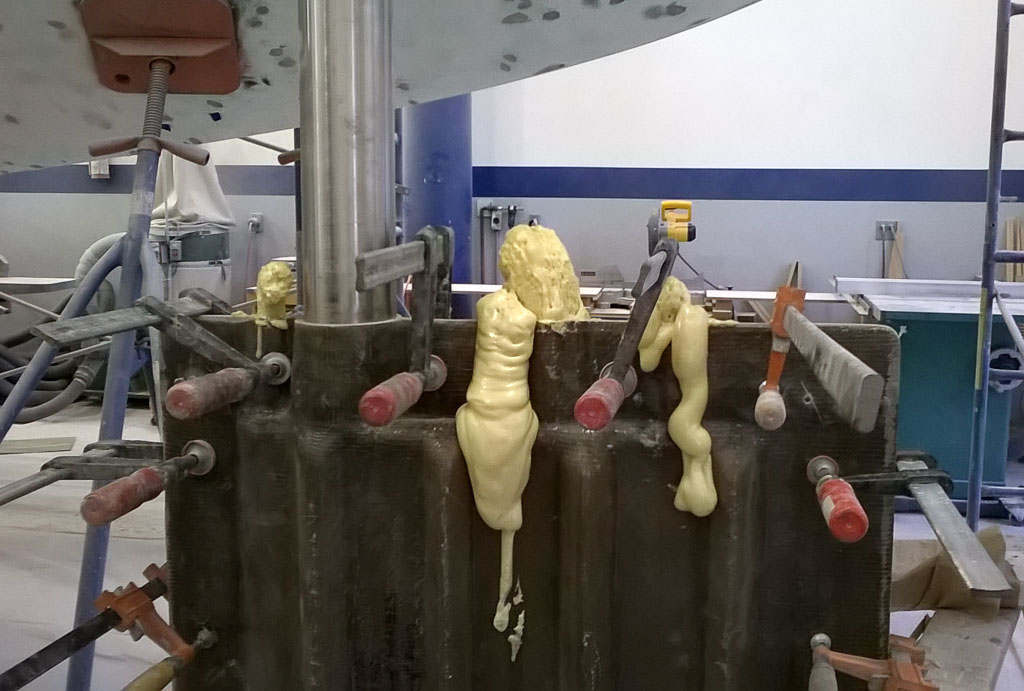
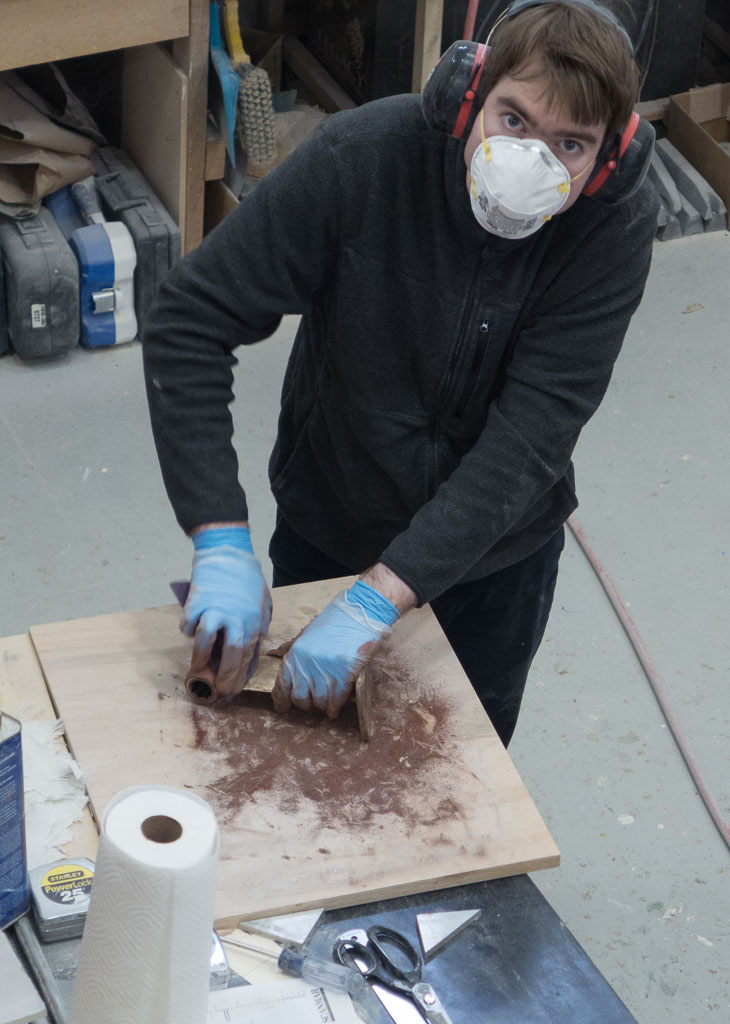
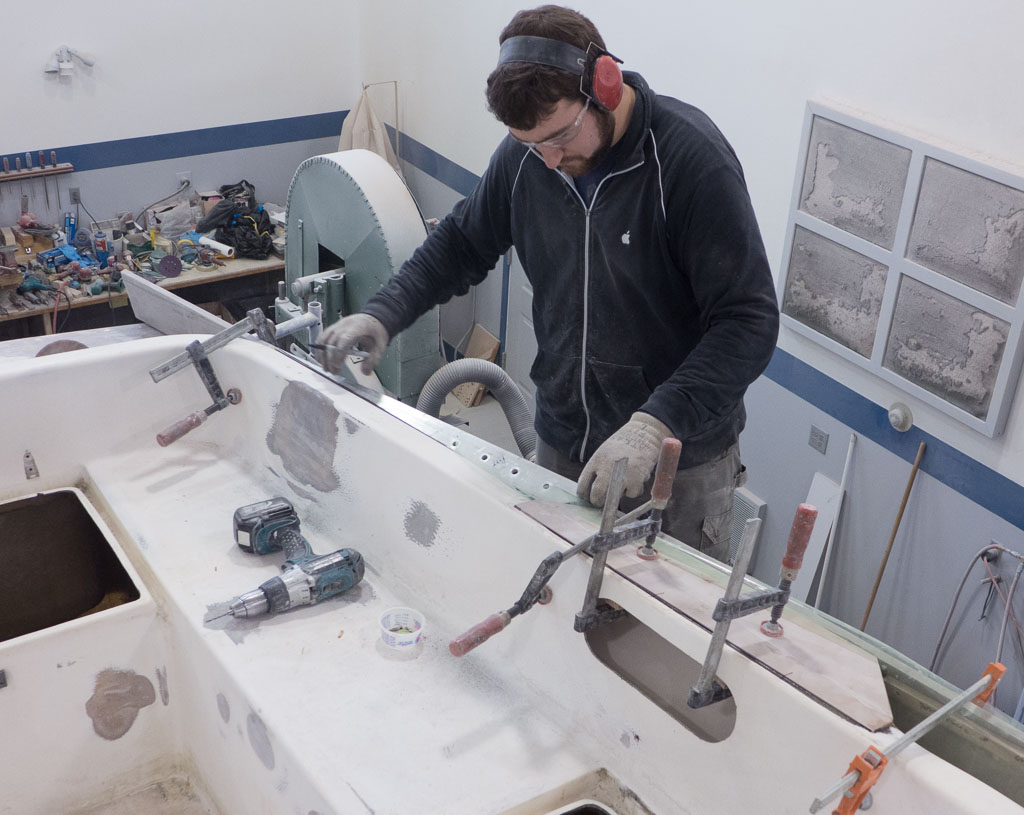
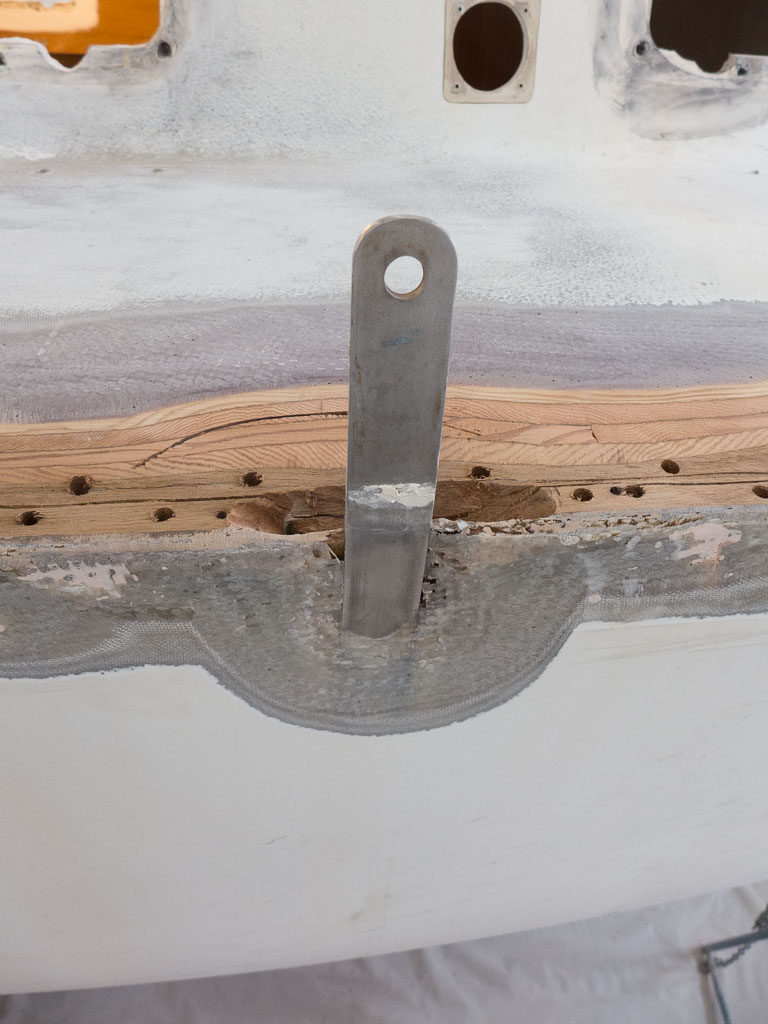
Marsden and Bill also located where the hand rails are going to go on the cabin top. They are moving outward about 6 inches. The new bolt holes now have to be cast in epoxy to protect the deck from any possible leaks. A locator hole is drilled and then you over drill your holes about twice as big as they were and fill them with epoxy. Filling holes on a sloping  cabin top is not easy. You need to make tape dams to catch the epoxy and as we found out little dams don’t work. You need super dams.

Good tape dams. You can also see the aluminum tape and fiberglass for the fillet.
Good tape dams. You can also see the aluminum tape and fiberglass for the fillet for the dodger.
Our first effort at tape dams, they are too small.
Our first effort at tape dams, they are too small. Two streams of epoxy to sand instead of one!

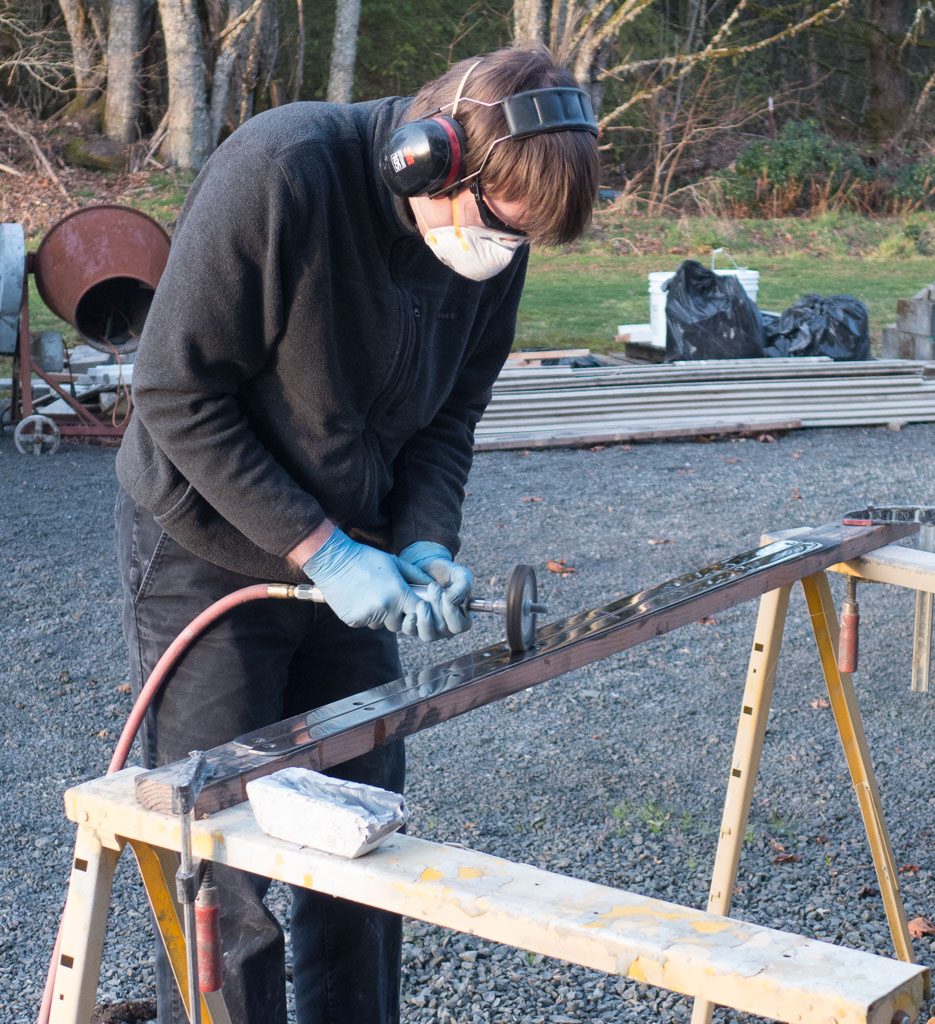
Marsden got to polish more metal parts. All three of us learned how to use a milling machine to smooth out the tiller cap that goes on the top of the rudder tube.  It’s now smooth and ready to be anodized with the other aluminum parts Marsden has been working on.

Week 4: A Rudder Is Born

It has been a busy week in the boat shop. Nina and I put in 5 days and Marsden did 4. On Friday we started glassing the hull to deck joint. This will make the whole boat one solid piece rather than the deck just being bolted to the hull. When the waves are big this means a much stronger boat.

Finished glass work.
Rails have been glassed half way back from the bow. The green paper is a drip skirt to catch most of our drips.

On Saturday Bill finished grinding the bottom paint off of the keel. The bottom is paint free! Now we get to repair the blisters, which means more grinding. Gypsy’s keel is very flat and so to make her sail better we are going to add a foil (wing) shape to the keel to make Gypsy sail better.clean_keelWhile I was doing this, Nina continued to remove the galley counter and prep the engine bed logs. This means grinding old resin and paint off.

Sunday Marsden got taken off blister repair and put on the polishing metal task. He spent most of Sunday and Monday getting the companion way hatch rails polished to a mirror finish. Polishing is a slow process.

You can see yourself in the rails now.

Bill and Nina did more sanding and demolition in the cabin. If you are wondering about boat work, much of it is repetitive. On Monday the final demolition work prepping the space for the new diesel fuel tank was done. Nina cleaned more butyl rubber off the ports. This stuff is sticky and messy, but it dissolves nicely in lacquer thinner. The weather has been great so this can happen outside. Then we helped to finish the glassing of the hull to deck joint.

This gives an idea of the glassing. The piles of glass are going to be laminated on to the two corners of the transom with lots of resin. We will try not to drip too much.
Nina is relaxing after glassing the hull to deck joint.

While we were doing this Tom was making our new rudder. He laminated new fiberglass skins in the two mold halves. Then he had to fit the rudder post to the mold and glue the two halves together. After glassing the hull to deck joint we watched as Tom filled the open space in the rudder mold with foam. The foam is made by mixing the two component parts together. Then you have a minute or so before the chemical reaction starts and the foam expands. To control the reaction we did three smaller pours instead of one big pour.

The rudder mold is assembled.
Tom pouring the foam.
Waiting.
Waiting.
The mold is full.
The mold is full.

Tuesday found Bill re-sanding the bottom blister epoxy fills. Nina getting rid of more old carpet glue and cleaning parts of old caulk and Marsden got to get the rust off of the engine bed plates. Luckily these are going to be painted so a mirror finish is not needed. While we did this Tom worked on grinding the newly glassed hull to deck joint into shape.

After grinding the deck joint smooth.

We also have decided to replace our wood toe rails with aluminum ones. The four 20′ rails came this week and they are going to be lovely.

Our new toe rails.
Our new toe rails.

Week 3 – Aren’t we done yet?

We have finished another week and you may be wondering when we will be done? Well, if we are lucky and funds hold out we should be finished in June. Even though we have been racing along this is not a fast project. We are making progress. I finished sanding the bottom paint off and now I get to sand the keel to repair some poor glass work on it. While I work on the bottom, Nina is working on removing bulk heads, (dividers across the boat), in the cockpit lockers that we don’t need or want to move. She is also removing the counter top and some storage in the galley. This is in preparation for a new sink and refrigerator. Marsden has been fixing blisters on the hull. Blisters form when water makes its way into tiny voids in the fiberglass laminate of the hull. To fix them you need to grind out the blister and fill it with epoxy putty.

While we are doing our part Tom has been designing new water and fuel tanks as well as overseeing the project and Chris has been working on the improved cockpit combings.

Bottom pain is gone. The keel still needs work.
Bottom paint is gone. The keel still needs work.
Bill grinding on the keel. (Respirator removed for photo.)
Counter top half off.
Nina is willing to go to great lengths to get a good galley.
Close up of blisters freshly filled with epoxy.
Marsden sanding the bottom paint off the propeller strut.
Combings are taking shape.
Chris working on the combings.

Week 2 – It’s only a paper loo

We were thinking of calling this the weekly grind.  Bill’s been working away at the bottom paint.  The fun part of that is that it gets harder to sand the longer it’s out of the water.  Today he pretty much finished and is now going back around to pick up all the leftover red bits.  When that’s done, he gets to start grinding out blisters.  Thankfully, we only have about 15 per square foot.  It could be MUCH worse.

Meanwhile, in the inside of the boat, Nina’s been learning to use a Makita grinder.  Carpet residue and glue is not the best learning medium since it gums up sanding sheets before you turn the thing on.  She also discovered what a loose grinder with the lock on can do in a small space.  Don’t try this at home.  Luckily, a small rip in the suit was the extent of the damage.

Marsden totally escaped grinding or sanding.  His particular version of boat purgatory was cutting 720 feet of fiberglass cloth into various widths for Tom to glass onto the hull to deck joint.  His other fiberglassing experience was making the backing plates for the remaining thru-hulls.  To do this, about an inch thick pile of fiberglass cloth was laminated together and then cut out on a drill press, very slowly.

Pictures for the week:

cabin_
Filling holes where instruments used to be. We will be moving instruments and adding new ones and cutting new holes for those.
chain_plate
The hull ground away around a chainplate. It looks much worse than it is. The wood is dry, the chainplate is solid and not rusty. Hooray for US stainless! We won’t have to replace these.
chain_plates
A longer stretch of the hull to deck joint waiting to be glassed. The holes were to allow moisture to evaporate out of the wood.
head
The head floor with the thru-hulls glassed in. The upper hole was for the sink drain and the lower hole was for the sewage discharge. We now have a composting toilet so we no longer need a holding tank and its discharge.
paper_loo
A cardboard mockup of the new head vanity. The composting toilet was the cause of the head redesign.  We have used the composting toilet for the last 3 years and we like it.  It is an Airhead. The green outline is roughly a new oval sink.  We have moved the vanity outboard to give more space for the toilet. The old vanity came out to where the whitish paint ends.
head_ext
Glassed in thru-hulls from the bottom. Earlier in the week, with bottom paint to still grind off. We are going from 8 thru-hulls to 5 and the new ones will be flush to make the hull more streamlined.
watertank_prep
The starboard settee in the cabin carved up to put in a new 30 gallon stainless water tank.
cockpit_combing
Green foam to start the new winch platforms. Bill was hoping for fins with the piece in the back, but not this time around. Chris was relieved, but thought fins would be fun.
bow
Filling in deck holes and more of the hull to deck joint ground down for glassing.